从零开始搭建个人博客
从零开始搭建个人博客
- 个人博客
- 搭建hexo博客框架
-
- 下载安装Node.js
- 下载安装Git
- 下载安装hexo
- 使用hexo
- 部署到Github
- 更改主题
- 上传图片到博客
- 参考文献
个人博客
作为一名程序员,没有自己的博客网站怎么能行?
搭建hexo博客框架
hexo 博客框架非常成熟,在搭建过程中出现问题,一般在网上都可以找到相关的解决方案。
我选择的是 Windows 系统作为博客搭建的主要平台。
下载安装Node.js
hexo是需要Node.js支持的,因此需要安装Node.js。去Node.js官网,可以下载使用长期稳定版本。

安装完成之后,Node.js 包含两部分。一个是 Node.js 本身,另个一是包管理器 npm。
下载安装Git
\quad 可以去Git官网进行下载安装。安装完成后,输入命令查看版本信息,检验是否安装成功:
git --version
运行结果:
git version 2.31.1.windows.1
同样,可以检验 Node.js 和 npm 的版本:
node -v
运行结果:
# v16.5.0
npm -v
运行结果:
# 7.19.1
Git安装成功后,需要进行一些初始化的配置。
$ git config --global user.name "自定义名字"

$ git config --global user.email 自定义邮箱
下载安装hexo
hexo 需要使用 npm 进行安装,但使用官网的 npm 安装会很慢,可以使用npm 镜像 进行安装。
# 这里选择的是淘宝的镜像源

npm install -g cnpm --registry=https://registry.npm.taobao.org
运行结果:
npm WARN deprecated [email protected]: this library is no longer supported
npm WARN deprecated [email protected]: request has been deprecated, see https://github.com/request/request/issues/3142
removed 277 packages, and changed 311 packages in 23s
安装完成后,使用 cnpm -v 进行验证。
cnpm -v
运行结果:
[email protected] (C:\Users\username\AppData\Roaming\npm\node_modules\cnpm\lib\parse_argv.js)
[email protected](C:\Users\username\AppData\Roaming\npm\node_modules\cnpm\node_modules\npm\lib\npm.js)
[email protected] (C:\nodejs\node.exe)
[email protected] (C:\Users\username\AppData\Roaming\npm\node_modules\cnpm\node_modules\npminstall\lib\index.js)
prefix=C:\Users\username\AppData\Roaming\npm
win32 x64 10.0.19042
registry=https://registry.nlark.com
之后,可以使用 cnpm 安装 hexo:
cnpm install -g hexo-cli
安装完成后,可以使用 hexo -v 进行验证。
hexo -v
运行结果:
hexo-cli: 4.3.0
os: win32 10.0.19042
node: 16.5.0
v8: 9.1.269.38-node.20
uv: 1.41.0
zlib: 1.2.11
brotli: 1.0.9
ares: 1.17.1
modules: 93
nghttp2: 1.42.0
napi: 8
llhttp: 6.0.2
openssl: 1.1.1k+quic
cldr: 39.0
icu: 69.1
tz: 2021a
unicode: 13.0
ngtcp2: 0.1.0-DEV
nghttp3: 0.1.0-DEV
使用hexo
\quad 首先需要建立一个空文件夹,用于存放博客的相关配置文件。这里,我新建了一个名为 thunder1015 的文件夹。
使用 Git Bash 打开该文件夹,并使用 hexo进行初始化操作。
hexo init
运行结果:
INFO  Cloning hexo-starter https://github.com/hexojs/hexo-starter.git
INFO  Install dependencies
INFO  Start blogging with Hexo! # 安装完成!
初始化之后,就可以使用 hexo 了,输入命令:
hexo s
# hexo start 或 hexo server
运行结果:
INFO  Validating config
INFO  Start processing
INFO  Hexo is running at http://localhost:4000 . Press Ctrl+C to stop.
INFO  Have a nice day
在浏览器中,输入地址http://localhost:4000,即可打开原始的博客页面。

在命令行中,输入hexo n +"文件名" 即可创建一个新的 .md 文件。
hexo n "The first day"
在修改相关的 .md 文件后,需要清理一下本地缓存,然后重新生成。
hexo clean
hexo g
之后打开http://localhost:4000 ,界面就刷新了。
部署到Github
写博客当然希望从本地部署到网络上去,一种免费的方式就是将搭建好的Hexo框架部署到 Github 上。
登录 Github(没有账号的需要注册登录),点击页面右上角的 + ,选择 New respository,在 Repository name* 中输入:
# 我的配置
/thunder1015.github.io
注意:一定要保持 昵称.gihub.io 这个形式!
下面需要安装一个工具:
cnpm install hexo-deployer-git --save
之后,需要配置相关文件,打开文件目录下的 _config.yml 配置文件,在文件底部,设置:
# Deployment
## Docs: https://hexo.io/docs/one-command-deployment
deploy:
  type: git
  repo: https://github.com/thunder1015/thunder1015.github.io.git
  branch: master
配置完成后,即可使用hexo d部署到远端。按照要求输入Github账户及密码即可。
之后,访问仓库名 https://thunder1015.github.io/:

至此,基于 Hexo 框架的部署到 Github 的博客搭建完成!
更改主题
原始的 Hexo 主题过于简洁,可以按照自己对的偏好更换主题。以非常受欢迎的主题 yilia 为例:
git clone https://github.com/litten/hexo-theme-yilia.git themes/yilia
下载成功后,修改文件目录下的 _config.yml 配置文件,找到 theme: landscape: 并将其修改为:theme: yilia。之后执行:
hexo clean
hexo g
hexo s
打开http://localhost:4000,主题已更换。

之后,输入 hexo d 推送到 Github 即可。
上传图片到博客
之前在本地书写 .md 笔记时,为了方便修改图像,常常将 .md 文件以及对应的插图放到一块儿,而没有选择将图像上传至图床。
现在,为了方便将这些笔记上传至博客空间,需要 Hexo 能支持类似的结构。
首先,修改文件目录下的 _config.yml 配置文件,找到 post_asset_folder: false 并将其修改为:post_asset_folder: ture。之后,使用Git Bash 打开文件夹 thunder1015,输入安装插件的命令:
cnpm install https://github.com/CodeFalling/hexo-asset-image --save
然后,使用 Hexo 创建新文件:
hexo n "数据结构——图结构:图"
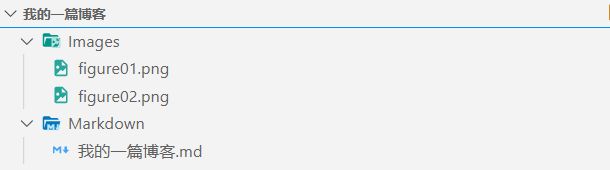
查看路径 source/_posts/ 即可发现,数据结构——图结构:图.md 存在同名的文件夹。将博客配图放入该文件夹中,之后执行:
hexo clean
hexo g
hexo d
博客即可更新。
参考文献
[1] CodeSheep. 手把手教你从0开始搭建自己的个人博客 |无坑版视频教程| hexo
[2] ios收藏家. hexo+github上传图片到博客