前言
本次自定义相机使用的框架是CameraView,由CameraKitView衍生而来,以下为官方文档连接
https://natario1.github.io/CameraView/
心得:
1.早点转到AndroidX,现在android studio3.5(或者更早),新建项目时会强制使用androidx 本文由于要在公司的老项目中使用自定义相机,所以不能用CameraView2.3.1最新版(迁移到了androidx),而是用的1.6.1
由于官方文档一直对应的最新版,所以对于老版本和文档有出入的地方,请参考:
https://natario1.github.io/CameraView/extra/v1-migration-guide.html
2.android遇到问题别再百度了,国内各家都是互相抄过来抄过去,稍微好些,android遇到问题可以在stackoverflow上搜索
https://stackoverflow.com/search
3.拍照后得到的bitmap需要压缩后写入sd卡
压缩方式:
https://www.cnblogs.com/shoneworn/p/6932638.html
正式开始
一.导入框架&权限
//这里用的是没有迁移到androidx之前的老版本 最新版为2.3.1
implementation 'com.otaliastudios:cameraview:1.6.1'
二.Activity中基本使用
2.1 Activity布局
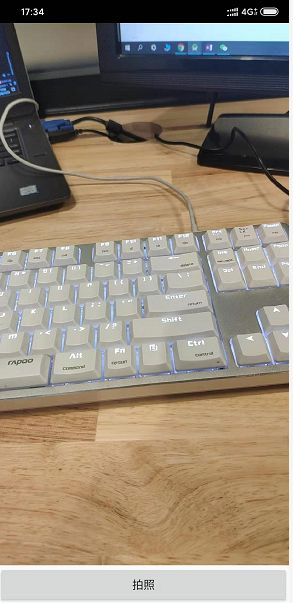
布局非常简单,就是一个CameraView和一个Button作为快门
2.2实现相机拍照功能 备注写的很清楚 不多赘述了
CameraActivity.class
public class CameraActivity extends AppCompatActivity {
    //CameraView对象
    private CameraView camera;
    //shutter快门按钮
    private Button shutter;
    //保存图片的文件夹地址
    String dirpath = Environment.getExternalStorageDirectory().getAbsolutePath() + File.separator + "formbackup";
    @Override
    protected void onCreate(Bundle savedInstanceState) {
        super.onCreate(savedInstanceState);
        setContentView(R.layout.activity_camera);
        //实例化对象
        camera = findViewById(R.id.camera);
        shutter = findViewById(R.id.shutter);
        //设置快门的监听
        shutter.setOnClickListener(view -> takephoto());
        camera.start();
        initCamera();
    }
    //拍照的方法
    private void takephoto() {
        //调用capturePicture()进行拍照
        camera.capturePicture();
        //camera.takePicture(); //2.3.1修改的拍照方法
    }

    private void initCamera() {
        //初始化相机 设置相机拍照后的处理
        camera.addCameraListener(new CameraListener() {
            @Override
            public void onPictureTaken(byte[] jpeg) {
                super.onPictureTaken(jpeg);
                //通过jpeg获取图片的旋转角度orientation jpeg中包含了照片角度信息
                int orientation = Exif.getOrientation(jpeg);
                //通过jpeg获取bitmap对象
                Bitmap bitmap = BitmapFactory.decodeByteArray(jpeg, 0, jpeg.length);
                //将bitmap按解析出来的角度进行旋转orientation
                //有些机型会将照片旋转90度
                Matrix m = new Matrix();
                m.postRotate(orientation);
                bitmap = Bitmap.createBitmap(bitmap, 0, 0, bitmap.getWidth(), bitmap.getHeight(), m, true);

                //进行拍摄成功后的处理
                takeSuccess(bitmap);
            }

        });

    }


    public void takeSuccess(Bitmap bitmap) {//拍照成功后进行保存
        //创建文件,要保存png,这里后缀就是png,要保存jpg,后缀就用jpg
        //以拍摄时间为图片名进行命名
        File file = new File(dirpath, System.currentTimeMillis() + ".jpg");
        try {
            //文件输出流
            FileOutputStream fileOutputStream = new FileOutputStream(file);
            //压缩图片,如果要保存png,就用Bitmap.CompressFormat.PNG,要保存jpg就用Bitmap.CompressFormat.JPEG,质量是100%,表示不压缩
            bitmap.compress(Bitmap.CompressFormat.JPEG, 100, fileOutputStream);
            //写入,这里会卡顿,因为图片较大
            fileOutputStream.flush();
            //记得要关闭写入流
            fileOutputStream.close();
            //成功的提示,写入成功后,请在对应目录中找保存的图片
            Toast.makeText(this, "拍照成功", Toast.LENGTH_SHORT).show();
        } catch (FileNotFoundException e) {
            e.printStackTrace();
            //失败的提示
            Toast.makeText(this, e.getMessage(), Toast.LENGTH_SHORT).show();
        } catch (IOException e) {
            e.printStackTrace();
            //失败的提示
            Toast.makeText(this, e.getMessage(), Toast.LENGTH_SHORT).show();
        }
    }


    //动态权限申请
    @Override
    public void onRequestPermissionsResult(int requestCode, @NonNull String[] permissions, @NonNull int[] grantResults) {
        super.onRequestPermissionsResult(requestCode, permissions, grantResults);
        boolean valid = true;
        for (int grantResult : grantResults) {
            valid = valid && grantResult == PackageManager.PERMISSION_GRANTED;
        }
        if (valid && !camera.isStarted()) {
            camera.start();
        }
    }

    //根据activity生命周期 将来启动或者销毁相机
    @Override
    protected void onResume() {
        super.onResume();
        if (!camera.isStarted()) {
            camera.start();
        }
    }

    @Override
    protected void onPause() {
        super.onPause();
        camera.stop();//退出界面 比如点击home时 停掉相机 以onResume重启

    }

    @Override
    protected void onDestroy() {
        super.onDestroy();
        //销毁相机释放资源
        camera.destroy();
    }
}
进行拍照结果分析的Exif.class 主要作用就是从返回的byte[]数组中得到图片的旋转信息(纯算法,理解不了直接用)
import android.util.Log;

public class Exif {
    private static final String TAG = "CameraExif";

    // Returns the degrees in clockwise. Values are 0, 90, 180, or 270.
    public static int getOrientation(byte[] jpeg) {
        if (jpeg == null) {
            return 0;
        }

        int offset = 0;
        int length = 0;

        // ISO/IEC 10918-1:1993(E)
        while (offset + 3 < jpeg.length && (jpeg[offset++] & 0xFF) == 0xFF) {
            int marker = jpeg[offset] & 0xFF;

            // Check if the marker is a padding.
            if (marker == 0xFF) {
                continue;
            }
            offset++;

            // Check if the marker is SOI or TEM.
            if (marker == 0xD8 || marker == 0x01) {
                continue;
            }
            // Check if the marker is EOI or SOS.
            if (marker == 0xD9 || marker == 0xDA) {
                break;
            }

            // Get the length and check if it is reasonable.
            length = pack(jpeg, offset, 2, false);
            if (length < 2 || offset + length > jpeg.length) {
                Log.e(TAG, "Invalid length");
                return 0;
            }

            // Break if the marker is EXIF in APP1.
            if (marker == 0xE1 && length >= 8 &&
                    pack(jpeg, offset + 2, 4, false) == 0x45786966 &&
                    pack(jpeg, offset + 6, 2, false) == 0) {
                offset += 8;
                length -= 8;
                break;
            }

            // Skip other markers.
            offset += length;
            length = 0;
        }

        // JEITA CP-3451 Exif Version 2.2
        if (length > 8) {
            // Identify the byte order.
            int tag = pack(jpeg, offset, 4, false);
            if (tag != 0x49492A00 && tag != 0x4D4D002A) {
                Log.e(TAG, "Invalid byte order");
                return 0;
            }
            boolean littleEndian = (tag == 0x49492A00);

            // Get the offset and check if it is reasonable.
            int count = pack(jpeg, offset + 4, 4, littleEndian) + 2;
            if (count < 10 || count > length) {
                Log.e(TAG, "Invalid offset");
                return 0;
            }
            offset += count;
            length -= count;

            // Get the count and go through all the elements.
            count = pack(jpeg, offset - 2, 2, littleEndian);
            while (count-- > 0 && length >= 12) {
                // Get the tag and check if it is orientation.
                tag = pack(jpeg, offset, 2, littleEndian);
                if (tag == 0x0112) {
                    // We do not really care about type and count, do we?
                    int orientation = pack(jpeg, offset + 8, 2, littleEndian);
                    switch (orientation) {
                        case 1:
                            return 0;
                        case 3:
                            return 180;
                        case 6:
                            return 90;
                        case 8:
                            return 270;
                    }
                    Log.i(TAG, "Unsupported orientation");
                    return 0;
                }
                offset += 12;
                length -= 12;
            }
        }

        Log.i(TAG, "Orientation not found");
        return 0;
    }

    private static int pack(byte[] bytes, int offset, int length,
                            boolean littleEndian) {
        int step = 1;
        if (littleEndian) {
            offset += length - 1;
            step = -1;
        }

        int value = 0;
        while (length-- > 0) {
            value = (value << 8) | (bytes[offset] & 0xFF);
            offset += step;
        }
        return value;
    }
}
以上,我们的相机就实现了,启动之后,点击 拍照 会拍照并直接保存。
三.总结
3.1关于CameraView版本
还是推荐使用最新的2.3.1,文档也写的很清楚全面。本例使用的1.6.1和文档有冲突,费了很大劲
3.2相机拍照保存的图片自动旋转的问题 在网上找了很多发方法,因为有写手机不旋转图片,有些手机要旋转图片,做测试的时候,只有第一种最稳,在这里做一个记录
3.2.1 直接解析相机返回的byte[] jpeg中包含的图片角度信息,
Exif的代码在上方已经给出,这里感谢stackoverflow上的大神
原问题连接:https://stackoverflow.com/questions/39443657/camerasource-takepicture-save-rotated-images-in-some-device/39510691#39510691
                //通过jpeg获取图片的旋转角度orientation /jpeg中包含了照片角度信息
                int orientation = Exif.getOrientation(jpeg);
3.2.2 先用ExifInterface类得到照片的角度参数,然后再将照片角度转回来(本例不可行),读取到的角度恒为0
https://blog.csdn.net/midux/article/details/80318207
/**
     * 读取照片旋转角度
     *
     * @param path 照片路径
     * @return 角度
     */
    public int readPictureDegree(String path) {
        int degree = 0;
        try {
            ExifInterface exifInterface = new ExifInterface(path);
            int orientation = exifInterface.getAttributeInt(ExifInterface.TAG_ORIENTATION, ExifInterface.ORIENTATION_NORMAL);
            Log.i("tag", "读取角度-" + orientation);
            switch (orientation) {
                case ExifInterface.ORIENTATION_ROTATE_90:
                    degree = 90;
                    break;
                case ExifInterface.ORIENTATION_ROTATE_180:
                    degree = 180;
                    break;
                case ExifInterface.ORIENTATION_ROTATE_270:
                    degree = 270;
                    break;
            }
        } catch (IOException e) {
            e.printStackTrace();
        }
        return degree;
    }

    /**
     * 旋转图片
     *
     * @param angle  被旋转角度
     * @param bitmap 图片对象
     * @return 旋转后的图片
     */
    public Bitmap rotaingImageView(int angle, Bitmap bitmap) {
        Bitmap returnBm = null;
        // 根据旋转角度,生成旋转矩阵
        Matrix matrix = new Matrix();
        matrix.postRotate(-angle);
        try {
            // 将原始图片按照旋转矩阵进行旋转,并得到新的图片
            returnBm = Bitmap.createBitmap(bitmap, 0, 0, bitmap.getWidth(), bitmap.getHeight(), matrix, true);
        } catch (OutOfMemoryError e) {
        }
        if (returnBm == null) {
            returnBm = bitmap;
        }
        if (bitmap != returnBm) {
            bitmap.recycle();
        }
        return returnBm;
    }
3.2.3 拍照成功后获取相机状态,得到相机的偏转角度,再根据这个角度旋转图片(本例不可行)获取到的相机角度恒为90(竖拍)
https://blog.csdn.net/midux/article/details/80318207
 //获取图片时
    Bitmap realImage = BitmapFactory.decodeByteArray(data, 0, data.length);
    android.hardware.Camera.CameraInfo info = new android.hardware.Camera.CameraInfo();
    android.hardware.Camera.getCameraInfo(0, info);//得到Camera相机信息
int orientation=info.orientation;//相机偏转角度
        // 根据旋转角度,生成旋转矩阵
        Matrix matrix = new Matrix();
        matrix.postRotate(-angle);
        returnBm = Bitmap.createBitmap(bitmap, 0, 0, bitmap.getWidth(), bitmap.getHeight(), matrix, true);
