深度学习实战笔记一:google colab使用入门+mnist数据集入门+Dense层预测
Colab使用介绍
- 前言
- google colab创建、设置
- colab和drive的连接
- 更改工作目录
- 在colab上运行py文件
- 另附:google colab的快捷键
- 在colab上进行mnist手写体识别实战
-
- 代码运行结果:
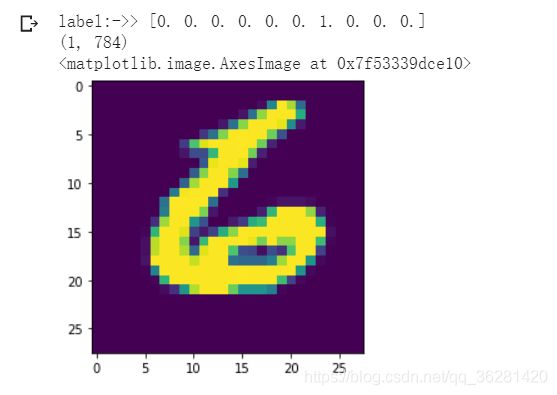
- 示例:拉取的test[9999]的图
- 用模型预测test[9999]
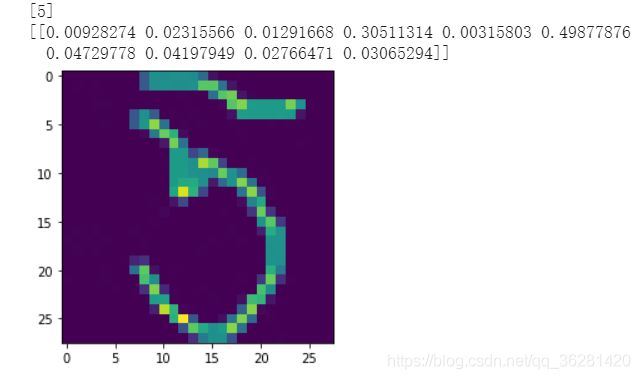
- 用自己的图片预测(PS自己创造的28*28的灰度图):
- 在google上使用tensorborad
- 加载一次后,如果要重新加载,就需要使用reload方法
前言
流程:
上传数据集到自己的google drive => 新建google colaboratory => 把colab和drive连接起来以访问drive上的数据集、代码文件等
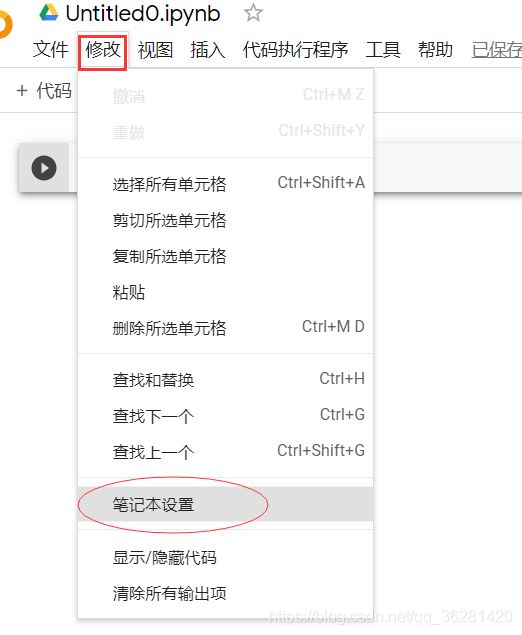
google colab创建、设置
首先kexue上网,进入google云端硬盘
新建->更多->Google Colaboratory (没有该选项的时候,点击关联更多应用,把Google Colaboratory 和drive关联起来)

创建了一个新的.ipynb文件

可修改该文件的名称

使用google colab的GPU
colab和drive的连接
运行代码,点击链接,操作后粘贴码到下面方框中,回车。
这样在colab里面就可以访问drive的数据了
from google.colab import drive
drive.mount('/content/drive/')

下面图片表示与google drive连接成功

运行以上两句代码后,在google colab中可以访问到google drive的文件
示例:
target=processimage.imread("/content/drive/My Drive/app/my_image/test5.jpg")
该图片位于一个名字为app的文件夹里的my_image文件夹
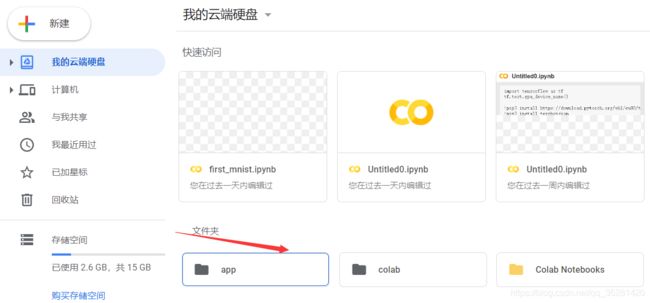
使用‘ls’命令查看文件夹的内容
ls '/content/drive/My Drive/app/my_image'
更改工作目录
因为有些时候,我们可能会直接运行github上别人的代码,而这些代码的路径一般写的是相对路径,google colab运行的时候需要查找绝对路径,使用以下方法可以更改工作目录,避免我们在运行别人项目时需要打开项目修改路径:
(下面的代码中,需要运行的super-resolution.ipynb是在google drive里/Colab_Test/deep-image-prior/目录下)
import os
path = "/content/drive/My Drive/Colab_Test/deep-image-prior/"
os.chdir(path)
os.listdir(path)
!ls
在colab上运行py文件
`有时候可以把自己的代码上传到github,然后克隆到colab的内存中
完整的克隆github代码,拷贝drive中保留的数据集,运行py文件的流程如下:
# clone代码到colab的内存中
# 这里我一般用的是想要克隆项目的网址连接(如下图),使用ssh连接反而不好使
!git clone https://github.com/migu***/s***

#数据集保存在drive中,先连接drive
from google.colab import drive
drive.mount('/content/drive')

# 复制drive的数据到colab的内存中

# 在刚才克隆的项目中创建一个dataset文件夹
!mkdir /content/shanshan-interim/dataset
# 复制drive中保留的zip文件datasets_for_net.zip到当前内存的根目录/content下
!cp /content/drive/My\ Drive/datasets_for_net.zip /content/
# 解压zip文件到根目录
!unzip /content/datasets_for_net.zip
# 复制解压好的文件到刚才创建的dataset文件夹
!cp -r  /content/datasets_for_net /content/shanshan-interim/dataset/
# 定位到该项目路径
path = '/content/shanshan-interim/'
import os
os.chdir(path)
# ls可以查看是否定位到了真正想要定位的位置
!ls

# 运行以下指令,安装运行py文件所需要的的全部模块
!pip install -r requirements.txt
# 运行该项目的main.py文件
!python train.py
另附:google colab的快捷键
#上面是colabd的快捷键
# 下面一行对应的是jupyter的快捷键

# see all keyboard shortcuts
ctrl + M + H
H

#向上/下添加一个cell
ctrl + M + A/B
A/B
# change cell  to markdown
ctrl + M + M
M
# 终止cell的运行
ctrl + M + I
II
# 删除cell
ctrl + M + D
DD
# 保存cell
ctrl + M + S
ctrl + S
在colab上进行mnist手写体识别实战
以下是观看up主Mike高的视频笔记:
import numpy as np
from keras.datasets import mnist
from keras.models import Sequential,Model
from keras.layers.core import Dense,Activation,Dropout
from keras.utils import np_utils

import matplotlib.pyplot as plt
import matplotlib.image as processimage

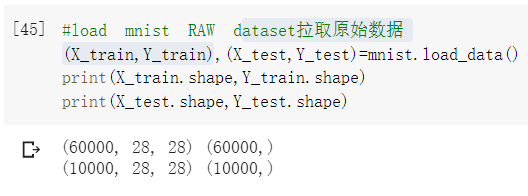
#load mnist RAW dataset拉取原始数据
(X_train,Y_train),(X_test,Y_test)=mnist.load_data()
print(X_train.shape,Y_train.shape)
print(X_test.shape,Y_test.shape)

#准备数据
#因为使用的是全连接层,不认识矩阵,只认识向量
#所以需要把数据准备成神经网络需要的数据

X_train = X_train.reshape(60000,28*28)
X_test = X_test.reshape(10000,28*28)
#print(X_train)#可以看到X_train中都是整数,因为使用小数收敛更好,所以可以改成小数

#把所有的数据设置成浮点型

#使用类型设置函数:astype,“set as type"
X_train = X_train.astype('float32')
X_test = X_test.astype('float32')

#print(X_train) #打印出来的数据带有小数点,但是其实只是整数加了一个小数点

#归一化,将整数变成真正的小数

#因为颜色总数是255
#这样所有的值都变成了0.几
X_train = X_train/255
#print(X_train)
#打印train中的某个向量
#print(X_train[9999])

X_test /=255

#prepare basic seups
#给神经网络配置基本参数
batch_size = 1024 #每次要从60000条数据中拿出多少条数据来进行训练

#batch_size会影响精度

nb_class = 10 #要训练几个类
nb_epochs = 4 #类似于 for i in range(4)

#class vectors[0,0,0,0,0,0,0,0,1,0]
print(Y_test.shape)
Y_test = np_utils.to_categorical(Y_test,nb_class)
Y_train = np_utils.to_categorical(Y_train,nb_class)

#print(Y_test[9999])
print(Y_test.shape)


#设置网络结构
model = Sequential()
#1st layer
#设置输出512维,因为是第一层所以要有输入维度
model.add(Dense(512,input_shape=(784,))) #input_dim = 784,
#(784,)表示(784,1),一行数据有784列
#model.add(Activiation('relu'))
model.add(Activation('relu'))
#Dropout从现有网络中拿掉一些数据,防止过拟合
model.add(Dropout(0.2))

#设置第二层
#第二层的输入是从第一层得到的,不需要再设置输入维度
model.add(Dense(256))
model.add(Activation('relu'))
model.add(Dropout(0.2))

#设置第三层
model.add(Dense(10))
#softmax主要用于分类
model.add(Activation('softmax'))

#编译
model.compile(
    loss='categorical_crossentropy',
    optimizer='rmsprop',
    metrics=['accuracy'],
)

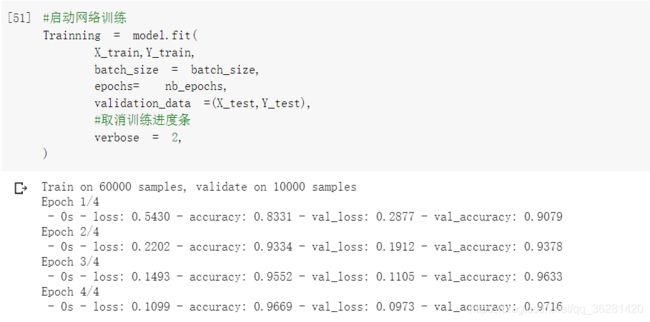
#启动网络训练
Trainning = model.fit(
    X_train,Y_train,
    batch_size = batch_size,
    epochs=  nb_epochs,
    validation_data =(X_test,Y_test),
    #取消训练进度条
    verbose = 2,
)

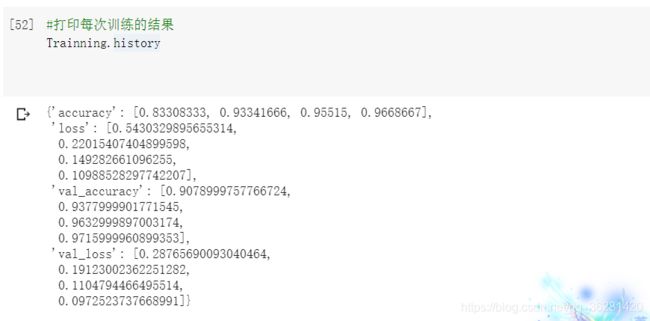
#打印每次训练的结果
Trainning.history

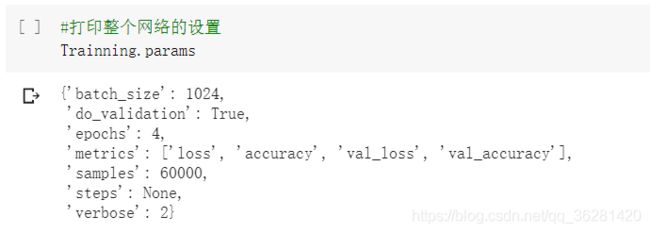
#打印整个网络的设置
Trainning.params


#拉去test里的图
testrun = X_test[9999].reshape(1,784)
#如果这里直接写testrun = X_test[9999],没有reshape的话,下面预测的时候会有输入错误
#print(testrun)
testlabel = Y_test[9999]
print('label:->>',testlabel)
print(testrun.shape)
plt.imshow(testrun.reshape([28,28]))

#判定输出结果
pred = model.predict(testrun)
print('label of test sample Y_test[9999]->>',testlabel)
print('预测结果->>',pred)
#找出最大值下标
print([i.argmax() for i in pred])
a = [i.argmax() for i in pred]
print(a)

#用自己的图片预测一下


target=processimage.imread("/content/drive/My Drive/app/my_image/test5.jpg")
print(target.shape)

plt.imshow(target)
#数据预处理
target_img = target.reshape(1,784)
#把图片数据转换为数组
target_img = np.array(target_img)

target_img = target_img.astype('float32')
target_img/=255

print(target_img)

pred = model.predict(target_img)
#print('预测结果:->',pred)
print([myfinal.argmax() for myfinal in pred ])

print(pred)
代码运行结果:
示例:拉取的test[9999]的图
用模型预测test[9999]
用自己的图片预测(PS自己创造的28*28的灰度图):
在google上使用tensorborad
(2020/9/3号更新)
%load_ext tensorboard
%tensorboard --logdir ‘./log/train’
加载一次后,如果要重新加载,就需要使用reload方法
%reload_ext tensorboard
%tensorboard --logdir ‘./log/train’


