图片相似度识别_deepface:人脸识别\特征分析,强大而好用的工具。

deepface是python的轻量级面部识别和面部属性分析(年龄,性别,情感和种族)框架。您只需几行代码就可以应用面部分析。它弥合了软件工程和机器学习研究之间的鸿沟,非常适合想开车但不会造车的你。
开发者 Sefik Ilkin Serengil
脸部识别的步骤
face recognition pipelinesefiks.com侦测脸部区域(找到脸)
detectsefiks.com脸部方向调整
alignsefiks.com图片数据化(训练)
representsefiks.com找到图片相似度
verifysefiks.com所有这些复杂的前期,deepface 都在后台运算好了。
DeepFace界面下的验证功能可提供单张面部识别。该函数的每次调用都会构建一个人脸识别模型,这非常耗内存。如果要顺序验证多个面孔,则应将面孔数组传递给函数,而不要在for循环中调用该函数。这样,一次就可以构建复杂的人脸识别模型,这将极大地加快功能的速度。此外,在for循环中调用该函数可能还会导致内存问题。
脸部验证Face Verification-
Demoyoutu.be批量脸部识别 Large scale face recognition-
Demoyoutu.be脸部特征分析(年龄,性别,种族,表情)Facial Attribute Analysis-
Demoyoutu.be实时视频分析Streaming and Real Time Analysis-
Demoyoutu.beif 打不开油管:
轻轻的告诉你:
那就接着往下看哦。
import os
os.chdir('C:/R_Py/Jupyter/deepface')
print("Current Working Directory " , os.getcwd())
path="./yangyuying/"
frames=[]
for image_db in os.listdir(path):
    #images=(path+"/"+image_db)
      frames.append(path+"/"+image_db)
读取数据库的图片
import cv2
import matplotlib.pyplot as plt
#cv2 读取的是GBR
image1 = cv2.imread(frames[0])
plt.imshow(image1)
plt.imshow(image1[:, :, ::-1])
# 加上[:, :, ::-1] 改为RGB
import matplotlib.image as mpimg
#也可以直接用matplotlib.image 来读去图片
image2 = mpimg.imread(frames[1])
plt.imshow(image2)
from deepface import DeepFace
result= DeepFace.verify(frames[0],frames[1])
print("Is verified:",result["verified"])

-------------
Using VGG-Face model backend and cosine distance.
Verification:   0%|                                                                              | 0/1 [00:00
结果是true,表明两个图片相似度非常高,image1 和 image2 是同一个人(杨钰莹)。
接下来用find来找到图片库里和特定照片所有的相似度(distance 越小越相似,VGG-Face 阈值是0.4)
import pandas as pd
df = DeepFace.find(img_path = image1,db_path = path)

--------------
	identity	distance
0	./yangyuying//yang2.jpg	0.168852
1	./yangyuying//yang3.jpg	0.218472
2	./yangyuying//yang_mao.jpg 0.255236
读取其中一张看看
image3 = mpimg.imread(df["identity"][1])
plt.imshow(image3)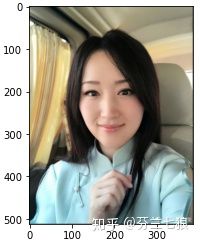
deepface 里有多个不同的模块来侦测脸部,其中"VGG-Face" 准确度最高。
VGG-Face,Facenet 回值为 True
OpenFace,DeepFace 回值为 False
models = ["VGG-Face", "Facenet", "OpenFace", "DeepFace"]
result2 =[]
for model in models:
    result = DeepFace.verify(path + "yang1.jpeg", path +"yang2.jpg", model_name = model)
    result2.append(result)

---------------
[{'verified': True,
  'distance': 0.1688520312309265,
  'max_threshold_to_verify': 0.4,
  'model': 'VGG-Face',
  'similarity_metric': 'cosine'},
 {'verified': True,
  'distance': 0.2785506248474121,
  'max_threshold_to_verify': 0.4,
  'model': 'Facenet',
  'similarity_metric': 'cosine'},
 {'verified': False,
  'distance': 0.1669234037399292,
  'max_threshold_to_verify': 0.1,
  'model': 'OpenFace',
  'similarity_metric': 'cosine'},
 {'verified': False,
  'distance': 0.34316086769104004,
  'max_threshold_to_verify': 0.23,
  'model': 'DeepFace',
  'similarity_metric': 'cosine'}]
deepface 有3种图片相似度算法["cosine", "euclidean", "euclidean_l2"],默认的为 Cosine。
metrics = ["cosine", "euclidean", "euclidean_l2"]
result3 = []
for metric in metrics:
    result = DeepFace.verify(path + "yang1.jpeg", path +"yang2.jpg",distance_metric = metric)
    result3.append(result)

---------------
[{'verified': True,
  'distance': 0.1688520312309265,
  'max_threshold_to_verify': 0.4,
  'model': 'VGG-Face',
  'similarity_metric': 'cosine'},
 {'verified': True,
  'distance': 0.49954766,
  'max_threshold_to_verify': 0.55,
  'model': 'VGG-Face',
  'similarity_metric': 'euclidean'},
 {'verified': True,
  'distance': 0.5811232,
  'max_threshold_to_verify': 0.75,
  'model': 'VGG-Face',
  'similarity_metric': 'euclidean_l2'}]
接下来就是非常实用的脸部特征分析(年龄,性别,种族,表情)
demography = DeepFace.analyze(path + "yang1.jpeg", actions = ['age', 'gender', 'race', 'emotion'])
#demographies = DeepFace.analyze(["img1.jpg", "img2.jpg", "img3.jpg"]) #analyzing multiple faces same time
print("Age: ", demography["age"])
print("Gender: ", demography["gender"])
print("Emotion: ", demography["dominant_emotion"])
print("Race: ", demography["dominant_race"])
看看结果:
Age:  27.17988143003153
Gender:  Woman
Emotion:  happy
Race:  asian
在把图片读出来确认下。。。
image2 = mpimg.imread(path + "yang1.jpeg")
plt.imshow(image2)
人脸识别任务可以通过几种模型和相似性指标来处理。在此,deepface提供了一种特殊的增强和组合解决方案,以提高面部识别任务的准确性。这大大提高了准确性。人类可以在面部识别任务上获得97.53%的分数,而这种集成方法可以达到人类水平的准确度,并且可以达到98.57%的准确度。另一方面,要注意这比单个模型要慢得多。
resp_obj = DeepFace.verify(path + "yang1.jpeg", path +"yang2.jpg", model_name = "Ensemble")
df2 = DeepFace.find(img_path = path + "yang1.jpeg", db_path = path, model_name = "Ensemble")
杨钰莹图片来源QQ,如有版权问题,联系我删除!
原文作者: Sefik Ilkin Serengil
github链接:
https://github.com/serengil/deepfacegithub.com