netty作为一个高性能的io框架,是非好用的一个技术框架,
Netty 是一个基于NIO的客户、服务器端编程框架,使用Netty 可以确保你快速和简单的开发出一个网络应用,例如实现了某种协议的客户、服务端应用。Netty相当于简化和流线化了网络应用的编程开发过程,例如:基于TCP和UDP的socket服务开发。
“快速”和“简单”并不用产生维护性或性能上的问题。Netty 是一个吸收了多种协议(包括FTP、SMTP、HTTP等各种二进制文本协议)的实现经验,并经过相当精心设计的项目。最终,Netty 成功的找到了一种方式,在保证易于开发的同时还保证了其应用的性能,稳定性和伸缩性
那么如何和springboot这个比较流行的框架进行整合呢?
首先整个项目引入pom
    4.0.0

        org.springframework.boot
        spring-boot-starter-parent
        2.2.1.RELEASE


    com.cxy
    netty
    0.0.1-SNAPSHOT
    netty
    Demo project for Spring Boot


        1.8


            org.springframework.boot
            spring-boot-starter-web


            io.netty
            netty-all
            4.1.25.Final


            org.springframework.boot
            spring-boot-starter-test
            test


                    org.junit.vintage
                    junit-vintage-engine


                org.springframework.boot
                spring-boot-maven-plugin
handler类是不会改变的
package com.cxy.netty.controller;
import io.netty.buffer.ByteBuf;
import io.netty.channel.ChannelFutureListener;
import io.netty.channel.ChannelHandlerContext;
import io.netty.channel.ChannelInboundHandlerAdapter;
import io.netty.util.CharsetUtil;
public class EchoServerHandler extends ChannelInboundHandlerAdapter {
    @Override
    public void channelRead(ChannelHandlerContext ctx, Object msg){
        ByteBuf in = (ByteBuf) msg;
        System.out.println("Server received: " + in.toString(CharsetUtil.UTF_8));
        ctx.write(in);
    }
    public void channelReadComplete(ChannelHandlerContext ctx){
        ctx.writeAndFlush(ChannelFutureListener.CLOSE);
    public void exceptionCaught(ChannelHandlerContext ctx, Throwable cause){
        cause.printStackTrace();
        ctx.close();
}
这个handler是我从官网上copy下来的
方式一:注解@PostConstruct
package com.cxy.netty.controller;
import io.netty.bootstrap.ServerBootstrap;
import io.netty.channel.ChannelFuture;
import io.netty.channel.ChannelInitializer;
import io.netty.channel.EventLoopGroup;
import io.netty.channel.nio.NioEventLoopGroup;
import io.netty.channel.socket.SocketChannel;
import io.netty.channel.socket.nio.NioServerSocketChannel;
import org.slf4j.Logger;
import org.slf4j.LoggerFactory;
import org.springframework.boot.autoconfigure.web.ServerProperties;
import org.springframework.stereotype.Component;
import javax.annotation.PostConstruct;
import javax.annotation.PreDestroy;
import java.net.InetSocketAddress;
@Component
public class NettyServer {
    /*private  int port =8080;
    public int getPort() {
        return port;
    }
    public void setPort(int port) {
        this.port = port;
    }
    public NettyServer(int port) {
        this.port = port;
    }*/
    @PostConstruct
    public void start() throws Exception {
        System.out.println("启动记载netty");
        EventLoopGroup boss = new NioEventLoopGroup();
        EventLoopGroup work = new NioEventLoopGroup();
        ServerBootstrap b = new ServerBootstrap();
        b.group(boss,work)
                .channel(NioServerSocketChannel.class)
                .localAddress(new InetSocketAddress(8082))
                .childHandler(new ChannelInitializer() {
                    @Override
                    protected void initChannel(SocketChannel ch) throws Exception {
                        ch.pipeline().addLast(new EchoServerHandler());
                    }
                });
        System.out.println("启动加载netty2");
        ChannelFuture channelFuturef = b.bind().sync();
        if (channelFuturef.isSuccess()){
        System.out.println("启动成功");
        }
    }
}
点击启动:
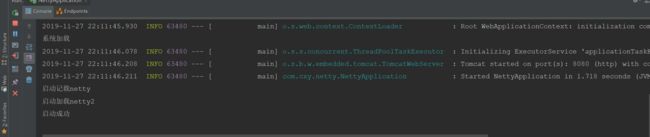
看日志:

说明已经启动
那么这个注解为什么这么神奇呢:

大概的意思,大家看下,意思就是这个方法会随着类的加载而加载,初始化加载的意思:
@Documented
@Retention (RUNTIME)
@Target(METHOD)
public @interface PostConstruct {
}
方式二:利用监听器启动:
package com.cxy.netty.controller;
import javax.servlet.ServletContextEvent;
import javax.servlet.ServletContextListener;
/**
 * 系统初始化监听器
 * @author Administrator
 *
 */
public class InitListener implements ServletContextListener {
    @Override
    public void contextInitialized(ServletContextEvent sce) {

        NettyServer nettyServer = new NettyServer(8081);
        try {
            nettyServer.start();
        } catch (Exception e) {
            e.printStackTrace();
        }
    }

    @Override
    public void contextDestroyed(ServletContextEvent sce) {

    }
}
启动类:
package com.cxy.netty;
import com.cxy.netty.controller.InitListener;
import com.cxy.netty.controller.NettyServer;
import org.springframework.boot.CommandLineRunner;
import org.springframework.boot.SpringApplication;
import org.springframework.boot.autoconfigure.SpringBootApplication;
import org.springframework.boot.web.servlet.ServletListenerRegistrationBean;
import org.springframework.context.annotation.Bean;
@SpringBootApplication
public class NettyApplication {
    /**
     * 注册监听器
     * @return
     */
    @SuppressWarnings({ "rawtypes", "unchecked" })
    @Bean
    public ServletListenerRegistrationBean servletListenerRegistrationBean() {
        ServletListenerRegistrationBean servletListenerRegistrationBean =
                new ServletListenerRegistrationBean();
        servletListenerRegistrationBean.setListener(new InitListener());
        return servletListenerRegistrationBean;
    }
    public static void main(String[] args) {
        SpringApplication.run(NettyApplication.class, args);
    }
}
看日志:

方式三 :利用ApplicationListener 上下文监听器
package com.cxy.netty.controller; import com.cxy.netty.controller.NettyServer; import org.springframework.context.ApplicationListener; import org.springframework.context.event.ContextRefreshedEvent; import org.springframework.stereotype.Component; @Component public class NettyBooter implements ApplicationListener{ @Override public void onApplicationEvent(ContextRefreshedEvent event) { NettyServer nettyServer = new NettyServer(8081); try { nettyServer.start(); } catch (Exception e) { e.printStackTrace(); } } }
启动类:
package com.cxy.netty;
import com.cxy.netty.controller.NettyServer;
import org.springframework.boot.CommandLineRunner;
import org.springframework.boot.SpringApplication;
import org.springframework.boot.autoconfigure.SpringBootApplication;
import org.springframework.boot.web.servlet.ServletListenerRegistrationBean;
import org.springframework.context.annotation.Bean;
@SpringBootApplication
public class NettyApplication {
   /**
     * 注册监听器
     * @return
     */
   /* @SuppressWarnings({ "rawtypes", "unchecked" })
    @Bean
    public ServletListenerRegistrationBean servletListenerRegistrationBean() {
        ServletListenerRegistrationBean servletListenerRegistrationBean =
                new ServletListenerRegistrationBean();
        servletListenerRegistrationBean.setListener(new InitListener());
        return servletListenerRegistrationBean;
    }*/
    public static void main(String[] args) {
        SpringApplication.run(NettyApplication.class, args);
    }
}
看启动日志:

方式四:commiandLinerunner启动
package com.cxy.netty;
import com.cxy.netty.controller.NettyServer;
import org.springframework.boot.CommandLineRunner;
import org.springframework.boot.SpringApplication;
import org.springframework.boot.autoconfigure.SpringBootApplication;
import org.springframework.boot.web.servlet.ServletListenerRegistrationBean;
import org.springframework.context.annotation.Bean;
/*
@SpringBootApplication
public class NettyApplication {
   */
/**
     * 注册监听器
     * @return
     *//*
   */
/* @SuppressWarnings({ "rawtypes", "unchecked" })
    @Bean
    public ServletListenerRegistrationBean servletListenerRegistrationBean() {
        ServletListenerRegistrationBean servletListenerRegistrationBean =
                new ServletListenerRegistrationBean();
        servletListenerRegistrationBean.setListener(new InitListener());
        return servletListenerRegistrationBean;
    }*//*
    public static void main(String[] args) {
        SpringApplication.run(NettyApplication.class, args);
    }
}
*/
@SpringBootApplication
public class NettyApplication implements CommandLineRunner {
    public static void main(String[] args) {
        SpringApplication.run(NettyApplication.class, args);
    }
    @Override
    public void run(String... args) throws Exception {
        NettyServer echoServer = new NettyServer(8083);
        echoServer.start();
    }
}
看日志:
代表这四种都可以启动成功,下章接再分析后面三种为什么可以启动成功
到此这篇关于springboot整合netty的方式小结的文章就介绍到这了,更多相关springboot整合netty内容请搜索脚本之家以前的文章或继续浏览下面的相关文章希望大家以后多多支持脚本之家!