OpenCV 表计识别中倾斜的仪表转正透视变换投影变换
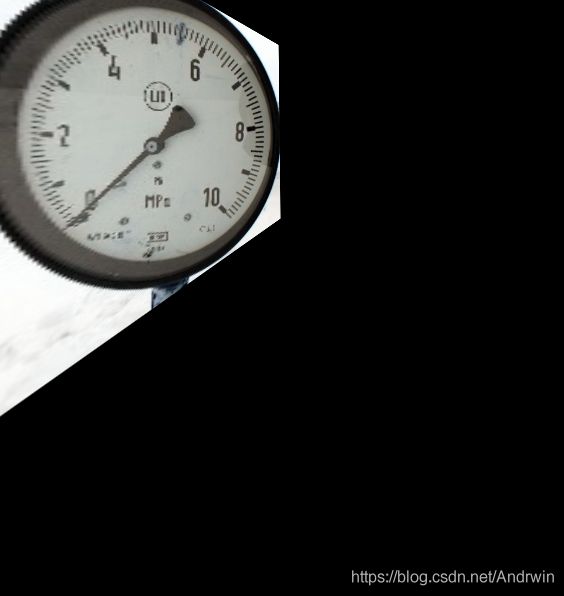
有的时候表非常的歪,再加上镜头畸变,你们来感受下这个画风:
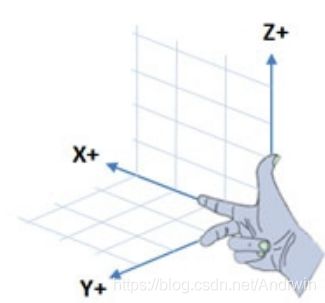
就要想办法把它从这个样子给正过来,拿起你的右手,食指向前中指向左大拇指向上其他收起来
跟我一起做这个动作:
好了,放下吧,我们用不到~
首先思路就是做个变换,做个啥变换呢?是不是要揪住表的左边往屏幕外拽
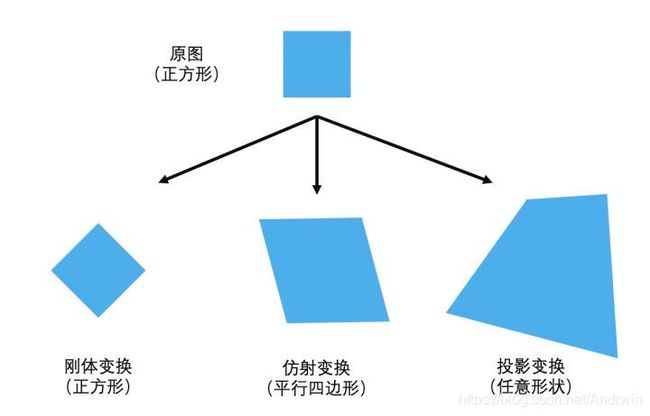
然后我发现变换分为两种,一种是仿射变换,一种是透视变换(投影变换),我偷了一张非常好懂的图
显然仿射变换不满足我们的要求,这种方法没办法把它拉出屏幕外。
这个时候我发现了另外一种思路:http://cprs.patentstar.com.cn/Search/Detail?ANE=9GDC9EHC4BCA9CGE9IGG6FBA8EBA9AHC9CEC9CFD9AHH9HAG
(找专利就去这里,收费网站太不要脸了)
专利里面的方法其实就是OpenCV里面的透视变换,只不过做了结果处理
找找资料很容易就copy一份能跑得起来的
import cv2
import numpy as np
import matplotlib.pyplot as plt
from PIL import Image
img = cv2.imread('1.jpg')
H_rows, W_cols= img.shape[:2]
print(H_rows, W_cols)
N = 30
X = 40
pts1 = np.float32([[77, 0], [171, 128], [77, 268], [0, 128]])
pts2 = np.float32([[126+N+X, 0],[252+N,128],[126+N+X, 268],[0,128]])
M = cv2.getPerspectiveTransform(pts1, pts2)
dst = cv2.warpPerspective(img, M, (268+N,252+N))
cv2.imwrite("res.jpg",dst)
image_show_11 = Image.fromarray(img)
display(image_show_11)
image_show_12 = Image.fromarray(dst)
display(image_show_12)
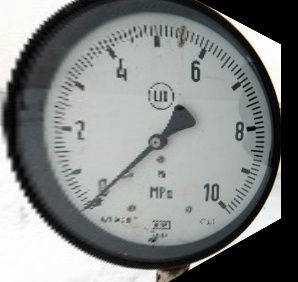
其实就是猜猜变化坐标,就可以变得勉强能看:(这个图当做标准图,后面要用到它)
现在的问题是我们手动选了四个坐标,手动计算了四个映射后的坐标才学到了单应性矩阵(变换矩阵啦)
这么行呢?太麻烦了
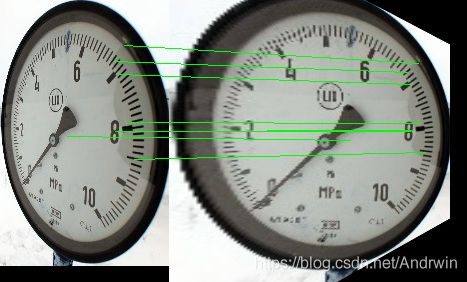
是时候祭出SURF大法了,用SURF找出两张图特征点(一张待变换的,一张原图-模板图-标准图随你怎么称呼),然后去匹配他们的特征点,有了对应点不就可用上一个办法计算单应性矩阵了吗(结果证明SURF不如SIFT效果好一点,用SURF的话就把代码里面的SIFT四个字母换成SURF就可以其他不要动,在第27行哟)
import cv2
import numpy as np
from PIL import Image

R = 0.45

def drawMatchesKnn_cv2(img1_gray,kp1,img2_gray,kp2,Match):
    h1, w1 = img1_gray.shape[:2]
    h2, w2 = img2_gray.shape[:2]
    vis = np.zeros((max(h1, h2), w1 + w2, 3), np.uint8)
    vis[:h1, :w1] = img1_gray
    vis[:h2, w1:w1 + w2] = img2_gray
    p1 = [kpp.queryIdx for kpp in Match]
    p2 = [kpp.trainIdx for kpp in Match]
    post1 = np.int32([kp1[pp].pt for pp in p1])
    post2 = np.int32([kp2[pp].pt for pp in p2]) + (w1, 0)
    for (x1, y1), (x2, y2) in zip(post1, post2):
        cv2.line(vis, (x1, y1), (x2, y2), (0,255,0),1)
    image_show_4 = Image.fromarray(vis)
    display(image_show_4)

def perspectiveTransformation(img1_gray, img2_gray):
#     image_show_1 = Image.fromarray(img1_gray)
#     display(image_show_1)
#     image_show_2 = Image.fromarray(img2_gray)
#     display(image_show_2)
    surf = cv2.xfeatures2d.SIFT_create()
    kp1, des1 = surf.detectAndCompute(img1_gray, None)
    kp2, des2 = surf.detectAndCompute(img2_gray, None)
    bf = cv2.BFMatcher(cv2.NORM_L2)
    matches = bf.knnMatch(des1, des2, k = 2)
    Match = []
    for m,n in matches:
        if m.distance < R * n.distance:
            Match.append(m)
    if len(Match) > 4:
        src_pts = np.float32([ kp1[m.queryIdx].pt for m in Match ]).reshape(-1,1,2)
        dst_pts = np.float32([ kp2[m.trainIdx].pt for m in Match ]).reshape(-1,1,2)
        M,status  = cv2.findHomography(src_pts, dst_pts, cv2.RANSAC,5.0)
    dst = cv2.warpPerspective(img1_gray, M, (img2_gray.shape[0]*2,img2_gray.shape[1]*2))
    drawMatchesKnn_cv2(img1_gray,kp1,img2_gray,kp2,Match[:15])
    image_show_3 = Image.fromarray(dst)
    display(image_show_3)
    return dst

img1_gray = cv2.imread("待变换.jpg")
img2_gray = cv2.imread("模板图.jpg")
pt = perspectiveTransformation(img1_gray, img2_gray)
raw = cv2.cvtColor(pt,cv2.COLOR_BGR2RGB)
raw_gray = cv2.cvtColor(raw,cv2.COLOR_RGB2GRAY)
edges = cv2.Canny(raw_gray,125,350)
image1 = Image.fromarray(edges.astype('uint8')).convert('RGB')
display(image1)
最后做了个canny边缘检测,效果就很不错了~
然后再研究个深度学习的做法吧,这玩意太不靠谱了~
有机会再写剩下的!


