Pytorch神经网络结构可视化之tensorwatch
Tensorwatch查看网络结构图踩过的坑
-
- 踩坑日记
- 出坑日记
-
- 一、环境安装
- 二、graphviz安装
- 三、逐个解决错误
使用tensorwatch对网络进行可视化,但是绘制的图有问题,那十有八九就是版本较高带来的问题!
踩坑日记
本来自己使用的pytorch版本是1.8,听说tensorwatch对版本有要求,特意装了一个低版本的pytorch,结果还是掉坑里了。
pytorch=1.4
torchvision=0.5.0
pydot=1.4.2
tensorwatch=0.9.1
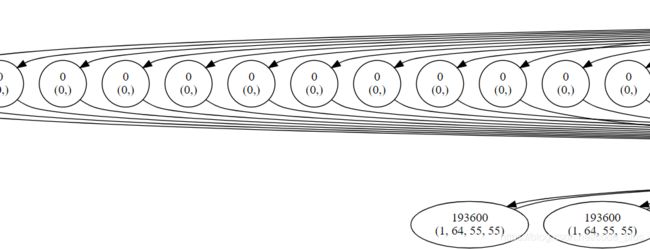
上述的版本可以画出图,但是画出的图有问题:
import tensorwatch as tw
import torchvision.models
alexnet_model = torchvision.models.alexnet()
img = tw.draw_model(alexnet_model, [1, 3, 224, 224])
img.save(r'alex.jpg')
类似这样(整个只是图的一部分):

原因:pytorch的版本较高。
出坑日记
这里提供一个可用的版本:
pytorch=1.2
torchvision=0.4.0
pydot=1.4.2
tensorwatch=0.8.7
一、环境安装
按照上面的版本安装pytorch和tensorwatch的环境。
二、graphviz安装
安装 graphviz这个软件,记住安装的目录,并将bin目录添加到系统环境变量中,在命令行中输入dot.exe,如果不报错的话基本上就ok了。
三、逐个解决错误
搞定之后,执行下面的代码不出意外会出现如下错误:
import tensorwatch as tw
import torchvision.models
alexnet_model = torchvision.models.alexnet()
img = tw.draw_model(alexnet_model, [1, 3, 224, 224])
1、第一个错误:KeyError: 'upsample_bilinear2d’
解决方案:找到这个文件symbolic_opset9.py,目录在E:\Anaconda3\envs\pytorch1.2\Lib\site-packages\torch\onnx。同时找到
upsample_nearest3d = _interpolate('upsample_nearest3d', 5, "nearest")
大概在745行左右,将下面的代码粘贴到上面那行代码的下面,第一个问题成功被解决。
upsample_bilinear1d = _interpolate('upsample_bilinear1d', 3, "linear")
upsample_bilinear2d = _interpolate('upsample_bilinear2d', 4, "linear")
upsample_bilinear3d = _interpolate('upsample_bilinear3d', 5, "linear")
2、第二个错误:FileNotFoundError: [WinError 2] “dot” not found in path.
解决方案:对pydot.py文件做如下修改。
(1)、set_prog函数
修改前:
def set_prog(self, prog):
    """Sets the default program.

    Sets the default program in charge of processing
    the dot file into a graph.
    """
    self.prog = prog
修改后:
def set_prog(self, prog):
   """Sets the default program.

   Sets the default program in charge of processing
   the dot file into a graph.
   """
   path = r'E:\Graphviz\bin'
   prog = os.path.join(path, prog)
   prog += '.exe'
   # self.prog = prog
   return prog
(2)、create函数
找到下面这段代码,
if prog is None:
     prog = self.prog
 assert prog is not None
在后面添加,
prog = self.set_prog('dot')
最终,大功告成,可以成功的画出想要的图了,给一个最上面的代码画出AlexNet的例子,如下图(仅截取了小部分):

注:踩坑日记,如果对你有帮助,欢迎点赞!