神经网络之特征图可视化
目录
-
-
- 1 前言
- 2 coding
-
- 2.1 加载数据及模型
- 2.2 微调及训练
- 2.3 可视化特征图
- 3 总结
- 附录
-
1 前言
- 使用torch实现。
- 使用cifar10数据集
- 代码中,有一点点迁移学习的内容
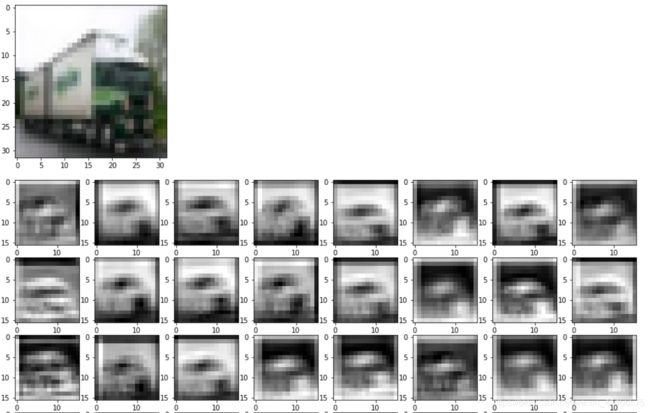
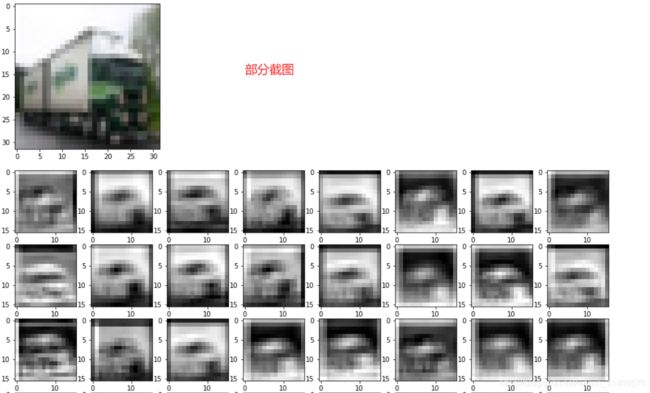
- 中间层输出的特征图与原始图像进行对比,加深对神经网络理解。即从人为的可视化的角度,理解神经网络到底干了什么事。
2 coding
- 为了减少运行时间,这里直接使用resnet18的预训练模型。
- 但是由于resnet18是适配imagenet数据集(1000个类别)的,最终层输出是1000维的向量。这里我们使用一个全连接层,将其映射为10维的输出(对应cifar10数据集的10个类别)。
- 如你所见,resnet18虽然是已经训练好了的,但是我们仍要训练自己定义的全连接层。这在迁移学习里叫做微调模型(fine-tune)。
实验步骤:
- 加载预训练resnet18模型以及cifar10数据集
- 对resnet18模型进行微调(添加一个全连接层)并训练
- 输出resnet18其中的特征图并与原图像比较
2.1 加载数据及模型
import torch
import torchvision
import torchvision.models as models
import torchvision.transforms as transforms
resnet18 = models.resnet18(pretrained = True)

# 得到对象 PIL.Image.Image image mode=RGB size=32x32 at 0x7FEECE0EEC50
# 如果需要对图像进行reshape或者归一化等操作,可以使用transforms.lambda(lambda x:---)进行定义
train_dataset = torchvision.datasets.CIFAR10('./data' ,train = True ,download=True, transform = transforms.Compose([transforms.ToTensor(),]))
test_dataset = torchvision.datasets.CIFAR10('./data' ,train = True ,download=False, transform = transforms.Compose([transforms.ToTensor(),]))
train_loader = torch.utils.data.DataLoader(train_dataset,batch_size=10,shuffle=True)
test_loader = torch.utils.data.DataLoader(test_dataset,batch_size=10,shuffle=True)
2.2 微调及训练
from tqdm import tqdm
epoch = 1
learning_rate = 0.001
device = torch.device('cuda' if torch.cuda.is_available() else 'cpu')

category_list = ['airplane','automobile','bird','cat','deer','dog','frog','horse','ship','truck']
resnet18 = resnet18.to(device)
transfer_layer = torch.nn.Linear(1000,10).to(device)
# 联合参数进行优化需使用如下方式。key只能是params
optimizer = torch.optim.SGD([{'params':transfer_layer.parameters()},{'params':resnet18.conv1.parameters()}],lr = learning_rate)

def train():
  for i in range(epoch):
    for j,(data,target) in tqdm(enumerate(train_loader)):
      logit = transfer_layer(resnet18(data.to(device)))
      # print (logit.shape)
      # print (target.shape)
      loss = torch.nn.functional.cross_entropy(logit.to(device),target.to(device))
      loss.backward()
      for param in transfer_layer.parameters():
        if param.grad is not None:
          param.grad.zero_()
      optimizer.step()
      # 上下两种优化网络参数方式都行。
      # for param in transfer_layer.parameters():
      #   param = (param - learning_rate*param.grad).detach().requires_grad_()

      if j % 500 == 0:
        print ('第{}次迭代,loss值为{}'.format(j*10,loss))

def test():
  correct_num = torch.tensor(0).to(device)
  for j,(data,target) in tqdm(enumerate(test_loader)):
    data = data.to(device)
    target = target.to(device)
    logit = transfer_layer(resnet18(data))
    pred = logit.max(1)[1]
    num = torch.sum(pred==target)
    correct_num = correct_num + num
  print (correct_num)
  print ('\n correct rate is {}'.format(correct_num/10000))

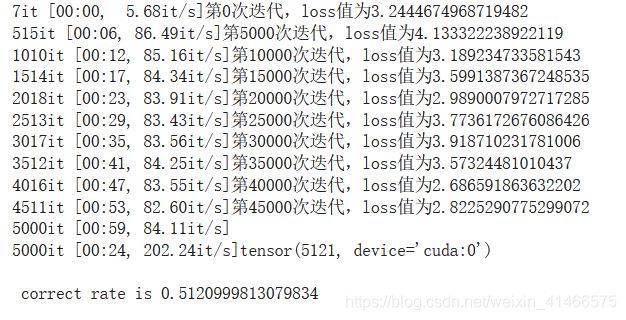
train()
test()
- 有必要提到的是optimizer。torch.optim.SGD([{‘params’:transfer_layer.parameters()},{‘params’:resnet18.conv1.parameters()}],lr = learning_rate)
- 这意味着torch的优化器可以自己选择指定的网络层进行参数更新。你可能疑惑,resnet18.conv1.parameters()是什么。这是resnet18的其中一个卷积层。print (resnet18),如下图就明白了如何取其网络层。

Output:
2.3 可视化特征图
import matplotlib.pyplot as plt
import numpy as np

activation = {}
def get_activation(name):
    def hook(model, input, output):
        activation[name] = output.detach()
    return hook
resnet18.conv1.register_forward_hook(get_activation('conv1'))

# 在0维上增加维度
# data.unsqueeze_(0)
for i,(data,target) in enumerate(test_loader):
  if i>=1:
    break
  print (data.shape)
  output = resnet18(data.to(device))

act = activation['conv1']
plt.imshow(np.transpose(data[0],(1,2,0)).detach().cpu().numpy())
plt.show()
plt.figure(figsize=(8*2,8*2))
cnt = 0
for j in range(act.size()[1]):
  cnt = cnt + 1
  plt.subplot(np.floor(np.sqrt(act.size()[1])),np.floor(np.sqrt(act.size()[1])),cnt)
  plt.imshow(act[0][cnt-1].detach().cpu().numpy(),cmap='gray')
plt.show()
- 重头戏来了。你可能疑惑 get_activation 这个函数什么鬼?说实话,我不知道。但是能用就行了。
- 还有就是 resnet18.conv1.register_forward_hook 又是什么鬼。意思就是我们需要输出的特征图是 resnet18 中的一个名为conv1的卷积层。Anyway,能满足需求就行。
- 将resnet18.conv1.register_forward_hook改成resnet18.layer1[0].conv1.register_forward_hook,再跑一下特征图。代码如下:
import matplotlib.pyplot as plt
import numpy as np

activation = {}
def get_activation(name):
    def hook(model, input, output):
        activation[name] = output.detach()
    return hook
resnet18.layer1[0].conv1.register_forward_hook(get_activation('layer1_conv1'))

# 在0维上增加维度
# data.unsqueeze_(0)
for i,(data,target) in enumerate(test_loader):
  if i>=1:
    break
  print (data.shape)
  output = resnet18(data.to(device))

act = activation['layer1_conv1']
plt.imshow(np.transpose(data[1],(1,2,0)).detach().cpu().numpy())
plt.show()
plt.figure(figsize=(8*2,8*2))
cnt = 0
for j in range(act.size()[1]):
  cnt = cnt + 1
  plt.subplot(np.floor(np.sqrt(act.size()[1])),np.floor(np.sqrt(act.size()[1])),cnt)
  plt.imshow(act[1][cnt-1].detach().cpu().numpy())
plt.show()
3 总结
- 通过直观图可以发现,神经网络做卷积或其他操作,其实就是在提取特征,特征图更加会突出其细节特征。如果将nlp中的Attention的思想应用到cv上,就能发现网络最终输出的特征图,会更加聚焦于图像的主角。如下图:
- Attenion的思想与相机中的人像模式有相似之处。
附录
参考资料:
- 学姐带你学AI
- pytorch中squeeze()和unsqueeze()函数介绍
- pytorch 优化器(optim)不同参数组,不同学习率设置
MY Coding:
- google colab平台实现


