计算机视觉(一)--- 基本图像操作和处理
PIL:Python图像处理类库
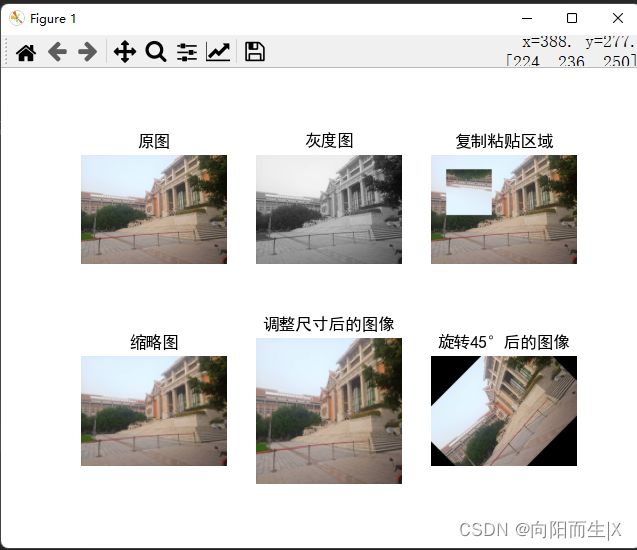
PIL (Python Imaging Library)图像库提供了很多常用的图像处理及很多有用的图像基本操作,如图像缩放、裁剪、旋转、颜色转换等。
转换图像格式
在大量处理图片,需要形成图片列表,但是有些图片不太合适,需要更换图片格式,请注意,这个所做的变换不会更改图片的内容,只是更改了图片的打开方式。
创建缩略图
利用PIL可以创建缩略图,通过调用thumnail()方法,thumbnail函数接受一个元组作为参数,分别对应着缩略图的宽高,在缩略时,函数会保持图片的宽高比例;如果输入的参数宽高和原图像宽高比不同,则会依据最小对应边进行原比例缩放。
拷贝并粘贴区域
crop((x0,y0,x1,y1))方法可以对图片做裁切,区域由一个4元组定义,表示为坐标是 (左,上,右,下)。调用crop()方法即可从一幅图像中进行区域拷贝,拷贝出区域后,可以对区域进行旋转等变换。
调整尺寸及旋转
要对一幅图像的尺寸进行调整,可以调用resize()方法,元组中放置的便是你要调整尺寸的大小。如果要对图像进行旋转变换的话,可以调用rotate()方法,rotate的主要目的就是将【first~middle】的元素和【middle~last】的元素互换位置,middle所指向的元素会成为整个容器的第一个元素
代码
from PIL import Image
from pylab import *


plt.rcParams['font.sans-serif']=['SimHei']
plt.rcParams['axes.unicode_minus'] = False
# 显示原图
pil_im = Image.open('D:\CV\images\img1.jpg')
print(pil_im.mode, pil_im.size, pil_im.format)
subplot(231)
title(u'原图')
axis('off')
imshow(pil_im)

# 显示灰度图
pil_im = Image.open('D:\CV\images\img1.jpg').convert('L')
gray()
subplot(232)
title(u'灰度图')
axis('off')
imshow(pil_im)

# 复制并粘贴区域
pil_im = Image.open('D:\CV\images\img1.jpg')
box = (100, 100, 400, 400)
region = pil_im.crop(box)
region = region.transpose(Image.ROTATE_180)
pil_im.paste(region, box)
subplot(233)
title(u'复制粘贴区域')
axis('off')
imshow(pil_im)

# 缩略图
pil_im = Image.open('D:\CV\images\img1.jpg')
size = 128, 128
pil_im.thumbnail(size)
print(pil_im.size)
subplot(234)
title(u'缩略图')
axis('off')
imshow(pil_im)
pil_im.save('D:\CV\images\img3.jpg')# 保存缩略图

#调整图像尺寸
pil_im = Image.open('D:\CV\images\img1.jpg')
pil_im=pil_im.resize(size)
print(pil_im.size)
subplot(235)
title(u'调整尺寸后的图像')
axis('off')
imshow(pil_im)

#旋转图像45°
pil_im = Image.open('D:\CV\images\img1.jpg')
pil_im=pil_im.rotate(45)
subplot(236)
title(u'旋转45°后的图像')
axis('off')
imshow(pil_im)
show()
Matplotlib库
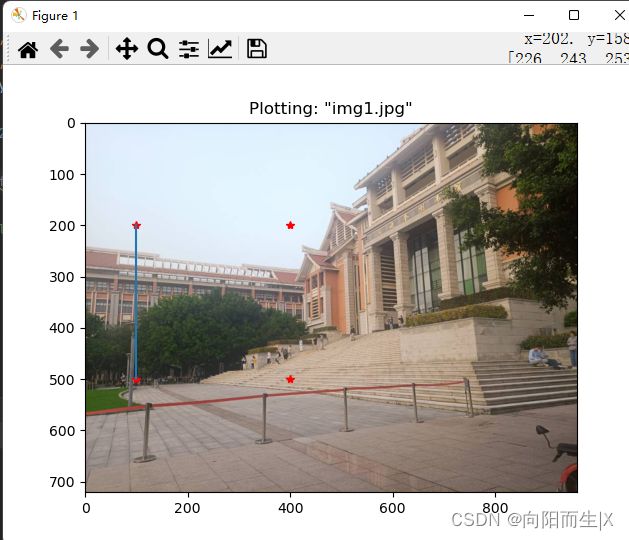
绘制图像,点和线
from PIL import Image
from pylab import *

im = array(Image.open('D:\CV\images\img1.jpg'))

imshow(im)

x = [100, 100, 400, 400]
y = [200, 500, 200, 500]
plot(x, y, 'r*')

plot(x[:2], y[:2])

#axis('off')

title('Plotting: "img1.jpg"')
show()
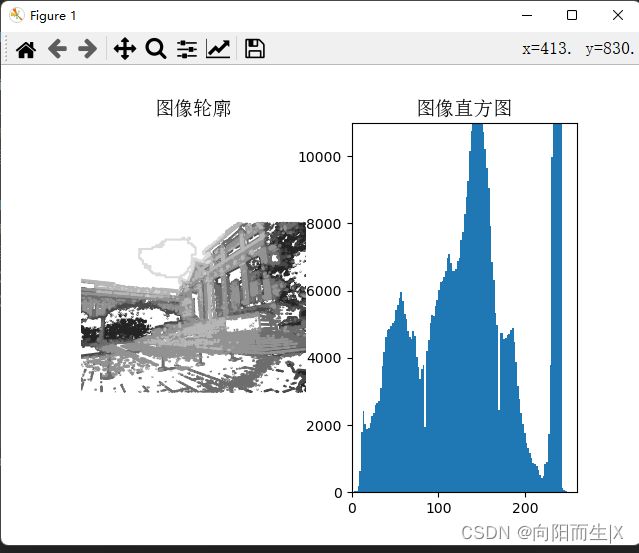
图像轮廓和直方图
 # -*- coding: utf-8 -*-
from PIL import Image
from pylab import *

# 添加中文字体支持
from matplotlib.font_manager import FontProperties
font = FontProperties(fname=r"c:\windows\fonts\SimSun.ttc", size=14)
im = array(Image.open('D:\CV\images\img1.jpg').convert('L'))  # 打开图像,并转成灰度图像

figure()
subplot(121)
gray()
contour(im, origin='image')
axis('equal')
axis('off')
title(u'图像轮廓', fontproperties=font)

subplot(122)
hist(im.flatten(), 128)
title(u'图像直方图', fontproperties=font)
plt.xlim([0,260])
plt.ylim([0,11000])

show()
Numpy
numpy(Numerical Python)提供了python对多维数组对象的支持:ndarray,具有矢量运算能力,快速、节省空间。numpy支持高级大量的维度数组与矩阵运算,此外也针对数组运算提供大量的数学函数库。
 # -*- coding: utf-8 -*-
from PIL import Image
from pylab import *
from pcv.tools import imtools

# 添加中文字体支持
from matplotlib.font_manager import FontProperties
font = FontProperties(fname=r"c:\windows\fonts\SimSun.ttc", size=14)

im = array(Image.open('D:\CV\images\img1.jpg').convert('L'))  # 打开图像,并转成灰度图像
#im = array(Image.open('../data/AquaTermi_lowcontrast.JPG').convert('L'))
im2, cdf = imtools.histeq(im)

figure()
subplot(2, 2, 1)
axis('off')
gray()
title(u'原始图像', fontproperties=font)
imshow(im)

subplot(2, 2, 2)
axis('off')
title(u'直方图均衡化后的图像', fontproperties=font)
imshow(im2)

subplot(2, 2, 3)
axis('off')
title(u'原始直方图', fontproperties=font)
#hist(im.flatten(), 128, cumulative=True, normed=True)
hist(im.flatten(), 128, density=True,stacked=True)

subplot(2, 2, 4)
axis('off')
title(u'均衡化后的直方图', fontproperties=font)
#hist(im2.flatten(), 128, cumulative=True, normed=True)
hist(im2.flatten(), 128, density=True,stacked=True)

show()
SciPy
图像模糊-高斯模糊
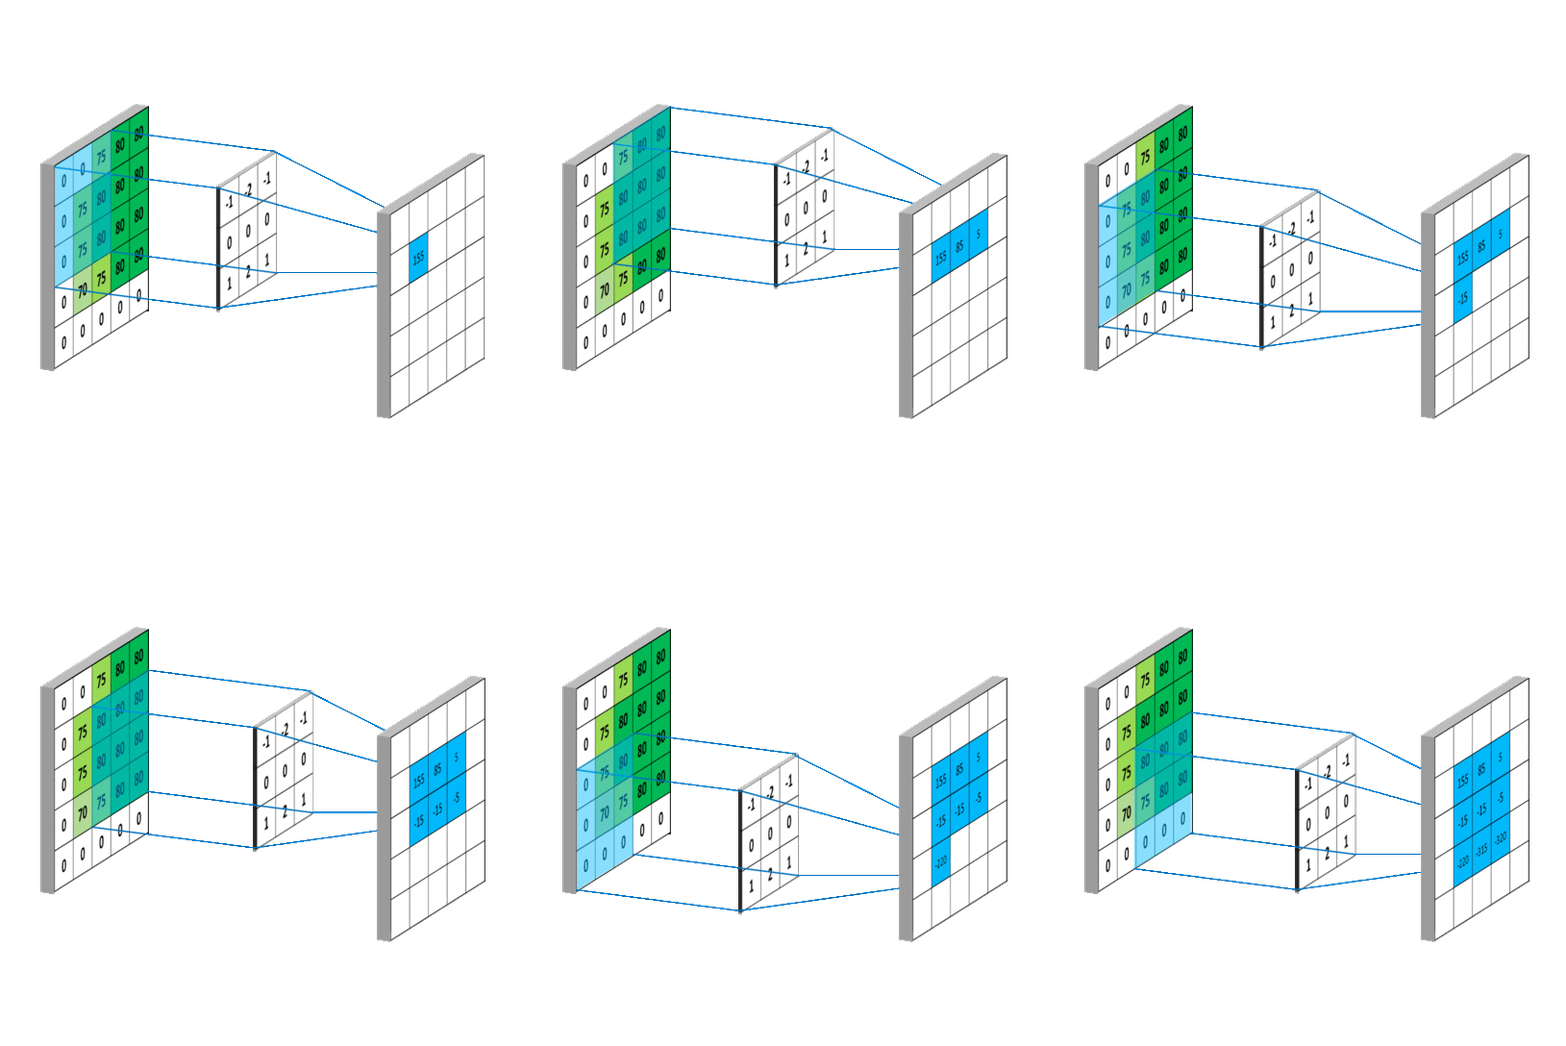
模糊,就是对图像进行平滑化处理。平滑化处理,就是用平滑滤波函数,生成卷积核对应的权重,然后对图像进行卷积操作。平滑滤波函数很多,包括均值滤波函数,高斯滤波函数等。
# -*- coding: utf-8 -*-
from PIL import Image
from pylab import *
from numpy import *
from numpy import random
from scipy.ndimage import filters
from pcv.tools import rof

""" This is the de-noising example using ROF in Section 1.5. """

# 添加中文字体支持
from matplotlib.font_manager import FontProperties
font = FontProperties(fname=r"c:\windows\fonts\SimSun.ttc", size=14)

im = array(Image.open('D:\CV\images\img1.jpg').convert('L'))

U,T = rof.denoise(im,im)
G = filters.gaussian_filter(im,10)


# save the result
#imsave('synth_original.pdf',im)
#imsave('synth_rof.pdf',U)
#imsave('synth_gaussian.pdf',G)


# plot
figure()
gray()

subplot(1,3,1)
imshow(im)
#axis('equal')
axis('off')
title(u'原噪声图像', fontproperties=font)

subplot(1,3,2)
imshow(G)
#axis('equal')
axis('off')
title(u'高斯模糊后的图像', fontproperties=font)

subplot(1,3,3)
imshow(U)
#axis('equal')
axis('off')
title(u'ROF降噪后的图像', fontproperties=font)

show()
