2021-01-07 视频人像检测(背景替换)
1.研究背景
对于序列视频中的人像物体进行检测,以达到后续背景替换、人脸识别等目的。
2.相关论文解析
参考论文为《Background Matting: The World is Your Green Screen》
论文描述的算法流程如下:
1.使用基础网络提取特征(resnet/mobilenet),得到(N,C,H,W)大小的特征向量。
2.使用空洞卷积组合增加感受野(Conv1+conv3+conv6+conv9+Pooling),即deeplabv3中的ASPP。
3.使用Refiner精化人物边缘。
3.算法实现
3.1 算法流程
3.1.1输入
输入包括原始图像和背景图像。
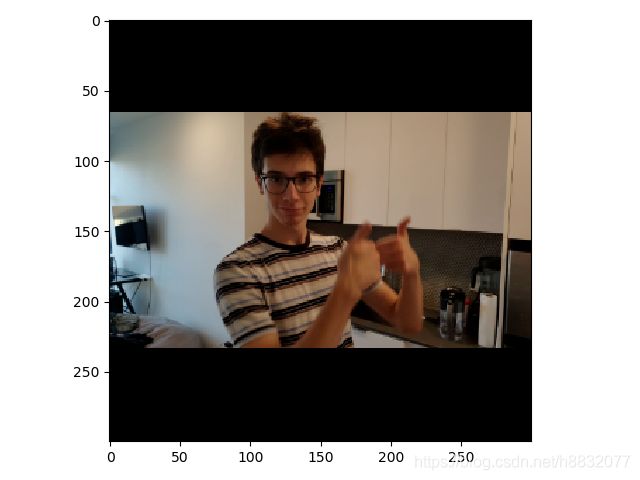
可以对数据进行3种预操作:缩放(可选)、归一化、匹配(可选)。其中一例输入图像如下:
3.1.2 Coarse
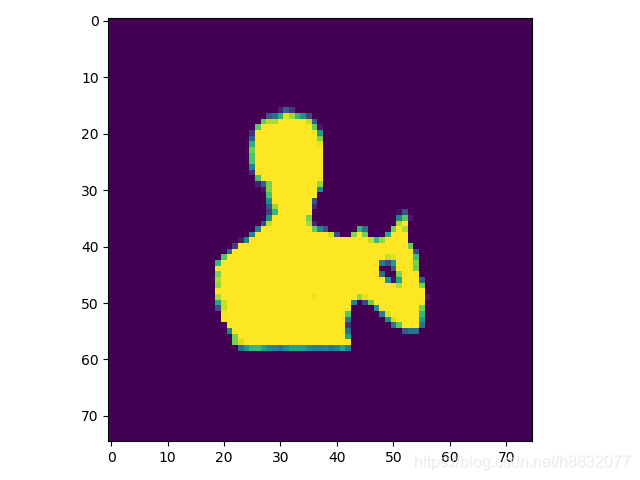
对应论文中4.1节"Basenet"。该步结果经过Resnet+ASPP+Decoder以后生成的Coarse区域。下图即粗略区域:
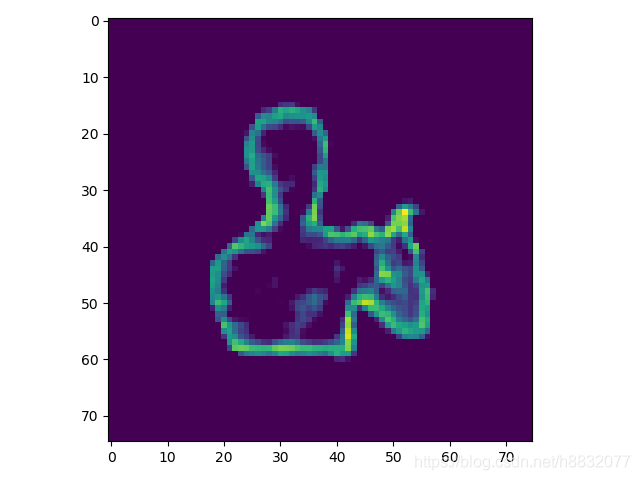
同时该网络会生成error区域,分布在物体边缘。error区域可以为后续精化提供区域。共有3种边界选择的方法:full(全部error区域)、sampling(按error从高到低选取k个像素)、thresholding(按阈值分)。
3.1.3 Refiner
Refiner网络根据,人物边缘细节更加精确,但不考虑内部的图像。

Refiner和Coarse的结果相加,得到最终的结果。

3.2 refine过程
refine过程是整个算法中最复杂的部分,主要先通过select_refinement_regions对区域进行选择,然后用crop_patch对所选像素进行窗口选取。crop_patch中,最快的方法是使用unflod进行选择,原理如下:
    def crop_patch(self,
                   x: torch.Tensor,
                   idx: Tuple[torch.Tensor, torch.Tensor, torch.Tensor],
                   size: int,
                   padding: int):
        """
        Crops selected patches from image given indices.

        Inputs:
            x: image (B, C, H, W).
            idx: selection indices Tuple[(P,), (P,), (P),], where the 3 values are (B, H, W) index.
            size: center size of the patch, also stride of the crop.
            padding: expansion size of the patch.
        Output:
            patch: (P, C, h, w), where h = w = size + 2 * padding.
        """
        if padding != 0:
            x = F.pad(x, (padding,) * 4)

        if self.patch_crop_method == 'unfold':
            # Use unfold. Best performance for PyTorch and TorchScript.
            return x.permute(0, 2, 3, 1) \
                    .unfold(1, size + 2 * padding, size) \
                    .unfold(2, size + 2 * padding, size)[idx[0], idx[1], idx[2]]
        else:
        	...
这一步比较难懂,permute操作将输入变为了(N,H,W,C),第一个unfold的参数分别为dim=1,size=size+2 * padding,step=size。即首先在H维度上滑窗,生成的特征大小为 ( N , ( H − s i z e ) / s t e p + 1 , W , C , s i z e ) (N,(H-size)/step+1,W,C,size) (N,(H−size)/step+1,W,C,size);同理,第二个unfold在W维度上进行操作,生成特征大小为 ( N , ( H − s i z e ) / s t e p + 1 , ( W − s i z e ) / s t e p + 1 , C , s i z e , s i z e ) (N,(H-size)/step+1,(W-size)/step+1,C,size,size) (N,(H−size)/step+1,(W−size)/step+1,C,size,size);最后对dim=(0,1,2)的特征求索引,得到 ( ∗ , C , s i z e , s i z e ) (*,C,size,size) (∗,C,size,size),其中*是索引的大小。
3.3 实验
在官方Demo的基础上,测试实际影像的检测效果。输入影像大小为1080p,30fps。处理速度为5fps。效果如下,左侧为原始视频,右侧为人像检测:
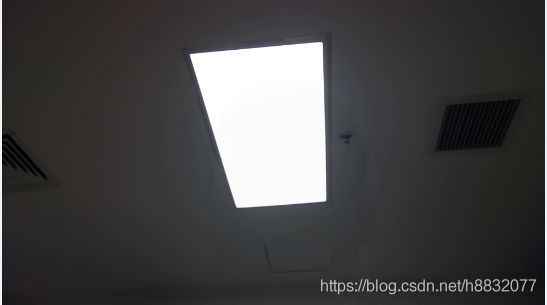
需要注意的是,考虑到实际的视频采集过程,我们并没有单独对背景采集,而是通过帧间残差检测,自动生成了如下背景图像:
4.优化
在实际视频中,由于传感器会进行自动曝光补偿,所以当人进行出入画、抬手等动作甚至静止时,该算法的检测效果都有失效的时候。
此时考虑对背景用同样的退化模型,抵消这种影响。
4.1 背景优化
设计一个简单的线性退化模型如下:
f u n ( s r c ) = s r c ∗ r a t i o fun(src)=src *ratio fun(src)=src∗ratio
计算退化后的背景和当前视频帧的匹配程度时,计算小于某一阈值的具体像素数量:
 def liner_brightness(r, inputs, comp):
	 th=20
     img = np.clip(inputs, 0, 255 / r) * r
     img = img.astype(np.uint8)
     diff = cv2.absdiff(img, comp)
     return np.count_nonzero(diff < th)
同时使用可变步长查找策略对全局最优值进行查找,代码如下:
th=0.1
while step > th:
    lastvalue, lastmean = 0, 0
    while ratio - step < maxratio:
        value= liner_brightness(ratio, tar, src)
        meanvalue = (lastvalue + value) / 2
        if lastmean > meanvalue:
            ratio, maxratio = ratio - step, lastvalue
            step = step / 2
            break
        else:
            lastvalue = value
            lastmean = meanvalue
            ratio += step
    if ratio + step > maxratio:
        ratio, maxratio = ratio - step * 2, ratio - step
        step = step / 2
self.lastratio = ratio
经过背景退化处理以后,效果有很大提升,见下图:
4.2 速度优化
由于背景优化算法每次都要进行都要对视频帧进行重新检查,会有性能损失(约120ms),现在考虑进行速度优化。
4.2.1 参数记忆
由于上下帧之间的光照差异不会突变,可以设置一个变量记忆上一帧的比率。不用每帧都从0.25搜索到4。
4.2.2 输入缩放
由于所求参数为全局参数,可以对输入图像进行比例缩放(取1/10),加速图像操作过程。
上述这些优化做完后,速度有比较大的提高,约15ms,提速800%。
5.c++封装
5.1 cmake预编译torch
clone最新版本的torch,按照官方文档的说明进行编译。如果只需要cpu运行,注意要取消cuda编译选项。
5.2 vs2019 编译torch
笔者直接编译torch项目,会自动编译其他依赖库。成功后会产生4个库:c10.dll(Caffe Tensor 基础库),asmjit.dll(jit方法),fbgemm.dll(矩阵运算),torch_cpu.dll(torch相关类)。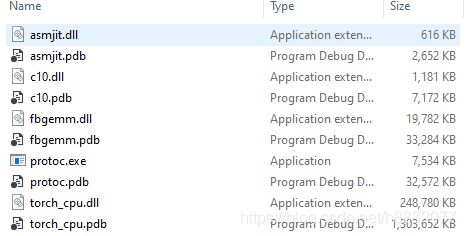
5.3 模型固化
用torch-script技术进行模型固化,当然你也可以采用onnx。
Torch-script编写的代码可以从Python进程中保存,并在没有Python依赖的进程中加载。
具体细节请参考官方文档:https://pytorch.apachecn.org/docs/1.0/jit.html
5.4 测试
通过tensor和cvmat相互转化,将图像放入网络中运行。
tensor转化为mat代码如下:
void TensorToCVMat(const torch::Tensor& bgr, const torch::Tensor& fgr,Mat& dst)
{
	auto tensor_8u = (fgr*bgr.ne(0)).squeeze().permute({1,2,0}).contiguous().mul(255).clamp(0, 255).to(torch::kU8);
	int64_t height = tensor_8u.size(0);
	int64_t width = tensor_8u.size(1);
	dst=Mat(width, height, CV_8UC3);
	std::memcpy((void*)dst.data, tensor_8u.data_ptr(), sizeof(torch::kU8) * tensor_8u.numel());
}
6.总结
还可以进一步优化的方向有:
- 根据视频大小,剪去ASPP中的部分结构。
- 修改退化模型,更贴近现实传感器的曝光补偿。
- 训练过程优化。
- 建立数据池(多线程读写)

