数字图像处理 matlab采样与量化 实验二
目录:
- 1. 读取图像
- 2. 不同采样点数
- 3. 不同量化级数
- 4. 导入不同的图像
1. 读取图像
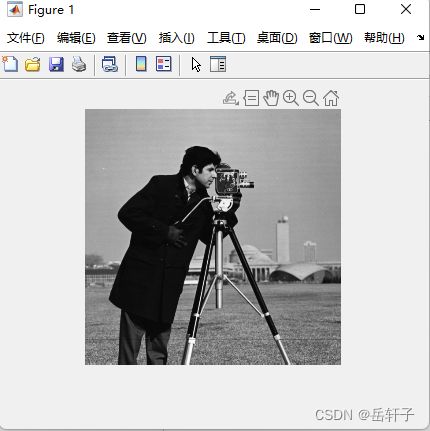
这个是一个matlab自带的图像
I = imread('Cameraman.tif');
imshow(I);  % 展示一下
2. 不同采样点数
这里我们已经知道原图的大小为256*256
% 沿用上面的图像
w = 16; % 窗口的宽度
S = size(I); % 取大小
subplot(2,2,1);
imshow(I);
% 取图像中央的子图像,大小为w*w
J = I(S(1)/2-w/2:S(1)/2+w/2-1,S(2)/2-w/2:S(2)/2+w/2-1);
subplot(2,2,2);imshow(J);
% 裁剪:上2w,下w,左2w,右5w
K = I(2*w:S(1)-w,2*w:S(2)-5*w);
subplot(2,2,3);
imshow(K);
裁剪:我们用K = I(2w:S(1)-w,2w:S(2)-5*w); ,对应于I(上:下,左:右)
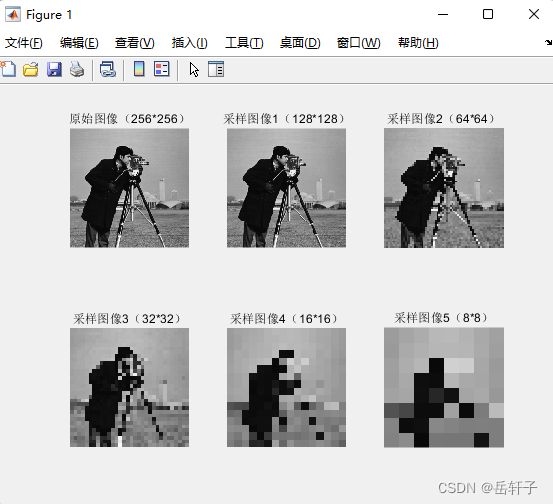
这里我们已经知道原图的大小为256*256
I1=I(1:2:end,1:2:end); % 采样图像1:128*128
I2=I(1:4:end,1:4:end); % 采样图像2:64*64
I3=I(1:8:end,1:8:end); % 采样图像3:32*32
I4=I(1:16:end,1:16:end); % 采样图像4:16*16
I5=I(1:32:end,1:32:end); % 采样图像5:8*8

% 把一个图像窗口分为2*3的区域
subplot(2,3,1);imshow(I);title('原始图像(256*256)');
subplot(2,3,2);imshow(I1);title('采样图像1(128*128)');
subplot(2,3,3);imshow(I2);title('采样图像2(64*64)');
subplot(2,3,4);imshow(I3);title('采样图像3(32*32)');
subplot(2,3,5);imshow(I4);title('采样图像4(16*16)');
subplot(2,3,6);imshow(I5);title('采样图像5(8*8)');
采样点:I1=I(1:2:end,1:2:end); 从1到end,间隔为2
3. 不同量化级数
量化级数的修改用histep(I,num)函数,I为灰度图像,num为灰度级数
I256 = histeq(I,256);  %将图像的灰度级数改为256
I64 = histeq(I,64);  %将图像的灰度级数改为64
I32 = histeq(I,32);  %将图像的灰度级数改为32
I16 = histeq(I,16);  %将图像的灰度级数改为16
I4 = histeq(I,4);  %将图像的灰度级数改为4
I2 = histeq(I,2);  %将图像的灰度级数改为2
subplot(2,3,1),imshow(I256),title('图像1(256)');
subplot(2,3,2),imshow(I64),title('图像2(64)');
subplot(2,3,3),imshow(I32),title('图像3(32)');
subplot(2,3,4),imshow(I16),title('图像4(16)');
subplot(2,3,5),imshow(I4),title('图像5(4)');
subplot(2,3,6),imshow(I4),title('图像6(2)');
4. 导入不同的图像
I = imread('4.jpg');
imshow(I);
2. 转为灰度图像
J= rgb2gray(I); % 得到灰度图像
imshow(J);
title('灰度图像');
3. 进行采样操作和量化操作
为了方便操作,这里我直接写了两个函数:
采样函数:
% 这个用来做不同采样的图像
% I 是灰度图像;w是窗口大小
function diffcultC(I,w)
S = size(I); % 取大小
subplot(2,2,1);
imshow(I);
% 取图像中央的子图像,大小为w*w
J = I(S(1)/2-w/2:S(1)/2+w/2-1,S(2)/2-w/2:S(2)/2+w/2-1);
subplot(2,2,2);imshow(J);
% 裁剪:上2w,下w,左2w,右5w
K = I(2*w:S(1)-w,2*w:S(2)-5*w);
subplot(2,2,3);
imshow(K);
采样函数2:
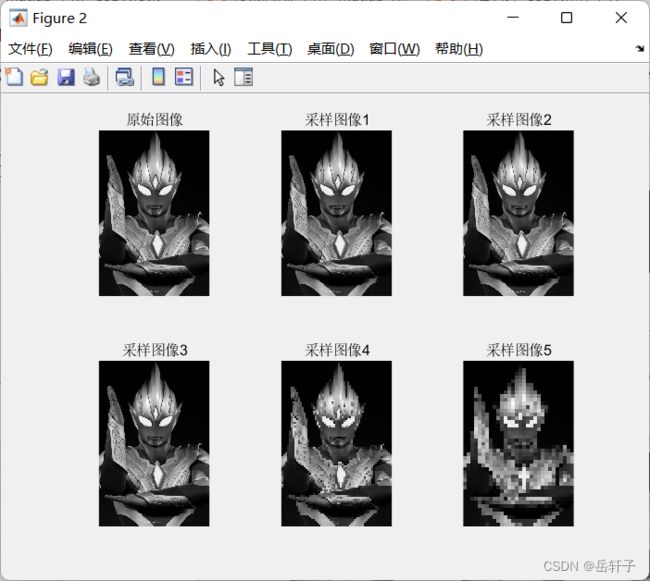
function diffcultL(I)
I1=I(1:2:end,1:2:end); % 采样图像1:间隔2取点
I2=I(1:4:end,1:4:end); % 采样图像2:间隔4取点
I3=I(1:8:end,1:8:end); % 采样图像3:间隔8取点
I4=I(1:16:end,1:16:end); % 采样图像4:间隔16取点
I5=I(1:32:end,1:32:end); % 采样图像5:间隔32取点

% 把一个图像窗口分为2*3的区域
subplot(2,3,1);imshow(I);title('原始图像');
subplot(2,3,2);imshow(I1);title('采样图像1');
subplot(2,3,3);imshow(I2);title('采样图像2');
subplot(2,3,4);imshow(I3);title('采样图像3');
subplot(2,3,5);imshow(I4);title('采样图像4');
subplot(2,3,6);imshow(I5);title('采样图像5');
量化函数:
% I为灰度图像
function diffcultL2(I)
I256 = histeq(I,256);  %将图像的灰度级数改为256
I64 = histeq(I,64);  %将图像的灰度级数改为64
I32 = histeq(I,32);  %将图像的灰度级数改为32
I16 = histeq(I,16);  %将图像的灰度级数改为16
I4 = histeq(I,4);  %将图像的灰度级数改为4
I2 = histeq(I,2);  %将图像的灰度级数改为2
subplot(2,3,1),imshow(I256),title('图像1(256)');
subplot(2,3,2),imshow(I64),title('图像2(64)');
subplot(2,3,3),imshow(I32),title('图像3(32)');
subplot(2,3,4),imshow(I16),title('图像4(16)');
subplot(2,3,5),imshow(I4),title('图像5(4)');
subplot(2,3,6),imshow(I4),title('图像6(2)');
代码:
I = imread('4.jpg');
% imshow(I);
J= rgb2gray(I); % 得到灰度图像
diffcultC(J,16); % 窗口大小为16
figure(2);
diffcultL(J);
figure(3);
diffcultL2(J);
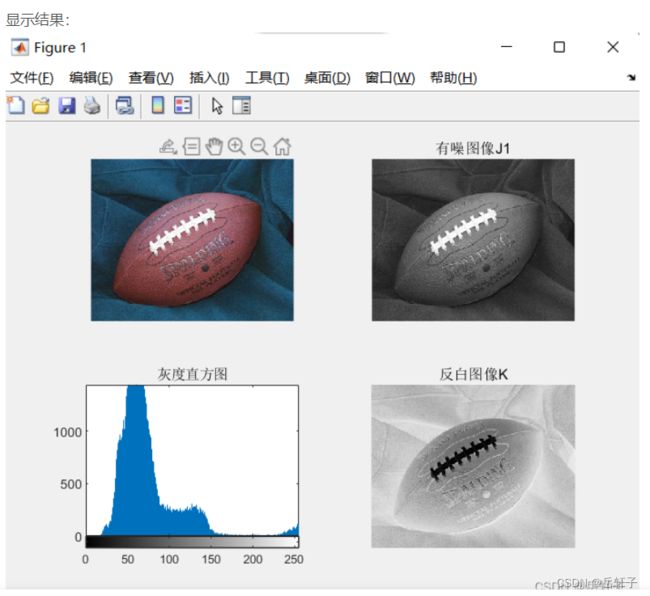
更正上一篇的一个错误:

这里的第二个图,是灰度图像,不是有噪图像
创作不易,请大家多多关注!!!
如有错误,请告知up,将于下一篇进行更正

实在对不起大家!劣质的内容给大家带来了困扰,往后的作品,一定认真审查!!
上一篇:数字图像处理 matlab 基本操作 实验一的部分内容


