当卷积核比图片还大会发生什么?
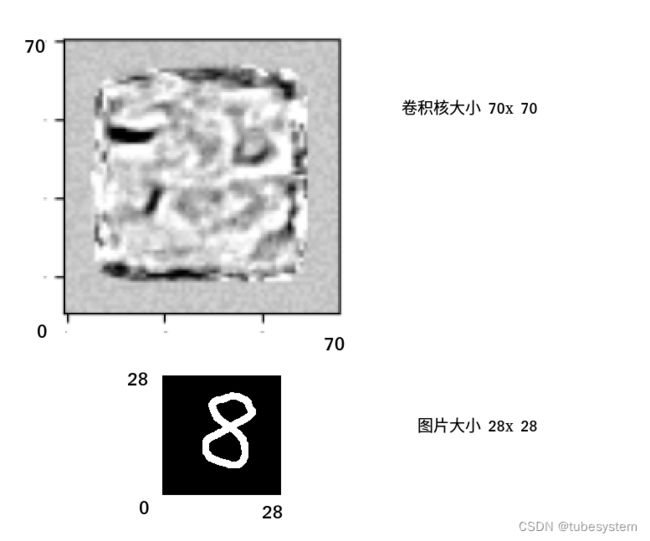
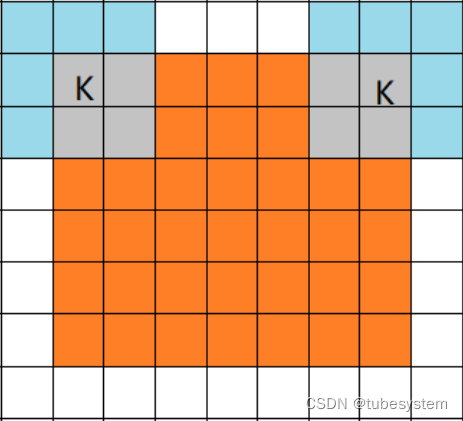
一句话答案, 卷积核里的边长大于2倍图片的部分参数空间会被浪费, 卷积核边沿参数不会更新,保持初始随机状态.就像下图中四周的灰色区域.
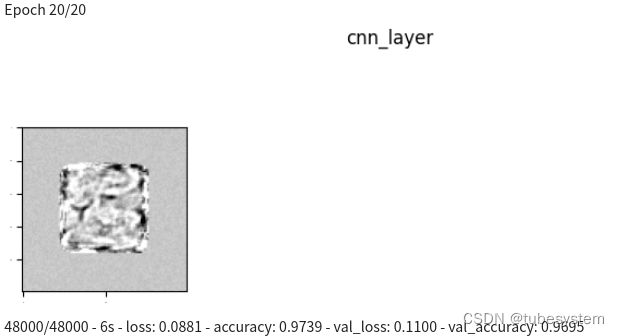
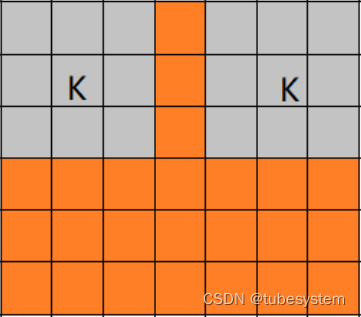
如果更夸张一些, 用100x 100的卷积核去卷28x28 的图片会发生下面的情形:
可以看到图像的灰色边缘扩大了,
解释一下过程
首先, fit 函数的padding参数--same,也就是补充边界,让卷积后的图片大小与卷积前的相同
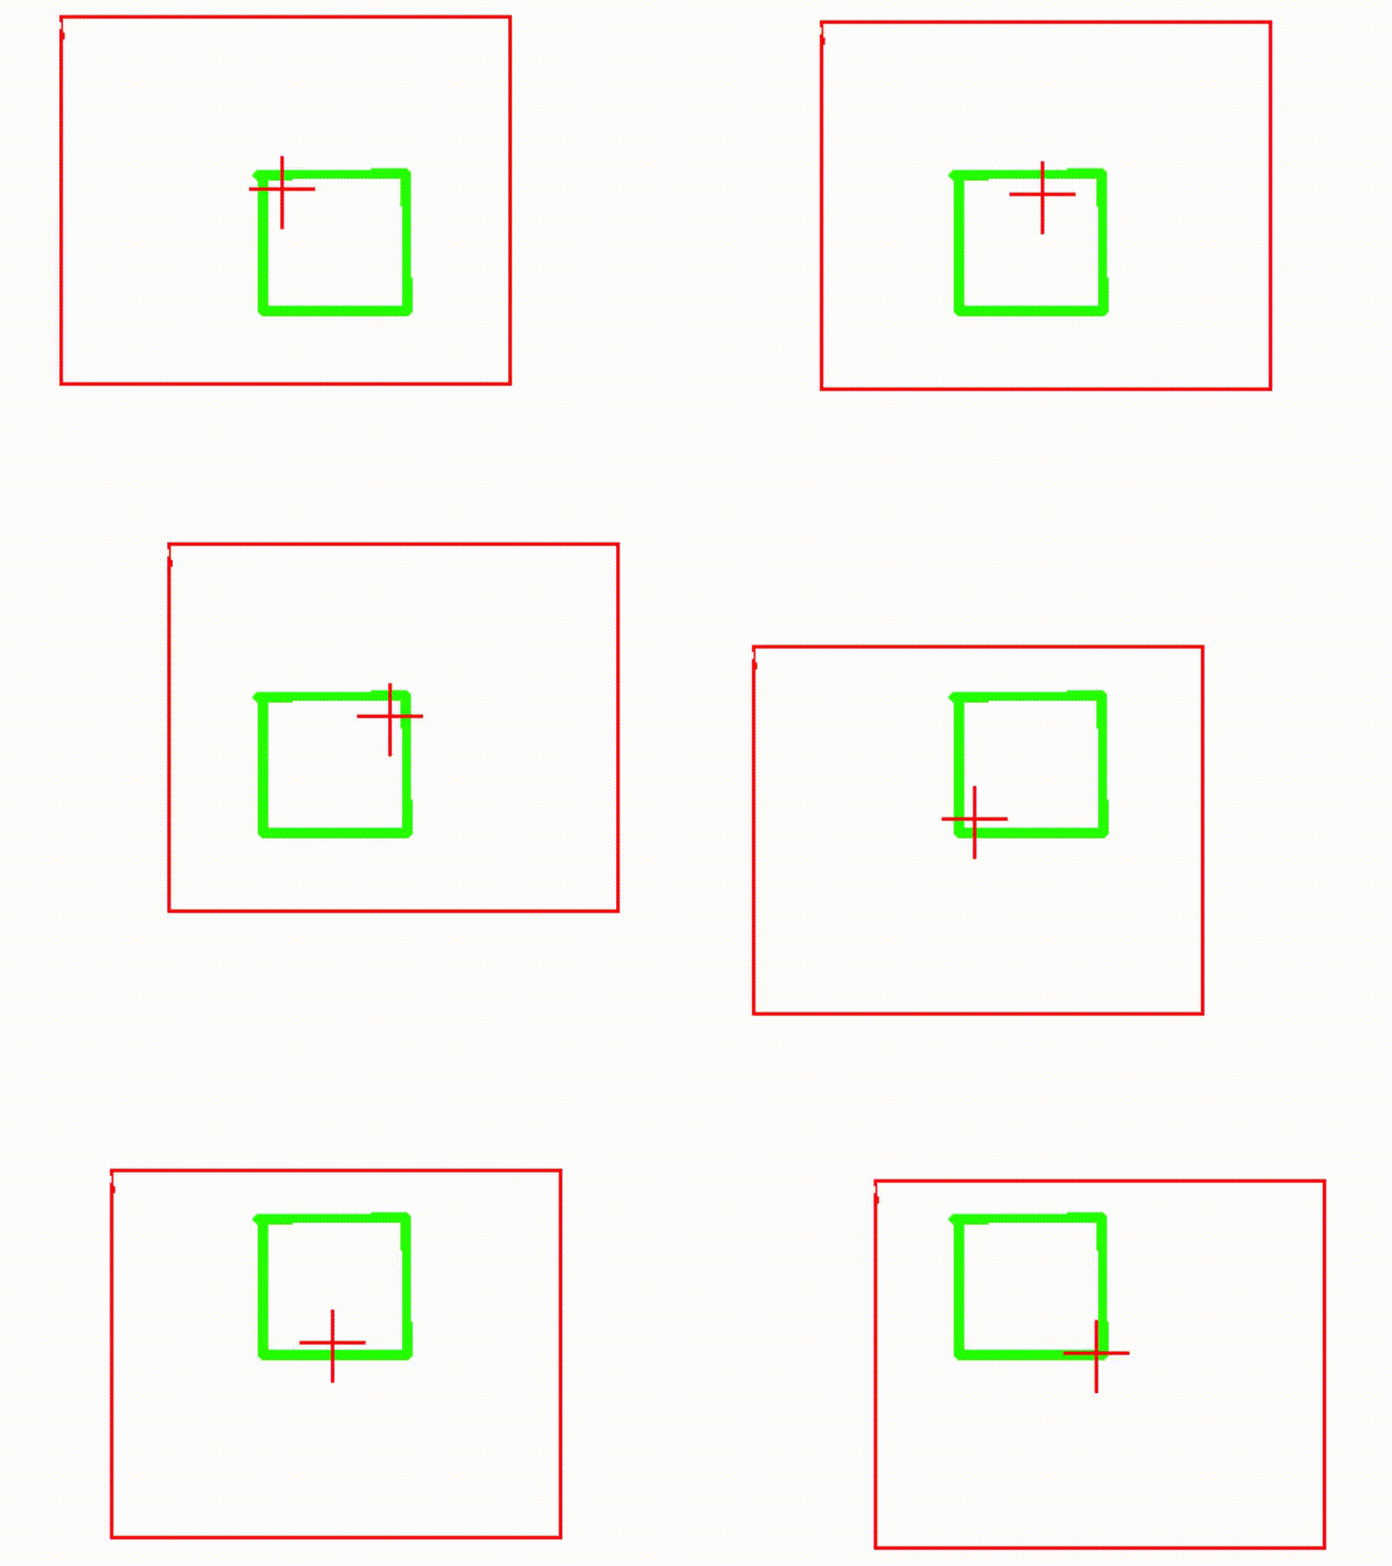
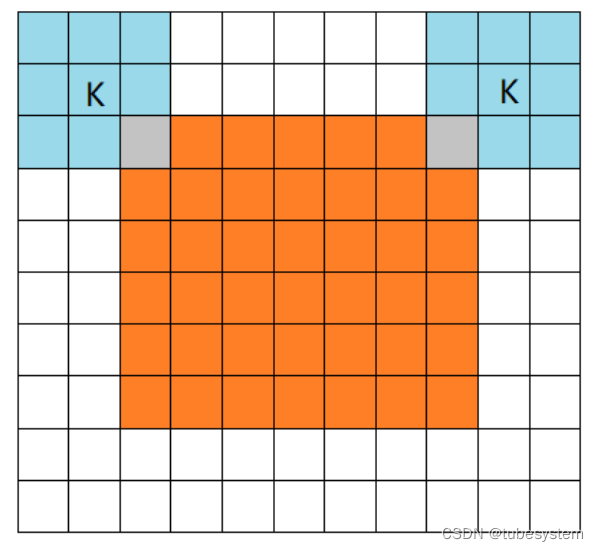
其次, 卷积核的中心点与图片的左上角重合,并从左上角开始 逐行 ,逐点 做卷积. 因为卷积核太大,有一部分卷积核始终无法与图片进行重叠, 所以也不能进行参数调整,于是保持了随机噪音(灰色)
视觉化一下就是
卷积的3种模式:
full,
same,
valid
tf.keras.layers.Conv2D 属性 padding的2种模式
same,
valid
本文使用的时same. 如果使用alid,因为卷积核大于图片,会报错.
from 卷积的三种模式:full, same, valid_ _
full:
same:
valid:
# todo 测试 数组转图片,然后画图的输入范围,是否能自动map数值的上下限,是否对负数自动变为正数
# todo 用2层卷积核,拟合数据, 然后在训练完成并训练结果较好的时候, 将2层卷积核相乘,看看每一种可能性 ,看看能不能看到 1-9-0 十个数字

#  todo 加入部件 输出gif 或者mp4

# todo  加入部件,看卷积核与fc层连接的权重

#  todo 卷积核的初始化很重要,  看到20x20的卷积核虽然测试及表现良好,但是学习的花纹有些看不懂,也许学习的很正确,但是人类看不懂.  希望构造部件学习到类似条纹的卷积核                         另外,看到20个epochs 后,花纹基本不变, 不过从初始化到第一步看不到. todo 加入部件,看最初的初始化.

# todo 如何解包, 而不是将一堆小文件存储在文件夹里   --切片??


# 终于提取到卷积核的数据,  并且用图片形式表示出来(每个epoch 只画一个卷积核 ) , 并且画出全部卷积核
# https://blog.csdn.net/gaotihong/article/details/80983937      ---Python-matplotlib画图


# 控制 logs: [ p.terminate() for p in processes if p.is_alive()]

# 在model.Sequential. 里面 找卷积核数值

# xxxx  卷积核的位置从  print(model.summary())   可以获知, 每次运行 卷积核的序列号加2

# 可以用命名的方式,指定每层的名称。  from https://www.tensorflow.org/guide/keras/sequential_model

#  (因为每个层都是一个类,所以返回的层本质上是一个类)

#导入模块
import tensorflow as tf
import numpy as np
import matplotlib.pyplot as plt
from tensorflow import keras
from tensorflow.keras.callbacks import LambdaCallback
from PIL import Image


################################################################
# 没有gpu的计算机不需要本段
# 这一段的作用是在用gpu计算时,debug gpu内存报错  UnknownError:  Failed to get convolution algorithm.
    # This is probably because cuDNN failed to initialize, so try looking to see if a warning log message was printed above.
    #  [[node sequential/cnn_layer/Conv2D (defined at tmp/ipykernel_13733/2736373417.py:104) ]] [Op:__inference_distributed_function_799]
from tensorflow.compat.v1.keras.backend  import set_session
config=tf.compat.v1.ConfigProto()
config.gpu_options.allow_growth = True
sess=tf.compat.v1.Session(config=config)
set_session(sess)
tf.keras.backend.clear_session() #清理session
###############################################################


#导入数据集
mnist = tf.keras.datasets.mnist
(x_train, y_train), (x_test, y_test) = mnist.load_data()

#数据预处理
#Reshape
x_train4D = x_train.reshape(x_train.shape[0],28,28,1).astype('float32')
x_test4D = x_test.reshape(x_test.shape[0],28,28,1).astype('float32')
#像素标准化
x_train, x_test = x_train4D / 255.0, x_test4D / 255.0


#模型搭建
model = tf.keras.models.Sequential([
    tf.keras.layers.Conv2D(filters=1 , kernel_size=(50,50), padding='same',input_shape=(28,28,1),  activation='relu',name="cnn_layer"),      #  <<<<<<<<<<<<<<<<<<<<<<<<<<<<<<<<<<<<<卷积核大小  数量
    tf.keras.layers.Flatten(),                                                                     #  卷积层输出二维数据,而全连接层接收一维数据,faltten降维数据
    tf.keras.layers.Dense(10,activation='softmax')
])


#打印模型
print(model.summary())                 # print  模型

#训练配置
model.compile(loss='sparse_categorical_crossentropy',optimizer='adam', metrics=['accuracy'])


#开始训练


class plot_kernel(keras.callbacks.Callback):        #   定义class
    """
    def on_train_begin(self, logs={}):
        self.losses = []
    """

    def on_epoch_end(self, batch, logs={}):
        #img = Image.fromarray(model.get_layer(name="cnn_layer").kernel.numpy ()[:, :, :, :])

        plt.figure(figsize=(9, 9)) #设置窗口大小
        plt.suptitle('cnn_layer') # 图片名称

        for i in range(0,1 ):                                                                                                                                                                    #<<<<<<<<<<<<<<<<<<<<<<<<<<<<<<<<<<<<<<<<<<<<<<  绘图 ,设定卷积核个数
            img = Image.fromarray(model.get_layer(name="cnn_layer").kernel.numpy ()[:,:,0,i]   *500+200   )
            plt.subplot(4,4,  (i+1)  )
            plt.title('  ')
            plt.imshow(img)
            #plt.axis('off')                  # plt.imshow(gray,cmap='gray'), plt.axis('off') #这里显示灰度图要加cmap
            plt.xticks(fontsize=0)
            plt.yticks(fontsize=0)

        plt.show()


pltKernel = plot_kernel()                              #  class 实例化


model.fit(
    x=x_train, y=y_train,
    callbacks=[pltKernel],
    validation_split=0.2,
    epochs=20 , batch_size=300, verbose=2)   # verbose = 2 为每个epoch输出一行记录       <<<<<<<<<<<<<<<<<<<<<<<<<<<<<<<<<<<<<<<<<<<<<<<<<<<<<<<<<<<<<<<<<<<<<<<<<<<,<<<                  epochs


#print("model.get_layer(index=0).output_shape============",    model.get_layer(index=0).output_shape)   #  这个是第一层(cnn)的输出图片.维度
print("model.cnn_layer.kernel=============",          model.get_layer(name="cnn_layer").kernel)
print("model.cnn_layer.kernel.shape=========",        model.get_layer(name="cnn_layer").kernel.shape)    # 这个是第一层 卷积核图片.维度


# callbacks
