人像分割PP-HumanSeg模型onnx C++ windows部署
目录
一、下载PaddleSeg
二、下载模型
三、模型导出
1、动态图模型转静态图
2、静态图转onnx
四、C++部署
1、环境
2、onnx模型查看
3、C++代码
参考:
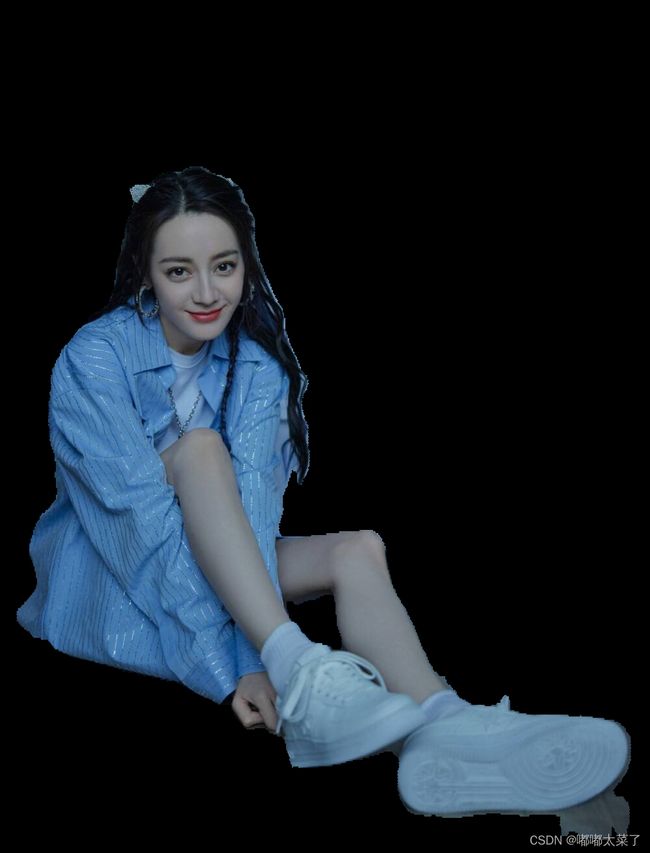
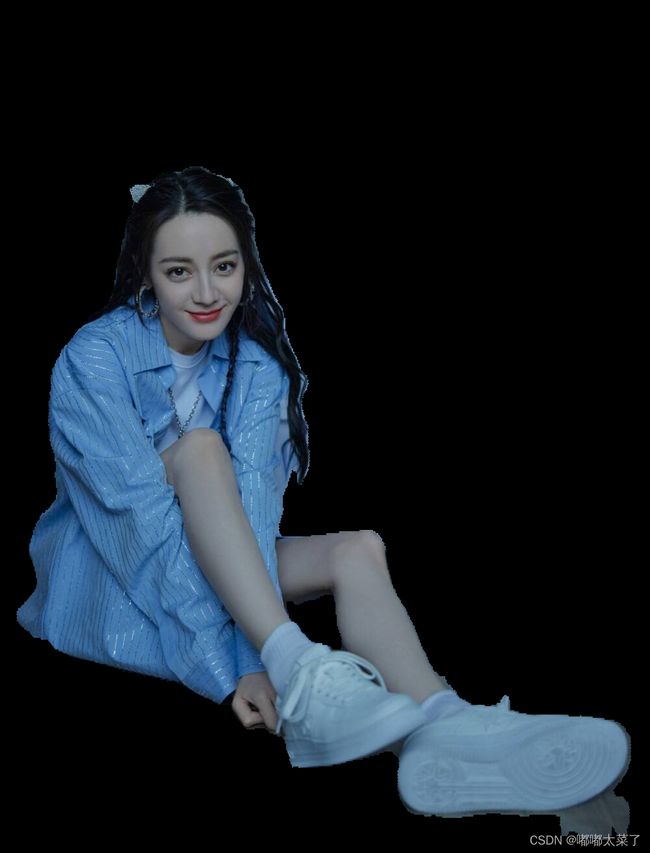
本文将PaddleSeg的人像分割(PP-HumanSeg)模型导出为onnx,并使用C++部署到windows,实现人像分割,效果如下图所示。
一、下载PaddleSeg
git clone https://github.com/PaddlePaddle/PaddleSeg.git二、下载模型
进入PP-HumanSeg目录,使用pip安装paddleseg库,并使用PaddleSeg提供的脚本下载预训练模型,该模型将用于后续导出为onnx。
%cd ~/PaddleSeg/contrib/PP-HumanSeg
!pip install paddleseg
!python pretrained_model/download_pretrained_model.py
三、模型导出
上一步下载的模型是paddlepaddle动态图模型,为了将其转换为onnx,先将paddlepaddle动态图模型转换为静态图模型,再利用paddle2onnx工具将其转为onnx模型(附录提供转换好的模型,如使用该模型,请直接跳到四、C++部署)。
1、动态图模型转静态图
这里提供超轻量级模型PP-HumanSeg-Lite转换示例,该模型适用于移动端实时分割场景,例如手机自拍、Web视频会议,模型输入大小(192, 192)。为了防止后续onnx模型使用报错,需要加上--input_shape参数。(命令中的文件路径如有需要请更换成自己的路径)
%cd ~/PaddleSeg/contrib/PP-HumanSeg
!python ../../export.py \
--config configs/fcn_hrnetw18_small_v1_humanseg_192x192_mini_supervisely.yml \
--model_path pretrained_model/fcn_hrnetw18_small_v1_humanseg_192x192/model.pdparams \
--save_dir export_model/fcn_hrnetw18_small_v1_humanseg_192x192 \
 --with_softmax  --input_shape 1 3 192 192
2、静态图转onnx
得到paddlepaddle动态图模型后,使用paddle2onnx工具将静态图模型转换为onnx模型,首先安装paddle2onnx库。
!pip install paddle2onnx 使用paddle2onnx工具,将上一步得到的paddlepaddle静态图的模型转换为onnx。
%cd ~/PaddleSeg/contrib/PP-HumanSeg
! paddle2onnx --model_dir ./export_model/fcn_hrnetw18_small_v1_humanseg_192x192/ \
    --model_filename model.pdmodel \
    --params_filename model.pdiparams \
    --save_file onnx_model/model.onnx \
    --opset_version 12
四、C++部署
1、环境
windows 10x64 cpu
onnxruntime-win-x64-1.10.0
opencv 4.5.5
visual studio 2019
2、onnx模型查看
使用Netron 查看模型结构,如下图所示。
查看模型相关属性,这里需要注意模型的输出类型是int64,如下图。
3、C++代码
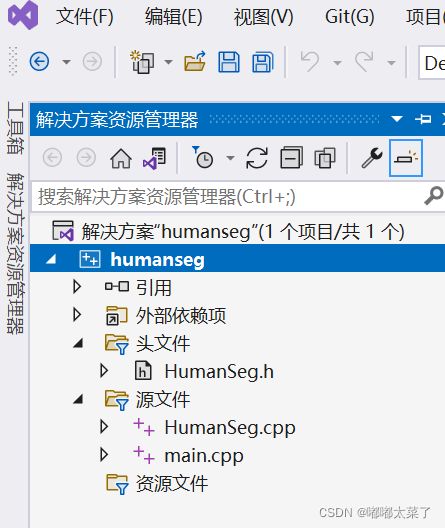
目录结构如下图所示,包含HumanSeg.h/HumanSeg.cpp/main.cpp共3个文件。
HumanSeg.h内容如下:
#pragma once
#include
#include
#include
#include
#include
#include


class HumanSeg
{
protected:
	Ort::Env env_;
	Ort::SessionOptions session_options_;
	Ort::Session session_{nullptr};
	Ort::RunOptions run_options_{nullptr};

	std::vector input_tensors_;


	std::vector input_node_names_;
	std::vector input_node_dims_;
	size_t input_tensor_size_{ 1 };

	std::vector out_node_names_;
	size_t out_tensor_size_{ 1 };

	int image_h;
	int image_w;

	cv::Mat normalize(cv::Mat& image);
	cv::Mat preprocess(cv::Mat image);

public:
	HumanSeg() =delete;
	HumanSeg(std::wstring model_path, int num_threads, std::vector input_node_dims);
	cv::Mat predict_image(cv::Mat& src);
	void predict_image(const std::string& src_path, const std::string& dst_path);
	void predict_camera();


};
HumanSeg.cpp内容如下:
#include "HumanSeg.h"


HumanSeg::HumanSeg(std::wstring model_path, int num_threads = 1, std::vector input_node_dims = { 1, 3, 192, 192 }) {
	input_node_dims_ = input_node_dims;
	for (int64_t i : input_node_dims_) {
		input_tensor_size_ *= i;
		out_tensor_size_ *= i;
	}

	//std::cout << input_tensor_size_ << std::endl;
	session_options_.SetIntraOpNumThreads(num_threads);
	session_options_.SetGraphOptimizationLevel(GraphOptimizationLevel::ORT_ENABLE_EXTENDED);

	try {
		session_ = Ort::Session(env_, model_path.c_str(), session_options_);
	}
	catch (...) {

	}

	Ort::AllocatorWithDefaultOptions allocator;
	//获取输入name
	const char* input_name = session_.GetInputName(0, allocator);
	input_node_names_ = { input_name };
	//std::cout << "input name:" << input_name << std::endl;
	const char* output_name = session_.GetOutputName(0, allocator);
	out_node_names_ = { output_name };
	//std::cout << "output name:" << output_name << std::endl;
}


cv::Mat HumanSeg::normalize(cv::Mat& image) {
	std::vector channels, normalized_image;
	cv::split(image, channels);

	cv::Mat r, g, b;
	b = channels.at(0);
	g = channels.at(1);
	r = channels.at(2);
	b = (b / 255. - 0.5) / 0.5;
	g = (g / 255. - 0.5) / 0.5;
	r = (r / 255. - 0.5) / 0.5;

	normalized_image.push_back(r);
	normalized_image.push_back(g);
	normalized_image.push_back(b);

	cv::Mat out = cv::Mat(image.rows, image.cols, CV_32F);
	cv::merge(normalized_image, out);
	return out;
}

/*
* preprocess: resize -> normalize
*/
cv::Mat HumanSeg::preprocess(cv::Mat image) {
	image_h = image.rows;
	image_w = image.cols;
	cv::Mat dst, dst_float, normalized_image;
	cv::resize(image, dst, cv::Size(int(input_node_dims_[3]), int(input_node_dims_[2])), 0, 0);
	dst.convertTo(dst_float, CV_32F);
	normalized_image = normalize(dst_float);

	return normalized_image;
}

/*
* postprocess: preprocessed image -> infer -> postprocess
*/
cv::Mat HumanSeg::predict_image(cv::Mat& src) {
	cv::Mat preprocessed_image = preprocess(src);
	cv::Mat blob = cv::dnn::blobFromImage(preprocessed_image, 1, cv::Size(int(input_node_dims_[3]), int(input_node_dims_[2])), cv::Scalar(0, 0, 0), false, true);
	//std::cout << "load image success." << std::endl;
	// create input tensor
	auto memory_info = Ort::MemoryInfo::CreateCpu(OrtArenaAllocator, OrtMemTypeDefault);

	input_tensors_.emplace_back(Ort::Value::CreateTensor(memory_info, blob.ptr(), blob.total(), input_node_dims_.data(), input_node_dims_.size()));

	std::vector output_tensors_ = session_.Run(
		Ort::RunOptions{ nullptr },
		input_node_names_.data(),
		input_tensors_.data(),
		input_node_names_.size(),
		out_node_names_.data(),
		out_node_names_.size()
	);
	int64* floatarr = output_tensors_[0].GetTensorMutableData();

	// decoder
	cv::Mat mask = cv::Mat::zeros(static_cast(input_node_dims_[2]), static_cast(input_node_dims_[3]), CV_8UC1);

	for (int i{ 0 }; i < static_cast(input_node_dims_[2]); i++) {
		for (int j{ 0 }; j < static_cast(input_node_dims_[3]); ++j) {
			mask.at(i, j) = static_cast(floatarr[i * static_cast(input_node_dims_[3]) + j]);
		}
	}
	cv::resize(mask, mask, cv::Size(image_w, image_h), 0, 0);
    input_tensors_.clear();
	return mask;
}

void HumanSeg::predict_image(const std::string& src_path, const std::string& dst_path) {
	cv::Mat image = cv::imread(src_path);
	cv::Mat mask = predict_image(image);
	cv::Mat predict_image;
	cv::bitwise_and(image, image, predict_image, mask = mask);
	cv::imwrite(dst_path, predict_image);
	//std::cout << "predict image over" << std::endl;

}


void HumanSeg::predict_camera() {
	cv::Mat frame;
	cv::VideoCapture cap;
	int deviceID{ 0 };
	int apiID{ cv::CAP_ANY };
	cap.open(deviceID, apiID);
	if (!cap.isOpened()) {
		std::cout << "Error, cannot open camera!" << std::endl;
		return;
	}
	//--- GRAB AND WRITE LOOP
	std::cout << "Start grabbing" << std::endl << "Press any key to terminate" << std::endl;
	int count{0};
	clock_t start{clock()}, end;
	double fps{ 0 };
	for (;;)
	{
		// wait for a new frame from camera and store it into 'frame'
		cap.read(frame);
		// check if we succeeded
		if (frame.empty()) {
			std::cout << "ERROR! blank frame grabbed" << std::endl;
			break;
		}
		cv::Mat mask = predict_image(frame);
		cv::Mat segFrame;
		cv::bitwise_and(frame, frame, segFrame, mask = mask);
		// fps
		end = clock();
		++count;
		fps = count / (float(end - start) / CLOCKS_PER_SEC);
		if (count >= 100) {
			count = 0;
			start = clock();
		}
		std::cout << fps << "  " << count << "   " << end - start << std::endl;
		//设置绘制文本的相关参数
		std::string text{ std::to_string(fps) };
		int font_face = cv::FONT_HERSHEY_COMPLEX;
		double font_scale = 1;
		int thickness = 2;
		int baseline;
		cv::Size text_size = cv::getTextSize(text, font_face, font_scale, thickness, &baseline);

		//将文本框居中绘制
		cv::Point origin;
		origin.x = 20;
		origin.y = 20;
		cv::putText(segFrame, text, origin, font_face, font_scale, cv::Scalar(0, 255, 255), thickness, 8, 0);

		// show live and wait for a key with timeout long enough to show images
		imshow("Live", segFrame);
		if (cv::waitKey(5) >= 0)
			break;

	}
	return;
}
main.cpp内容如下(model_path路径为上面步骤中导出的onnx路径):
#include
#include
#include
#include "HumanSeg.h"
#include


int main()
{
    std::wstring model_path(L"D:\\C_code\\humanseg\\x64\\Debug\\onnx_model\\model.onnx");
    std::cout << "infer...." << std::endl;
    HumanSeg human_seg(model_path, 1, { 1, 3, 192, 192 });
    human_seg.predict_image("C:\\Users\\langdu\\Pictures\\test1.jpeg", "C:\\Users\\langdu\\Pictures\\p1.png");
    human_seg.predict_camera(); //使用摄像头
    return 0;
}
五、效果
下方为测试图片及分割效果:
参考:
已经转换好的onnx模型,和上面的代码配套
PP-HuanSeg python部署到树莓派
PaddleSeg
onnx模型导出Aistudio教程


