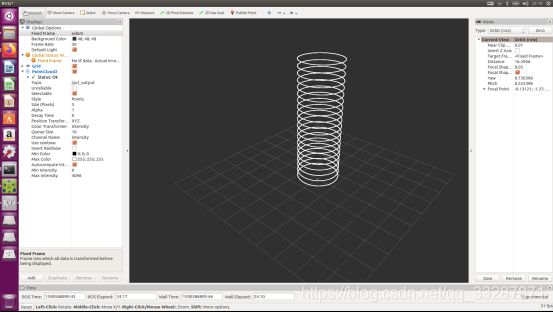
ROS-创建点云数据并在Rviz中显示

环境:
Ubuntu16.04
ROS kinetic
C++
1.新建ROS工作空间

mkdir -p PointCloundShow_ws/src
cd PointCloundShow_ws/src
catkin_init_workspace
cd ..
catkin_make 

将工作空间下的setup.bash文件路径添加到Home路径下的.bashrc文件中:
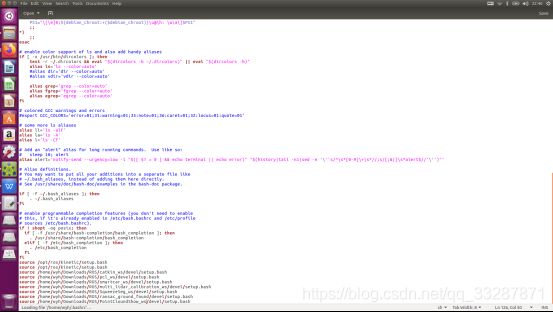
ROS-创建点云数据并在Rviz中显示_第1张图片
这样就不用每次都source一下了.
2.创建功能包

cd src
catkin_create_pkg pointcloundshow pcl_ros roscpp rospy sensor_msgs std_msgs 

在功能包的src文件夹下新建cpp文件pcl_create.cpp

#include  
#include  
#include  
#include  

main (int argc, char **argv) 
{ 
	ros::init (argc, argv, "pcl_create"); 
	
	ros::NodeHandle nh; 
	ros::Publisher pcl_pub = nh.advertise<sensor_msgs::PointCloud2> ("pcl_output", 1);     
	pcl::PointCloud<pcl::PointXYZ> cloud; 
	sensor_msgs::PointCloud2 output; 
	
	// Fill in the cloud data 
	cloud.width = 100; 
	cloud.height = 1; 
	cloud.points.resize(cloud.width * cloud.height); 
	
	for (size_t i = 0; i < cloud.points.size (); ++i)
	 { 
		 cloud.points[i].x = 1024 * rand () / (RAND_MAX + 1.0f); 
		 cloud.points[i].y = 1024 * rand () / (RAND_MAX + 1.0f); 
		 cloud.points[i].z = 1024 * rand () / (RAND_MAX + 1.0f); 
	} 
	
	//Convert the cloud to ROS message 
	pcl::toROSMsg(cloud, output); 
	output.header.frame_id = "odom"; 
	
	ros::Rate loop_rate(1); 
	while (ros::ok()) 
	{ 
		pcl_pub.publish(output);
	    ros::spinOnce(); 
		loop_rate.sleep(); 
	 } 
	return 0; 
}

然后将下面的编译规则写到功能包的CMakeLists.txt文件中

find_package(PCL REQUIRED) 
include_directories(include${PCL_INCLUDE_DIRS})
link_directories(${PCL_LIBRARY_DIRS}) 
add_executable(pcl_create src/pcl_create.cpp)
target_link_libraries(pcl_create ${catkin_LIBRARIES} ${PCL_LIBRARIES})

ROS-创建点云数据并在Rviz中显示_第2张图片
回到工作空间路径下输入catkin_make进行编译
依次打开新的终端分别运行下面的指令:

roscore
rosrun  pointcloundshow pcl_create
rviz

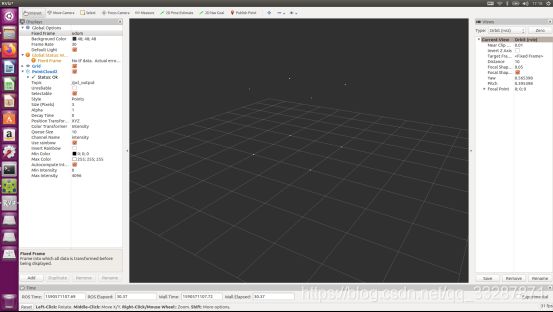
打开rviz
在rviz中增加PointCloud2d
topic 选 /pcl_output
fixed Frame 输入odom
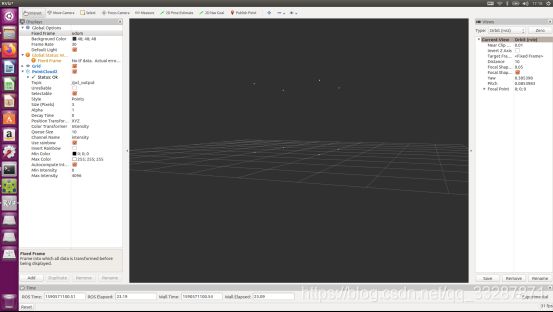
如图
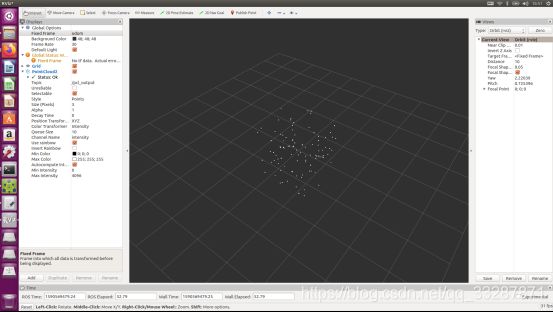
ROS-创建点云数据并在Rviz中显示_第3张图片ROS-创建点云数据并在Rviz中显示_第4张图片
手动创建正方体八个角点,理解点云的空间意义:
代码:

#include  
#include  
#include  
#include  

main (int argc, char **argv) 
{ 
	ros::init (argc, argv, "pcl_create"); 
	
	ros::NodeHandle nh; 
	ros::Publisher pcl_pub = nh.advertise<sensor_msgs::PointCloud2> ("pcl_output", 1);     
	pcl::PointCloud<pcl::PointXYZ> cloud; 
	sensor_msgs::PointCloud2 output; 
	
	// Fill in the cloud data 
	cloud.width = 8; 
	cloud.height = 1; //此处也可以为cloud.width = 4; cloud.height = 2; 
	cloud.points.resize(cloud.width * cloud.height); 
	
	cloud.points[0].x = 1; 
	cloud.points[0].y = 1; 
	cloud.points[0].z = 0; 
	
	cloud.points[1].x = -1; 
	cloud.points[1].y = 1; 
	cloud.points[1].z = 0; 
	
	cloud.points[2].x = 1; 
	cloud.points[2].y = -1; 
	cloud.points[2].z = 0;
	 
	cloud.points[3].x = -1; 
	cloud.points[3].y = -1; 
	cloud.points[3].z = 0;
	 
	cloud.points[4].x = 1; 
	cloud.points[4].y = 1; 
	cloud.points[4].z = 2; 
	
	cloud.points[5].x = -1; 
	cloud.points[5].y = 1; 
	cloud.points[5].z = 2; 
	
	cloud.points[6].x = 1; 
	cloud.points[6].y = -1; 
	cloud.points[6].z = 2;
	 
	cloud.points[7].x = -1; 
	cloud.points[7].y = -1; 
	cloud.points[7].z = 2; 
	//Convert the cloud to ROS message 
	pcl::toROSMsg(cloud, output); 
	output.header.frame_id = "odom"; 
	
	ros::Rate loop_rate(1); 
	while (ros::ok()) 
	{ 
		pcl_pub.publish(output);
		 ros::spinOnce(); 
		 loop_rate.sleep(); 
	 } 
	return 0; 
}
ROS-创建点云数据并在Rviz中显示_第5张图片ROS-创建点云数据并在Rviz中显示_第6张图片
利用循环嵌套,创建一个正方体

#include  
#include  
#include  
#include  

main (int argc, char **argv) 
{ 
	float table[]={-2,-1.5,-1,-0.5,0.5,1,1.5,2};
    int point_num;
	ros::init (argc, argv, "pcl_create"); 
	
	ros::NodeHandle nh; 
	ros::Publisher pcl_pub = nh.advertise<sensor_msgs::PointCloud2> ("pcl_output", 1);     
	pcl::PointCloud<pcl::PointXYZ> cloud; 
	sensor_msgs::PointCloud2 output; 
	
	// Fill in the cloud data 
	cloud.width = 512; 
	cloud.height = 1; 
	cloud.points.resize(cloud.width * cloud.height); 
	for(int a=0;a<(sizeof(table)/sizeof(int));++a)
	{
		float width = table[a];
		for(int i=0;i<8;++i)
		{
			float length = table[i];
			for(int c=0;c<8;++c)
			{
				 point_num = a*64+i*8+c;
				 cloud.points[point_num].x = width; 
				 cloud.points[point_num].y = length; 
				 cloud.points[point_num].z = table[c]; 
			}
		}	
	}

	//Convert the cloud to ROS message 
	pcl::toROSMsg(cloud, output); 
	output.header.frame_id = "odom"; 
	
	ros::Rate loop_rate(1); 
	while (ros::ok()) 
	{ 
		 pcl_pub.publish(output);
		 ros::spinOnce(); 
		 loop_rate.sleep(); 
	 } 
	return 0; 
}
ROS-创建点云数据并在Rviz中显示_第7张图片ROS-创建点云数据并在Rviz中显示_第8张图片
创建一个圆柱体:

#include  
#include  
#include  
#include  
#include 

#define PI 3.1415926535

main (int argc, char **argv) 
{ 
    long point_num;
	ros::init (argc, argv, "pcl_create"); 
	
	ros::NodeHandle nh; 
	ros::Publisher pcl_pub = nh.advertise<sensor_msgs::PointCloud2> ("pcl_output", 1);     
	pcl::PointCloud<pcl::PointXYZ> cloud; 
	sensor_msgs::PointCloud2 output; 
	
	// Fill in the cloud data 
	cloud.width = 360; 
	cloud.height = 21; 
	cloud.points.resize(cloud.width * cloud.height); 

	for(int z=0;z<20;++z)
	{
		for(int loop=0;loop<360;++loop)
		{
			point_num=z*360 + loop;
			float hudu = 180 *loop/PI;
			cloud.points[point_num].x = cos(hudu); 
			cloud.points[point_num].y = sin(hudu); 
			cloud.points[point_num].z = 0.3*(z+1.0f);//或者为0.3*static_cast(z);目地在于int转换为float
		}	
	}
		
	//Convert the cloud to ROS message 
	pcl::toROSMsg(cloud, output); 
	output.header.frame_id = "odom"; 
	
	ros::Rate loop_rate(1); 
	while (ros::ok()) 
	{ 
		pcl_pub.publish(output);
		ros::spinOnce(); 
		loop_rate.sleep(); 
	 } 
	return 0; 
}

ROS-创建点云数据并在Rviz中显示_第9张图片

你可能感兴趣的:(ROS,PCL教程笔记)