C#编写window服务,一步一步(1)
Window服务是啥,这里就不废话了,如何用在哪里用也不废话了,这里我这篇文章只是详述了我在vs2012中创建window服务的经过,希望对你有所帮助。
另外:我在编写服务过程中参考了 Professional C# 2012 and .NET 4.5
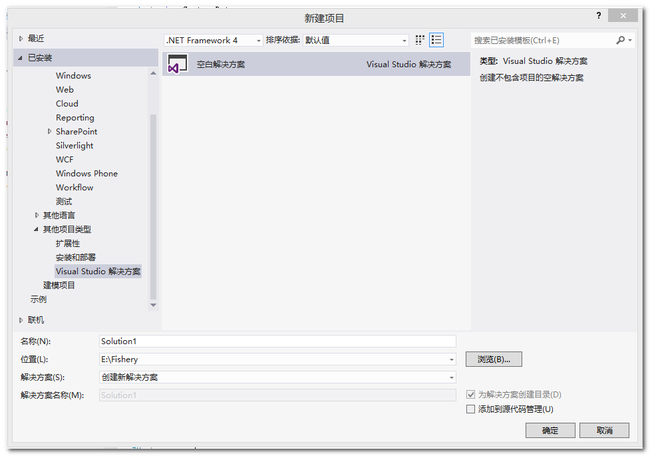
第一步,创建一个解决方案名称MonitoringFish
不废话,你肯定会,会的直接去下一步。如果真的不会请继续看
第二步添加服务用的类库项目Sensor
并添加类文件QuoteException.cs和SensorFish.cs
这两个类的功能并不重要,主要是给服务类用的,你也可以写自己的类文件,或者干脆不要,直接在服务类里边写逻辑代码
QuoteException.cs代码如下:
 1 using System;
 2 using System.Collections.Generic;
 3 using System.Linq;
 4 using System.Text;
 5
 6 namespace Sensor
 7 {
 8     /// <summary>
 9     /// 自定义异常
10     /// </summary>
11     [Serializable]
12     class QuoteException : Exception
13     {
14         public QuoteException() { }
15         public QuoteException(string message) : base(message) { }
16         public QuoteException(string message, Exception inner) : base(message, inner) { }
17         protected QuoteException(
18         System.Runtime.Serialization.SerializationInfo info,
19         System.Runtime.Serialization.StreamingContext context)
20             : base(info, context) { }
21     }
22 }
SensorFish.cs代码如下:
  1 using System;
  2 using System.Collections.Generic;
  3 using System.Linq;
  4 using System.Text;
  5 using System.IO;
  6 using System.Net;
  7 using System.Net.Sockets;
  8 using System.Threading.Tasks;
  9 using System.Diagnostics.Contracts;
 10 using System.Diagnostics;
 11
 12 namespace Sensor
 13 {
 14     /// <summary>
 15     /// 传感器监测
 16     /// </summary>
 17     public class SensorFish
 18     {
 19
 20
 21         private TcpListener listener;
 22         private int port;//端口号
 23         private string filename;
 24         private List<string> quotes;
 25         private Random random;
 26         private Task listenerTask;
 27
 28         /// <summary>
 29         /// 传感器控制类
 30         /// </summary>
 31         public SensorFish()
 32             : this("quotes.txt")
 33         {
 34
 35         }
 36
 37         /// <summary>
 38         /// 传感器控制类
 39         /// </summary>
 40         /// <param name="fileName"></param>
 41         public SensorFish(string fileName)
 42             : this(fileName, 7890)
 43         {
 44
 45         }
 46
 47         /// <summary>
 48         /// 传感器控制类
 49         /// </summary>
 50         /// <param name="fileName"></param>
 51         /// <param name="port"></param>
 52         public SensorFish(string fileName, int port)
 53         {
 54             //Contract.Requires<ArgumentNullException>(fileName != null);
 55             //Contract.Requires<ArgumentException>(port >= IPEndPoint.MinPort && port <= IPEndPoint.MaxPort);
 56             this.filename = fileName;
 57             this.port = port;
 58         }
 59
 60         protected void ReadQuotes()
 61         {
 62             try
 63             {
 64                 quotes = File.ReadAllLines(filename).ToList();
 65                 if (quotes.Count == 0)
 66                 {
 67                     throw new QuoteException("quotes  file  is   empty");
 68                 }
 69                 random = new Random();
 70             }
 71             catch (IOException ex)
 72             {
 73                 throw new QuoteException("I/O Error", ex);
 74             }
 75         }
 76
 77         protected string GetRandomQuoteOfTheDay()
 78         {
 79             int index = random.Next(0, quotes.Count);
 80             return quotes[index];
 81         }
 82
 83
 84         /// <summary>
 85         /// 开启服务
 86         /// </summary>
 87         public void Start()
 88         {
 89             ReadQuotes(); //读取文件
 90             listenerTask = Task.Factory.StartNew(Listener, TaskCreationOptions.LongRunning);//异步方法调用
 91         }
 92
 93         private void Listener()
 94         {
 95             try
 96             {
 97                 IPAddress ipAddress = IPAddress.Any;//提供一个ip地址,只是服务器应侦听所有网络接口上的客户端活动。此字段为只读
 98                 listener = new TcpListener(ipAddress, port);//指定在本地的IP地址和端口号上侦听是否有传入的连接尝试
 99                 listener.Start();//开始侦听传入的连接请求
100                 while (true)
101                 {
102                     Socket clientSocket = listener.AcceptSocket();//接受关起的连接请求
103                     string message = GetRandomQuoteOfTheDay();
104                     var encoder = new UnicodeEncoding();
105                     byte[] buffer = encoder.GetBytes(message);
106                     clientSocket.Send(buffer, buffer.Length, 0);//将指定的字节数发送到已连接的Socket
107                     clientSocket.Close();//关闭Socket,并释放所有的关联的资源
108                 }
109             }
110             catch (SocketException ex)
111             {
112                 Trace.TraceError(string.Format("QuoteServer {0}", ex.Message));
113                 throw new QuoteException("socket error", ex);
114             }
115         }
116
117
118         /// <summary>
119         /// 停止服务
120         /// </summary>
121         public void Stop()
122         {
123             listener.Stop();//关闭侦听
124         }
125
126         /// <summary>
127         /// 暂定服务
128         /// </summary>
129         public void Suspend()
130         {
131             listener.Stop();
132         }
133
134         /// <summary>
135         /// 重新开始服务
136         /// </summary>
137         public void Resume()
138         {
139             Start();
140         }
141
142         /// <summary>
143         /// 重启
144         /// </summary>
145         public void RefreshSensor()
146         {
147             ReadQuotes();
148         }
149     }
150 }
第三步添加控制台应用程序SensorServiceTest
这里要说下为什么添加这个控制台程序了。
因为在开发过程中要对Sensor项目进行调试,为了方便用 SensorServiceTest承载这个类库,作为服务使用。在第四步的程序中将会调用这个服务,以便验证Sensor中的各个类功能是否正常。
直接主函数中加入代码,如下:
 1     /// <summary>
 2     /// 服务测试程序
 3     /// </summary>
 4     class Program
 5     {
 6         static void Main(string[] args)
 7         {
 8
 9             var qs = new SensorFish("Quotes.txt", 4567);
10             qs.Start();
11             Console.WriteLine("Hit return to  exit");
12             Console.ReadLine();
13             qs.Stop();
14         }
15      }
第四步添加wpf应用程序项目ServiceTestClicent
用于配合第三步创建服务测试Sensor项目,请注意配置项目属性页的【设置】选项卡的键值如下图所示
这个项目中我创建了一个MainWindow.xaml文件和QuoteInformation.cs类用于客户端程序的调用,当然在创建wpf项目时候自动生成了app.config(非必须)和App.xaml(必须)
xaml文件代码如下:
 1 <Window x:Class="ServiceTestClicent.MainWindow"
 2         xmlns="http://schemas.microsoft.com/winfx/2006/xaml/presentation"
 3         xmlns:x="http://schemas.microsoft.com/winfx/2006/xaml"
 4         Title="MainWindow"  Height="200" Width="300">
 5     <Grid>
 6         <Grid.RowDefinitions>
 7             <RowDefinition Height="*" MinHeight="30"></RowDefinition>
 8             <RowDefinition Height="3*"></RowDefinition>
 9         </Grid.RowDefinitions>
10
11         <Button     Margin="3" VerticalAlignment="Stretch" Grid.Row="0" Background="{DynamicResource {x:Static SystemColors.ActiveCaptionBrushKey}}"
12                 IsEnabled="{Binding EnableRequset}" Click="OnGetQuote" >Get Quote</Button>
13         <TextBlock  Margin="6" Grid.Row="1" TextWrapping="Wrap" Text="{Binding Quote}" />
14     </Grid>
15 </Window>
 1 using System;
 2 using System.Net.Sockets;
 3 using System.Text;
 4 using System.Windows;
 5 using System.Windows.Input;
 6
 7 namespace ServiceTestClicent
 8 {
 9     /// <summary>
10     /// MainWindow.xaml 的交互逻辑
11     /// </summary>
12     public partial class MainWindow : Window
13     {
14         private QuoteInformation quoteInfo = new QuoteInformation();
15         public MainWindow()
16         {
17             InitializeComponent();
18             this.DataContext = quoteInfo;
19         }
20
21         private async void OnGetQuote(object sender, RoutedEventArgs e)
22         {
23             const int bufferSize = 1024;
24             Cursor currentCursor = this.Cursor; //代表用于鼠标指针的图像
25             quoteInfo.EnableRequest = false;
26
27             string serverName = Properties.Settings.Default.ServerName; //url
28             int port = Properties.Settings.Default.PortNumber;//端口
29             var client = new TcpClient();//
30             NetworkStream stream = null;
31             try
32             {
33                 await client.ConnectAsync(serverName, port);
34                 stream = client.GetStream();
35                 byte[] buffer = new Byte[bufferSize];
36                 int received = await stream.ReadAsync(buffer, 0, bufferSize);
37                 if (received <= 0)
38                 {
39                     return;
40                 }
41
42                 quoteInfo.Quote = Encoding.Unicode.GetString(buffer).Trim('\0');
43
44             }
45             catch (SocketException ex)
46             {
47                 MessageBox.Show(ex.Message, "Error Quote of  the  day", MessageBoxButton.OK, MessageBoxImage.Error);
48             }
49             finally
50             {
51                 if (stream != null)
52                 {
53                     stream.Close();
54                 }
55
56                 if (client.Connected)
57                 {
58                     client.Close();
59                 }
60                 this.Cursor = currentCursor;
61                 quoteInfo.EnableRequest = true;
62             }
63
64
65         }
66     }
67
68
69
70 }
QuoteInformation.cs类代码如下
 1 using System;
 2 using System.Collections.Generic;
 3 using System.ComponentModel;
 4 using System.Linq;
 5 using System.Runtime.CompilerServices;
 6 using System.Text;
 7
 8 namespace ServiceTestClicent
 9 {
10     class QuoteInformation : INotifyPropertyChanged
11     {
12         public QuoteInformation()
13         {
14             EnableRequest = true;
15         }
16         private string quote;
17         public string Quote
18         {
19             get
20             {
21                 return quote;
22             }
23             internal set
24             {
25                 SetProperty(ref quote, value);
26             }
27         }
28
29         private bool enableRequest;
30         public bool EnableRequest
31         {
32             get
33             {
34                 return enableRequest;
35             }
36             internal set
37             {
38                 SetProperty(ref enableRequest, value);
39             }
40         }
41
42         private void SetProperty<T>(ref T field, T value, [CallerMemberName] string propertyName = "")
43         {
44             if (!EqualityComparer<T>.Default.Equals(field, value))
45             {
46                 field = value;
47                 var handler = PropertyChanged;
48                 if (handler != null)
49                 {
50                     handler(this, new PropertyChangedEventArgs(propertyName));
51                 }
52             }
53         }
54
55         public event PropertyChangedEventHandler PropertyChanged;
56     }
57 }
在项目SensorServiceTestClient和ServiceTestClicent上右键-生成后打开在各自项目中的Debug文件夹下找到exe可执行文件,并先启动SensorServiceTestClient.exe然后启动ServiceTestClicent.exe
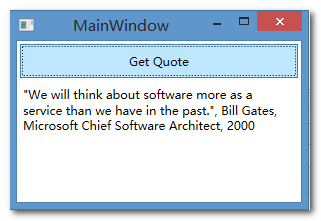
启动ServiceTestClicent.exe如下图所示,表示各个程序功能正常
经过测试功能正常,就可以真正的编写windows服务了
第五步添加服务项目SensorFishService
添加一个服务类FisheryMonitoring.cs
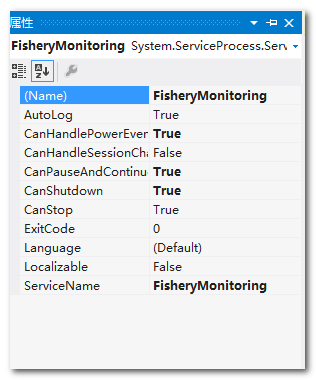
在空白处点击一下,以便选中该选项卡,然后打开属性窗口看到下图所示
(Name)对应的是服务类的名称
AutoLog指定把启动和停止服务的事件自动写到事件日志中
CanPauseAndContinue、CanShutdown和CanStop指定服务可以处理暂停、继续、关闭和停止服务的请求
ServiceName是写到注册表中的服务的名称,使用这个名称可以控制服务
CanHandleSessionChangeEvent确定服务是否能处理终端服务器会话中的改变事件
CanHandlePowerEvent选项对运行在笔记本电脑或移动设备上的服务有效。如果启用这个选项,服务就可以响应低电源事件,并响应的改变服务的行为。电源事件包括电量低、电源状态改变(因为A/C电源之间的切换)开关和改为断电
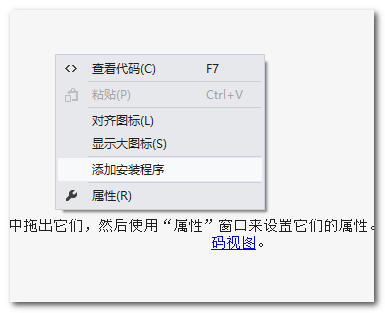
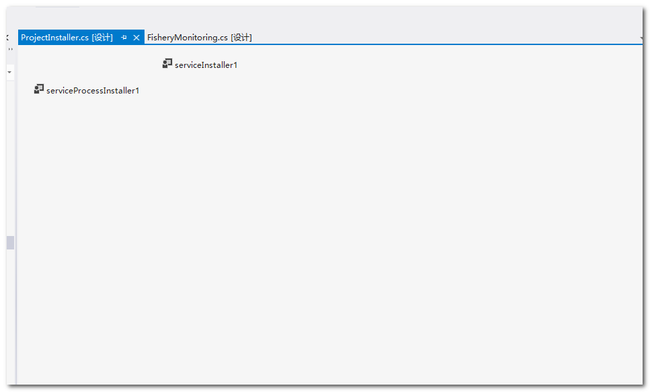
设置好各个属性后,在服务类的选项卡上右键,选择【添加安装程序】
选中 ServiceProcessInstaller1打开属性选项卡
设置一下 Account,如果将他的值设置为User那么在安装服务的时候就要指定一个具体的账户,只有这个账户可以使用这个服务,其他的不详,请查阅其他资料
选中serviceInstaller1并打开属性选项卡
设置一下各个属性,各位看官请自行对照属性的作用,下图是系统服务中的截图
值得注意的是 ServiceName必须和上文中提到的ServiceName相同,别问我为什么
至此重点的部分介绍完毕
当然,大头的部分还在后边,请各位看官注意
第六步在SensorFishService项目中添加类Program.cs
这个必须的,因为承载了程序入口,所以名字不能变,代码如下
 1 static class Program
 2     {
 3         static void Main(string[] args)
 4         {
 5
 6             ServiceBase[] ServicesToRun;
 7             ServicesToRun = new ServiceBase[]{
 8                     new  FisheryMonitoring()
 9                 };
10
11             //服务响应
12             ServiceBase.Run(ServicesToRun);
13 // ServiceBase.Run(new  FisheryMonitoring());
14         }
15     }
至此整个windows服务编写已经完成,下一篇笔者将介绍安装和卸载服务的过程
注:请各位看客自行设置项目之间的引用和项目上的程序集的引用,很简单的
附源码:http://files.cnblogs.com/netqq/Fishery.zip
window服务的安装请参考文章 http://www.cnblogs.com/netqq/p/4218147.html
