TensorFlow入门官方demo
这个demo是TensorFlow官方提供的新手入门教程,训练了一个结构非常简单的神经网络,对于小白而言可以快速入手TensorFlow。以下代码的执行默认配置好TensorFlow环境并导入keras。
官方教程地址
程序需要导入以下模块
import tensorflow as tf
from tensorflow import keras
import numpy as np
import matplotlib.pyplot as plt
import mnist_reader
注意:mnist_reader不是系统自带,而需要手动添加至文件夹Lib\site-packages,其作用是用于读取数据集(文件点此获取)
接下来导入数据,
train_images = np.ones((60000,28,28))
test_images = np.ones((10000,28,28))
train_images_pre,train_labels = mnist_reader.load_mnist('/深度学习/fashion-minist数据集',kind='train')
test_images_pre,test_labels = mnist_reader.load_mnist('/深度学习/fashion-minist数据集',kind='t10k')
for i in range(60000):
    image_array = train_images_pre[i, :]
    image_array = image_array.reshape(28, 28)
    train_images[i, :] = image_array

for i in range(10000):
    image_array = test_images_pre[i, :]
    image_array = image_array.reshape(28, 28)
    test_images[i, :] = image_array
由于官方给的程序读取出来的是二维数组,但我们需要的是三维数组,所以这里做了一些转换(数据集在这里获取)
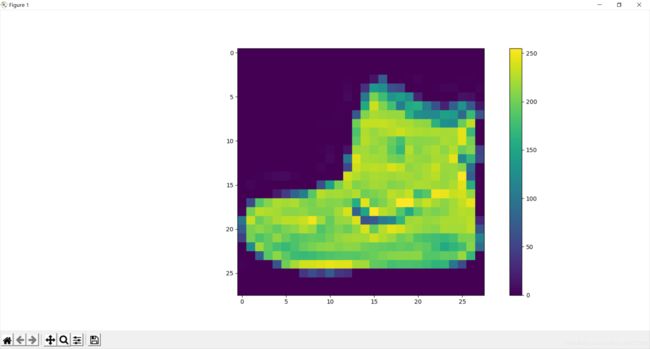
在这里可使用如下程序观测数据集中某个的图片
plt.figure()
plt.imshow(train_images[0])
plt.colorbar()
plt.grid(False)
plt.show()
定义标签名称,并将图片灰度归一化
class_names = ['T-shirt/top', 'Trouser', 'Pullover', 'Dress', 'Coat',
               'Sandal', 'Shirt', 'Sneaker', 'Bag', 'Ankle boot']

#图片归一化
train_images = train_images / 255.0
test_images = test_images / 255.0
创建模型
model = keras.Sequential([
    keras.layers.Flatten(input_shape=(28, 28)),
    keras.layers.Dense(128, activation='relu'),
    keras.layers.Dense(10)
])

model.compile(optimizer='adam',
              loss=tf.keras.losses.SparseCategoricalCrossentropy(from_logits=True),
              metrics=['accuracy'])
接下来训练,训练次数十次
model.fit(train_images, train_labels, epochs=10)
通过softmax算法将结果变为概率
probability_model = tf.keras.Sequential([model,tf.keras.layers.Softmax()])
predictions = probability_model.predict(test_images)
通过调用以下程序可以看出,图片对应标签出现的概率最大,符合预期。
print(predictions[0])
print(np.argmax(predictions[0]))
print(test_labels[0])

调用以下程序可以将训练结果可视化
def plot_image(i, predictions_array, true_label, img):
  predictions_array, true_label, img = predictions_array, true_label[i], img[i]
  plt.grid(False)
  plt.xticks([])
  plt.yticks([])

  plt.imshow(img, cmap=plt.cm.binary)

  predicted_label = np.argmax(predictions_array)
  if predicted_label == true_label:
    color = 'blue'
  else:
    color = 'red'

  plt.xlabel("{} {:2.0f}% ({})".format(class_names[predicted_label],
                                100*np.max(predictions_array),
                                class_names[true_label]),
                                color=color)

def plot_value_array(i, predictions_array, true_label):
  predictions_array, true_label = predictions_array, true_label[i]
  plt.grid(False)
  plt.xticks(range(10))
  plt.yticks([])
  thisplot = plt.bar(range(10), predictions_array, color="#777777")
  plt.ylim([0, 1])
  predicted_label = np.argmax(predictions_array)

  thisplot[predicted_label].set_color('red')
  thisplot[true_label].set_color('blue')

num_rows = 5
num_cols = 3
num_images = num_rows*num_cols
plt.figure(figsize=(2*2*num_cols, 2*num_rows))
for i in range(num_images):
  plt.subplot(num_rows, 2*num_cols, 2*i+1)
  plot_image(i, predictions[i], test_labels, test_images)
  plt.subplot(num_rows, 2*num_cols, 2*i+2)
  plot_value_array(i, predictions[i], test_labels)
plt.tight_layout()
plt.show()
训练结果

完整代码点这里