Docker(第四周)-Docker镜像定制
一、Dockerfile制作镜像——自定义镜像mycentos
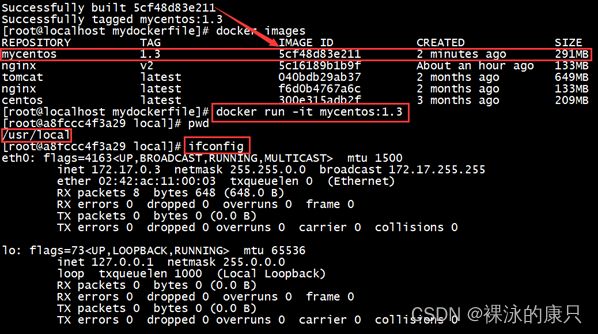
要求:默认的centos:7镜像默认不支持vim和ifconfig。现在,我们要自定义mycentos镜像,使其具备:登陆后的默认路径为/usr/local;vim编辑器;查看网络配置ifconfig支持。
2.1 编写Dockerfile文件
准备编写Dockerfile
Dockerfile文件的内容:
2.2构建
语法:docker build -t 新镜像名字:TAG .
注意最后有个点,代表使用当前路径的 Dockerfile 进行构建
2.3 运行
语法:docker run -it 新镜像名字:TAG
二、docker commit制作镜像(基于现有镜像创建)
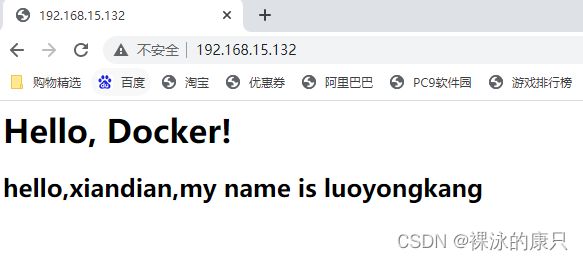
最终效果:制作了一个新镜像,运行新镜像,然后访问nginx服务,出现如下:
1.1 生成nginx容器
docker run -id -p 80:80 --name=webserver nginx
-p 主机端口:docker容器端口
-P 随机分配端口
i:交互
d:后台进程
这条命令会用 nginx 镜像启动一个容器,命名为 webserver,并且映射了 80 端 口,这样可以用浏览器去访问这个 nginx 服务器。直接用浏览器访问的话,会看到默认的 Nginx 欢迎页面。
2.3将容器保存为新镜像
docker commit -m=“提交的描述信息” -a=“作者” 容器ID 要创建的目标镜像名:[标签名]
p
[root@localhost /]# docker commit -a='luoli
sha256:a0d99cbc3178e06cf0a6664478500defa700c49f5482c9ee5cd10ac13a87fc95
2.4运行新镜像
[root@localhost /]# docker images nginx:v2
REPOSITORY TAG IMAGE ID CREATED SIZE
nginx v2 a0d99cbc3178 3 minutes ago 127MB
用 docker history 具体查看镜像内的历史记录,如果比较 nginx:latest 的历史记录,会发现新增了刚刚提交的这一层。
[root@localhost /]# docker history nginx:v2
IMAGE CREATED CREATED BY SIZE COMMENT
a0d99cbc3178 2 minutes ago nginx -g daemon off; 46B 修改了默认网页
2073e0bcb60e 7 weeks ago /bin/sh -c #(nop) CMD ["nginx" "-g" "daemon… 0B
新的镜像定制好后,可以来运行这个镜像。
docker run -id --name=web2 -p 81:80 nginx:v2
Complete!
Removing intermediate container fe6cf99849d9
 ---> 089f39c4e75d
Step 6/7 : RUN yun install -y net-tools
 ---> Running in f0357d2268ea
/bin/sh: yun: command not found
The command '/bin/sh -c yun install -y net-tools' returned a non-zero code: 127
Dockerfile文件编写错了
改正:把Run yun install 改为 Run yum install
【实训】
题目:定制一个web网站,在网站页面上打印“Hello world,my name is XXXX”。
所有步骤以截图形式给出结果。
- 下载Nginx镜像。
[root@localhost ~]# docker pull nginx
Using default tag: latest
latest: Pulling from library/nginx
Digest: sha256:2d17cc4981bf1e22a87ef3b3dd20fbb72c3868738e3f307662eb40e2630d4320
Status: Image is up to date for nginx:latest
docker.io/library/nginx:latest- 创建镜像目录。
[root@localhost ~]# mkdir mynginx
[root@localhost ~]# cd mynginx/- 编写Dockerfile文件。
[root@localhost mynginx]# docker build -t mynninx:v3 -f Dockerfile3 .[root@localhost mynginx]# vi Dockerfile3FROM nginx
MAINTAINER luoyongkang
RUN echo 'Hello, Docker!
hello,xiandian,my name is luoyongkang ' > /usr/share/nginx/html/index.html
EXPOSE 80
CMD ["nginx","-g","daemon off;"]
- 使用Dockerfile构建新镜像,新镜像名称为xxxNginx,如luoliNginx。
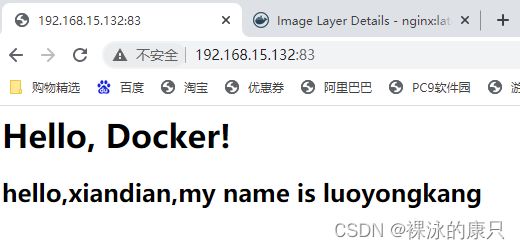
[root@localhost mynginx]# docker run -id --name n3 -p 83:80 mynninx:v3
107799425b452b88dbe3add1af0a6a09278797152c0df41f7d1cd0fb8a4e0474- 运行新镜像。打开浏览器查看网站页面,网站页面打印“Hello world,my name is XXXX”。


