Deeplabv3+语义分割实战:详解Deeplabv3+训练与测试(tensorflow)
Deeplabv3+语义分割实战:详解Deeplabv3+训练与测试(tensorflow)
- 引言
- 数据集处理
-
- CamVid数据集
- 制作自己的数据集
-
- labelme工具标注数据
- 图像标注后的数据转换
- 训练集生成标签图
- 测试集生成标签图
- mask灰度值的转换
- 整理数据集文件夹
- 制作指引文件
- 将数据转换成TFRecord
- 模型训练
-
- 训练集准备
-
- 安装DeeplabV3+并简单测试
- 修改data_generator.py
- 修改utils/train_utils.py
- 下载预训练模型
- 类别不平衡修正
- 开始训练
- 模型测试
-
- 验证集
- 测试集
- 训练完后的模型保存
- 批量可视化分割结果
- 批量导出分割文件
引言
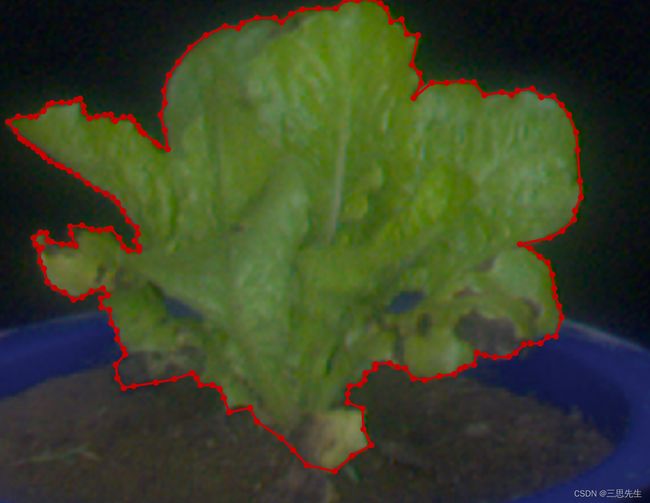
Deeplabv3+语义分割实战的目的是对生菜图像进行语义分割,也就是实现生菜的精细化抠图。
数据集处理
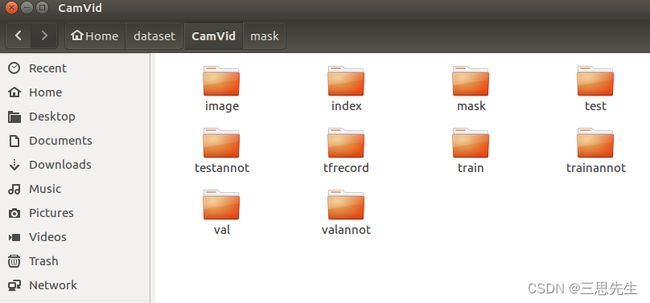
CamVid数据集
本文训练数据集将被转化为CamVid数据集,最终训练数据集的文件夹结构如下:
制作自己的数据集
labelme工具标注数据
用labelme工具标注原始影像数据,生成影像对应的json文件。本次实验一共标注360张,320张用于模型训练,40张用于验证.
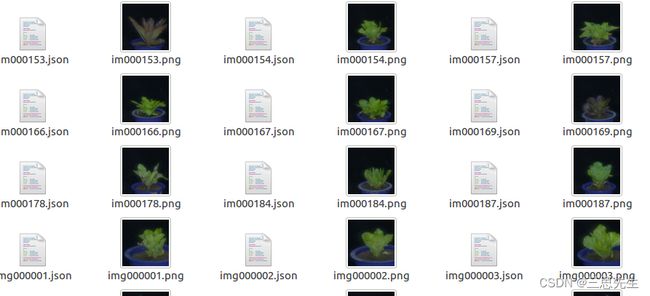
图像标注后的数据转换
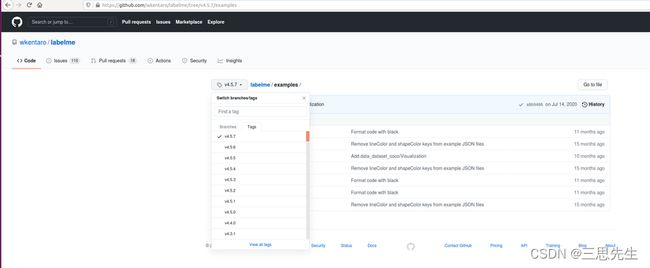
json文件需要解析之后得到标签图片.使用labelme2voc.py生成voc数据集格式的数据集,生成的label图与每一类的编号一致.该脚本完成转换的label图是8-bit的RGB图,需要再转换成灰度图.
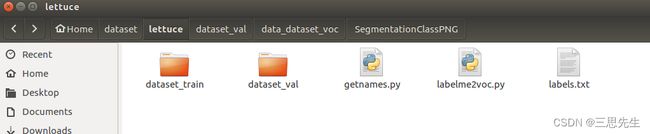
训练集生成标签图
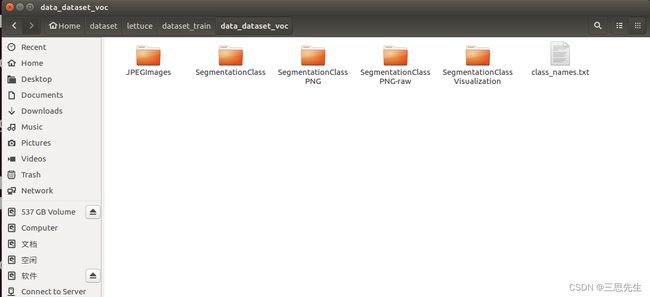
训练数据集生成标签图建立文件夹/home/zhai/dataset/dataset_train,并dataset_train下建立子文件夹data_annotated。把训练数据集图像和labelme标注的json文件放置到dataset_train/data_annotated目录下。在/home/zhai/dataset目录下执行:
python labelme2voc.py dataset_train/data_annotated dataset_train/data_dataset_voc --labels labels.txt
运行是出现如下错误:

解决办法:在github(链接)上下载对应版本的labelme2voc.py文件.
另外,如果运行过程中,如果发现出现如下错误。是因为在labelme标注标签的时候,多标注了“pot”类没有删掉,而导致无法识别,找到对应的json文件,删掉‘pot’标签,就可以了。


测试集生成标签图
python labelme2voc.py dataset_val/data_annotated dataset_val/data_dataset_voc --labels labels.txt
mask灰度值的转换
- 去除mask的colormap使用:
~/models/research/deeplab/datasets/remove_gt_colormap.py
- 对训练集mask去除colormap:在/home/zhai/dataset下执行:
python ~/models/research/deeplab/datasets/remove_gt_colormap.py --original_gt_folder dataset_train/data_dataset_voc/SegmentationClassPNG --output_dir dataset_train/data_dataset_voc/SegmentationClassPNG-raw
- 对测试集mask去除colormap:在/home/zhai/dataset下执行:
python ~/models/research/deeplab/datasets/remove_gt_colormap.py --original_gt_folder dataset_val/data_dataset_voc/SegmentationClassPNG --output_dir dataset_val/data_dataset_voc/SegmentationClassPNG-raw
整理数据集文件夹
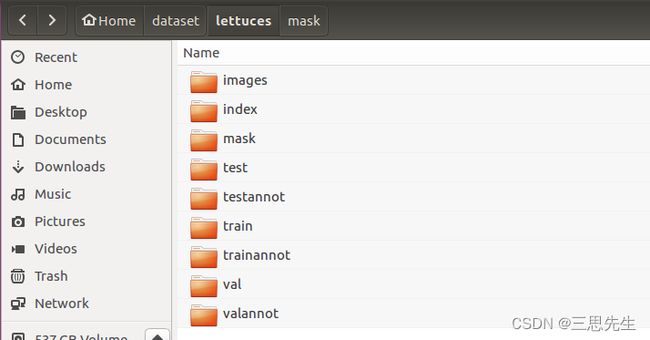 数据集的文件夹结构为:
├── test
├── testannot
├── train
├── trainannot
├── val
└── valannot
由上到下分别是测试集、测试集标签、训练集、训练集标签、验证集、验证集标签。
对于lettuces, 其中训练集、验证集中的图片数目分别为train 320, val 40。将SegmentationClassPNG里的灰度图分别放入到trainannot/valannot文件夹中. images存放360张的原始图像,mask存放360张标签灰度图.
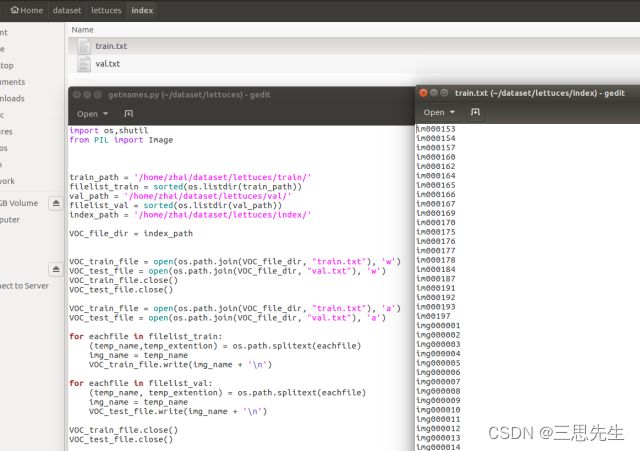
制作指引文件
可使用以下代码对训练集,测试集和验证集图像的名称提取出来,放在txt文件中,作为指引文件。
将数据转换成TFRecord
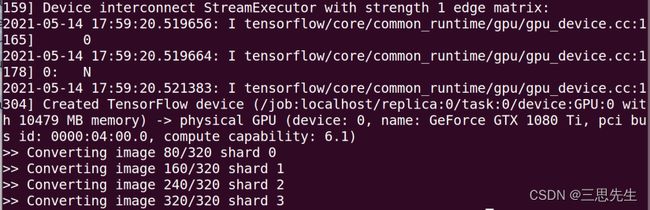
mkdir tfrecord
将上述制作的数据集打包成TFRecord,使用的是build_voc2012_data.py:
python ~/models/research/deeplab/datasets/build_voc2012_data.py \
--image_folder="/home/zhai/dataset/lettuces/images" \
--semantic_segmentation_folder="/home/zhai/dataset/lettuces/mask" \
--list_folder="/home/zhai/dataset/lettuces/index" \
--image_format="png" \
--output_dir="/home/zhai/dataset/lettuces/tfrecord"

模型训练
训练集准备
安装DeeplabV3+并简单测试
1、在github下载deeplabv3+代码
git clone https://github/tensorflow/models.git
2、添加项目依赖路径
编辑文件 ~/.bashrc
sudo gedit ~/.bashrc
在配置文件末尾加上一句:
export PYTHONPATH=/home/zhai/models/research/slim:/home/zhai/models/research:$PYHONPATH
source ~/.bashrc
3、配置tesorflow环境参见我前面总结的博客
4、测试DeeplabV3+
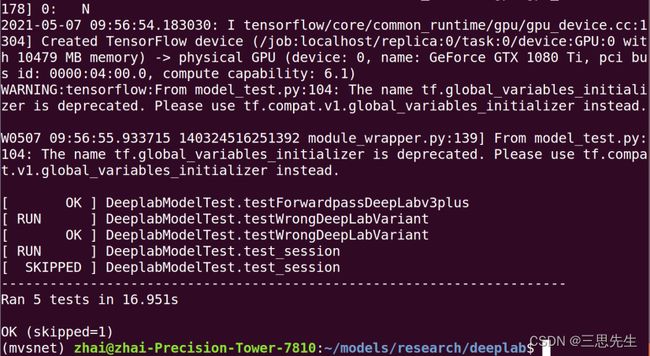
cd /home/zhai/models/research/deeplab
python model_test.py
最后输入结果应没有错误,表明deeplabv3+配置环境没有问题,可以正常运行。
如果输出有如下错误信息:
![]()
执行以下三个命令:
cd /home/zhai/models/research/slim
python setup.py build
python setup.py install
修改data_generator.py
在DeepLabv3+模型的基础上,主要需要修改以下两个文件data_generator.py 文件
在datasets/data_generator.py文件中,添加自己的数据集描述,例如训练集的数量,验证集的数量以及分为几类(如果对单株生菜进行分割,就有生菜和背景两类)。
_MYDATA_INFORMATION = DatasetDescriptor(
    splits_to_sizes={'train': 320,
                     'val': 40,
                     },
    num_classes=2,
    ignore_label=255,
)

_DATASETS_INFORMATION = {
    'cityscapes': _CITYSCAPES_INFORMATION,
    'pascal_voc_seg': _PASCAL_VOC_SEG_INFORMATION,
    'ade20k': _ADE20K_INFORMATION,
    'mydata':_MYDATA_INFORMATION,  #added by clf 20210514
}
修改utils/train_utils.py
对应的utils/train_utils.py中,将 exclude_list 的设置修改(新版第209行;旧版第159行),作用是在使用预训练权重时候,不加载该 logit 层: train_utils.py
#Variables that will not be restored.
exclude_list = ['global_step','logits'] #modified by clf,add 'logits'
if not initialize_last_layer:
  exclude_list.extend(last_layers)
如果想在DeepLab的基础上fine-tune其他数据集, 可在deeplab/train.py中修改输入参数。
一些选项:
- 使用预训练的所有权重,设置initialize_last_layer=True
- 只使用网络的backbone,设置initialize_last_layer=False和 last_layers_contain_logits_only=False
使用所有的预训练权重,除了logits。因为如果是自己的数据集,对应的classes不同(这个我们前
面已经设置不加载logits),可设置initialize_last_layer=False和 last_layers_contain_logits_only=True
下载预训练模型
在model_zoo上下载预训练模型:
下载地址:https://github.com/tensorflow/models/blob/master/research/deeplab/g3doc/model_zoo.md
下载的预训练权重为xception_cityscapes_trainfine xception71_dpc_cityscapes_trainfine
类别不平衡修正
在train_utils.py文件中add_softmax_cross_entropy_loss_for_each_scale函数中第一句加上你设置的权重,例如 loss_weight=[1.0, 10.0, 15.0, 10.0, 10.0, 10.0] 其中1.0是背景权重,后面是5个类别物体的权重。本文设置的loss_weight=[1.0, 10.0],因为只有两类。
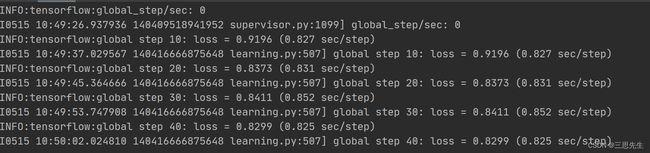
开始训练
在目录 ~/models/research/deeplab下执行:
python train.py \
--logtostderr \
--training_number_of_steps=3000 \
   --train_split="train" \
   --model_variant="xception_71" \
   --atrous_rates=6 \
   --atrous_rates=12 \
   --atrous_rates=18 \
   --output_stride=16 \
   --decoder_output_stride=4 \
   --train_crop_size=513,513 \
   --train_batch_size=4 \
   --dataset="mydata" \
   --tf_initial_checkpoint='/home/zhai/models/research/deeplab/train_fine/model.ckpt' \
   --train_logdir='/home/zhai/models/research/deeplab/exp/mydata_train/train' \
   --dataset_dir='/home/zhai/dataset/lettuces/tfrecord'

模型测试
验证集
验证集,在目录 ~/models/research/deeplab下执行:
python vis.py \
   --logtostderr \
   --vis_split="val" \
   --model_variant="xception_71" \
   --atrous_rates=6 \
   --atrous_rates=12 \
   --atrous_rates=18 \
   --output_stride=16 \
   --decoder_output_stride=4 \
   --vis_crop_size=512,512\
   --dataset="mydata" \
   --colormap_type="pascal" \
   --checkpoint_dir='/home/zhai/models/research/deeplab/exp/mydata_train/train' \
   --vis_logdir='/home/zhai/models/research/deeplab/exp/mydata_train/vis_20' \
   --dataset_dir='/home/zhai/dataset/lettuces/tfrecord'


测试集
1、测试集,在目录 ~/models/research/deeplab下执行:
python eval.py \
   --logtostderr \
   --eval_split="val" \
   --model_variant="xception_71" \
   --atrous_rates=6 \
   --atrous_rates=12 \
   --atrous_rates=18 \
   --output_stride=16 \
   --decoder_output_stride=4 \
   --eval_crop_size=16,16 \
   --dataset="mydata" \
   --checkpoint_dir='/home/zhai/models/research/deeplab/exp/mydata_train/train' \
   --eval_logdir='/home/zhai/models/research/deeplab/exp/mydata_train/eval' \
   --dataset_dir='/home/zhai/dataset/lettuces/tfrecord' \
   --max_number_of_evaluations=1
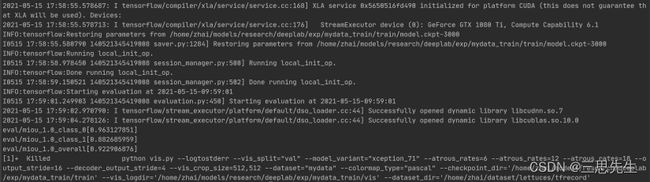 2、查看mIoU值:
tensorboard --logdir /home/zhai/models/research/deeplab/exp/mydata_train/eval --host=127.0.0.1
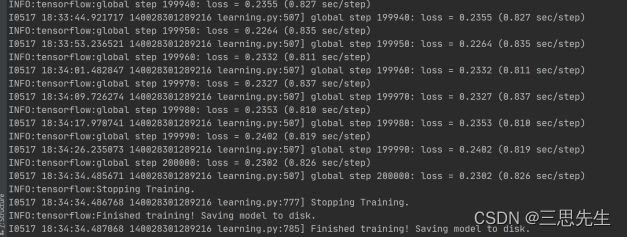
3、查看训练过程的loss:
tensorboard --logdir /home/zhai/models/research/deeplab/exp/mydata_train/train --host=127.0.0.1
训练完后的模型保存
python export_model.py \
 --checkpoint_path="/home/zhai/models/research/deeplab/exp/mydata_train/train/model.ckpt-200000" \
    --export_path="/home/zhai/models/research/deeplab/datasets/mydata/trainout/pb/frozen_inference_graph.pb"  \
    --model_variant="xception_71"  \
    --atrous_rates=6  \
    --atrous_rates=12  \
    --atrous_rates=18   \
    --output_stride=16  \
    --decoder_output_stride=4  \
    --num_classes=2 \
    --crop_size=512 \
    --crop_size=512  \
    --inference_scales=1.0
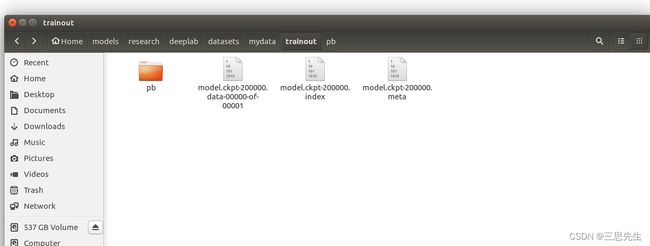

在此路径下/home/zhai/models/research/deeplab/datasets/mydata/trainout/pb/frozen_inference_graph.pb执行打包命令:
tar -czf frozen_inference_graph.pb.tar.gz frozen_inference_graph.pb
批量可视化分割结果

# coding: utf-8
import os
import tarfile

from matplotlib import gridspec
import matplotlib.pyplot as plt
import numpy as np
from PIL import Image
import tempfile
from six.moves import urllib
import tensorflow as tf

class DeepLabModel(object):
    """
    加载 DeepLab 模型;
    推断 Inference.
    """
    INPUT_TENSOR_NAME = 'ImageTensor:0'
    OUTPUT_TENSOR_NAME = 'SemanticPredictions:0'
    INPUT_SIZE = 512 ########和转换为.pb时的crop_size对应
    FROZEN_GRAPH_NAME = 'frozen_inference_graph'

    def __init__(self, tarball_path):
        """
        Creates and loads pretrained deeplab model.
        """
        self.graph = tf.Graph()

        graph_def = None
        # Extract frozen graph from tar archive.
        tar_file = tarfile.open(tarball_path)
        for tar_info in tar_file.getmembers():
            if self.FROZEN_GRAPH_NAME in os.path.basename(tar_info.name):
                file_handle = tar_file.extractfile(tar_info)
                graph_def = tf.GraphDef.FromString(file_handle.read())
                break

        tar_file.close()

        if graph_def is None:
            raise RuntimeError('Cannot find inference graph in tar archive.')

        with self.graph.as_default():
            tf.import_graph_def(graph_def, name='')

        self.sess = tf.Session(graph=self.graph)

    def run(self, image):
        """
        Runs inference on a single image.
        Args:
        image: A PIL.Image object, raw input image.
        Returns:
        resized_image: RGB image resized from original input image.
        seg_map: Segmentation map of `resized_image`.
        """
        width, height = image.size
        resize_ratio = 1.0 * self.INPUT_SIZE / max(width, height)
        target_size = (int(resize_ratio * width), int(resize_ratio * height))
        resized_image = image.convert('RGB').resize(target_size, Image.ANTIALIAS)
        batch_seg_map = self.sess.run(self.OUTPUT_TENSOR_NAME,
                                      feed_dict={self.INPUT_TENSOR_NAME: [np.asarray(resized_image)]})
        seg_map = batch_seg_map[0]
        return resized_image, seg_map


def create_pascal_label_colormap():
    """
    Creates a label colormap used in PASCAL VOC segmentation benchmark.
    Returns:
        A Colormap for visualizing segmentation results.
    """
    colormap = np.zeros((256, 3), dtype=int)
    ind = np.arange(256, dtype=int)

    for shift in reversed(range(8)):
        for channel in range(3):
            colormap[:, channel] |= ((ind >> channel) & 1) << shift
        ind >>= 3

    return colormap


def label_to_color_image(label):
    """
    Adds color defined by the dataset colormap to the label.
    Args:
        label: A 2D array with integer type, storing the segmentation label.
    Returns:
        result: A 2D array with floating type. The element of the array
        is the color indexed by the corresponding element in the input label
        to the PASCAL color map.
    Raises:
        ValueError: If label is not of rank 2 or its value is larger than color
        map maximum entry.
    """
    if label.ndim != 2:
        raise ValueError('Expect 2-D input label')

    colormap = create_pascal_label_colormap()

    if np.max(label) >= len(colormap):
        raise ValueError('label value too large.')

    return colormap[label]


def vis_segmentation(image, seg_map):
    """Visualizes input image, segmentation map and overlay view."""
    plt.figure(figsize=(15, 5))
    grid_spec = gridspec.GridSpec(1, 4, width_ratios=[6, 6, 6, 1])

    plt.subplot(grid_spec[0])
    plt.imshow(image)
    plt.axis('off')
    plt.title('input image')

    plt.subplot(grid_spec[1])
    seg_image = label_to_color_image(seg_map).astype(np.uint8)
    plt.imshow(seg_image)
    plt.axis('off')
    plt.title('segmentation map')

    plt.subplot(grid_spec[2])
    plt.imshow(image)
    plt.imshow(seg_image, alpha=0.7)
    plt.axis('off')
    plt.title('segmentation overlay')

    unique_labels = np.unique(seg_map)
    ax = plt.subplot(grid_spec[3])
    plt.imshow(FULL_COLOR_MAP[unique_labels].astype(np.uint8), interpolation='nearest')
    ax.yaxis.tick_right()
    plt.yticks(range(len(unique_labels)), LABEL_NAMES[unique_labels])
    plt.xticks([], [])
    ax.tick_params(width=0.0)
    plt.grid('off')
    plt.show()


# ##修改类别
LABEL_NAMES = np.asarray(
    ['background','lettuce'])

FULL_LABEL_MAP = np.arange(len(LABEL_NAMES)).reshape(len(LABEL_NAMES), 1)
FULL_COLOR_MAP = label_to_color_image(FULL_LABEL_MAP)

## Tensorflow 提供的模型下载
MODEL_NAME = 'xception71_dpc_cityscapes_trainfine'
# ['mobilenetv2_coco_voctrainaug', 'mobilenetv2_coco_voctrainval', 'xception_coco_voctrainaug', 'xception_coco_voctrainval']

_DOWNLOAD_URL_PREFIX = 'https://github.com/tensorflow/models/blob/master/research/deeplab/g3doc/model_zoo.md'
_MODEL_URLS = {'mobilenetv2_coco_voctrainaug': 'deeplabv3_mnv2_pascal_train_aug_2018_01_29.tar.gz',
               'mobilenetv2_coco_voctrainval': 'deeplabv3_mnv2_pascal_trainval_2018_01_29.tar.gz',
               'xception_coco_voctrainaug': 'deeplabv3_pascal_train_aug_2018_01_04.tar.gz',
               'xception_coco_voctrainval': 'deeplabv3_pascal_trainval_2018_01_04.tar.gz',
               'xception71_dpc_cityscapes_trainfine':'deeplab_cityscapes_xception71_trainfine_2018_09_08.tar.gz'}

# _TARBALL_NAME = 'deeplab_model.tar.gz'

# model_dir = tempfile.mkdtemp()
# tf.gfile.MakeDirs(model_dir)
#
# download_path = os.path.join(model_dir, _TARBALL_NAME)
# print('downloading model, this might take a while...')
# urllib.request.urlretrieve(_DOWNLOAD_URL_PREFIX + _MODEL_URLS[MODEL_NAME], download_path)
# print('download completed! loading DeepLab model...')


download_path = '/home/zhai/models/research/deeplab/datasets/mydata/trainout/pb/frozen_inference_graph.pb.tar.gz' #模型所在位置
#download_path = '/home/dreamdeck/Downloads/Tensorflow/models-master/research/deeplab/datasets/VOC2012/test_model/pb_53506.tar.gz'
#download_path = '/home/dreamdeck/Downloads/Tensorflow/models-master/research/deeplab/deeplabv3_cityscapes_train/deeplabv3_mnv2_pascal_train_aug_8bit/pb.tar.gz' #模型所在位置

MODEL = DeepLabModel(download_path)
print('model loaded successfully!')


##
def run_visualization(imagefile):
    """
    DeepLab 语义分割,并可视化结果.
    """
    orignal_im = Image.open(imagefile)
    print('running deeplab on image %s...' % imagefile)
    resized_im, seg_map = MODEL.run(orignal_im)

    vis_segmentation(resized_im, seg_map)


images_dir = '/home/zhai/dataset/cut'  # 测试图片目录所在位置
#images_dir = '/home/dreamdeck/Downloads/Tensorflow/models-master/research/deeplab/datasets/VOC2012/JPEGImages'
images = sorted(os.listdir(images_dir))
for imgfile in images:
    run_visualization(os.path.join(images_dir, imgfile))

print('Done.')
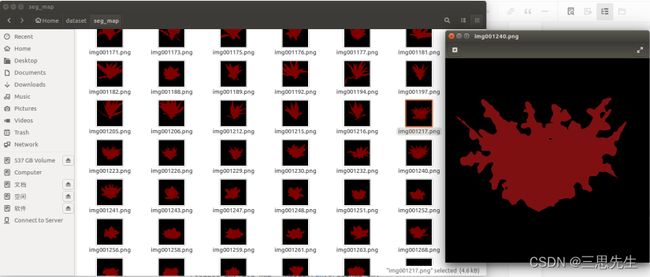
批量导出分割文件
# coding: utf-8
import os
import tarfile

from matplotlib import gridspec
import matplotlib.pyplot as plt
import numpy as np
from PIL import Image
import tempfile
from six.moves import urllib
import tensorflow as tf
import datetime

class DeepLabModel(object):
    """
    加载 DeepLab 模型;
    推断 Inference.
    """
    INPUT_TENSOR_NAME = 'ImageTensor:0'
    OUTPUT_TENSOR_NAME = 'SemanticPredictions:0'
    INPUT_SIZE = 512 ########和转换为.pb时的crop_size对应
    FROZEN_GRAPH_NAME = 'frozen_inference_graph'

    def __init__(self, tarball_path):
        """
        Creates and loads pretrained deeplab model.
        """
        self.graph = tf.Graph()

        graph_def = None
        # Extract frozen graph from tar archive.
        tar_file = tarfile.open(tarball_path)
        for tar_info in tar_file.getmembers():
            if self.FROZEN_GRAPH_NAME in os.path.basename(tar_info.name):
                file_handle = tar_file.extractfile(tar_info)
                graph_def = tf.GraphDef.FromString(file_handle.read())
                break

        tar_file.close()

        if graph_def is None:
            raise RuntimeError('Cannot find inference graph in tar archive.')

        with self.graph.as_default():
            tf.import_graph_def(graph_def, name='')

        self.sess = tf.Session(graph=self.graph)

    def run(self, image):
        """
        Runs inference on a single image.
        Args:
        image: A PIL.Image object, raw input image.
        Returns:
        resized_image: RGB image resized from original input image.
        seg_map: Segmentation map of `resized_image`.
        """
        width, height = image.size
        resize_ratio = 1.0 * self.INPUT_SIZE / max(width, height)
        target_size = (int(resize_ratio * width), int(resize_ratio * height))
        resized_image = image.convert('RGB').resize(target_size, Image.ANTIALIAS)
        batch_seg_map = self.sess.run(self.OUTPUT_TENSOR_NAME,
                                      feed_dict={self.INPUT_TENSOR_NAME: [np.asarray(resized_image)]})
        seg_map = batch_seg_map[0]
        return resized_image, seg_map


def create_pascal_label_colormap():
    """
    Creates a label colormap used in PASCAL VOC segmentation benchmark.
    Returns:
        A Colormap for visualizing segmentation results.
    """
    colormap = np.zeros((256, 3), dtype=int)
    ind = np.arange(256, dtype=int)

    for shift in reversed(range(8)):
        for channel in range(3):
            colormap[:, channel] |= ((ind >> channel) & 1) << shift
        ind >>= 3

    return colormap


def label_to_color_image(label):
    """
    Adds color defined by the dataset colormap to the label.
    Args:
        label: A 2D array with integer type, storing the segmentation label.
    Returns:
        result: A 2D array with floating type. The element of the array
        is the color indexed by the corresponding element in the input label
        to the PASCAL color map.
    Raises:
        ValueError: If label is not of rank 2 or its value is larger than color
        map maximum entry.
    """
    if label.ndim != 2:
        raise ValueError('Expect 2-D input label')

    colormap = create_pascal_label_colormap()

    if np.max(label) >= len(colormap):
        raise ValueError('label value too large.')

    return colormap[label]


def vis_segmentation(image, seg_map):
    """Visualizes input image, segmentation map and overlay view."""
    plt.figure(figsize=(15, 5))
    grid_spec = gridspec.GridSpec(1, 4, width_ratios=[6, 6, 6, 1])

    plt.subplot(grid_spec[0])
    plt.imshow(image)
    plt.axis('off')
    plt.title('input image')

    plt.subplot(grid_spec[1])
    seg_image = label_to_color_image(seg_map).astype(np.uint8)
    plt.imshow(seg_image)
    plt.axis('off')
    plt.title('segmentation map')

    plt.subplot(grid_spec[2])
    plt.imshow(image)
    plt.imshow(seg_image, alpha=0.7)
    plt.axis('off')
    plt.title('segmentation overlay')

    unique_labels = np.unique(seg_map)
    ax = plt.subplot(grid_spec[3])
    plt.imshow(FULL_COLOR_MAP[unique_labels].astype(np.uint8), interpolation='nearest')
    ax.yaxis.tick_right()
    plt.yticks(range(len(unique_labels)), LABEL_NAMES[unique_labels])
    plt.xticks([], [])
    ax.tick_params(width=0.0)
    plt.grid('off')
    plt.show()


# ##修改类别
LABEL_NAMES = np.asarray(
    ['background', 'lettuce'])

FULL_LABEL_MAP = np.arange(len(LABEL_NAMES)).reshape(len(LABEL_NAMES), 1)
FULL_COLOR_MAP = label_to_color_image(FULL_LABEL_MAP)

## Tensorflow 提供的模型下载
MODEL_NAME = 'xception71_dpc_cityscapes_trainfine'
# ['mobilenetv2_coco_voctrainaug', 'mobilenetv2_coco_voctrainval', 'xception_coco_voctrainaug', 'xception_coco_voctrainval']

_DOWNLOAD_URL_PREFIX = 'https://github.com/tensorflow/models/blob/master/research/deeplab/g3doc/model_zoo.md'
_MODEL_URLS = {'mobilenetv2_coco_voctrainaug': 'deeplabv3_mnv2_pascal_train_aug_2018_01_29.tar.gz',
               'mobilenetv2_coco_voctrainval': 'deeplabv3_mnv2_pascal_trainval_2018_01_29.tar.gz',
               'xception_coco_voctrainaug': 'deeplabv3_pascal_train_aug_2018_01_04.tar.gz',
               'xception_coco_voctrainval': 'deeplabv3_pascal_trainval_2018_01_04.tar.gz',
               'xception71_dpc_cityscapes_trainfine':'deeplab_cityscapes_xception71_trainfine_2018_09_08.tar.gz'}

# _TARBALL_NAME = 'deeplab_model.tar.gz'

# model_dir = tempfile.mkdtemp()
# tf.gfile.MakeDirs(model_dir)
#
# download_path = os.path.join(model_dir, _TARBALL_NAME)
# print('downloading model, this might take a while...')
# urllib.request.urlretrieve(_DOWNLOAD_URL_PREFIX + _MODEL_URLS[MODEL_NAME], download_path)
# print('download completed! loading DeepLab model...')


download_path = '/home/zhai/models/research/deeplab/datasets/mydata/trainout/pb/frozen_inference_graph.pb.tar.gz' #模型所在位置
#download_path = '/home/dreamdeck/Downloads/Tensorflow/models-master/research/deeplab/datasets/VOC2012/test_model/pb_53506.tar.gz'
#download_path = '/home/dreamdeck/Downloads/Tensorflow/models-master/research/deeplab/deeplabv3_cityscapes_train/deeplabv3_mnv2_pascal_train_aug_8bit/pb.tar.gz' #模型所在位置

MODEL = DeepLabModel(download_path)
print('model loaded successfully!')

def load_image(image_path):
    """从本地文件夹中加载图像"""
    img = Image.open(image_path)
    return img


def save_seg_image(seg_map, save_logdir):
    """save segmentation image"""
    colored_image = label_to_color_image(seg_map).astype(np.uint8)
    colored_image = Image.fromarray(colored_image)
    colored_image.save(save_logdir)

##
def run_visualization(image_path, saved_path, mode=False):
    """inferences deeplab model and visualizes results
    Args:
        image_path:path where image stores or url where can load image
        saved_path:path where segmentation images store
        mode:chose load image from local path or online, default False refers local path """
    start = datetime.datetime.now()
    if mode:
        try:
            f = urllib.request.urlopen(image_path)
            jpeg_str = f.read()
            original_im = Image.open(BytesIO(jpeg_str))
        except IOError:
            print('Cannot retrieve image.Please check url:' + image_path)
            return
        resized_im, seg_map = MODEL.run(original_im)
    else:
        if not os.path.exists(image_path) or not os.path.exists(saved_path):
            print('Error:cannot find image path!')
            return
        image_lists = os.listdir(image_path)
        length = len(image_lists)
        for i in range(0, length):
            print('predict the %dth image' % i)
            original_im = load_image(os.path.join(image_path, image_lists[i]))
        # print('running deeplab on image %s...' % image_path)
            resized_im, seg_map = MODEL.run(original_im)
            save_seg_image(seg_map, os.path.join(saved_path, image_lists[i]))
    end = datetime.datetime.now()
    print(end - start)
    vis_segmentation(resized_im, seg_map)

images_dir = '/home/zhai/dataset/cut'  # 测试图片目录所在位置
#images_dir = '/home/dreamdeck/Downloads/Tensorflow/models-master/research/deeplab/datasets/VOC2012/JPEGImages'
#images = sorted(os.listdir(images_dir))
save_path = '/home/zhai/dataset/seg_map'
# for imgfile in images:
#     run_visualization(images_dir, save_path)
run_visualization(images_dir, save_path)
print('Done.')