[自动驾驶系列一]Introduction to Self-Driving Cars
Introduction to Self-Driving Cars
- Module 1: The Requirements for Autonomy
-
- Lesson 1: Taxonomy of Driving(驾驶分类)
- Lesson 1:Practice
- Lesson 2: Requirements for Perception
- Lesson 2:Practice
- Lesson 3: Driving Decisions and Actions
- 测验1
- Module 2: Self-Driving Hardware and Software Architectures
-
- Lesson 1: Sensors and Computing Hardware
- Lesson 2: Hardware Configuration Design
- Lesson 3: Software Architecture
- Lesson 4: Environment Representation
- 测验2
- Module 3: Safety Assurance for Autonomous Vehicles
-
- Lesson 1: Safety Assurance for Self-Driving Vehicles
- Lesson 2: Industry Methods for Safety Assurance and Testing
- Lesson 3: Safety Frameworks for Self-Driving
- 测验3
- Module 4: Vehicle Dynamic Modeling
-
- Lesson 1: Kinematic Modeling in 2D
- Lesson 2: The Kinematic Bicycle Model
- Lesson 3: Dynamic Modeling in 2D
- Lesson 4: Longitudinal Vehicle Modeling
- Lesson 5: Lateral Dynamics of Bicycle Model
- Lesson 6: Vehicle Actuation
- Lesson 7: Tire Slip and Modeling
- 编程1
- 编程2
- Module 5: Vehicle Longitudinal Control
-
- Lesson 1: Proportional-Integral-Derivative (PID) Control
- Lesson 2: Longitudinal Speed Control with PID
- Lesson 3: Feedforward Speed Control
- 测验3
- Module 6: Vehicle Lateral Control
-
- Lesson 1: Introduction to Lateral Vehicle Control
- Lesson 2: Geometric Lateral Control - Pure Pursuit
- Lesson 3: Geometric Lateral Control - Stanley
- Lesson 4: Advanced Steering Control - MPC
- 测验4
- Module 7: Putting it all together
- Lesson 1: Carla Overview - Self-Driving Car Simulation
- Lesson 2: Final Project Overview
- Final Project Solution
很幸运的搜到了这门课程,作为某实验室的一个小白,对这个行业很有兴趣,希望真的会有那么一天,L5的实现给人们带来极大的便利。记录一下课程重要的ppt和课后作业,这个是多伦多大学的一门课程,COURSERA上可以找的到,配套的作业很不错,有精力的可以去申请一下。
https://www.coursera.org/specializations/self-driving-cars
Module 1: The Requirements for Autonomy
Lesson 1: Taxonomy of Driving(驾驶分类)
![[自动驾驶系列一]Introduction to Self-Driving Cars_第1张图片](http://img.e-com-net.com/image/info8/974dd3a70e4644f2ae832d30228f7a20.jpg)
- ODD:设计运行范围,自动驾驶系统被设计的起作用的条件及适用范围,把我们知道的天气环境、道路情况(直路、弯路的半径)、车速、车流量等信息作出测定,以确保系统的能力在安全的环境之内
![[自动驾驶系列一]Introduction to Self-Driving Cars_第2张图片](http://img.e-com-net.com/image/info8/ffeb71283340482ebb14d9594470eb1d.jpg)
![[自动驾驶系列一]Introduction to Self-Driving Cars_第3张图片](http://img.e-com-net.com/image/info8/05482ee01d6347d3a97aeb89c62356e8.jpg)
- Lateral control: 横向控制,左右转,直行或沿曲线行驶
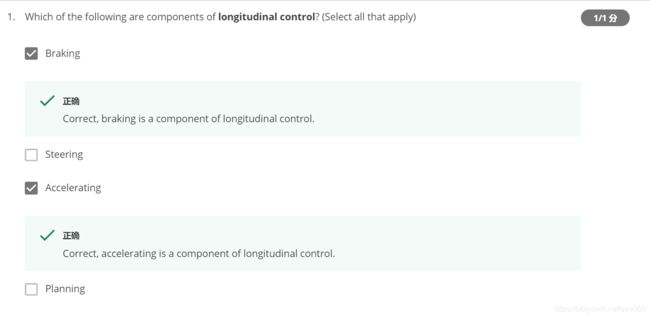
- Longitudinal control: 纵向控制,刹车加速控制汽车的位置或速度
- Object and Event Detection and Response(OEDR):感知和判断,对车辆纵向运动方向操作、通过对物体和事件检测、认知归类和后续响应,达到对车辆周围环境的监测和执行对应操作、车辆运动的计划还有对外信息的传递
![[自动驾驶系列一]Introduction to Self-Driving Cars_第4张图片](http://img.e-com-net.com/image/info8/7026051014424224adb19f5c508dd3c8.jpg)
![[自动驾驶系列一]Introduction to Self-Driving Cars_第5张图片](http://img.e-com-net.com/image/info8/c53d686cbe2d4100b9ee6c7e2f974a42.jpg)
![[自动驾驶系列一]Introduction to Self-Driving Cars_第6张图片](http://img.e-com-net.com/image/info8/b475b4e3884343d28be8dc0004f253e2.jpg)
![[自动驾驶系列一]Introduction to Self-Driving Cars_第7张图片](http://img.e-com-net.com/image/info8/ea55cee0592640d6887da1e6c198eb07.jpg)
![[自动驾驶系列一]Introduction to Self-Driving Cars_第8张图片](http://img.e-com-net.com/image/info8/2335b447be584d049ed83055eace9212.jpg)
![[自动驾驶系列一]Introduction to Self-Driving Cars_第9张图片](http://img.e-com-net.com/image/info8/2e4d93963c8d490d8542bf9866fc4c22.jpg)
![[自动驾驶系列一]Introduction to Self-Driving Cars_第10张图片](http://img.e-com-net.com/image/info8/7ff6bf99bf8d403c946e793b884e60e3.jpg)
Lesson 1:Practice
![[自动驾驶系列一]Introduction to Self-Driving Cars_第11张图片](http://img.e-com-net.com/image/info8/424c8a3153fb4cb2b994d5ecc5cc9a7c.jpg)
转弯:swerve
![[自动驾驶系列一]Introduction to Self-Driving Cars_第12张图片](http://img.e-com-net.com/image/info8/b0edbb0950e04282b0ed183a1a12bf37.jpg)
![[自动驾驶系列一]Introduction to Self-Driving Cars_第13张图片](http://img.e-com-net.com/image/info8/4181c60bcbd743aa8e756ff1165a7d7f.jpg)
![[自动驾驶系列一]Introduction to Self-Driving Cars_第14张图片](http://img.e-com-net.com/image/info8/9ce49dea77c9466c87cb99b5a6aeaae9.jpg)
Lesson 2: Requirements for Perception
![[自动驾驶系列一]Introduction to Self-Driving Cars_第15张图片](http://img.e-com-net.com/image/info8/cd390a56303744edb0ac561925548285.jpg)
![[自动驾驶系列一]Introduction to Self-Driving Cars_第16张图片](http://img.e-com-net.com/image/info8/c753ba3d3f5c41159d60fe1d9df23495.jpg)
![[自动驾驶系列一]Introduction to Self-Driving Cars_第17张图片](http://img.e-com-net.com/image/info8/527f334986bf4cc48d3e763174217f30.jpg)
curbs:路边![[自动驾驶系列一]Introduction to Self-Driving Cars_第18张图片](http://img.e-com-net.com/image/info8/4f873ce852034a028090c967c2d741c5.jpg)
![[自动驾驶系列一]Introduction to Self-Driving Cars_第19张图片](http://img.e-com-net.com/image/info8/ee5bf9658ccb4bf9a4900702f7e2dc71.jpg)
![[自动驾驶系列一]Introduction to Self-Driving Cars_第20张图片](http://img.e-com-net.com/image/info8/c8ecfe07577341ae8dbf97fd98f2e31f.jpg)
![[自动驾驶系列一]Introduction to Self-Driving Cars_第21张图片](http://img.e-com-net.com/image/info8/4b39d3a87c7846a395851f4f1e9bd1c0.jpg)
![[自动驾驶系列一]Introduction to Self-Driving Cars_第22张图片](http://img.e-com-net.com/image/info8/789b30c1e59a4490bf053618390b5c20.jpg)
illumination:照明
![[自动驾驶系列一]Introduction to Self-Driving Cars_第23张图片](http://img.e-com-net.com/image/info8/131c09c2f02c40f59b6de3689f9e2584.jpg)
Lesson 2:Practice
potholes: 坑洼
sidewalks:人行道
sensor occlusion:传感器阻塞
inertial:惯性的
![[自动驾驶系列一]Introduction to Self-Driving Cars_第24张图片](http://img.e-com-net.com/image/info8/352a04b3304943b6ae521c2fca394151.jpg)
![[自动驾驶系列一]Introduction to Self-Driving Cars_第25张图片](http://img.e-com-net.com/image/info8/50e7c7b9b600450fb321b9b5caea6757.jpg)
![[自动驾驶系列一]Introduction to Self-Driving Cars_第26张图片](http://img.e-com-net.com/image/info8/c74252f71dfa44529d5450b932482919.jpg)
![[自动驾驶系列一]Introduction to Self-Driving Cars_第27张图片](http://img.e-com-net.com/image/info8/95dcd07cc14043e5ad3150c5e1e6a88d.jpg)
![[自动驾驶系列一]Introduction to Self-Driving Cars_第28张图片](http://img.e-com-net.com/image/info8/2ec59ed892254833b7068e577f5b0d9d.jpg)
Lesson 3: Driving Decisions and Actions
![[自动驾驶系列一]Introduction to Self-Driving Cars_第29张图片](http://img.e-com-net.com/image/info8/de4ff49053a4455495a64f684d1255fa.jpg)
![[自动驾驶系列一]Introduction to Self-Driving Cars_第30张图片](http://img.e-com-net.com/image/info8/3fbc7ce8210f4631901b0698672e562e.jpg)
![[自动驾驶系列一]Introduction to Self-Driving Cars_第31张图片](http://img.e-com-net.com/image/info8/d5b7c38c495f4e30bb3b5cc2367350f2.jpg)
测验1
take a nap:小睡一下
![[自动驾驶系列一]Introduction to Self-Driving Cars_第32张图片](http://img.e-com-net.com/image/info8/d787b02fa34f4f9fa51f939f10309df8.jpg)
![[自动驾驶系列一]Introduction to Self-Driving Cars_第33张图片](http://img.e-com-net.com/image/info8/215e3398e2c947b3a325dd50e569393d.jpg)
![[自动驾驶系列一]Introduction to Self-Driving Cars_第34张图片](http://img.e-com-net.com/image/info8/01ac383f0ade4bf18ca487798448f468.jpg)
![[自动驾驶系列一]Introduction to Self-Driving Cars_第35张图片](http://img.e-com-net.com/image/info8/7562acaa3e5142e18c09d1157499919e.jpg)
![[自动驾驶系列一]Introduction to Self-Driving Cars_第36张图片](http://img.e-com-net.com/image/info8/dd162c62bb1241ac9f5a4bf1eb4fe202.jpg)
![[自动驾驶系列一]Introduction to Self-Driving Cars_第37张图片](http://img.e-com-net.com/image/info8/0b2e0080d42441e9807ec02e7c5408e0.jpg)
![[自动驾驶系列一]Introduction to Self-Driving Cars_第38张图片](http://img.e-com-net.com/image/info8/c143e2ee906345c7a417485189dd92ca.jpg)
![[自动驾驶系列一]Introduction to Self-Driving Cars_第39张图片](http://img.e-com-net.com/image/info8/9c6827f64dc9422dae5ea4fbf3c778b3.jpg)
![[自动驾驶系列一]Introduction to Self-Driving Cars_第40张图片](http://img.e-com-net.com/image/info8/2d0e7bf7e0ae4162bf1b009121e0df95.jpg)
![[自动驾驶系列一]Introduction to Self-Driving Cars_第41张图片](http://img.e-com-net.com/image/info8/c55b446e5bfd4a91931d3087484fcec3.jpg)
![[自动驾驶系列一]Introduction to Self-Driving Cars_第42张图片](http://img.e-com-net.com/image/info8/270e72bb85a3450d9f749ae94da8ffe7.jpg)
![[自动驾驶系列一]Introduction to Self-Driving Cars_第43张图片](http://img.e-com-net.com/image/info8/d46108c7d75f4599943fe29a0a3d3c71.jpg)
应该是B
![[自动驾驶系列一]Introduction to Self-Driving Cars_第44张图片](http://img.e-com-net.com/image/info8/44adc0d47ae64dec9bdf77073cc0053c.jpg)
![[自动驾驶系列一]Introduction to Self-Driving Cars_第45张图片](http://img.e-com-net.com/image/info8/a1cd3446cec1460aa48f50e6bf431704.jpg)
![[自动驾驶系列一]Introduction to Self-Driving Cars_第46张图片](http://img.e-com-net.com/image/info8/86ded4261cba47b69a6f980a32171d1f.jpg)
![[自动驾驶系列一]Introduction to Self-Driving Cars_第47张图片](http://img.e-com-net.com/image/info8/fffc76613b2c4f9ea6cf9992d2c15420.jpg)
![[自动驾驶系列一]Introduction to Self-Driving Cars_第48张图片](http://img.e-com-net.com/image/info8/cf4b0d8d511f402d9cca1f958206911e.jpg)
![[自动驾驶系列一]Introduction to Self-Driving Cars_第49张图片](http://img.e-com-net.com/image/info8/fe1dca786cc14a52b7a017d080890eab.jpg)
![[自动驾驶系列一]Introduction to Self-Driving Cars_第50张图片](http://img.e-com-net.com/image/info8/f68ef15f9ef14dbd93d8ce8acc81c15d.jpg)
Module 2: Self-Driving Hardware and Software Architectures
Lesson 1: Sensors and Computing Hardware
![[自动驾驶系列一]Introduction to Self-Driving Cars_第51张图片](http://img.e-com-net.com/image/info8/d45a5c0795ed46ee947c65ee5da091ab.jpg)
![[自动驾驶系列一]Introduction to Self-Driving Cars_第52张图片](http://img.e-com-net.com/image/info8/583f89dfbb3643d3acb66f9267ec9dfe.jpg)
stereo:立体的
![[自动驾驶系列一]Introduction to Self-Driving Cars_第53张图片](http://img.e-com-net.com/image/info8/7c0fa7000e3948768333c70f84c04537.jpg)
LIDAR——Light Detection And Ranging,GPS+IMU,更精确,900-1500nm,激光
RADAR——radio detection and ranging,4-12mm,无线电
![[自动驾驶系列一]Introduction to Self-Driving Cars_第54张图片](http://img.e-com-net.com/image/info8/a28423562d6e4e018ba6805c510518e5.jpg)
![[自动驾驶系列一]Introduction to Self-Driving Cars_第55张图片](http://img.e-com-net.com/image/info8/ff54c2a9cc2f45f9b51923f54c48f99d.jpg)
![[自动驾驶系列一]Introduction to Self-Driving Cars_第56张图片](http://img.e-com-net.com/image/info8/7aec84c0a0834e6b81e3aec74660098d.jpg)
![[自动驾驶系列一]Introduction to Self-Driving Cars_第57张图片](http://img.e-com-net.com/image/info8/cb19969214b944f88c2dcb78a1ff8721.jpg)
![[自动驾驶系列一]Introduction to Self-Driving Cars_第58张图片](http://img.e-com-net.com/image/info8/ef0acb508efe44f38cfb74b79f2b35ea.jpg)
![[自动驾驶系列一]Introduction to Self-Driving Cars_第59张图片](http://img.e-com-net.com/image/info8/8c682fc842174907967a743d11dbc122.jpg)
Lesson 2: Hardware Configuration Design
![[自动驾驶系列一]Introduction to Self-Driving Cars_第60张图片](http://img.e-com-net.com/image/info8/399ac13511ba4375b5fada8d5c0f2664.jpg)
![[自动驾驶系列一]Introduction to Self-Driving Cars_第61张图片](http://img.e-com-net.com/image/info8/3c4425705f1146618f728e4370c81ba4.jpg)
![[自动驾驶系列一]Introduction to Self-Driving Cars_第62张图片](http://img.e-com-net.com/image/info8/61804009217e4b018e6fce728ce9d2d5.jpg)
![[自动驾驶系列一]Introduction to Self-Driving Cars_第63张图片](http://img.e-com-net.com/image/info8/3c49a7fd5ccf4bfa82360895150f1e97.jpg)
![[自动驾驶系列一]Introduction to Self-Driving Cars_第64张图片](http://img.e-com-net.com/image/info8/e58208a00af04278b689ca471f6a4c4c.jpg)
![[自动驾驶系列一]Introduction to Self-Driving Cars_第65张图片](http://img.e-com-net.com/image/info8/6981beee41d84cfe9a7d046e1f68026f.jpg)
![[自动驾驶系列一]Introduction to Self-Driving Cars_第66张图片](http://img.e-com-net.com/image/info8/f4f6362435244ff6a1b134da5487cc6b.jpg)
![[自动驾驶系列一]Introduction to Self-Driving Cars_第67张图片](http://img.e-com-net.com/image/info8/6e07e0246d904eda88427e3de1db47a1.jpg)
![[自动驾驶系列一]Introduction to Self-Driving Cars_第68张图片](http://img.e-com-net.com/image/info8/810cc68817464fc8a2353db3bc2f0fb1.jpg)
![[自动驾驶系列一]Introduction to Self-Driving Cars_第69张图片](http://img.e-com-net.com/image/info8/ccf98c397aee43bc9d9c04d8fe4708c0.jpg)
![[自动驾驶系列一]Introduction to Self-Driving Cars_第70张图片](http://img.e-com-net.com/image/info8/3052ac3242244925bf705a8fd5386aae.jpg)
![[自动驾驶系列一]Introduction to Self-Driving Cars_第71张图片](http://img.e-com-net.com/image/info8/32905ff1303d40ac86cf1e1f8a69e019.jpg)
![[自动驾驶系列一]Introduction to Self-Driving Cars_第72张图片](http://img.e-com-net.com/image/info8/b2aca8974220430c89f0a869bdfb3cd1.jpg)
![[自动驾驶系列一]Introduction to Self-Driving Cars_第73张图片](http://img.e-com-net.com/image/info8/0f23eec43b394a869fd92753bf9d092d.jpg)
![[自动驾驶系列一]Introduction to Self-Driving Cars_第74张图片](http://img.e-com-net.com/image/info8/9ec97c58539b43678b7a7c3fd855c224.jpg)
![[自动驾驶系列一]Introduction to Self-Driving Cars_第75张图片](http://img.e-com-net.com/image/info8/482f475d6c514ed5bc9c5f68937f642f.jpg)
![[自动驾驶系列一]Introduction to Self-Driving Cars_第76张图片](http://img.e-com-net.com/image/info8/b15d57a21bce4ed398de22d8bde04bc4.jpg)

Lesson 3: Software Architecture
CARLA:
![[自动驾驶系列一]Introduction to Self-Driving Cars_第77张图片](http://img.e-com-net.com/image/info8/c659701ba316473bb55dec32bc5b1fa3.jpg)
感知,建图,规划,控制,监督
![[自动驾驶系列一]Introduction to Self-Driving Cars_第78张图片](http://img.e-com-net.com/image/info8/d1d21180d2af42c1aa90f7748abcab2e.jpg)
![[自动驾驶系列一]Introduction to Self-Driving Cars_第79张图片](http://img.e-com-net.com/image/info8/6f57b5d3afad4c84bd00fa9b4177f0f3.jpg)
三种地图
![[自动驾驶系列一]Introduction to Self-Driving Cars_第80张图片](http://img.e-com-net.com/image/info8/806d7e48943e4f6fb9f5b1c361fc9c6e.jpg)
![[自动驾驶系列一]Introduction to Self-Driving Cars_第81张图片](http://img.e-com-net.com/image/info8/0263618a13a343e4a742a70d4d74e3f3.jpg)
![[自动驾驶系列一]Introduction to Self-Driving Cars_第82张图片](http://img.e-com-net.com/image/info8/40cafebe2ac64aefb4b7e01ff10ff18c.jpg)
![[自动驾驶系列一]Introduction to Self-Driving Cars_第83张图片](http://img.e-com-net.com/image/info8/42b3e70c828f463980f1c2df443475b7.jpg)
![[自动驾驶系列一]Introduction to Self-Driving Cars_第84张图片](http://img.e-com-net.com/image/info8/1810d573377544abb6a66018d096f385.jpg)
![[自动驾驶系列一]Introduction to Self-Driving Cars_第85张图片](http://img.e-com-net.com/image/info8/7a4beadc9d8f465990c242b414edf7f2.jpg)
![[自动驾驶系列一]Introduction to Self-Driving Cars_第86张图片](http://img.e-com-net.com/image/info8/49ecff961c77454587ebfda79bd8578f.jpg)

参考这篇文章有几个常见的单词
ego-vehicle 表示自我概念呢,用来表示被自动控制的车辆,相对于没被自动控制的车辆,或者也叫self-vehicle
类似的,经常用exo来表示其他的车辆,如exo-agent表示外智能体
Lesson 4: Environment Representation
![[自动驾驶系列一]Introduction to Self-Driving Cars_第87张图片](http://img.e-com-net.com/image/info8/8c96a532e7cb4d728a1302bf35aee49e.jpg)
![[自动驾驶系列一]Introduction to Self-Driving Cars_第88张图片](http://img.e-com-net.com/image/info8/f96e47db51474d68893b6bf03dbbffdc.jpg)
![[自动驾驶系列一]Introduction to Self-Driving Cars_第89张图片](http://img.e-com-net.com/image/info8/b7d38a42f23b4045887392bc81755eb5.jpg)
测验2
![[自动驾驶系列一]Introduction to Self-Driving Cars_第90张图片](http://img.e-com-net.com/image/info8/2e3a3b4a4cab40f7b80c553bf1223e15.jpg)
![[自动驾驶系列一]Introduction to Self-Driving Cars_第91张图片](http://img.e-com-net.com/image/info8/7878daa218334b818332fd64488c9c18.jpg)
![[自动驾驶系列一]Introduction to Self-Driving Cars_第92张图片](http://img.e-com-net.com/image/info8/0ce579791d3f45a6ac576121f56af9cb.jpg)
![[自动驾驶系列一]Introduction to Self-Driving Cars_第93张图片](http://img.e-com-net.com/image/info8/c14b835431b9418983d2011c85c12653.jpg)
![[自动驾驶系列一]Introduction to Self-Driving Cars_第94张图片](http://img.e-com-net.com/image/info8/09cc7bb6652142748f5f96ef4c42286d.jpg)
![[自动驾驶系列一]Introduction to Self-Driving Cars_第95张图片](http://img.e-com-net.com/image/info8/1024babb9c29423a85e5186d7b949bce.jpg)
由于定位测绘(localization mapping)只涉及识别车辆在环境中的姿势,因此可以使用点特征或物体位置,不需要密集地覆盖整个环境,而占位网格测绘(occupancy grid mapping)必须捕捉所有需要避开的障碍物的位置,因此必须密集。
localization mapping是估计自主车辆如何在环境中移动的关键测量,依赖于将当前时间的传感器测量结果与定位图进行匹配。占位网格图以车辆周围被占用和未被占用的单元格的形式存储实时避撞数据。
![[自动驾驶系列一]Introduction to Self-Driving Cars_第96张图片](http://img.e-com-net.com/image/info8/beb8484635094bef86cb31ca1692f2f5.jpg)
![[自动驾驶系列一]Introduction to Self-Driving Cars_第97张图片](http://img.e-com-net.com/image/info8/051b357d30294bca9bd30c5d72096579.jpg)
![[自动驾驶系列一]Introduction to Self-Driving Cars_第98张图片](http://img.e-com-net.com/image/info8/ce62a3ab3d5f496da849555ee442dc67.jpg)
![[自动驾驶系列一]Introduction to Self-Driving Cars_第99张图片](http://img.e-com-net.com/image/info8/71337a7ad471424b88f8ff255b120fe5.jpg)
![[自动驾驶系列一]Introduction to Self-Driving Cars_第100张图片](http://img.e-com-net.com/image/info8/f21827beaa844c6e8975391b0a6cdbb7.jpg)
Module 3: Safety Assurance for Autonomous Vehicles
Lesson 1: Safety Assurance for Self-Driving Vehicles
![[自动驾驶系列一]Introduction to Self-Driving Cars_第101张图片](http://img.e-com-net.com/image/info8/32fe40c90a2d4bb78e09253303db5837.jpg)
![[自动驾驶系列一]Introduction to Self-Driving Cars_第102张图片](http://img.e-com-net.com/image/info8/62837b3e68484e8f90bbedc585f8541c.jpg)
Lesson 2: Industry Methods for Safety Assurance and Testing
![[自动驾驶系列一]Introduction to Self-Driving Cars_第103张图片](http://img.e-com-net.com/image/info8/b3dcb03b990c495082eb1bc379e3927d.jpg)
![[自动驾驶系列一]Introduction to Self-Driving Cars_第104张图片](http://img.e-com-net.com/image/info8/9c8fd70aa745446792a427b2fbbb1693.jpg)
![[自动驾驶系列一]Introduction to Self-Driving Cars_第105张图片](http://img.e-com-net.com/image/info8/35ae1779fd4a4b4391dbf4c92c753eb7.jpg)
FMEA: Failure Mode and Effects Analysis
一种由下而上(bottom up)的失败分析方法,衡量个别原因和决定其在更高层系统中的影响
![[自动驾驶系列一]Introduction to Self-Driving Cars_第106张图片](http://img.e-com-net.com/image/info8/773d8b73030f45e59bfb5df414958a01.jpg)
![[自动驾驶系列一]Introduction to Self-Driving Cars_第107张图片](http://img.e-com-net.com/image/info8/69e1d8912d0d48d1b76cc1783e6d2e54.jpg)
![[自动驾驶系列一]Introduction to Self-Driving Cars_第108张图片](http://img.e-com-net.com/image/info8/8379ebfdb79c430faa9577d01ccf82d0.jpg)
Lesson 3: Safety Frameworks for Self-Driving
![[自动驾驶系列一]Introduction to Self-Driving Cars_第109张图片](http://img.e-com-net.com/image/info8/f4621152ccd747c4a07b3d0ed4035f38.jpg)
![[自动驾驶系列一]Introduction to Self-Driving Cars_第110张图片](http://img.e-com-net.com/image/info8/27424e560fdf4a96bc95e9f71f524abd.jpg)
![[自动驾驶系列一]Introduction to Self-Driving Cars_第111张图片](http://img.e-com-net.com/image/info8/7f99b7293326433a970b8fa5c69d6714.jpg)
![[自动驾驶系列一]Introduction to Self-Driving Cars_第112张图片](http://img.e-com-net.com/image/info8/cb69cb2c54474ee68c8b43866e364d1a.jpg)
![[自动驾驶系列一]Introduction to Self-Driving Cars_第113张图片](http://img.e-com-net.com/image/info8/45765fa25c9d4427bc4396e29dfd2c79.jpg)
![[自动驾驶系列一]Introduction to Self-Driving Cars_第114张图片](http://img.e-com-net.com/image/info8/df13752062d84685a7505364c37c9c3c.jpg)
![[自动驾驶系列一]Introduction to Self-Driving Cars_第115张图片](http://img.e-com-net.com/image/info8/81f6842d7a76433597e652d101d73dff.jpg)
测验3
rollover 车辆翻滚
intersection 交叉路口
lane change 变道
rear-end 追尾
road departure 失控冲出路面事故
扩展:
- head-on collision 迎头对撞事故
- rear-end collision 追尾事故;
- Back-up collisions 倒车事故;
- side collisions 侧面撞击事故;
- run-off-road collision / roadway departure / road departure 失控冲出路面事故;
- rollovers 翻车事故;
- pile-up / multiple vehicle collision 多车相撞事故;
- hit-and-run incident 肇事逃逸事故
![[自动驾驶系列一]Introduction to Self-Driving Cars_第116张图片](http://img.e-com-net.com/image/info8/d6911415b6ae4d41939d95129289ce56.jpg)
![[自动驾驶系列一]Introduction to Self-Driving Cars_第117张图片](http://img.e-com-net.com/image/info8/dc6e14f3e0c0462e8f1ebad637be2704.jpg)
![[自动驾驶系列一]Introduction to Self-Driving Cars_第118张图片](http://img.e-com-net.com/image/info8/05de935ae1634d9fb88d34422276f13a.jpg)
![[自动驾驶系列一]Introduction to Self-Driving Cars_第119张图片](http://img.e-com-net.com/image/info8/7e838c9fd82147c885948cefd4255395.jpg)

![[自动驾驶系列一]Introduction to Self-Driving Cars_第120张图片](http://img.e-com-net.com/image/info8/f5cb13c8d24a4bc1b52128269b471710.jpg)
![[自动驾驶系列一]Introduction to Self-Driving Cars_第121张图片](http://img.e-com-net.com/image/info8/cd0e2ad8d5214343a408e8f41bca9c5d.jpg)
![[自动驾驶系列一]Introduction to Self-Driving Cars_第122张图片](http://img.e-com-net.com/image/info8/bdab3003e0df42a7bdb4d8583b40f5e5.jpg)
![[自动驾驶系列一]Introduction to Self-Driving Cars_第123张图片](http://img.e-com-net.com/image/info8/5b7862c03d954a6bbf200174f76f8ef0.jpg)
![[自动驾驶系列一]Introduction to Self-Driving Cars_第124张图片](http://img.e-com-net.com/image/info8/08f6279c11f24856b2cb0e38f479cbf9.jpg)
![[自动驾驶系列一]Introduction to Self-Driving Cars_第125张图片](http://img.e-com-net.com/image/info8/7a0505c4fe32474b9497f78e2109577f.jpg)
![[自动驾驶系列一]Introduction to Self-Driving Cars_第126张图片](http://img.e-com-net.com/image/info8/7df1b6fe105844938f45ac548efbb8c5.jpg)
![[自动驾驶系列一]Introduction to Self-Driving Cars_第127张图片](http://img.e-com-net.com/image/info8/80f43c94692e42f2baef0cb79b9cb0e5.jpg)
![[自动驾驶系列一]Introduction to Self-Driving Cars_第128张图片](http://img.e-com-net.com/image/info8/63c8a5a263974159ae01af4588c53825.jpg)
Module 4: Vehicle Dynamic Modeling
Lesson 1: Kinematic Modeling in 2D
![[自动驾驶系列一]Introduction to Self-Driving Cars_第129张图片](http://img.e-com-net.com/image/info8/39735f9e78f4472fbb7e47ad7839edcc.jpg)
![[自动驾驶系列一]Introduction to Self-Driving Cars_第130张图片](http://img.e-com-net.com/image/info8/ec8d1b021659432fbe951420c00262ae.jpg)
![[自动驾驶系列一]Introduction to Self-Driving Cars_第131张图片](http://img.e-com-net.com/image/info8/2592ed1c11d24dc9a64bb793b7dc05ce.jpg)
![[自动驾驶系列一]Introduction to Self-Driving Cars_第132张图片](http://img.e-com-net.com/image/info8/a50c3b11c24545de9da9a5cbce97830e.jpg)
![[自动驾驶系列一]Introduction to Self-Driving Cars_第133张图片](http://img.e-com-net.com/image/info8/dec6a230f5e349c7b0507edaed8680da.jpg)
![[自动驾驶系列一]Introduction to Self-Driving Cars_第134张图片](http://img.e-com-net.com/image/info8/ca3b1428e50c44d8b0bcf2abaf3c439e.jpg)
![[自动驾驶系列一]Introduction to Self-Driving Cars_第135张图片](http://img.e-com-net.com/image/info8/e5e0fed20e88411fa1874ddc28f95722.jpg)
![[自动驾驶系列一]Introduction to Self-Driving Cars_第136张图片](http://img.e-com-net.com/image/info8/f5b4ed46c56c4b07949e57bacb96a187.jpg)
![[自动驾驶系列一]Introduction to Self-Driving Cars_第137张图片](http://img.e-com-net.com/image/info8/5917b77010a9457b865d9824cabf3103.jpg)
Lesson 2: The Kinematic Bicycle Model
![[自动驾驶系列一]Introduction to Self-Driving Cars_第138张图片](http://img.e-com-net.com/image/info8/c4cd7e1d6d7b4051b28af478c12b062a.jpg)
![[自动驾驶系列一]Introduction to Self-Driving Cars_第139张图片](http://img.e-com-net.com/image/info8/a280b51501514ac49e1b9755aa01b65e.jpg)
![[自动驾驶系列一]Introduction to Self-Driving Cars_第140张图片](http://img.e-com-net.com/image/info8/3b4eda6d02d2457297b0d2aa79440502.jpg)
![[自动驾驶系列一]Introduction to Self-Driving Cars_第141张图片](http://img.e-com-net.com/image/info8/3bff1fa7640b4aa1a88fd7fceabae098.jpg)
![[自动驾驶系列一]Introduction to Self-Driving Cars_第142张图片](http://img.e-com-net.com/image/info8/3a747aaf1b0f4f13ac432ef5e7370dc1.jpg)
Lesson 3: Dynamic Modeling in 2D
![[自动驾驶系列一]Introduction to Self-Driving Cars_第143张图片](http://img.e-com-net.com/image/info8/97863c25649644fd980d0c7e2b772652.jpg)
![[自动驾驶系列一]Introduction to Self-Driving Cars_第144张图片](http://img.e-com-net.com/image/info8/6d7898a48b55492b8e187ab2357942ba.jpg)
Lesson 4: Longitudinal Vehicle Modeling
Torque converter:变矩器
![[自动驾驶系列一]Introduction to Self-Driving Cars_第145张图片](http://img.e-com-net.com/image/info8/43a30ac933f44e069624c585ea31c864.jpg)
![[自动驾驶系列一]Introduction to Self-Driving Cars_第146张图片](http://img.e-com-net.com/image/info8/7139f9d7ad94477a9460a2cd2ef2917e.jpg)
Lesson 5: Lateral Dynamics of Bicycle Model
decouple:解耦
tire force:轮胎力
stiffness:刚性

![[自动驾驶系列一]Introduction to Self-Driving Cars_第147张图片](http://img.e-com-net.com/image/info8/cc31741305964c74ab18739c4add4641.jpg)
Lesson 6: Vehicle Actuation
kinematics:动力学
![[自动驾驶系列一]Introduction to Self-Driving Cars_第148张图片](http://img.e-com-net.com/image/info8/62d95f46c8c843d3920d48e7d80cc4d2.jpg)
![[自动驾驶系列一]Introduction to Self-Driving Cars_第149张图片](http://img.e-com-net.com/image/info8/09ba574d451c4789a5aef9b872d02351.jpg)
![[自动驾驶系列一]Introduction to Self-Driving Cars_第150张图片](http://img.e-com-net.com/image/info8/6f31cc8c56dc490b8acd7ef73be883aa.jpg)
![[自动驾驶系列一]Introduction to Self-Driving Cars_第151张图片](http://img.e-com-net.com/image/info8/4a8da5b2cb264b0a84761edca6ffdf7b.jpg)
gear ratios 齿轮比
whell torque 扭矩
![[自动驾驶系列一]Introduction to Self-Driving Cars_第152张图片](http://img.e-com-net.com/image/info8/8eceb363619d4a9c9069e5f084f62e81.jpg)
Lesson 7: Tire Slip and Modeling
编程1
在本笔记本中,你将实现自行车运动学模型。该模型接受速度和转向率的输入,并通过自行车运动学方程来实现。一旦模型实现,你将提供一组输入来驱动自行车在图8的轨迹。
自行车运动学由以下方程组控制。
![[自动驾驶系列一]Introduction to Self-Driving Cars_第153张图片](http://img.e-com-net.com/image/info8/ba5996e3af144441a8144bfcdadb6372.jpg)
其中输入为自行车速度v和转向角率ω。输入也可以直接是转向角δ,而不是简化后的速率。Python模型将允许我们实现这两种情况。
为了创建这个模型,利用Python类对象是个好主意。这使我们可以存储状态变量,以及为实现自行车运动学而制作函数。
自行车的初始条件为零,最大转弯速率为1.22rad/s,轴距长度为2m,从后轴到其质量中心的长度为1.2m。
从这些条件出发,我们初始化Python类如下。
from notebook_grader import BicycleSolution, grade_bicycle
import numpy as np
import matplotlib.pyplot as plt
import matplotlib.image as mpimg

class Bicycle():
    def __init__(self):
        self.xc = 0
        self.yc = 0
        self.theta = 0
        self.delta = 0
        self.beta = 0

        self.L = 2
        self.lr = 1.2
        self.w_max = 1.22

        self.sample_time = 0.01

    def reset(self):
        self.xc = 0
        self.yc = 0
        self.theta = 0
        self.delta = 0
        self.beta = 0
当通过时间传播运动学时,数值积分需要一个采样时间。这个时间被设置为10毫秒。我们还有一个复位函数,将所有的状态变量设置为0。
有了这个采样时间,使用下一个单元格中定义的函数步骤来实现运动学模型。该函数应该将速度+角速率作为输入,并更新状态变量。不要忘了自行车的最大转弯率!
class Bicycle(Bicycle):
    def step(self, v, w):
        # ==================================
        #  Implement kinematic model here
        # ==================================
        class Bicycle(Bicycle):
    def step(self, v, w):
        # ==================================
        #  Implement kinematic model here
        # ==================================
        if w > 0:
            w = min(w,self.w_max)
        else:
            w = max(w,-self.w_max)

        sample_T = 10e-3

        # bicycle kinematics

        xc_dot= v * np.cos(self.theta + self.beta)
        yc_dot= v * np.sin(self.theta+self.beta)
        theta_dot= v * np.cos(self.beta) * np.tan(self.delta) / self.L
        delta_dot= w

        # update the state variables

        self.xc += xc_dot * sample_T
        self.yc += yc_dot * sample_T
        self.theta += theta_dot * sample_T
        self.delta += delta_dot * sample_T

        pass


        pass
有了模型设置,我们现在可以开始给自行车输入并产生轨迹。
假设我们希望模型在20秒内走完一个半径为10米的圆。利用曲率半径和转向角之间的关系,可以计算出所需的转向角。
![[自动驾驶系列一]Introduction to Self-Driving Cars_第154张图片](http://img.e-com-net.com/image/info8/57754b2d4d6e4af28575b0ddb1f37dcf.jpg)
如果使用模拟自行车模型直接将转向角设置为0.1974,那么自行车将在圆周内行驶,而不需要任何额外的转向输入。
所需的速度可以从圆周上计算出来。
![[自动驾驶系列一]Introduction to Self-Driving Cars_第155张图片](http://img.e-com-net.com/image/info8/27b881dcdb7d41ebb248da422bc404cc.jpg)
现在,我们可以在循环中实现这一点,以逐步完成模型方程。我们还将与您的模型一起运行我们的自行车模型解决方案,以显示您的预期轨迹。这将帮助您验证模型的正确性。
sample_time = 0.01
time_end = 20
model = Bicycle()
solution_model = BicycleSolution()

# set delta directly
model.delta = np.arctan(2/10)
solution_model.delta = np.arctan(2/10)

t_data = np.arange(0,time_end,sample_time)
x_data = np.zeros_like(t_data)
y_data = np.zeros_like(t_data)
x_solution = np.zeros_like(t_data)
y_solution = np.zeros_like(t_data)

for i in range(t_data.shape[0]):
    x_data[i] = model.xc
    y_data[i] = model.yc
    model.step(np.pi, 0)

    x_solution[i] = solution_model.xc
    y_solution[i] = solution_model.yc
    solution_model.step(np.pi, 0)

    #model.beta = 0
    #solution_model.beta=0

plt.axis('equal')
plt.plot(x_data, y_data,label='Learner Model')
plt.plot(x_solution, y_solution,label='Solution Model')
plt.legend()
plt.show()
上图显示了所需的半径为10米的圆,路径略有偏移,这是由于β造成的侧滑效应。通过取消循环中最后一行的注释,强制β=0,你可以看到偏移消失了,圆的中心位置变成了(0,10)。
然而,在实践中,转向角不能直接设置,必须通过角速率输入ω来改变。下面的单元格对此进行了修正,并设置角速率输入,生成相同的圆轨迹。速度v仍然保持在π m/s。
sample_time = 0.01
time_end = 20
model.reset()
solution_model.reset()

t_data = np.arange(0,time_end,sample_time)
x_data = np.zeros_like(t_data)
y_data = np.zeros_like(t_data)
x_solution = np.zeros_like(t_data)
y_solution = np.zeros_like(t_data)

for i in range(t_data.shape[0]):
    x_data[i] = model.xc
    y_data[i] = model.yc

    if model.delta < np.arctan(2/10):
        model.step(np.pi, model.w_max)
    else:
        model.step(np.pi, 0)

    x_solution[i] = solution_model.xc
    y_solution[i] = solution_model.yc

    if solution_model.delta < np.arctan(2/10):
        solution_model.step(np.pi, model.w_max)
    else:
        solution_model.step(np.pi, 0)

plt.axis('equal')
plt.plot(x_data, y_data,label='Learner Model')
plt.plot(x_solution, y_solution,label='Solution Model')
plt.legend()
plt.show()
![[自动驾驶系列一]Introduction to Self-Driving Cars_第156张图片](http://img.e-com-net.com/image/info8/c69b65b9dccb4128989843d04dfd2a11.jpg)
下面是一些其他的轨迹示例:正方形路径、螺旋路径和波浪路径。取消标注每个部分来查看。
sample_time = 0.01
time_end = 60
model.reset()
solution_model.reset()

t_data = np.arange(0,time_end,sample_time)
x_data = np.zeros_like(t_data)
y_data = np.zeros_like(t_data)
x_solution = np.zeros_like(t_data)
y_solution = np.zeros_like(t_data)

# maintain velocity at 4 m/s
v_data = np.zeros_like(t_data)
v_data[:] = 4

w_data = np.zeros_like(t_data)

# ==================================
#  Square Path: set w at corners only
# ==================================
w_data[670:670+100] = 0.753
w_data[670+100:670+100*2] = -0.753
w_data[2210:2210+100] = 0.753
w_data[2210+100:2210+100*2] = -0.753
w_data[3670:3670+100] = 0.753
w_data[3670+100:3670+100*2] = -0.753
w_data[5220:5220+100] = 0.753
w_data[5220+100:5220+100*2] = -0.753

# ==================================
#  Spiral Path: high positive w, then small negative w
# ==================================
# w_data[:] = -1/100
# w_data[0:100] = 1

# ==================================
#  Wave Path: square wave w input
# ==================================
#w_data[:] = 0
#w_data[0:100] = 1
#w_data[100:300] = -1
#w_data[300:500] = 1
#w_data[500:5700] = np.tile(w_data[100:500], 13)
#w_data[5700:] = -1

# ==================================
#  Step through bicycle model
# ==================================
for i in range(t_data.shape[0]):
    x_data[i] = model.xc
    y_data[i] = model.yc
    model.step(v_data[i], w_data[i])

    x_solution[i] = solution_model.xc
    y_solution[i] = solution_model.yc
    solution_model.step(v_data[i], w_data[i])

plt.axis('equal')
plt.plot(x_data, y_data,label='Learner Model')
plt.plot(x_solution, y_solution,label='Solution Model')
plt.legend()
plt.show()
![[自动驾驶系列一]Introduction to Self-Driving Cars_第157张图片](http://img.e-com-net.com/image/info8/cc3c6c016c644225827bac2cbf436c8c.jpg)
现在我们想让自行车走一个图八的轨迹。图八中的两个圆的半径都是8米,路径应该在30秒内完成。路径从左边圆的底部开始,如下图所示。
![[自动驾驶系列一]Introduction to Self-Driving Cars_第158张图片](http://img.e-com-net.com/image/info8/aab7a45e13044bc59da770c9bde6b462.jpg)
确定产生这种轨迹所需的速度和转向率输入,并在下面的单元格中实现。确保将您的输入保存到数组v_data和w_data中,这些将用于对您的解决方案进行评分。下面的单元格也绘制了你自己的模型所产生的轨迹。
sample_time = 0.01
time_end = 30
model.reset()

t_data = np.arange(0,time_end,sample_time)
x_data = np.zeros_like(t_data)
y_data = np.zeros_like(t_data)
v_data = np.zeros_like(t_data)
w_data = np.zeros_like(t_data)

# ==================================
#  Learner solution begins here
# ==================================
radius=8
#delta=np.arctan(np.arctan(np.arctan(np.arctan(model.L/radius))))
#delta=np.arctan(np.arctan(np.arctan(model.L/radius)))
delta=np.arctan(np.arctan(model.L/radius))
#delta=np.arctan(model.L/radius)
delta=0.983*np.arctan(model.L/radius)
print(delta)
print(np.arctan(np.arctan(model.L/radius)))
v_data[:]=2*2*np.pi*radius/time_end

for i in range(t_data.shape[0]):
    x_data[i]=model.xc
    y_data[i]=model.yc

    #w direction will change in first 1/4 circle (t/8) and 5/4 circle (5t/8)
    if i< t_data.shape[0]/8:
        # if model delta < delta then we should use max w
        if model.delta<delta:
            temp_w=abs(model.delta-delta)/model.delta*model.w_max
            if temp_w>0:
                w=min(temp_w,model.w_max)
            else:
                w=max(temp_w,-model.w_max)
            model.step(v_data[i],w)
            w_data[i]=w
            #print(w_data[i],t_data[i])
        #else we should use w=0 don't turn your front wheel
        else:
            model.step(v_data[i],0)
            #w_data[i]=0

    elif i< 5*t_data.shape[0]/8:
        #print(model.delta,delta,t_data[i])
        if model.delta>-delta:
            model.step(v_data[i],-model.w_max)
            w_data[i]=-model.w_max
            #print(w_data[i],t_data[i])
        else:
            model.step(v_data[i],0)
            #w_data[i]=0
    else:
        if model.delta<delta:
            model.step(v_data[i],model.w_max)
            w_data[i]=model.w_max
        else:
            model.step(v_data[i],0)
            #w_data[i]=0
#     model.beta = 0
#     solution_model.beta=0

# ==================================
#  Learner solution ends here
# ==================================
plt.axis('equal')
plt.plot(x_data, y_data)
plt.show()
现在我们将通过自行车模型解决方案运行您的速度和角速率输入。这是为了确保你的轨迹与你的模型是正确的。下面的单元格将显示由我们的模型生成的路径,以及一些航点在所需的图8上。这些航点周围是半径为1.5米的误差容差圈,如果生成的轨迹保持在这些容差圈的80%以内,你的解决方案将通过分级机。
grade_bicycle(t_data,v_data,w_data)
下面的单元格将把时间和车辆输入保存为名为fig8.txt的文本文件。要找到该文件,请将网络目录的末尾改为/notebooks/Course_1_Module_4/figure8.txt。
到了那里,你就可以下载文件,然后提交给Coursera评分器来完成这个评估。
![[自动驾驶系列一]Introduction to Self-Driving Cars_第159张图片](http://img.e-com-net.com/image/info8/4f239589e2324404bf0246f0d4f5a040.jpg)
data = np.vstack([t_data, v_data, w_data]).T
np.savetxt('figure8.txt', data, delimiter=', ')
编程2
![[自动驾驶系列一]Introduction to Self-Driving Cars_第160张图片](http://img.e-com-net.com/image/info8/b12f91daee914a30adea4620f69d4930.jpg)
![[自动驾驶系列一]Introduction to Self-Driving Cars_第161张图片](http://img.e-com-net.com/image/info8/5f23f5cbb69d49608fc32fd214921e59.jpg)
class Vehicle(Vehicle):
    def step(self, throttle, alpha):
        # ==================================
        #  Implement vehicle model here
        # ==================================
        w_w=self.GR*self.w_e
        s=(w_w*self.r_e-self.v)/self.v

        if abs(s)<1:
            F_x=self.c*s
        else:
            F_x=self.F_max

        F_aero=self.c_a*(self.v**2)
        R_x=self.c_r1*self.v
        F_g=self.m*self.g*np.sin(alpha)

        F_load=R_x+F_aero+F_g


        self.a=(F_x-F_load)/self.m
        self.v += self.a * self.sample_time
        self.x += self.v * self.sample_time

        T_e=throttle*(self.a_0+self.a_1*self.w_e+self.a_2*self.w_e**2)

        self.w_e_dot = (T_e - self.GR*self.r_e*F_load)/self.J_e
        self.w_e += self.w_e_dot * self.sample_time
        pass
sample_time = 0.01
time_end = 100
model = Vehicle()

t_data = np.arange(0,time_end,sample_time)
v_data = np.zeros_like(t_data)

# throttle percentage between 0 and 1
throttle = 0.2

# incline angle (in radians)
alpha = 0

for i in range(t_data.shape[0]):
    v_data[i] = model.v
    model.step(throttle, alpha)

plt.plot(t_data, v_data)
plt.show()
![[自动驾驶系列一]Introduction to Self-Driving Cars_第162张图片](http://img.e-com-net.com/image/info8/9259041ec66e4683adfb8f535f39a6ac.jpg)
throttle_data = np.zeros_like(t_data)
alpha_data = np.zeros_like(t_data)
for i,t in enumerate(t_data):
    if t<5:
        throttle_data[i]=0.2+(0.5-0.2)*t/5
    elif t<15:
        throttle_data[i]=0.5
    else:
        throttle_data[i]=0.5-0.5*(t-15)/5

for i in range(t_data.shape[0]):
    v_data[i]=model.v

    if model.x<60:
        alpha_data[i]=np.arctan(3/60)
    elif model.x<150:
        alpha_data[i]=np.arctan((12-3)/90)
    else:
        alpha_data[i]=0

    model.step(throttle_data[i], alpha_data[i])

    x_data[i]=model.x
    v_data[i]=model.v
    w_w=model.GR*model.w_e
 	s_data[i]=(w_w*model.r_e-model.v)/model.v
![[自动驾驶系列一]Introduction to Self-Driving Cars_第163张图片](http://img.e-com-net.com/image/info8/916de695a24a4680a5e7a1b4012a573b.jpg)
Module 5: Vehicle Longitudinal Control
Lesson 1: Proportional-Integral-Derivative (PID) Control
![[自动驾驶系列一]Introduction to Self-Driving Cars_第164张图片](http://img.e-com-net.com/image/info8/99746718fb724a9491d4c6aee8a4ad48.jpg)
![[自动驾驶系列一]Introduction to Self-Driving Cars_第165张图片](http://img.e-com-net.com/image/info8/b9559175e5c644e5b3586ab81f6db6b4.jpg)
Lesson 2: Longitudinal Speed Control with PID
![[自动驾驶系列一]Introduction to Self-Driving Cars_第166张图片](http://img.e-com-net.com/image/info8/9e6d45d7298d48d9a20fd33325be7f16.jpg)
![[自动驾驶系列一]Introduction to Self-Driving Cars_第167张图片](http://img.e-com-net.com/image/info8/c8e49e489740420f910903d1a42191f5.jpg)
Lesson 3: Feedforward Speed Control
![[自动驾驶系列一]Introduction to Self-Driving Cars_第168张图片](http://img.e-com-net.com/image/info8/d1dc1a074ee24b168c808d7ad222d94e.jpg)
![[自动驾驶系列一]Introduction to Self-Driving Cars_第169张图片](http://img.e-com-net.com/image/info8/187b65e60e334277b0075ccc821b49f8.jpg)
![[自动驾驶系列一]Introduction to Self-Driving Cars_第170张图片](http://img.e-com-net.com/image/info8/723420e0982d4c469a7cc60dc7beed82.jpg)
测验3
![[自动驾驶系列一]Introduction to Self-Driving Cars_第171张图片](http://img.e-com-net.com/image/info8/578e652949ea45dbb2ae74f045a0124e.jpg)
![[自动驾驶系列一]Introduction to Self-Driving Cars_第172张图片](http://img.e-com-net.com/image/info8/bb7b40558e87488ba6c219d61793d2e0.jpg)
![[自动驾驶系列一]Introduction to Self-Driving Cars_第173张图片](http://img.e-com-net.com/image/info8/55e32fb968ab4cba982117870e49eb07.jpg)
![[自动驾驶系列一]Introduction to Self-Driving Cars_第174张图片](http://img.e-com-net.com/image/info8/5a235f4de5794f4788c2ae488b184175.jpg)
![[自动驾驶系列一]Introduction to Self-Driving Cars_第175张图片](http://img.e-com-net.com/image/info8/5c656e936f51463da76fd72d6c95e09b.jpg)
![[自动驾驶系列一]Introduction to Self-Driving Cars_第176张图片](http://img.e-com-net.com/image/info8/8122eebfffe94545bbfbae9abbaba923.jpg)
增加微分控制可改善超调量和调节时间方面的阶跃响应,但会降低上升时间。相反,添加积分项可保持较短的上升时间,并且能够减少振荡和超调量,从而也缩短了调节时间。将导数和积分控制项相加会带来这两种方法的优点。
![[自动驾驶系列一]Introduction to Self-Driving Cars_第177张图片](http://img.e-com-net.com/image/info8/ab9c82464a724e45bfd37efb9870db46.jpg)
![[自动驾驶系列一]Introduction to Self-Driving Cars_第178张图片](http://img.e-com-net.com/image/info8/2a042edf33824c179fd09c97e1f3b762.jpg)
![[自动驾驶系列一]Introduction to Self-Driving Cars_第179张图片](http://img.e-com-net.com/image/info8/7162ba21d7e945dbbaaed5ba7d5fcbd0.jpg)
![[自动驾驶系列一]Introduction to Self-Driving Cars_第180张图片](http://img.e-com-net.com/image/info8/ead2e7e7c8444cc997a5049136e4be1c.jpg)
![[自动驾驶系列一]Introduction to Self-Driving Cars_第181张图片](http://img.e-com-net.com/image/info8/fc6545893e3948e89c48191c75c961cb.jpg)
![[自动驾驶系列一]Introduction to Self-Driving Cars_第182张图片](http://img.e-com-net.com/image/info8/14b0e34d4ff3417781e0606138844fbd.jpg)
![[自动驾驶系列一]Introduction to Self-Driving Cars_第183张图片](http://img.e-com-net.com/image/info8/87ac2bb9fb29462889706b1e9bad69c0.jpg)
Module 6: Vehicle Lateral Control
Lesson 1: Introduction to Lateral Vehicle Control
![[自动驾驶系列一]Introduction to Self-Driving Cars_第184张图片](http://img.e-com-net.com/image/info8/da147bb8db4a47e0b8905ad1065f4ed4.jpg)
![[自动驾驶系列一]Introduction to Self-Driving Cars_第185张图片](http://img.e-com-net.com/image/info8/798cd0b5ad2c4bef8cbc7fce23a1e28a.jpg)
![[自动驾驶系列一]Introduction to Self-Driving Cars_第186张图片](http://img.e-com-net.com/image/info8/b6da73f65fa84286bd112b9344d8b901.jpg)
![[自动驾驶系列一]Introduction to Self-Driving Cars_第187张图片](http://img.e-com-net.com/image/info8/e9ce8ecd030c49fda62133408b59db36.jpg)
Lesson 2: Geometric Lateral Control - Pure Pursuit
![[自动驾驶系列一]Introduction to Self-Driving Cars_第188张图片](http://img.e-com-net.com/image/info8/4980248e0b574941a7f9d3bd7ca6a9fc.jpg)
![[自动驾驶系列一]Introduction to Self-Driving Cars_第189张图片](http://img.e-com-net.com/image/info8/0daa5506f3df4b23b3dccb76118c64be.jpg)
Lesson 3: Geometric Lateral Control - Stanley
![[自动驾驶系列一]Introduction to Self-Driving Cars_第190张图片](http://img.e-com-net.com/image/info8/6dea35d791454615a01428fb43633fb1.jpg)
Lesson 4: Advanced Steering Control - MPC
![[自动驾驶系列一]Introduction to Self-Driving Cars_第191张图片](http://img.e-com-net.com/image/info8/b598746982eb40c9a6ee3eeb2e4eac3d.jpg)
测验4
![[自动驾驶系列一]Introduction to Self-Driving Cars_第192张图片](http://img.e-com-net.com/image/info8/d122db30ad9844649db47f127ffb0799.jpg)
![[自动驾驶系列一]Introduction to Self-Driving Cars_第193张图片](http://img.e-com-net.com/image/info8/afef51c3b517466d97d1ff930f1dd4a2.jpg)
![[自动驾驶系列一]Introduction to Self-Driving Cars_第194张图片](http://img.e-com-net.com/image/info8/d9ddfac1075549a2818de22741004272.jpg)
后轮
![[自动驾驶系列一]Introduction to Self-Driving Cars_第195张图片](http://img.e-com-net.com/image/info8/21cd2ef208a04a07b9b11c85bec38485.jpg)
![[自动驾驶系列一]Introduction to Self-Driving Cars_第196张图片](http://img.e-com-net.com/image/info8/41f1395330f54d8ca1572e40066aa6dc.jpg)
![[自动驾驶系列一]Introduction to Self-Driving Cars_第197张图片](http://img.e-com-net.com/image/info8/fba13d87ddd446d4b2073b2302262f08.jpg)
![[自动驾驶系列一]Introduction to Self-Driving Cars_第198张图片](http://img.e-com-net.com/image/info8/ab9fb8a19ac94571b82dadf01b00b8be.jpg)

![[自动驾驶系列一]Introduction to Self-Driving Cars_第199张图片](http://img.e-com-net.com/image/info8/42f4717dbead4d38a4575126ccea8bb3.jpg)
![[自动驾驶系列一]Introduction to Self-Driving Cars_第200张图片](http://img.e-com-net.com/image/info8/70706bb305a445f7b37a8ccb48442ed5.jpg)
![[自动驾驶系列一]Introduction to Self-Driving Cars_第201张图片](http://img.e-com-net.com/image/info8/969c345fa8814ceda1608032cf770d88.jpg)
Module 7: Putting it all together
Lesson 1: Carla Overview - Self-Driving Car Simulation
Lesson 2: Final Project Overview
详情见这里CLICK