基于python的更换照片底色工具开发
本文章的所有代码和相关文章, 仅用于经验技术交流分享,禁止将相关技术应用到不正当途径,滥用技术产生的风险与本人无关。
本文章是自己学习的一些记录。
开始
基于上一篇博客获取api的教程https://blog.csdn.net/hijacklei/article/details/115433874
受猪哥微信公众号的一篇文章的启发,在这里将我的想法实现,因为我们有时候会按照第三方的要求,提交不同底色的照片,于是有的人用ps 有的用excel 有的用其他工具,但是我想的是开发一个既方便效果又好的工具,直接一键完成。接下来我将它写为更换照片底色的工具方便使用
开发配置
模块:pyqt5、sys、PIL、removebg
开发工具:Pycharm
代码
#coding=utf-8
#@Time:2021/4/4 22:00
#@Author:csdn@hijacklei
#@File:piccolorchange.py
#@Software:PyCharm
from PyQt5 import QtCore, QtGui, QtWidgets
from PyQt5.QtCore import *
from PyQt5.QtGui import *
from PyQt5.QtWidgets import *
import sys
from PIL import Image
from removebg import RemoveBg
import imageusetool_rc

class ZhengJian(QMainWindow):
    def __init__(self):
        super(ZhengJian, self).__init__()
        self.initUI()

    def initUI(self):
        self.setWindowTitle("背景换色")
        self.resize(600,290)
        self.setWindowIcon(QIcon(r":/22.ico"))
        _translate = QtCore.QCoreApplication.translate
        # 添加菜单栏
        bar = self.menuBar()
        file = bar.addMenu("使用须知")
        file.addAction("点击查看")
        file.triggered.connect(self.see)

        file1 = bar.addMenu("打开remove网页")
        file1.addAction("点击打开")
        file1.triggered.connect(self.openweb)

        file2 = bar.addMenu("打开获取API教程")
        file2.addAction("点击打开")
        file2.triggered.connect(self.openapi)
        #原图显示也区域
        self.imageshow=QLabel("转换前显示",self)
        self.imageshow.setAlignment(Qt.AlignCenter)#文字居中
        self.imageshow.move(220,40)
        self.imageshow.resize(170,220)
        op = QtWidgets.QGraphicsOpacityEffect()  # 设置透明度的值,0.0到1.0,最小值0是透明,1是不透明
        op.setOpacity(0.8)
        self.imageshow.setGraphicsEffect(op)
        self.imageshow.setStyleSheet("QLabel{background:gray;}"
                                  "QLabel{color:rgb(255,255,255,150);"
                                  "font-size:20px;"
                                  "font-weight:bold;"
                                  "font-family:Roman times;}")
        # 转换后显示区域
        self.zhuanhuanshow = QLabel("转换后显示", self)
        self.zhuanhuanshow.setAlignment(Qt.AlignCenter)  # 文字居中
        self.zhuanhuanshow.move(420, 40)
        self.zhuanhuanshow.resize(170, 220)
        op = QtWidgets.QGraphicsOpacityEffect()  # 设置透明度的值,0.0到1.0,最小值0是透明,1是不透明
        op.setOpacity(0.8)
        self.zhuanhuanshow.setGraphicsEffect(op)
        self.zhuanhuanshow.setStyleSheet("QLabel{background:gray;}"
                                     "QLabel{color:rgb(255,255,255,150);"
                                     "font-size:20px;"
                                     "font-weight:bold;"
                                     "font-family:Roman times;}")
        # 选择图像按钮
        self.picselect=QPushButton("点击选择图像",self)
        self.picselect.resize(150,28)
        self.picselect.move(25,40)
        op = QtWidgets.QGraphicsOpacityEffect()# 设置透明度的值,0.0到1.0,最小值0是透明,1是不透明
        op.setOpacity(0.6)
        self.picselect.setGraphicsEffect(op)
        self.picselect.clicked.connect(self.selectimage)
        # 图像文件路径显示文本框
        self.shujulujing = QLineEdit(self)
        self.shujulujing.move(25,75)
        self.shujulujing.resize(150, 28)
        # self.shujulujing.setStyleSheet("background:transparent")  文本透明
        self.shujulujing.setPlaceholderText(_translate("MainWindow", "图像地址路径"))
        # 选择保存文件路径按钮
        self.baocun = QPushButton("选择保存地址", self)
        self.baocun.resize(150,28)
        self.baocun.move(25,110)
        op = QtWidgets.QGraphicsOpacityEffect()  # 设置透明度的值,0.0到1.0,最小值0是透明,1是不透明
        op.setOpacity(0.6)
        self.baocun.setGraphicsEffect(op)
        self.baocun.clicked.connect(self.baocundizhi)
        # 转换后保存的文件路径
        self.lujing = QLineEdit(self)
        self.lujing.move(25,150)
        self.lujing.resize(150, 28)
        # self.lujing.setStyleSheet("background:transparent")  文本透明
        self.lujing.setPlaceholderText(_translate("MainWindow", "保存地址路径"))
        # API输入文本框
        self.ap=QLineEdit(self)
        self.ap.move(25,190)
        self.ap.resize(150,28)
        # self.ap.setStyleSheet("background:transparent")  文本透明
        self.ap.setPlaceholderText(_translate("MainWindow", "输入API"))
        # 颜色选择下拉框
        self.colorslect=QComboBox(self)
        self.colorslect.move(25,230)
        self.colorslect.resize(70,30)
        op = QtWidgets.QGraphicsOpacityEffect()  # 设置透明度的值,0.0到1.0,最小值0是透明,1是不透明
        op.setOpacity(0.6)
        self.colorslect.setGraphicsEffect(op)
        self.colorslect.addItems(['白色','蓝色','红色'])
        self.colorslect.currentIndexChanged[str].connect(self.selectyanse)

        # 开始转换按钮
        self.queding=QPushButton("开始转换",self)
        self.queding.move(105,230)
        self.queding.resize(70,30)
        op = QtWidgets.QGraphicsOpacityEffect()  # 设置透明度的值,0.0到1.0,最小值0是透明,1是不透明
        op.setOpacity(0.6)
        self.queding.setGraphicsEffect(op)
        self.queding.clicked.connect(self.zhuanhuan)
    def selectyanse(self,i):
        pass
    # 转换按钮
    def zhuanhuan(self):
        color= self.colorslect.currentIndex()
        if color==0:
            color=(255,255,255)
        if color==1:
            color=(0,0,255)
        if color==2:
            color=(255,0,0)
        # removebg涉及到api_key,需要到其官网申请
        api_key = str(self.ap.text())#'4wZqgKqA5E31qiLJkoPnFheK'
        file_in = str(self.shujulujing.text())
        file_out = str(self.lujing.text())+"/"+'22.png'
        # color = self.colorslect.currentText()
        p, s = file_in.split(".")
        rmbg = RemoveBg(api_key, 'error.log')
        rmbg.remove_background_from_img_file(file_in)
        file_no_bg = "{}.{}_no_bg.{}".format(p, s, s)
        no_bg_image = Image.open(file_no_bg)
        x, y = no_bg_image.size
        new_image = Image.new('RGBA', no_bg_image.size, color=color)
        new_image.paste(no_bg_image, (0, 0, x, y), no_bg_image)
        new_image.save(file_out)
        jpg = QtGui.QPixmap(file_out).scaled(self.zhuanhuanshow.width(), self.zhuanhuanshow.height())
        self.zhuanhuanshow.setPixmap(jpg)
        QMessageBox.information(self,
                                "完成",
                                "更改完成!", )
    def selectimage(self):
        text, ok = QFileDialog.getOpenFileName(self,
                                               "打开文件", "", "*.png;;*.jpg;;All Files(*)")
        print(text)
        jpg = QtGui.QPixmap(text).scaled(self.imageshow.width(), self.imageshow.height())
        self.imageshow.setPixmap(jpg)
        if ok and text:
            self.shujulujing.setText(text)
    def baocundizhi(self):
        text1 = QFileDialog.getExistingDirectory(self,
                                                 "保存文件",
                                                 "")
        self.lujing.setText(text1)

    def see(self):
        QMessageBox.information(self,
                                "温馨提示",
                                "API需要到官网申请!", )

    def openweb(self):
        link="https://www.remove.bg/zh"
        QDesktopServices.openUrl(QUrl(link))

    def openapi(self):
        link = "https://blog.csdn.net/hijacklei/article/details/115433874"
        QDesktopServices.openUrl(QUrl(link))

if __name__ == '__main__':
    app=QApplication(sys.argv)
    main=ZhengJian()
    palette1=QPalette()
    pix = QPixmap(r':/33.jpeg')
    pix = pix.scaled(main.width(), main.height())
    palette1.setBrush(QPalette.Background, QBrush(pix))
    main.setPalette(palette1)
    main.show()
    sys.exit(app.exec_())
效果
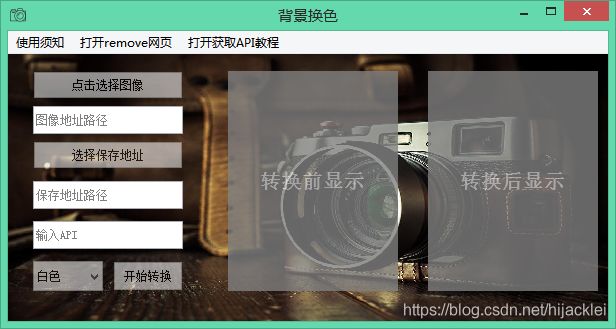
这个是开发好的软件

对于程序来说,打包成,.exe文件,并且显示好对应的图标,可参考我之前写的两篇博客:
1、https://blog.csdn.net/hijacklei/article/details/106540151
2、https://blog.csdn.net/hijacklei/article/details/112274805
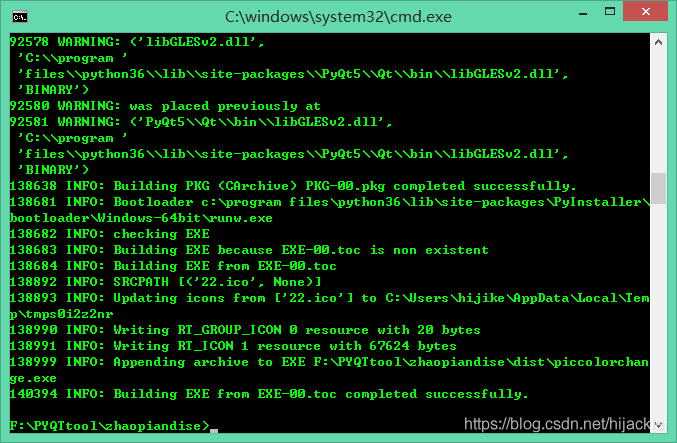
执行终端后打包成功:

展示
1、打开软件进入主界面

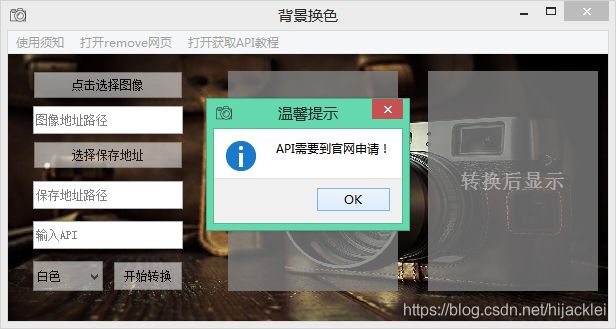
2、打开使用须知

3、对应的打开获取API的教程(参考我上一篇博客)
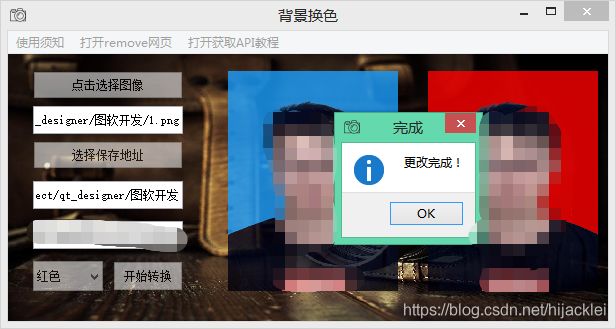
4、点击选择图像,打开待更换背景颜色的证件照,会转换前的显示区域显示,然后选择保存的位置,并且将获取的API粘贴在输入API区域,选择待转换的颜色,本工具目前支持蓝色、白色和红色 基本上也是最常用的颜色,点击开始转换即可

中间那张1.png_no_bg是去除背景颜色的照片
完成
所有工作完成,为我们今后更换电子证件照底色提供了方便。
