jetson tx2 nx系统烧录、远程配置、AI环境配置
一.jetson tx2 nx系统烧录
(一)所需材料:
安装有Ubuntu 18.04系统的PC一台、
Jetson设备和电源、
Type-C接口的USB连接线一根
(二)刷机步骤:
- 下载系统:
链接:https://pan.baidu.com/s/1r1LbdCaAtH-zDOrmGnz9tA
提取码:0816
- 将下载下来的压缩包解压(按实际包名),耗时较长,请耐心等待(Ubuntu PC下执行命令):
tar -xf mfi_*.tbz2
-
使用Type-C接口的USB线把PC与Jetson设备连接起来(Jetson设备端口为Type-C的OTG端口)
-
在Jetson关机状态下,使用细针按住recovery button不放,再按开机键,进入recovery模式
(注:在机器外壳侧面标有rc的小孔内,即是recovery button,进入recovery模式后power led不会亮起,但可以在PC上执行lsusb发现NVIDIA设备) -
进入刚解压的目录,执行刷机脚本并耐心等待(Ubuntu PC下执行)
sudo sh ./nvmflash.sh
- 用HDMI接上显示器,然后进入刷好的系统里面查看ip。
二、远程配置
先下载所需工具:
链接:https://pan.baidu.com/s/1tIqB15ERewk45wNuK6blDQ
提取码:0816
1.Windows安装putty远程SSH远程命令工具()
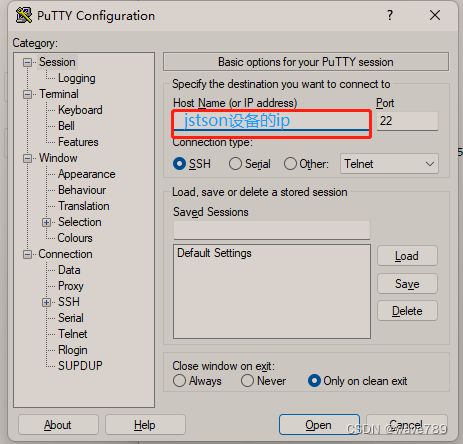
点击“open”,然后输入jetson设备的登录用户名及登录密码即可(默认密码:lcfc)
换源:
# 首先备份好原来的source.list文件
sudo cp /etc/apt/sources.list /etc/apt/sources.list.bak

# 修改source.list,更换清华源
sudo vim /etc/apt/sources.list


# 按dG删除所有内容,复制下面内容加入
deb http://mirrors.tuna.tsinghua.edu.cn/ubuntu-ports/ bionic main multiverse restricted universe
deb http://mirrors.tuna.tsinghua.edu.cn/ubuntu-ports/ bionic-security main multiverse restricted universe
deb http://mirrors.tuna.tsinghua.edu.cn/ubuntu-ports/ bionic-updates main multiverse restricted universe
deb http://mirrors.tuna.tsinghua.edu.cn/ubuntu-ports/ bionic-backports main multiverse restricted universe
deb-src http://mirrors.tuna.tsinghua.edu.cn/ubuntu-ports/ bionic main multiverse restricted universe
deb-src http://mirrors.tuna.tsinghua.edu.cn/ubuntu-ports/ bionic-security main multiverse restricted universe
deb-src http://mirrors.tuna.tsinghua.edu.cn/ubuntu-ports/ bionic-updates main multiverse restricted universe
deb-src http://mirrors.tuna.tsinghua.edu.cn/ubuntu-ports/ bionic-backports main multiv

# 保存

# 更新软件列表
sudo apt-get update

# pip换源
执行以下语句

cd ~
mkdir .pip
cd .pip
vi pip.conf

#pip.conf写入

[global]
index-url = https://pypi.tuna.tsinghua.edu.cn/simple/
[install]
trusted-host = pypi.tuna.tsinghua.edu.cn

#保存pip.conf
2.winSCP远程文件传输工具(填写信息同上,偷个懒~,)
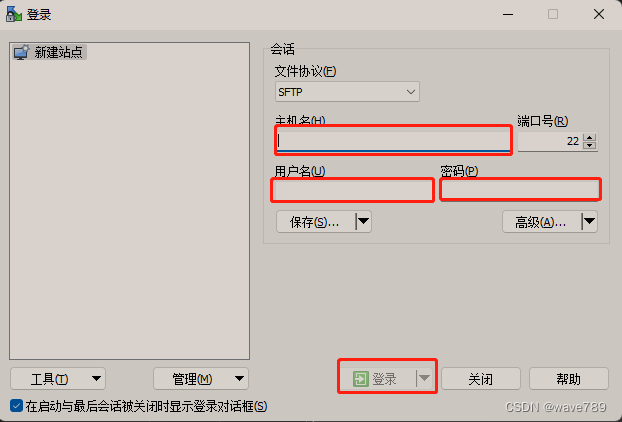
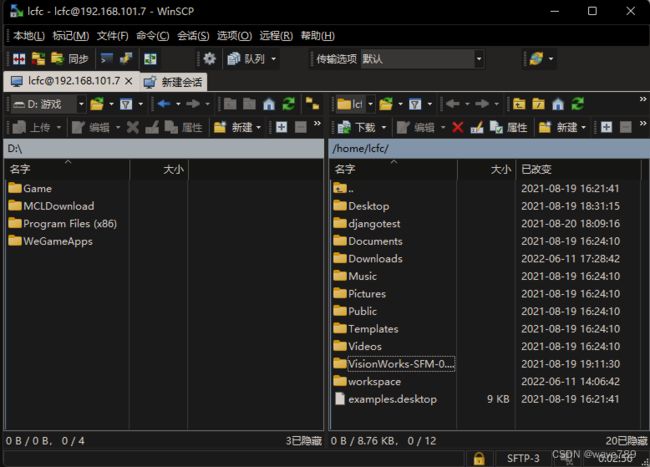
左边是本地的文件,选中一个文件,点击右键,弹出“上传”,也可以拖曳到右边;
右边是jetson设备,根据需要可以选择存放的路径。
3.VNC远程控制工具
# 更新软件源
sudo apt update

# Enable VNC 服务
sudo ln -s ../vino-server.service /usr/lib/systemd/user/graphical-session.target.wants

#配置 VNC server
gsettings set org.gnome.Vino prompt-enabled false
gsettings set org.gnome.Vino require-encryption false

#编辑 org.gnome.Vino.gschema.xml文件
sudo vi /usr/share/glib-2.0/schemas/org.gnome.Vino.gschema.xml

# 文件最后,之前添加以下内容
<key name='enabled' type='b'>
  <summary>Enable remote access to the desktop</summary>
  <description>
    If true, allows remote access to the desktop via the RFB
    protocol. Users on remote machines may then connect to the
    desktop using a VNC viewer.
  </description>
  <default>false</default>
</key>

#设置为 Gnome 编译模式
sudo glib-compile-schemas /usr/share/glib-2.0/schemas

#设置 VNC
gsettings set org.gnome.Vino authentication-methods "['vnc']"

gsettings set org.gnome.Vino vnc-password $(echo -n '123456'|base64)

#重启
sudo reboot

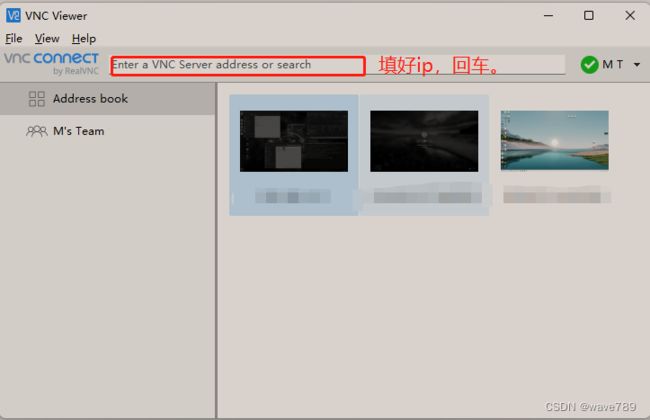
# Windows测试VNC是否能连接
...

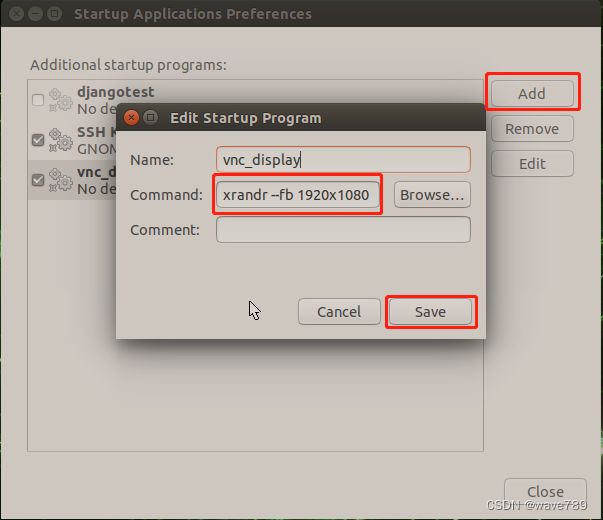
# 设置分辨率
# 在putty终端里面执行(任意设置哈)
xrandr --fb 1920x1080
三、AI环境配置
1.安装pip
sudo apt-get install python3-pip

#升级pip3(一定要执行哦!)
python3 -m pip install --upgrade pip
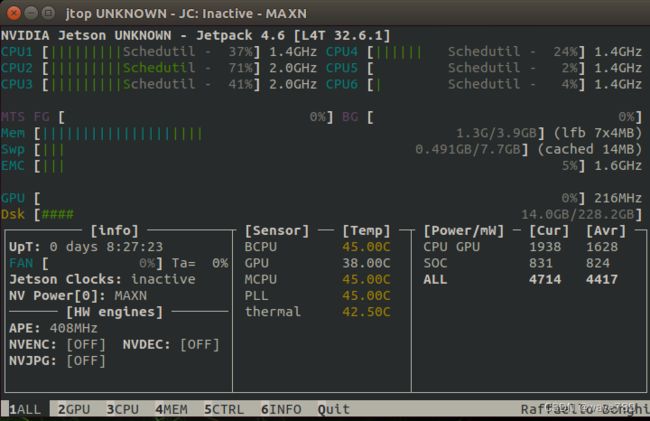
2.安装jtop监控
# 安装jtop
sudo -H pip3 install -U jetson-stats

# 重启
sudo reboot

# 查看jtop
jtop
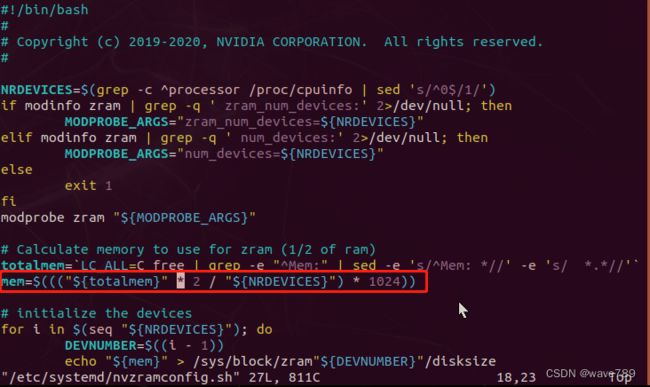
3.扩大交换内存swap
sudo vim /etc/systemd/nvzramconfig.sh
4.安装pytorch、torchvision(时间会消耗很久。。。。。【可能n个小时?】)
又偷懒了:命令都在官方,Nvidia官方链接: link,下面是介绍如何看。
下载torch*.whl

torch及torchvision安装命令介绍(巨耗时,可以睡一觉那种,耐心等待。):

测试是否成功安装:
先进入python3,再依次执行下面命令:

5.安装yolov5相关依赖
先克隆仓库:(可以先在Ubuntu上下载好,再用winSCP传到jetson设备上。)
git clone https://github.com/ultralytics/yolov5.git
然后,安装一些编译库(我之前没有执行这步,导致直接pip3 install -r requirements.txt并未成功,耗费很多时间ಥ_ಥ。)
sudo apt-get install gfortran
sudo apt-get install libopenblas-dev liblapack-dev libatlas-base-dev libblas-dev
sudo apt-get install libjpeg8 libjpeg62-dev libfreetype6 libfreetype6-dev
(如果安装不成功,可能有些依赖我给忘了。)
打开requirements.txt,注释掉pillow(单独安装)。
# 安装yolov5依赖
pip3 install -r requirements.txt

# 卸载
pip3 uninstall pillow
# 单独安装
pip3 install pillow==8.4.0 --no-cache-dir
测试是否成功安装:
python3 detect.py --source data/images/bus.jpg --weights yolov5n.pt --img 640 #图片测试
6.jetson安装opencv-4.1.1
先在Ubuntu上,下载所需文件:
https://codeload.github.com/opencv/opencv/zip/refs/tags/4.1.1
https://codeload.github.com/opencv/opencv_contrib/zip/refs/tags/4.1.1
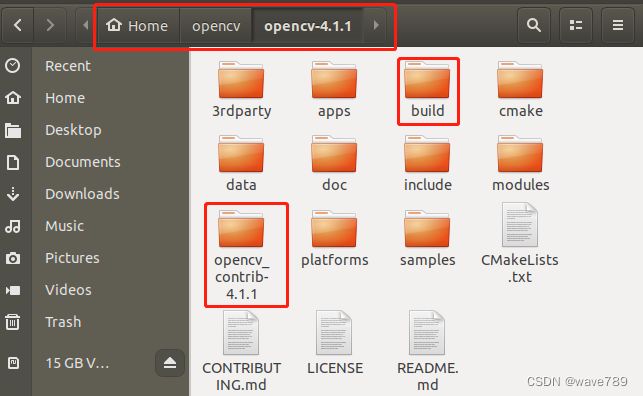
然后在jetson设备上打开home,新建opencv文件夹,
将下载的两个文件用winSCP上传到刚才的opencv文件夹下,然后分别解压,
将opencv_contrib-4.1.1剪切到opencv-4.1.1下,继续创建build 文件,并进入,右键打开终端。
换源:
未完待续。。。
