Python爬虫之美丽的汤——BeautifulSoup
本文概要
本篇文章主要介绍利用Python爬虫之美丽的汤——BeautifulSoup,适合练习爬虫基础同学,文中描述和代码示例很详细,干货满满,感兴趣的小伙伴快来一起学习吧!

是不是以为今天要教大家怎么做饭?确实,但是更大概率是你一定起猛了,再睡会,hhh…
个人简介
☀️大家好!我是新人小白博主朦胧的雨梦,希望大家多多关照和支持
大家一起努力,共同成长,相信我们都会遇到更好的自己
期待我的文章能给各位带来收获和解决问题的灵感
大家的三连是我不断更新的动力~
![]()
目录
- 本文概要
- 个人简介
- 本次操练网页
- 学习目标
- ✨一.爬虫模板
-
- 1.urllib库的使用模板
- 2.requests库的使用模板
- ✨二.分析信息接口
- ✨三.通过请求拿到响应
- ✨四. BeautifulSoup
-
- 1.漂亮的汤——BeautifulSoup
- ✨五.实战星巴克
-
- 1.分析页面信息
- ✨六.数据保存
- ✨七.总结(附完整代码)
-
- 完整代码
- 往期好文推荐
本次操练网页
https://www.starbucks.com.cn/menu/(星巴克)
网页内容:

学习目标
1.了解BeautifulSoup;
2.掌握BeautifulSoup语法;
3.掌握如何使用BeautifulSoup提取保存内容。
✨一.爬虫模板
1.urllib库的使用模板
import urllib.request
url ='xxxxxxxxxxxx'
# 发送请求
request= urllib.request.Request(url,data,header)
# 得到响应
response=urllib.request.urlopen(request)
# 解码
content = response.read().decode()
# 查看数据
print(content)
2.requests库的使用模板
import requests
url ='xxxxxxxxxxxx'
# 发送请求
response = request.get(url, params,headers)  (get请求或者post请求)
# 根据响应的格式解码,非常智能
response.encoding=response.appareent_encoding
# 查看数据
print(response.txt)
✨二.分析信息接口
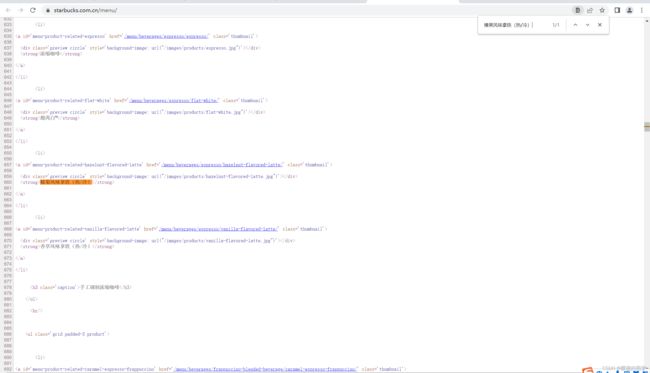
1.首先右键查看网页源代码
爬取的信息就在源代码里,所以直接对网页链接发起请求,从而得到它的网页源码。
✨三.通过请求拿到响应
import requests

# 需要请求的url
url = 'https://www.starbucks.com.cn/menu/'

# 伪装请求头
headers = {
    'User-Agent': 'Mozilla/5.0 (Windows NT 10.0; Win64; x64) AppleWebKit/537.36 (KHTML, like Gecko) Chrome/106.0.0.0 Safari/537.36',
}

# 获得响应
response = requests.get(url=url, headers=headers)

# 智能解码
response.encoding = response.apparent_encoding
# 打印数据
print(response.text)
请你喝杯咖啡,hahaha,上一篇咱们重点学习了如何去使用正则表达式提取页面信息,本篇正式学习如何使用BeautifulSoup提取页面信息
✨四. BeautifulSoup
1.漂亮的汤——BeautifulSoup
BeautifulSoup是一个可以从HTML或XML文件中提取数据的Python库。接口设计人性化。
安装bs4
pip install bs4
导入bs4
from bs4 import BeautifulSoup
创建对象
soup = BeautifulSoup(response.read().decode(),'lxml')
BeautifulSoup根据标签名查找节点
例如:存在一个如下的标签:
   找到的是第一个符合条件的数据
   soup.a
   获取标签a的属性和属性值
   soup.a.attrs
BeautifulSoup的一些函数
| 函数 | 作用 |
|---|---|
| find() | 返回的是第一个符合条件的数据 |
| findall() | 返回一个列表里面装的是所有符合条件的数据 |
| select() | 返回的是一个列表,并且返回多个数据 |
select()函数:
| 方法 | 语法 | 作用 |
|---|---|---|
| 类选择器 | . | 可以通过.代表class,我们把这种方法叫做类选择器 |
| id | # | 可以通过#代表id |
| 属性选择器 | a[href] | 通过属性来寻找对应的标签 |
| 层级选择器 | a+空格+后代标签 | 后代选择器 |
| 层级选择器 | a+>+后代标签 | 子一代选择器 |
| 层级选择器 | a+>+后一代代标签 | 子一代选择器 |
| 层级选择器 | a+,+其他标签 | 组合选择器 |
节点信息:
| 方法 | 作用 |
|---|---|
| obj.string | 获取节点内容 |
| obj.get_text | 获取节点内容 |
区别:如果标签中只有内容,两者皆可,但是除了内容还有标签,那么string就获取不到数据,换用get_text。
到这里,相信大家已经初步掌握了漂亮的汤,那我们开始实践:
✨五.实战星巴克
1.分析页面信息
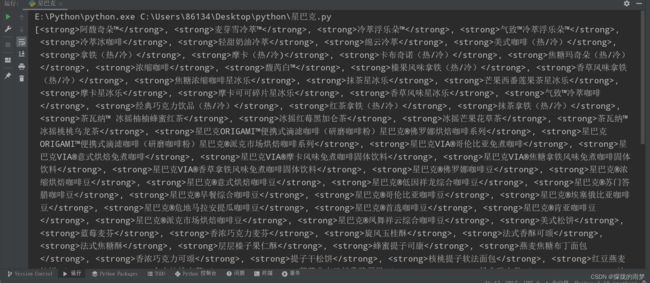
soup = BeautifulSoup(response.text, 'lxml')
name_list = soup.select('ul[class="grid padded-3 product"] strong')
print(name_list)
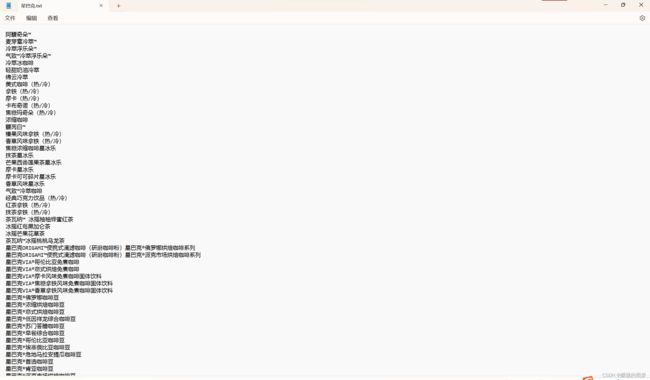
✨六.数据保存
# 保存数据
for i in name_list:
    with open('星巴克.txt', 'a', encoding='utf-8') as fp:
        fp.write(i.get_text())
        fp.write('\n')
print('文章爬取完成')
✨七.总结(附完整代码)
通过今天的小案例,相信大家已经对美丽的汤印象深刻了,好了,今天就分享到这里,谢谢大家的观看,有什么想法记得评论区告诉我!拜拜~✨ ✨ ✨
完整代码
import requests
from bs4 import BeautifulSoup

# 需要请求的url
url = 'https://www.starbucks.com.cn/menu/'

# 伪装请求头
headers = {
    'User-Agent': 'Mozilla/5.0 (Windows NT 10.0; Win64; x64) AppleWebKit/537.36 (KHTML, like Gecko) Chrome/106.0.0.0 Safari/537.36',
}

# 获得响应
response = requests.get(url=url, headers=headers)

# 智能解码
response.encoding = response.apparent_encoding

# 提取数据
soup = BeautifulSoup(response.text, 'lxml')
name_list = soup.select('ul[class="grid padded-3 product"] strong')

# 保存数据
for i in name_list:
    with open('星巴克.txt', 'a', encoding='utf-8') as fp:
        fp.write(i.get_text())
        fp.write('\n')
print('文章爬取完成')
往期好文推荐
TOP.Python爬虫经典战役——正则实战❤️❤️❤️❤️❤️❤️
TOP.Python |浅谈爬虫的由来❤️❤️❤️❤️❤️❤️
TOP.ChatGPT | 一文详解ChatGPT(学习必备)❤️❤️❤️❤️❤️❤️


