Stable Diffusion Webui 之 ControlNet使用
一、安装
1.1、插件安装
1.2、模型安装
模型安装分为预处理模型和 controlnet所需要的模型。
先安装预处理模型,打开AI所在的安装目录\extensions\sd-webui-controlnet\annotator,将对应的预处理模型放进对应的文件夹中即可,
而controlnet所需模型则是安装目录\extensions\sd-webui-controlnet\models,放在该文件夹下即可。
二、Control Net 使用
2.1、线稿上色
通过 ControlNet 边缘检测模型或线稿模型提取线稿(可提取参考图片线稿,或者手绘线稿),再根据提示词和风格模型对图像进行着色和风格化。
应用模型:Canny、SoftEdge、Lineart。
2.1.1、Canny
1、选择预处理器及模型
2、参数控制
1、preprocessor_resolution 预处理器分辨率
调整线稿的精细层度,越高生成的效果与原图越相像

数值越大,线条越细,描述越清晰

2、Threshold
3、写入提示词,生成图片
提示词:lace-trimmed dress,red dress,blck garter straps,
看的姿势很相似

2.1.3、SoftEdge(保留更多边缘细节)
预处理器: hed, hed_safe, 模型: control_v11p_sd15_softedge
参数同 canny

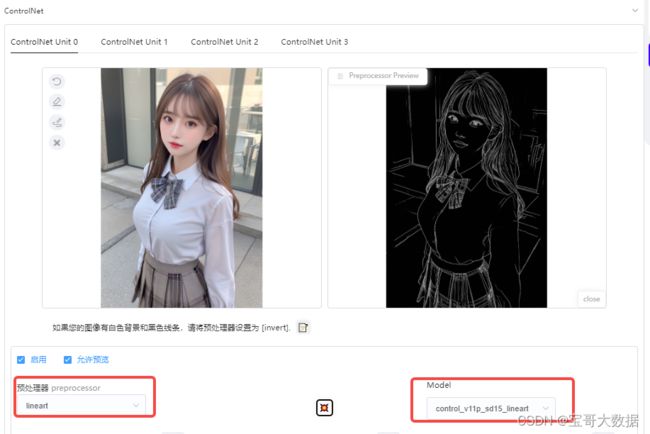
2.1.4、Lineart
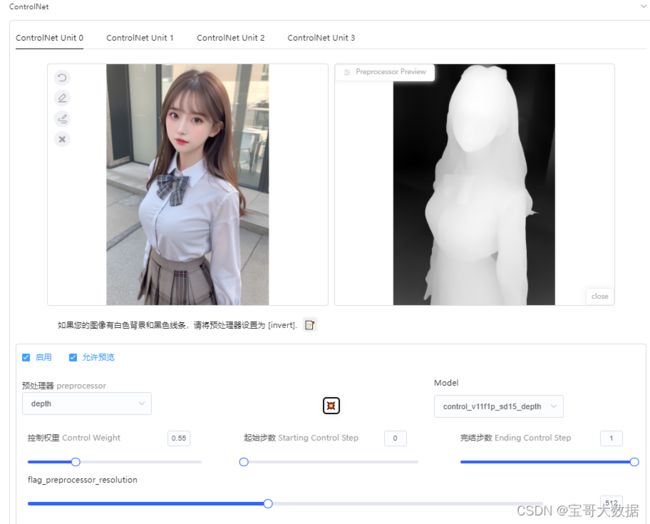
2.2、深度检测,提取深度结构
2.2.1、背景替换
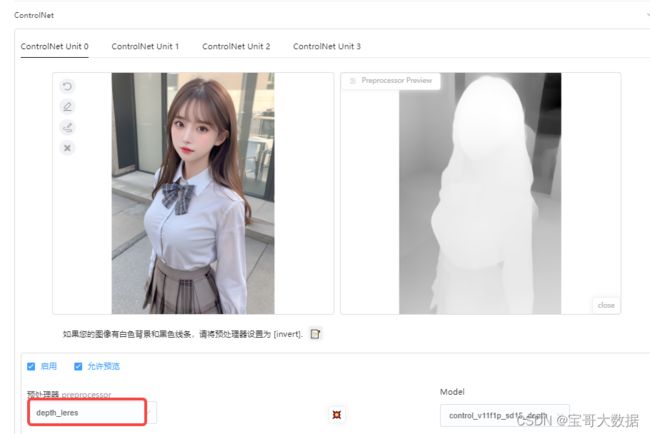
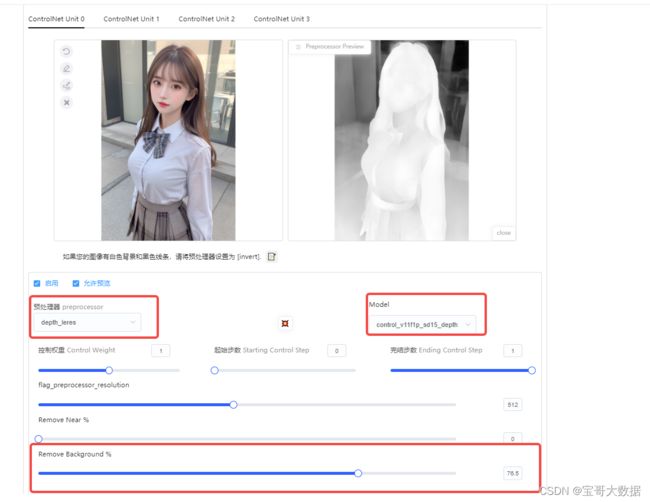
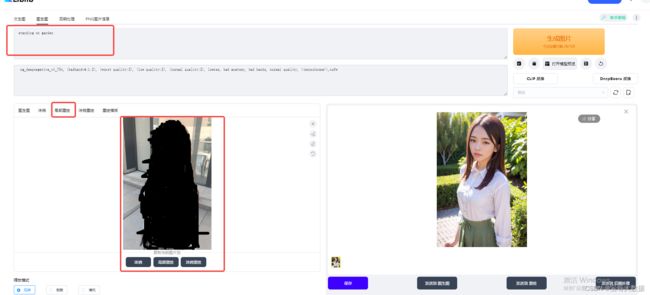
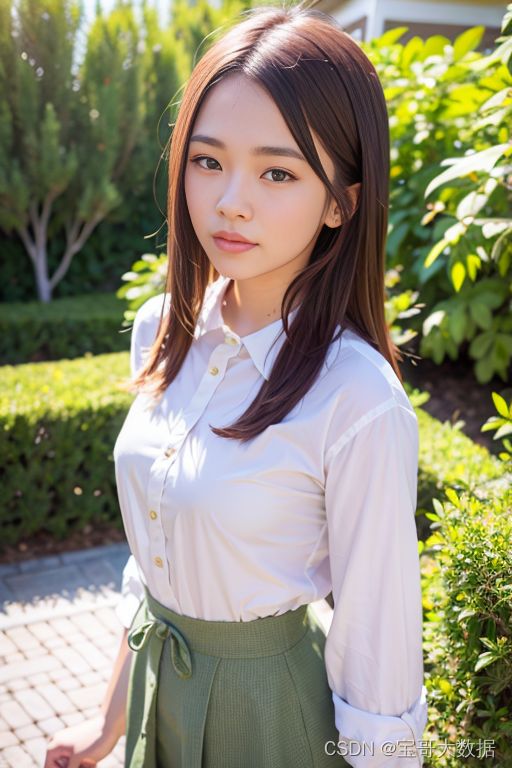
方法:在 img2img 图生图模式中,通过 ControlNet 的 Depth_leres 模型中的 remove background 功能移除背景,再通过提示词更换想要的背景。
预处理器 depth_leres, 应用模型:depth。
要点:如果想要比较完美的替换背景,可以在图生图的 Inpaint 模式中,对需要保留的图片内容添加蒙版,remove background 值可以设置在 70-80%。
2.3、openpose(姿态检测)
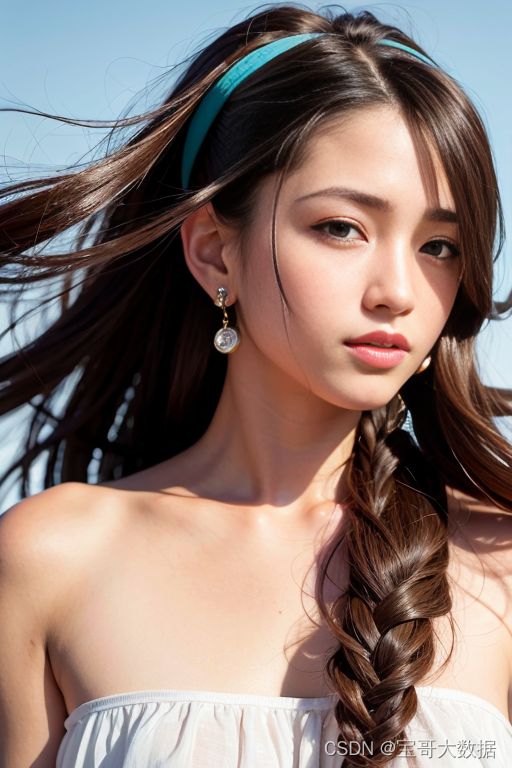
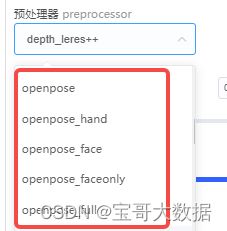
通过 ControlNet 的 Openpose 模型精准识别出人物姿态,再配合提示词和风格模型生成同样姿态的图片。
下面是一次生成的预览图

2.3.1、 控制女友姿势
提示词: 1girl, solo, dress, braid, hairband, earrings, smile, brown eyes, white dress, realistic, jewelry, long hair, black hair, looking at viewer, bare shoulders, lips, blue hairband, single braid, brown hair, simple background
2.4、Scribble (涂鸦)
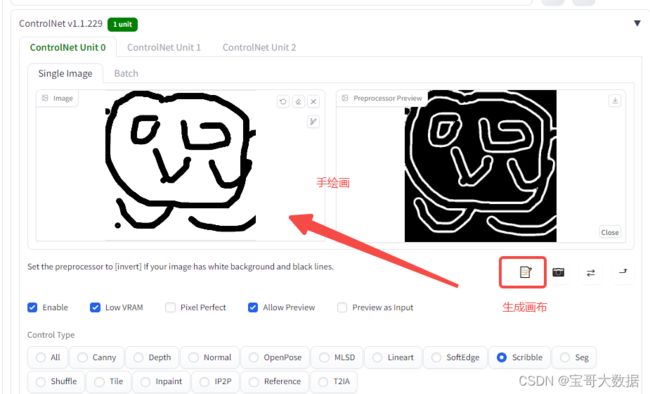
方法:通过 ControlNet 的 Scribble 模型提取涂鸦图(可提取参考图涂鸦,或者手绘涂鸦图),再根据提示词和风格模型对图像进行着色和风格化。
应用模型:Scribble。
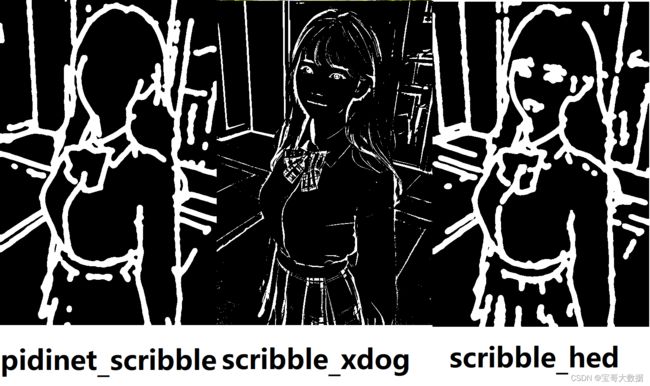
Scribble 比 Canny、SoftEdge 和 Lineart 的自由发挥度要更高,也可以用于对手绘稿进行着色和风格处理。Scribble 的预处理器有三种模式:Scribble_hed,Scribble_pidinet,Scribble_Xdog,对比如下,可以看到 Scribble_Xdog 的处理细节更为丰富:
2.4.1、涂鸦
提示词: 1girl, solo, dress, braid, hairband, earrings, smile, brown eyes, white dress, realistic, jewelry, long hair, black hair, looking at viewer, bare shoulders, lips, blue hairband, single braid, brown hair, simple background
2.4.2、手动涂鸦
Scribble 手动涂鸦示例(根据手绘草图,生成图像):
也可以不用参考图,直接创建空白画布,手绘涂鸦成图。
有提示词:1girl, solo, dress, braid, hairband, earrings, smile, brown eyes, white dress, realistic, jewelry, long hair, black hair, looking at viewer, bare shoulders, lips, blue hairband, single braid, brown hair, simple background
2.5、建筑物绘图
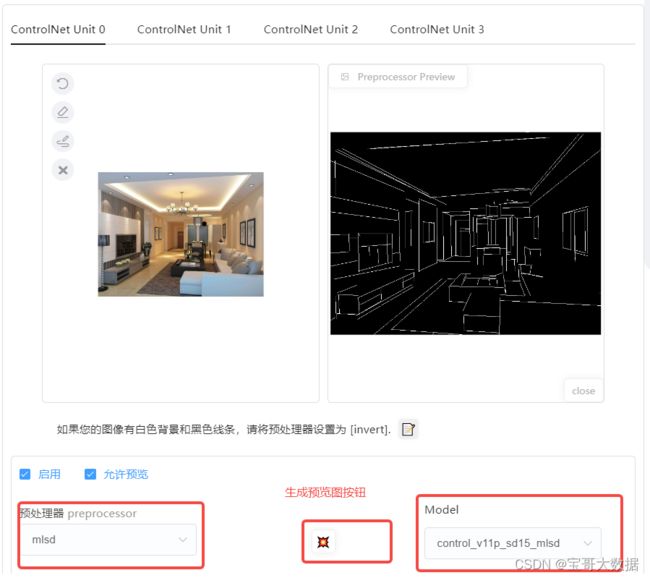
通过分析图片中的线条结构和几何形状,可以构建建筑物的外框,适合建筑、室内设计的朋友使用。
pearl white walls, windsor gray floors, bedroom, Natural lighting, earthly tones, simple and clean, trending on interior design, digital artwork by Audrey kawasaki, Smooth, Detailed, Artstation, Neutral colors, elegant
2.6、 法线贴图 (Normal map)
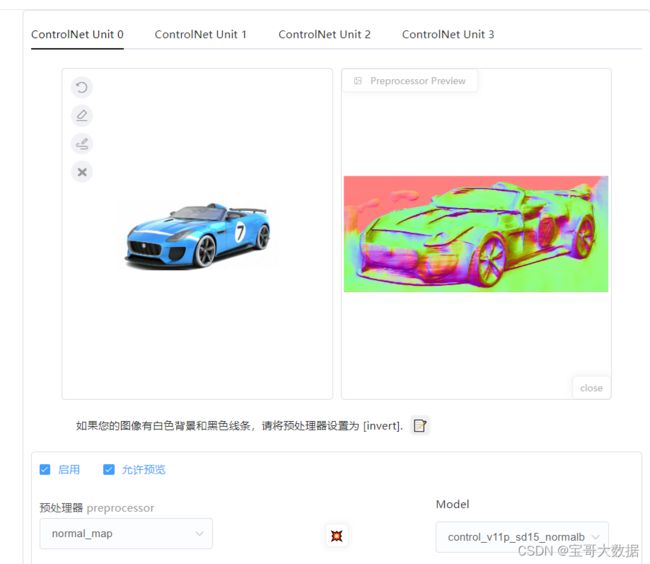
从原图中提取 3D 物体的法线向量,绘制的新图与原图的光影效果完全相同。


