《C++标准库》学习笔记 — STL — 并发 — 线程同步与并发 — 条件变量与原子操作
《C++标准库》学习笔记 — STL — 并发 — 线程同步与并发 — 条件变量与原子操作
- 一、条件变量
-
- 1、意图
- 2、条件变量的基本使用
- 3、使用条件变量实现消费队列
- 4、细究条件变量
- 二、Atmoic
-
- 1、使用 Atmoic
- 2、与其他变量共同使用
- 3、细究 Atomic 高级接口
-
- (1)构造
- (2)原子操作
- (3)原子更新和比较更新
- (4)is_lock_free
- 4、细究 Atomic 低层接口
- 三、使用 shared_pointer 时的线程安全
- 四、atomic_ref
一、条件变量
1、意图
我们前面介绍的 future 主要用于传递线程的返回值和异常。但是,有时我们需要确保不同线程之间的工作流。我们可以使用一个简单的变量和锁来控制,其带来的结果就是我们需要在线程中轮询该变量的值:
bool ready = false;
mutex readyMutex;

void thread1()
{
	unique_lock lg(readyMutex);
	ready = true;
}

void thread2()
{
	unique_lock lg(readyMutex);
	while (!ready)
	{
		lg.unlock();
		this_thread::yield();
		this_thread::sleep_for(chrono::milliseconds(200));
		lg.lock();
	}
}
这种轮询的处理方式并不是一个好的选择。一方面,等待中的线程需要不断的检验标志位;另一方面,sleep 函数的周期也很难设定。
一个较好的做法是使用条件变量。借由它,一个线程可以唤醒其他等待中的线程。这是一种类似中断的处理方式。
2、条件变量的基本使用
在使用条件变量时,等待条件满足的线程使用 wait 函数等待指定的条件变量被置位。类似锁,该类还提供了 wait_for 和 wait_until 方法用于设置等待的时间。需要注意,等待中的线程被唤醒不保证指定的条件变量已经被置位(假醒)。因此,wait 函数还支持设置一个判定式用以判定是否为假醒(通常为对标志位的判断)。置位条件变量的线程在相应条件满足后,使用 notify_one 和 notify_all 函数激活一个或所有等待此条件变量的线程。如果只激活一个线程,该激活不会被继续传递;也就是说,其余未被激活的线程需要等待这两个函数再次被调用:
#include 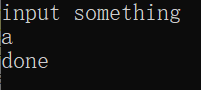
3、使用条件变量实现消费队列
#include 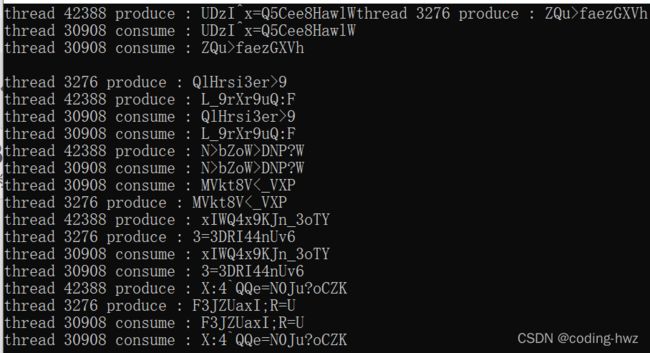
4、细究条件变量
不难发现,初始化条件变量时,一个对象和一个 mutex 是绑定的。事实上,所有等待某个条件变量的线程都必须相同的 mutex,并将该对象传入到条件变量构造函数中,否则会发生不明确的行为。
在 wait 函数中,有三个步骤可能会暂时解除 mutex 的锁定状态:
- 解锁 mutex 然后进入等待状态。
- 解除因等待而造成的阻塞。
- 再次锁住 mutex。
这意味着传给 wait 的判别式总是在 mutex 的锁定状态下被调用。因此它们可以安全地处理受 mutex 保护的对象。
二、Atmoic
1、使用 Atmoic
前面我们使用轮询实现了线程工作流的保证。我们可以借助 atmoic 模板类而不使用 mutex 实现相同的功能:
#include atomic 的 store 和 load 都是原子操作。
当然,如果我们要使用条件变量,还是必须要搭配 mutex。
2、与其他变量共同使用
我们可以使用 atomic 来控制标志位的设置和读取,以保证其它语句的执行顺序:
#include ![]()
除了原子操作外,store() 函数还会对影响所及的内存区执行 release 操作,确保此前所有内存操作的结果对其他线程都是可见的。load() 函数会对影响所及的内存区执行 acquire 操作,确保其后所有内存操作在都是在 load 结束后调用的。我们使用这种机制可以保证数据的读写顺序。这种内存次序称为 memory_order_seq_cst, 它代表 sequential consistent memory order (顺序一致的内存次序)。低层的 atomic 操作能够放宽这一次序保证。
3、细究 Atomic 高级接口
(1)构造
如果我们选择使用默认构造函数初始化 atomic 对象,初始化之后唯一合法的行为就是初始化 atomic_init。
如果我们使用值初始化构造对象,该行为不是原子操作。
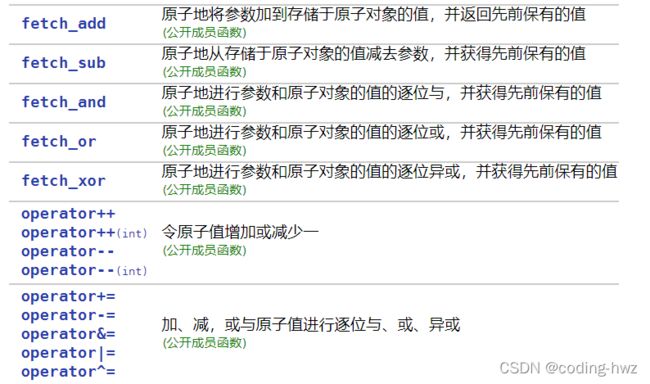
(2)原子操作
(3)原子更新和比较更新

其伪码类似(忽略了使用锁对整个函数的原子性保证):
bool compare_exchange_strong(T& expected, T desired)
{
	if (this->load() == expected) {
		this->store(desired);
		return true;
	} else {
		expected = this->load();
		return false;
	}
}
(4)is_lock_free
此方法用于检验原子类型是用锁实现,还是基于硬件支持。
4、细究 Atomic 低层接口
事实上,我们前面使用的 load 和 store 方法原型为:
![]()
![]()
这里都支持设置内存顺序。我们可以通过设置此参数来放宽对次序的保证:

三、使用 shared_pointer 时的线程安全
shared_pointer 本身不是线程安全的,因此我们需要使用 mutex 等技术避免数据竞争。但是,在某个线程改变对象时,其它线程读取器使用次数并不会导致数据竞争。此外,我们可以使用 atomic_store 函数或 atomic 类针对 shared_ptr 的特化版本,实现对其实例所引用指针的并发操作。
四、atomic_ref
我们使用 atomic 的过程是创建,原子操作,销毁。如果我们想对某个类实例在某段时间内或者某个过程中实现原子操作,可以使用 atomic_ref:

其支持的方法同 atomic。