OpenCV(三):一步步实现图像定位(Python版)
一、预期目标
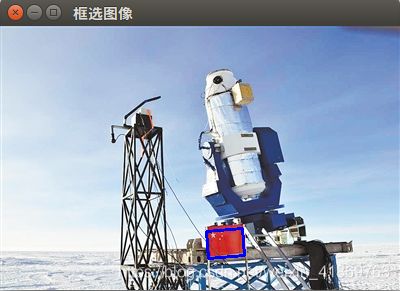
如下图,要识别图中的国旗,然后框选出来,并且返回国旗的中心位置,效果如下:

彩色图像大小: (400,264)
目标中心位置: (225, 218)
二、准备工作
1、将下面的图像另存为在本地,命名为 findflag.jpg
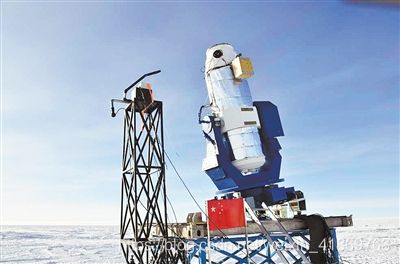
2、新建Python文件 findflag.py,与图像保存在同一目录下。
三、开始编写代码
1、读取与显示图像
# coding:UTF-8
# v1--读取与显示图像
import cv2
import numpy as np

img_bgr = cv2.imread('./findflag.jpg')   #读取图像

cv2.imshow('原始图像', img_bgr)            #显示图像
cv2.waitKey(0)
cv2.destroyAllWindows()
执行python findflag.py,能够正常显示图像
注意OpenCV里面的图像矩阵为 BGR 格式,而不是 RGB
2、根据 HSV 获得目标
# coding:UTF-8
# v2--获取红旗部分
import cv2
import numpy as np

## 图像类型转换
img_bgr = cv2.imread('./findflag.jpg')                  # 读取彩色图像
img_hsv = cv2.cvtColor(img_bgr, cv2.COLOR_BGR2HSV)      # 转化为 HSV 格式
thresh1 = np.array([0, 120, 120])                       # 目标红旗的低阈值
thresh2 = np.array([10, 255, 255])                      # 目标红旗的高阈值
img_flag = cv2.inRange(img_hsv, thresh1, thresh2)       # 获取红旗部分

cv2.imshow('原始图像', img_bgr)                          #显示图像
cv2.imshow('红旗图像', img_flag)
cv2.waitKey(0)
cv2.waitKey(0)
cv2.destroyAllWindows()
- 代码中,首先变化为 HSV 格式,因为 HSV 格式更利于做图像处理,具体原因可以参考RGB、HSV和HSL颜色空间。
- thresh1 的三个变量分别为 H(色度)、S(饱和度)、V(亮度)分量,[thresh1, thresh2] 之间的便是红旗的颜色。
- cv2.inRange(…) 返回一个图像矩阵(此处:256×400),大于阈值 thresh2 的为255(白色),小于阈值 thresh1 的为0(黑色),中间部分不变。
- cv2.bitwise_and(…) 函数是将图像进行与运算,使用来掩膜参数 mask,其效果相当于先把掩膜flag 和图像 img_hsv 相成,结果是除了红旗和噪声,其他地方为 0(黑色)。
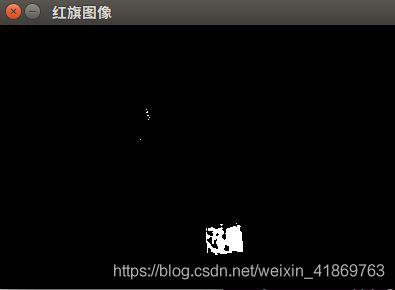
红旗部分效果如下,可见成功提取到红旗部分,但是含有少量噪声。
3、图像滤波
# coding:UTF-8
# v3--形态学滤波
import cv2
import numpy as np

## 图像类型转换
img_bgr = cv2.imread('./findflag.jpg')                  # 读取彩色图像
img_hsv = cv2.cvtColor(img_bgr, cv2.COLOR_BGR2HSV)      # 转化为 HSV 格式
thresh1 = np.array([0, 120, 120])                       # 目标红旗的低阈值
thresh2 = np.array([10, 255, 255])                      # 目标红旗的高阈值
img_flag = cv2.inRange(img_hsv, thresh1, thresh2)       # 获取红旗部分

## 形态学滤波
img_morph = img_flag.copy()                             # 复制图像
cv2.erode(img_morph, (3,3), img_morph, iterations= 3)   # 腐蚀运算
cv2.dilate(img_morph, (3,3), img_morph, iterations= 3)  # 膨胀运算

## 显示图像
cv2.imshow('原始图像', img_bgr)
cv2.imshow('红旗图像', img_flag)
cv2.imshow('滤波图像', img_morph)
cv2.waitKey(0)
cv2.waitKey(0)
cv2.destroyAllWindows()
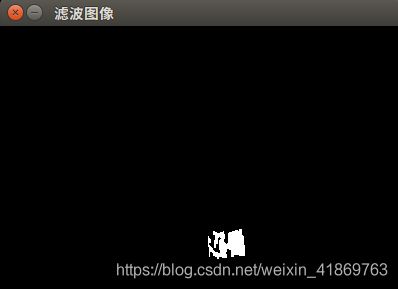
此处采用形态学(morphology)滤波算法,首先使用 (3×3)的核腐蚀 3次,然后又膨胀 3次,达到滤波效果,如下图:
4、特征显示
# coding:UTF-8
# v1--读取与显示图像
import cv2
import numpy as np

## 图像类型转换
img_bgr = cv2.imread('./findflag.jpg')                  # 读取彩色图像
img_hsv = cv2.cvtColor(img_bgr, cv2.COLOR_BGR2HSV)      # 转化为 HSV 格式
thresh1 = np.array([0, 120, 120])                       # 目标红旗的低阈值
thresh2 = np.array([10, 255, 255])                      # 目标红旗的高阈值
img_flag = cv2.inRange(img_hsv, thresh1, thresh2)       # 获取红旗部分

## 形态学滤波
img_morph = img_flag.copy()                             # 复制图像
cv2.erode(img_morph, (3,3), img_morph, iterations= 3)   # 腐蚀运算
cv2.dilate(img_morph, (3,3), img_morph, iterations= 3)  # 膨胀运算


## 获取图像特征
_, cnts, _ = cv2.findContours(img_morph, cv2.RETR_TREE, cv2.CHAIN_APPROX_SIMPLE) # 获取图像轮廓
cnts_sort = sorted(cnts, key= cv2.contourArea, reverse= True) # 将轮廓包含面积从大到小排列
box = cv2.minAreaRect(cnts_sort[0])                     # 选取包含最大面积的轮廓,并得出最小外接矩形
points = np.int0(cv2.boxPoints(box))                    # 获得该矩形的四个定点

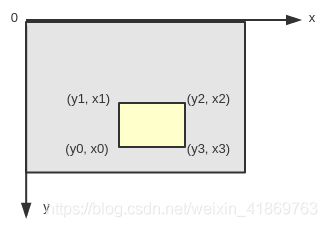
cen_v = (points[0,0] + points[2,0]) / 2                 # 得出横向中心
cen_h = (points[0,1] + points[2,1]) / 2                 # 得出纵向中心
rows, cols = img_bgr.shape[:2]
print '彩色图像大小: (' + str(cols) + ', ' + str(rows) + ')'
print '目标中心位置: (' + str(cen_h) + ', ' + str(cen_v) + ')'

cv2.drawContours(img_bgr, [points], -1, (255,0,0), 2)         # 在原图上绘制轮廓

## 显示图像
cv2.imshow('框选图像', img_bgr)
cv2.imshow('红旗图像', img_flag)
cv2.imshow('滤波图像', img_morph)
cv2.waitKey(0)
cv2.waitKey(0)
cv2.destroyAllWindows()
