springcloud gateway集成oauth2.0
直接进入主题
spring cloud gateway 简介
This project provides a library for building an API Gateway on top of Spring MVC. Spring Cloud Gateway aims to provide a simple, yet effective way to route to APIs and provide cross cutting concerns to them such as: security, monitoring/metrics, and resiliency
springcloud gateway 官方文档 https://spring.io/projects/spring-cloud-gateway#overview
oauth的认证权限可以参考https://blog.csdn.net/a15835774652/article/details/107065563 传送门
常见的网关认证模式
1.网关充当资源服务器 同时转发相关的认证请求到认证服务器 用户请求不同的资源 在网关层验证,判断权限等操作;
2.网关只负责转发操作 进行验证在每个资源服务上
这里采用第二种网关认证方式
源码位置: https://github.com/passliang/tiger
项目整体结构如下

auth-server 作为认证中心
gateway 作为网关 负责转发相关操作 仅仅作为网关
一.首先搭建注册中心
tiger 父工程 pom 如下
    4.0.0


        org.springframework.boot
        spring-boot-starter-parent
        2.3.4.RELEASE


    com.style
    tiger
    1.0.0-SNAPSHOT
    pom
    tiger
    oauth2.0


        auth-server
        gateway
        registry
        user


        1.8
        Hoxton.SR8


                org.springframework.cloud
                spring-cloud-dependencies
                Hoxton.SR8
                pom
                import
注册中心 pom文件
    4.0.0


        com.style
        tiger
        1.0.0-SNAPSHOT


    registry
    1.0.0-SNAPSHOT
    registry
    registry


            org.springframework.cloud
            spring-cloud-starter-netflix-eureka-server


            org.springframework.boot
            spring-boot-starter-actuator


            org.projectlombok
            lombok


            org.springframework.boot
            spring-boot-starter-test
            test


                    org.junit.vintage
                    junit-vintage-engine


            junit
            junit
            test


                org.springframework.boot
                spring-boot-maven-plugin
2.yaml 配置
server:
  port: 20020

spring:
  application:
    name: regisry

eureka:
  client:
    ### 取消Eureka服务器自我注册
    registerWithEureka: false
    ### 注册中心的服务器,没有必要再去检索服务
    fetchRegistry: false
  instance:
    hostname: localhost
  server:
    waitTimeInMsWhenSyncEmpty: 0
    #关闭自我保护
    enableSelfPreservation: false
    #剔除时间间隔,单位:毫秒
    evictionIntervalTimerInMs: 4000
3.启动配置文件
@SpringBootApplication
@EnableEurekaServer
public class RegistryApplication {

   public static void main(String[] args) {
      SpringApplication.run(RegistryApplication.class, args);
   }

}
二.网关
使用springcloud的gateway
1.pom文件如下
    4.0.0


        com.style
        tiger
        1.0.0-SNAPSHOT


    gateway
    1.0.0
    gateway
    gateway


            org.springframework.cloud
            spring-cloud-starter-netflix-eureka-client


            org.springframework.cloud
            spring-cloud-starter-zookeeper-discovery


            org.springframework.cloud
            spring-cloud-starter-consul-discovery


            org.springframework.cloud
            spring-cloud-starter-gateway


            org.springframework.cloud
            spring-cloud-starter-security


            org.springframework.boot
            spring-boot-actuator


            org.springframework.boot
            spring-boot-starter-test
            test


                    org.junit.vintage
                    junit-vintage-engine


            junit
            junit
            test


                org.springframework.boot
                spring-boot-maven-plugin
2.yaml配置文件
bootstrap.yaml
server:
  port: 20060

spring:
  application:
    name: gateway
  cloud:
    zookeeper:
      # zookeeper 服务发现与注册失效(默认)
      enabled: false
    consul:
      # consul 服务发现与注册失效(默认)
      enabled: false

  profiles:
    #切换不同 环境 使用zookeeper 或者consul
    active: eureka


eureka:
  client:
    # Eureka 服务发现与注册失效(默认)
    enabled: false

--- # Profile For Eureka
spring:
  profiles: eureka
eureka:
  server: # 官方不存在的配置(自定义配置)
    host: 127.0.0.1
    port: 20020
  client:
    service-url:
      #注册中心地址
      #多注册中心
#      defaultZone: http://localhost:20021/eureka,http://localhost:20022/eureka,http://localhost:20023/eureka
      defaultZone: http://localhost:20020/eureka
    # 5 秒轮训一次
    registryFetchIntervalSeconds: 5
    enabled: true
  instance:
    # eureka client发送心跳给server端后,续约到期时间(默认90秒)
    leaseExpirationDurationInSeconds: 10
    #发送心跳续约间 5秒 发一次 心跳
    leaseRenewalIntervalInSeconds: 5
    metadata-map:
      instanceId: ${spring.application.name}:${server.port}


--- #zookeeper
spring:
  profiles: zookeeper
  cloud:
    zookeeper:
      connectString: localhost:2181
      enabled: true


--- #consul
spring:
  profiles: consul
  cloud:
    consul:
      host: 127.0.0.1
      port: 8500
      discovery:
        #是否需要注册
        register: true
        #注册的实例ID (唯一标志)
        instance-id: ${spring.application.name}:${server.port}
        #服务的名称
        service-name: ${spring.application.name}
        #服务的请求端口
        port: ${server.port}
        #指定开启ip地址注册
        prefer-ip-address: true
        #当前服务的请求ip
        ip-address: 127.0.0.1
        enabled: true


application.yaml
spring:
  application:
    name: gateway
  autoconfigure:
    exclude: org.springframework.cloud.consul.serviceregistry.ConsulAutoServiceRegistrationAutoConfiguration

  cloud:
    gateway:
      routes:
        - id : oauth
          uri: lb://AUTH-SERVER
          predicates:
            - Path=/oauth/*
        - id: user
          uri: lb://USER
          predicates:
            - Path=/user/**
          filters:
            - StripPrefix=1


#默认暴露所有的节点给 adminServer 生产上谨慎使用 可增加认证
management:
  endpoints:
    web:
      exposure:
        #暴露hystrix监控端点 hystrix.stream
        include: '*'
  endpoint:
    health:
      show-details: always
3.启动类
@EnableDiscoveryClient
@SpringBootApplication
public class GatewayApplication {

   public static void main(String[] args) {
      SpringApplication.run(GatewayApplication.class, args);
   }

}
4. 安全的配置 (这个配置是必须加的 过滤到csrf)
gateway是用的webflux 和javax包下filter会冲突 注解这里使用 EnableWebFluxSecurity
WebSecurityConfig
@EnableWebFluxSecurity
@Configuration
public class WebSecurityConfig {

   @Bean
   public SecurityWebFilterChain webFluxFilterChain(ServerHttpSecurity http) {
      http
         .csrf().disable()
         .authorizeExchange()
         .pathMatchers("/**").permitAll()
         //option 请求默认放行
         .pathMatchers(HttpMethod.OPTIONS).permitAll()
         .and()
         .formLogin()
      ;

      return http.build();
   }

}
三.认证中心
pom依赖如下
    4.0.0


        com.style
        tiger
        1.0.0-SNAPSHOT


    auth-server
    0.0.1-SNAPSHOT
    auth-server
    auth-server


            org.springframework.cloud
            spring-cloud-starter-netflix-eureka-client


            org.springframework.cloud
            spring-cloud-starter-zookeeper-discovery


            org.springframework.cloud
            spring-cloud-starter-consul-discovery


            org.springframework.cloud
            spring-cloud-starter-security


            org.springframework.cloud
            spring-cloud-starter-oauth2


            org.springframework.boot
            spring-boot-starter-web


            org.springframework.boot
            spring-boot-actuator


            org.projectlombok
            lombok


            org.springframework.boot
            spring-boot-starter-test
            test


                    org.junit.vintage
                    junit-vintage-engine


            junit
            junit
            test


                org.springframework.boot
                spring-boot-maven-plugin
2.yaml配置
bootstrap.yaml
server:
  port: 20110

spring:
  application:
    name: auth-server
  cloud:
    zookeeper:
      # zookeeper 服务发现与注册失效(默认)
      enabled: false
    consul:
      # consul 服务发现与注册失效(默认)
      enabled: false

  profiles:
    #切换不同 环境 使用zookeeper 或者consul
    active: eureka


eureka:
  client:
    # Eureka 服务发现与注册失效(默认)
    enabled: false

--- # Profile For Eureka
spring:
  profiles: eureka
eureka:
  server: # 官方不存在的配置(自定义配置)
    host: 127.0.0.1
    port: 20020
  client:
    service-url:
      #注册中心地址
      defaultZone: http://localhost:20020/eureka
    #多注册中心
#      defaultZone: http://localhost:20021/eureka,http://localhost:20022/eureka,http://localhost:20023/eureka
    # 5 秒轮训一次
    registryFetchIntervalSeconds: 5
    enabled: true
  instance:
    # eureka client发送心跳给server端后,续约到期时间(默认90秒)
    leaseExpirationDurationInSeconds: 10
    #发送心跳续约间 5秒 发一次 心跳
    leaseRenewalIntervalInSeconds: 5
    metadata-map:
      instanceId: ${spring.application.name}:${server.port}


--- #zookeeper
spring:
  profiles: zookeeper
  cloud:
    zookeeper:
      connectString: localhost:2181
      enabled: true


--- #consul
spring:
  profiles: consul
  cloud:
    consul:
      host: 127.0.0.1
      port: 8500
      discovery:
        #是否需要注册
        register: true
        #注册的实例ID (唯一标志)
        instance-id: ${spring.application.name}:${server.port}
        #服务的名称
        service-name: ${spring.application.name}
        #服务的请求端口
        port: ${server.port}
        #指定开启ip地址注册
        prefer-ip-address: true
        #当前服务的请求ip
        ip-address: 127.0.0.1
        enabled: true


application.yml
spring:
  application:
    name: auth-server
  autoconfigure:
    exclude: org.springframework.cloud.consul.serviceregistry.ConsulAutoServiceRegistrationAutoConfiguration


#默认暴露所有的节点给 adminServer 生产上谨慎使用 可增加认证
management:
  endpoints:
    web:
      exposure:
        #暴露hystrix监控端点 hystrix.stream
        include: '*'
  endpoint:
    health:
      show-details: always
3.启动类配置
@SpringBootApplication
@EnableDiscoveryClient
public class AuthServerApplication {

   public static void main(String[] args) {
      SpringApplication.run(AuthServerApplication.class, args);
   }

}

目录结构如上
AuthorizationServerConfig
客户端信息存于内存中
@Configuration
@EnableAuthorizationServer
public class AuthorizationServerConfig extends AuthorizationServerConfigurerAdapter {

   @Autowired
   private AuthenticationManager authenticationManager;
   @Autowired
   private ClientDetailsService clientDetailsService;
   @Autowired
   private TokenStore tokenStore;
   @Autowired
   private JwtAccessTokenConverter jwtAccessTokenConverter;

   @Override
   public void configure(AuthorizationServerEndpointsConfigurer endpoints) {
      endpoints
            //允许token请求调用的请求类型
            .allowedTokenEndpointRequestMethods(HttpMethod.POST, HttpMethod.GET)
            //认证管理器
            .authenticationManager(authenticationManager)
            //token
            .tokenServices(tokenServices())
            //认证码
            .authorizationCodeServices(authorizationCodeServices())
      ;
   }

   @Bean
   public AuthorizationServerTokenServices tokenServices() {
      DefaultTokenServices tokenServices = new DefaultTokenServices();
      //认证管理器
      tokenServices.setAuthenticationManager(authenticationManager);
      //客户端信息
      tokenServices.setClientDetailsService(clientDetailsService);
      //jwt token存储
      tokenServices.setTokenStore(tokenStore);
      //token增强
      TokenEnhancerChain tokenEnhancer = new TokenEnhancerChain();
      tokenEnhancer.setTokenEnhancers(Collections.singletonList(jwtAccessTokenConverter));
      tokenServices.setTokenEnhancer(tokenEnhancer);
      //支持刷新token
      tokenServices.setSupportRefreshToken(true);
      //token 有效期 2小时
      tokenServices.setAccessTokenValiditySeconds(2 * 60 * 60);
      // 刷新token有效期 7天
      tokenServices.setRefreshTokenValiditySeconds(7 * 24 * 60 * 60);
      return tokenServices;
   }

   /**
    * 授权码 这里使用内存存储
    *
    * @return AuthorizationCodeServices
    */
   @Bean
   public AuthorizationCodeServices authorizationCodeServices() {
      return new InMemoryAuthorizationCodeServices();
   }

   /**
    * 自定义 加密器
    *
    * @return PasswordEncoder
    */
   @Bean
   public PasswordEncoder passwordEncoder() {
      return new BCryptPasswordEncoder();
   }

   /**
    * 客户端的信息
    *
    * @param clients clients
    * @throws  Exception
    */
   @Override
   public void configure(ClientDetailsServiceConfigurer clients) throws Exception {
      //配置内存中的 client
      clients.inMemory()
            .withClient("admin")
            .secret(new BCryptPasswordEncoder().encode("MyStyle"))
            //客户端允许的授权模式
            .authorities("authorization_code", "password", "client_credentials", "implicit", "refresh_token")
            //允许的授权范围
            .scopes("all","read","write")
            //验证回调地址
            .redirectUris("https://www.baidu.com")
            .and()
            .withClient("user")
            .secret(new BCryptPasswordEncoder().encode("MyStyle"))
            //客户端允许的授权模式
            .authorities("authorization_code", "password", "client_credentials", "implicit", "refresh_token")
            //允许的授权范围
            .scopes("read")
            //验证回调地址
            .redirectUris("https://www.baidu.com")
            .and()
            .build();
   }

   @Override
   public void configure(AuthorizationServerSecurityConfigurer security) {
      security
            //oauth/token_key是公开
            .tokenKeyAccess("permitAll()")
            //oauth/check_token公开
            .checkTokenAccess("permitAll()")
            //表单认证(申请令牌)
            .allowFormAuthenticationForClients()
      ;
   }

}
SecurityConfig
定义了两个用户都存于内存中
package com.style.auth.config;

import org.springframework.context.annotation.Bean;
import org.springframework.context.annotation.Configuration;
import org.springframework.security.authentication.AuthenticationManager;
import org.springframework.security.config.annotation.method.configuration.EnableGlobalMethodSecurity;
import org.springframework.security.config.annotation.web.builders.HttpSecurity;
import org.springframework.security.config.annotation.web.configuration.WebSecurityConfigurerAdapter;
import org.springframework.security.core.userdetails.User;
import org.springframework.security.core.userdetails.UserDetails;
import org.springframework.security.core.userdetails.UserDetailsService;
import org.springframework.security.crypto.bcrypt.BCryptPasswordEncoder;
import org.springframework.security.provisioning.InMemoryUserDetailsManager;


/**
 * @author leon
 * @date 2020-09-21 13:45:17
 */
@Configuration
@EnableGlobalMethodSecurity(prePostEnabled = true, securedEnabled = true)
public class SecurityConfig extends WebSecurityConfigurerAdapter {

   @Override
   protected void configure(HttpSecurity http) throws Exception {
      http
         .csrf().disable()
         .authorizeRequests()
         .antMatchers("/oauth/**").permitAll()
         .anyRequest().authenticated();
      ;
   }

   @Bean
   @Override
   public AuthenticationManager authenticationManager() throws Exception {
      return super.authenticationManager();
   }

   @Bean
   @Override
   public UserDetailsService userDetailsService() {
      //内存模式下创建的用户
      //权限列表
      UserDetails admin = User.withUsername("admin")
            .password(new BCryptPasswordEncoder().encode("123456"))
            //角色
            .roles("ADMIN", "DEVELOPER")
            //权限
            .authorities("get","update")
            .build();

      //开发者
      UserDetails developer = User.withUsername("developer")
            .password(new BCryptPasswordEncoder().encode("123456"))
            //角色
            .roles("DEVELOPER")
            //权限
            .authorities("get")
            .build();


      InMemoryUserDetailsManager userDetailsManager = new InMemoryUserDetailsManager();
      userDetailsManager.createUser(admin);
      userDetailsManager.createUser(developer);
      return userDetailsManager;
   }

}
token配置
TokenConfig
@Configuration
public class TokenConfig {

   private static final String SIGN_KEY = "MyStyle";

   /**
    * jwt token 存储
    *
    * @return TokenStore
    */
   @Bean
   public TokenStore tokenStore() {
      return new JwtTokenStore(jwtAccessTokenConverter());
   }

   /**
    * jwt tokenConvert
    *
    * @return JwtAccessTokenConverter
    */
   @Bean
   public JwtAccessTokenConverter jwtAccessTokenConverter() {
      JwtAccessTokenConverter jwtAccessTokenConverter = new JwtAccessTokenConverter();
      jwtAccessTokenConverter.setSigningKey(SIGN_KEY);
      return jwtAccessTokenConverter;
   }

}
四.用户中心
用户中心作为资源服务器 校验token以及权限
1.pom文件
    4.0.0


        com.style
        tiger
        1.0.0-SNAPSHOT


    user
    1.0.0-SNAPSHOT
    user
    user


            org.springframework.cloud
            spring-cloud-starter-netflix-eureka-client


            org.springframework.cloud
            spring-cloud-starter-zookeeper-discovery


            org.springframework.cloud
            spring-cloud-starter-consul-discovery


            org.springframework.cloud
            spring-cloud-starter-security


            org.springframework.cloud
            spring-cloud-starter-oauth2


            org.springframework.boot
            spring-boot-actuator


            org.springframework.boot
            spring-boot-starter-web


            org.projectlombok
            lombok


            org.springframework.boot
            spring-boot-starter-test
            test


                    org.junit.vintage
                    junit-vintage-engine


            junit
            junit
            test


                org.springframework.boot
                spring-boot-maven-plugin
2.yaml配置文件
bootstrap.yaml
server:
  port: 20080

spring:
  application:
    name: user
  cloud:
    zookeeper:
      # zookeeper 服务发现与注册失效(默认)
      enabled: false
    consul:
      # consul 服务发现与注册失效(默认)
      enabled: false

  profiles:
    #切换不同 环境 使用zookeeper 或者consul
    active: eureka

eureka:
  client:
    # Eureka 服务发现与注册失效(默认)
    enabled: false

--- # Profile For Eureka
spring:
  profiles: eureka
eureka:
  server: # 官方不存在的配置(自定义配置)
    host: 127.0.0.1
    port: 20020
  client:
    service-url:
      #注册中心地址
      #多注册中心
#      defaultZone: http://localhost:20021/eureka,http://localhost:20022/eureka,http://localhost:20023/eureka
      defaultZone: http://localhost:20020/eureka
    # 5 秒轮训一次
    registryFetchIntervalSeconds: 5
    enabled: true
  instance:
    # eureka client发送心跳给server端后,续约到期时间(默认90秒)
    leaseExpirationDurationInSeconds: 10
    #发送心跳续约间 5秒 发一次 心跳
    leaseRenewalIntervalInSeconds: 5
    metadata-map:
      instanceId: ${spring.application.name}:${server.port}


--- #zookeeper
spring:
  profiles: zookeeper
  cloud:
    zookeeper:
      connectString: localhost:2181
      enabled: true


--- #consul
spring:
  profiles: consul
  cloud:
    consul:
      host: 127.0.0.1
      port: 8500
      discovery:
        #是否需要注册
        register: true
        #注册的实例ID (唯一标志)
        instance-id: ${spring.application.name}:${server.port}
        #服务的名称
        service-name: ${spring.application.name}
        #服务的请求端口
        port: ${server.port}
        #指定开启ip地址注册
        prefer-ip-address: true
        #当前服务的请求ip
        ip-address: 127.0.0.1
        enabled: true

application.yaml


spring:
  application:
    name: user
  autoconfigure:
    exclude: org.springframework.cloud.consul.serviceregistry.ConsulAutoServiceRegistrationAutoConfiguration


#默认暴露所有的节点给 adminServer 生产上谨慎使用 可增加认证
management:
  endpoints:
    web:
      exposure:
        #暴露hystrix监控端点 hystrix.stream
        include: '*'
  endpoint:
    health:
      show-details: always
整体结构

3.启动文件
@SpringBootApplication
@EnableDiscoveryClient
public class UserApplication {

   public static void main(String[] args) {
      SpringApplication.run(UserApplication.class, args);
   }

}
4. 资源服务配置
ResourceServerConfig
@EnableResourceServer
@Configuration
public class ResourceServerConfig extends ResourceServerConfigurerAdapter {

   public static final String RESOURCE_ID = "resource";

   @Autowired
   private TokenStore tokenStore;

   @Override
   public void configure(ResourceServerSecurityConfigurer resources) {
      resources
            .resourceId(RESOURCE_ID)
            .tokenStore(tokenStore)
            .stateless(true)
      ;
   }

   @Override
   public void configure(HttpSecurity http) throws Exception {
      http.csrf().disable()
            .authorizeRequests()
            .antMatchers("/update").access("hasAuthority('update')")
            .antMatchers("/get").access("hasAuthority('get')")
            .antMatchers("/info").permitAll()
            .anyRequest().authenticated();
   }

}
WebSecurityConfig
@EnableGlobalMethodSecurity(prePostEnabled = true,securedEnabled = true)
@Configuration
public class WebSecurityConfig extends WebSecurityConfigurerAdapter {


   @Override
   protected void configure(HttpSecurity http) throws Exception {
      http.csrf().disable()
            .authorizeRequests()
            .anyRequest().authenticated();

   }

}
TokenConfig
@Configuration
public class TokenConfig {

   private static final String VERIFY_KEY = "MyStyle";

   @Bean
   public TokenStore tokenStore() {
      return new JwtTokenStore(jwtAccessTokenConverter());
   }

   @Bean
   public JwtAccessTokenConverter jwtAccessTokenConverter() {
      JwtAccessTokenConverter jwtAccessTokenConverter = new JwtAccessTokenConverter();
      jwtAccessTokenConverter.setVerifierKey(VERIFY_KEY);
      jwtAccessTokenConverter.setSigningKey(VERIFY_KEY);
      return jwtAccessTokenConverter;
   }
}
AuthController
验证的测试接口
@RestController
public class AuthController {

   @GetMapping("/get")
   public String get() {
      return "获取接口";
   }

   @PostMapping("/update")
   public String update() {
      return "更新接口";
   }

   @GetMapping("/info")
   public String info() {
      return "详情 自由查看 不受限制";
   }
}
update 接口需要有update 权限 get 接口需要有 get权限
项目到此搭建完成
首先启动注册中心 在启动网关 认证中心 用户中心
通过网关访问 user/get
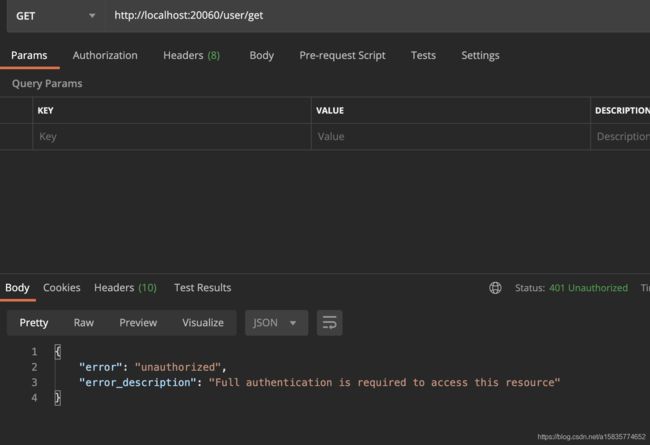
返回未正常 该接口是需要添加token 才可以访问
通过网关获取一个token
http://localhost:20060/oauth/token?client_id=admin&client_secret=MyStyle&grant_type=password&username=developer&password=123456

获取token成功
在拿着token 去调用 /user/get

调用成功
在尝试调用下 /user/update

访问被拒绝
update 接口需要 update 权限
再次调用获取token接口 这次使用admin 用户

用新的token 去调用 /user/update

调用成功
再来测试下 /user/info
不携带token进行请求

成功
到此结束
祝大家国庆快乐!!!