LangChain-Chatchat学习资料-Windows开发部署
系列文章目录
1.[LangChain-Chatchat学习资料-简介]
2.[LangChain-Chatchat学习资料-Windows开发部署]
3.[LangChain-Chatchat学习资料-Windows开发部署(踩坑篇)]
4.LangChain-Chatchat学习资料-Ubuntu安装Nvidia驱动和CUDA
5.LangChain-Chatchat学习资料-Ubuntu开发部署
6.LangChain-Chatchat学习资料-Ubuntu开发部署(踩坑篇)
文章目录
- 系列文章目录
- 在windows10下的安装部署
-
- 参考资料
- 基础环境准备
- 安装依赖
- 下载模型
- 修改配置项
-
- 修改模型相关参数配置文件
- 修改服务相关参数配置文件
- 知识库初始化
- 启动服务
-
- 启用LLM服务
- 启用API服务
- 启用webui服务
- 启动成功进行访问
在windows10下的安装部署
参考资料
1.LacnChain-Chatchat项目
基础环境准备
本人使用的是Windows10专业版22H2版本,已经安装了Python3.10,CUDA11.8版本,miniconda3。
硬件采用联想R9000P,AMD R7 5800H,16G内存,RTX3060 6G。
安装依赖
# 使用conda安装激活环境
conda create -n Langchain-Chatchat python=3.10
conda activate Langchain-Chatchat
# 拉取仓库
git clone https://github.com/chatchat-space/Langchain-Chatchat.git
# 进入目录
cd Langchain-Chatchat
# 安装全部依赖
pip install -r requirements.txt
默认依赖包括基本运行环境(FAISS向量库)。如果要使用 milvus/pg_vector 等向量库,请将 requirements.txt 中相应依赖取消注释再安装。
此项目分为LLM服务,API服务和WebUI服务,可单独根据运行需求安装依赖包。
如果只需运行 LLM服务和API服务,可执行:
pip install -r requirements_api.txt
如果只需运行 WebUI服务,可执行:
pip install -r requirements_webui.txt
注:使用 langchain.document_loaders.UnstructuredFileLoader 进行 .docx 等格式非结构化文件接入时,可能需要依据文档进行其他依赖包的安装,请参考 langchain 文档。
下载模型
Langchain-Chatchat支持的开源 LLM 与 Embedding 模型,如果使用在线LLM服务,如OpenAI的API,则请直接查看下一节。
如果需要本地或离线LLM服务,则需要下载模型,通常开源 LLM 与 Embedding 模型可以从 HuggingFace 下载。
因为我的显卡为RTX3060,只有6G的显存,所以我使用的 LLM 模型 THUDM/chatglm2-6b-int4 与 Embedding 模型 moka-ai/m3e-base。
下载模型需要先安装Git LFS,然后运行
git clone https://huggingface.co/THUDM/chatglm2-6b-int4
git clone https://huggingface.co/moka-ai/m3e-base
如果你的网络不好,下载很慢,chatglm2-6b相关模型,推荐以下的方式
1.仅从Huggingface上下载模型实现,不下载LFS模型文件
# 只获取仓库本身,而不获取任何 LFS 对象
GIT_LFS_SKIP_SMUDGE=1 git clone https://huggingface.co/THUDM/chatglm2-6b-int4
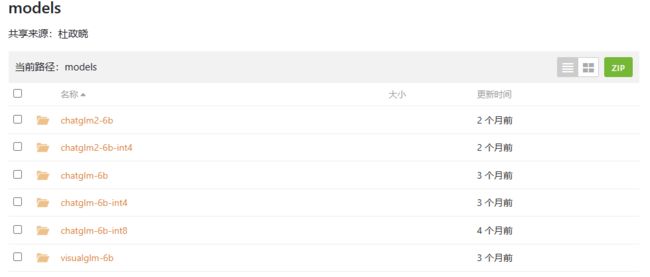
2.从清华云盘下载模型参数文件,放到本地chatglm2-6b仓库下

修改配置项
修改模型相关参数配置文件
复制一份模型相关参数配置模板文件 configs/model_config.py.example,并重命名为 model_config.py
- 修改本地LLM模型存储路径。
如果使用本地LLM模型,请确认已下载至本地的 LLM 模型本地存储路径写在 llm_model_dict 对应模型的 local_model_path 属性中,如:
llm_model_dict={
    "chatglm2-6b-int4": {
        "local_model_path": "D:\\Langchain-Chatchat\\chatglm2-6b-int4",  # "THUDM/chatglm2-6b-int4",
        "api_base_url": "http://localhost:8888/v1",  # "URL需要与运行fastchat服务端的server_config.FSCHAT_OPENAI_API一致
        "api_key": "EMPTY"
    },
}
默认模板中没有提供llm_model_dict中,没有chatglm2-6b-int4模型,需要自己添加。
- 修改在线LLM服务接口相关参数
如果使用在线LLM服务,类OpenAi的API,需在llm_model_dict的gpt-3.5-turbo模型,修改对应的API地址和环境变量中的KEY,或新增对应的模型对象。
llm_model_dict={
    "gpt-3.5-turbo": {
        "local_model_path": "gpt-3.5-turbo",
        "api_base_url": "https://api.openai.com/v1",
        "api_key": os.environ.get("OPENAI_API_KEY")
    },
}
- 修改使用的LLM模型名称
根据上述新增或修改的模型名称,修改LLM_MODEL为使用的模型名称
# LLM 名称
LLM_MODEL = "chatglm2-6b-int4"
- 修改embedding模型存储路径
请确认已下载至本地的 Embedding 模型本地存储路径写在 embedding_model_dict 对应模型属性中,如:
embedding_model_dict = {
    "m3e-base": "D:\\Langchain-Chatchat\\m3e-base",
}
- 其他修改项,可根据配置文件中的注释,自行进行修改。
修改服务相关参数配置文件
复制服务相关参数配置模板文件 configs/server_config.py.example,并重命名为 server_config.py。
- 修改服务绑定的IP和端口
根据实际情况,修改DEFAULT_BIND_HOST属性,改为需要绑定的服务IP
# 各服务器默认绑定host
DEFAULT_BIND_HOST = "10.0.21.161"
知识库初始化
如果您是第一次运行本项目,知识库尚未建立,或者配置文件中的知识库类型、Embedding模型发生变化,需要以下命令初始化或重建知识库:
python init_database.py --recreate-vs
启动服务
启用LLM服务
如果启动在线的API服务(如 OPENAI 的 API 接口),则无需启动 LLM 服务,如需使用开源模型进行本地部署,需首先启动 LLM 服务,参照项目部署手册,LLM服务启动方式有三种,我们只选择其中之一即可,这里采用的是基于多进程脚本 llm_api.py 启动 LLM 服务
在项目根目录下,执行 server/llm_api.py 脚本启动 LLM 模型服务:
python server/llm_api.py
启用API服务
执行server/api.py 脚本启动 API 服务
python server/api.py
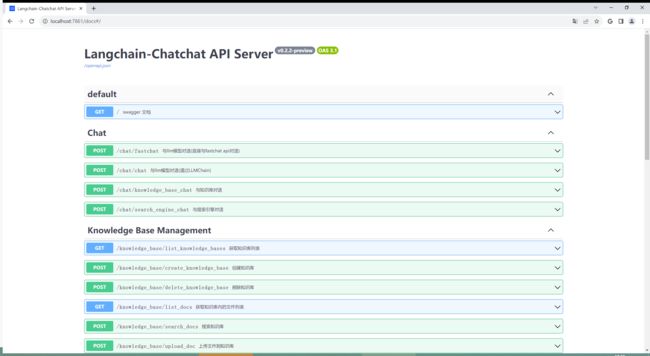
启动 API 服务后,可访问 localhost:7861 或 {API 所在服务器 IP}:7861 FastAPI 自动生成的 docs 进行接口查看与测试。

启用webui服务
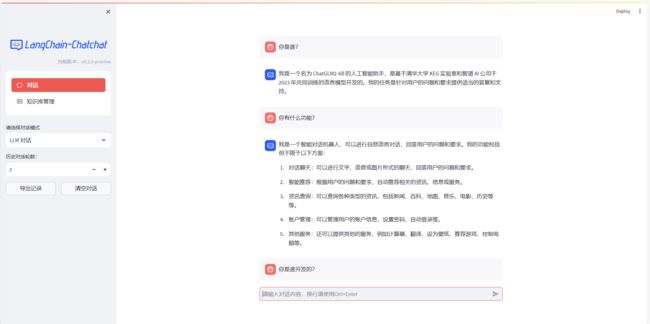
启动 API 服务后,执行 webui.py 启动 Web UI 服务(默认使用端口 8501)
streamlit run webui.py
使用 Langchain-Chatchat 主题色启动 Web UI 服务(默认使用端口 8501)
streamlit run webui.py --theme.base "light" --theme.primaryColor "#165dff" --theme.secondaryBackgroundColor "#f5f5f5" --theme.textColor "#000000"
或使用以下命令指定启动 Web UI 服务并指定端口号
streamlit run webui.py --server.port 666
