WEB3 solidity 带着大家编写测试代码 操作订单 创建/取消/填充操作
好 在我们的不懈努力之下 交易所中的三种订单函数已经写出来了

但是 我们只是编译 确认了 代码没什么问题
但还没有实际的测试过
这个测试做起来 其实就比较的麻烦了
首先要有两个账号 且他们都要在交易所中有存入
我们还是先将 ganache 的虚拟环境启动起来
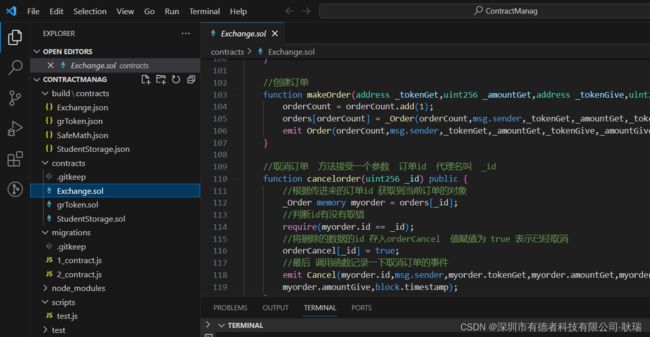
然后 我们在项目根目录中 创建一个 scripts 文件夹
下面创建一个 test.js 测试文件
参考代码如下
//指定以token grtoken合约
const GrToken = artifacts.require("grToken.sol")
//交易所合约
const Exchange = artifacts.require("Exchange.sol")
//定义E代理地址
const ETHER_ADDRESS = '0x0000000000000000000000000000000000000000';

const fromWei = (bn) => {
  return web3.utils.fromWei(bn, "ether");
}
const toWei = (bn) => {
    return web3.utils.toWei(bn.toString(), "ether");
}

module.exports = async function(callback) {
    const grTokenDai = await GrToken.deployed();
    const exchage = await Exchange.deployed();
    //获取用户列表
    const accounts = await web3.eth.getAccounts();
    //第一个账户 调用transfer 发送100000 grtoken给第二个用户 accounts[1]
    await grTokenDai.transfer(accounts[1],toWei(100000),{
        from: accounts[0]
    })
    //通过 exchage 交易所提供的  depositEther 函数 accounts[0] 第一个用户往交易所存入 100 E
    await exchage.depositEther({
        from: accounts[0],
        value: toWei(100)
    })

    // 获取第一个用户在交易所中的E数值
    let res1 = await exchage.tokens(ETHER_ADDRESS,accounts[0])
    console.log(fromWei(res1)+":E");

    //给第一个用户 accounts[0] 交易所 授权 100000 GRTOKEN 就是我自己定义的token
    await grTokenDai.approve(exchage.address,toWei(100000),{
        from: accounts[0]
    })

    //第一个用户 accounts[0] 通过交易所提供的 depositToken函数 存入100000 grToken
    await exchage.depositToken(grTokenDai.address,toWei(100000),{
        from: accounts[0]
    })
    //获取第一个用户 在交易所中 grtoken的数量
    let res2 = await exchage.tokens(grTokenDai.address,accounts[0])
    console.log(fromWei(res2)+":grtoken");

    //通过 exchage 交易所提供的  depositEther 函数 accounts[1] 第二个用户往交易所存入 50 E
    await exchage.depositEther({
        from: accounts[1],
        value: toWei(50)
    })

    // 获取第二个用户在交易所中的E数值
    let res3 = await exchage.tokens(ETHER_ADDRESS,accounts[1])
    console.log(fromWei(res3)+":第二个用户 E");
    //给第二个用户 accounts[1] 交易所 授权 50000 GRTOKEN 就是我自己定义的token
    await grTokenDai.approve(exchage.address,toWei(50000),{
        from: accounts[1]
    })

    //第二个用户 accounts[1] 通过交易所提供的 depositToken函数 存入50000 grToken
    await exchage.depositToken(grTokenDai.address,toWei(50000),{
        from: accounts[1]
    })
    // 获取第二个用户的 grtoken 并输出
    let res4 = await exchage.tokens(grTokenDai.address,accounts[1])
    console.log(fromWei(res4)+":第二个用户 grtoken");

    callback()
}
这里我自认为自己的注释已经写的比较清晰了 就不多解释了
然后 我们试试这段代码是否能够成功
我们先执行
truffle migrate --reset
truffle exec .\scripts\test.js
运行我们的测试文件

很明显 我们代码就运行成功了 但是 这里我们只是展示了 他们在交易所中可以操作的数值
并不是他们账号本身的数值
如果你认真读了代码 一定会理解 这个输出的数值 和我们预期的是一样的
然后 我们将test.js代码整个换成
//指定以token grtoken合约
const GrToken = artifacts.require("grToken.sol")
//交易所合约
const Exchange = artifacts.require("Exchange.sol")
//定义E代理地址
const ETHER_ADDRESS = '0x0000000000000000000000000000000000000000';

const fromWei = (bn) => {
  return web3.utils.fromWei(bn, "ether");
}
const toWei = (bn) => {
    return web3.utils.toWei(bn.toString(), "ether");
}

module.exports = async function(callback) {
    const grTokenDai = await GrToken.deployed();
    const exchage = await Exchange.deployed();
    //获取用户列表
    const accounts = await web3.eth.getAccounts();


    //存储订单id
    let orderId = 0;
    //存储创建订单返回结果
    let res ;
    //调用交易所创建订单  两千 gr 对 0.2E 由第一个用户发布
    res = await exchage.makeOrder(grTokenDai.address,toWei(2000), ETHER_ADDRESS ,toWei(0.2),{
        from: accounts[0]
    });
    //接收创建完成的订单id
    orderId = res.logs[0].args.id
    //告诉我们订单创建好了
    console.log("创建成功"+res.logs[0].args.id)
    //通过id取消订单
    await exchage.cancelorder(orderId,{
        from: accounts[0]
    })
    console.log(orderId,"取消订单成功")


    //调用交易所创建订单  一千 gr 对 0.1E 由第一个用户发布
    res = await exchage.makeOrder(grTokenDai.address,toWei(1000), ETHER_ADDRESS ,toWei(0.1),{
        from: accounts[0]
    });
    //接收创建完成的订单id
    orderId = res.logs[0].args.id
    //告诉我们订单创建好了
    console.log("创建成功"+res.logs[0].args.id)
    //利用用户 accounts[1] 来完成这个订单
    await exchage.fillorder(orderId,{from: accounts[1]})
    console.log("完成订单")

    // 获取第一个用户在交易所中的E数值
    let res1 = await exchage.tokens(ETHER_ADDRESS,accounts[0])
    console.log(fromWei(res1)+":E");
    //获取第一个用户 在交易所中 grtoken的数量
    let res2 = await exchage.tokens(grTokenDai.address,accounts[0])
    console.log(fromWei(res2)+":grtoken");

    // 获取第二个用户在交易所中的E数值
    let res3 = await exchage.tokens(ETHER_ADDRESS,accounts[1])
    console.log(fromWei(res3)+":第二个用户 E");
    // 获取第二个用户的 grtoken 并输出
    let res4 = await exchage.tokens(grTokenDai.address,accounts[1])
    console.log(fromWei(res4)+":第二个用户 grtoken");

    callback()
}
这些就是一个创建订单 取消订单 完成订单 最后输出 第一和第二个用户在交易所的数值
我们直接重新执行
truffle exec .\scripts\test.js

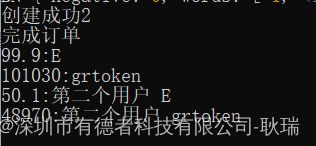
最后输出的数值 和我们订单上注释的内容是相对应的 成功的是第二个订单
大家都可以好好读一读我测试代码的注释 我注释写的还是比较用心了的
可能大家会好奇 为什么会多出来 30
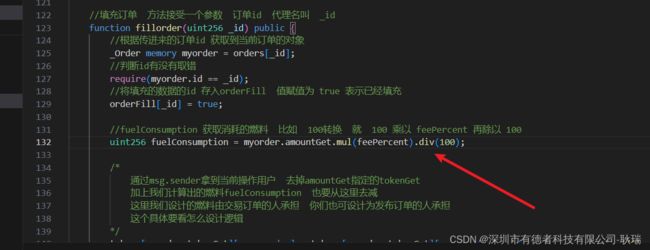
这是因为 我们交易所的燃料消耗 写的这个逻辑
我们燃料是完成订单的人承担的 正好我们 第一个账号又是燃料的接收用户 就达到了这么个效果

