电商平台 lnmp 架构之 nginx 优化
电商平台 lnmp 架构之 nginx 优化
-
- 1. nginx 的优化
- 2. nginx平滑升级
- 3. nginx 的虚拟主机
- 4. nginx 负载均衡
- 5. nginx 算法
- 6. nginx 限流
- 7. nginx 配置管理
- 8. nginx 重定向
- 9. nginx 防盗链
- 10. goaccess 日志可视化
1. nginx 的优化
停掉之前的 openresty 开启的 nginx,切换到之前的 nginx ;
[root@server1 conf]# /usr/local/openresty/nginx/sbin/nginx -s stop
[root@server1 conf]# cd
[root@server1 ~]# systemctl start nginx
-
Linux 下高并发 socket 最大连接数所受的各种限制
-
修改用户进程可打开文件数限制
/etc/security/limits.conf
nginx - nofile 65535 -
Linux 系统级的最大打开文件数限制
fs.file-max = 188414 //和内存容量相关 -
修改网络内核对 TCP 连接的有关限制
net.ipv4.ip_local_port_range = 1024 65535 -
限制接收新 TCP 连接侦听队列的大小
net.core.somaxconn = 2048 -
启用 tcp 连接 timewait 快速回收和重用
net.ipv4.tcp_tw_recycle = 1
net.ipv4.tcp_tw_reuse = 1 -
worker_processes ##工作进程数
worker_connections ##单个工作进程并发连接数 -
nginx 作为 http 服务器时:
max_clients = worker_processes * worker_connections -
nginx 作为反向代理服务器时:
max_clients = worker_processes * worker_connections / 2 -
worker_processes ##将其设置为可用的CPU内核数将是一个好的开始
worker_rlimit_nofile ##worker进程的最大打开文件数限制。如果没设置的话,这个值为操作系统的限制。 -
worker_processes 2; ## 最多开启8个
worker_cpu_affinity 01 10; ## cpu有多少个核,就有几位数,1代表内核开启,0代表内核关闭 -
multi_accept on; ## 告诉 nginx 收到一个新连接通知后接受尽可能多的连接;
-
use epoll; ##使用 epoll 模型
-
开启文件高效传输模式,同时设置 tcp_nopush 和 tcp_nodelay 为on,可以防止网路和磁盘IO阻塞。
sendfile on;
tcp_nopush on;
tcp_nodelay on;
- 修该配置文件
[root@server1 conf]# pwd
/usr/local/nginx/conf
[root@server1 conf]#  vim nginx.conf
  2 user nginx nginx;
  3 worker_processes  2;		##工作进程数
  4 worker_cpu_affinity 01 10;
  ##绑定cpu,第一个cpu和第一个work绑定,第二个cpu和第二个work 绑定

 13 events {
 14     use epoll;		##默认用的是linux内核的epoll模型
 15     worker_connections  65535;
 ##65535并发量,单个工作进程并发连接数;连接数 X 进程数表示当前最大的并发量
 16 }
[root@server1 conf]# nginx -s reload		##重新加载
[root@server1 conf]# ps ax | grep nginx
当设定工作进程数为 2 时,重新加载配置文件之后,此时可以看到进程中就开启了两个进程;

当然进程数并不是越多越好,应该和 cpu 数量保持一致才能发挥的更好;可以用命令 lscpu 来查看当前主机的 cpu 数量;
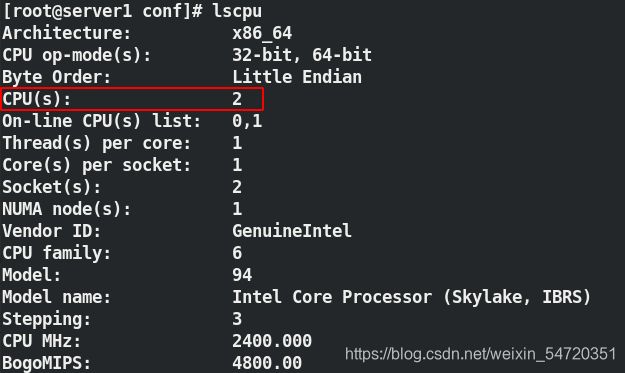
当不知道当前系统的 cpu 数量时,就写入 auto ,会自动根据 cpu 的数量来开启工作进程;但是用 auto 可能会出现负载不稳定的现象;
如:当有 8 个cpu ,可能会前面四个打满,后面四个很闲,为什么出现这种情况? 只能根据日志的输出来判断,程序、文件系统、网络可能都会引起这种情况的发生
所以应该手动指定进程数量。
在 linux 系统中,默认 kernel > system > 软件的权限;当我们写入 65535 时,一个网络连接可能就会消耗掉,对系统来说这是不被允许的。
可以用命令 ulimit -a 来查看系统最大支持的数量;
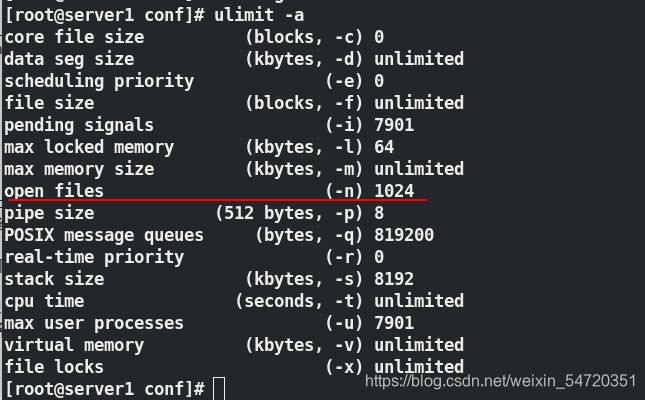
当数量低于我们写入的值时,就要手动的去设定系统的并发量;
[root@server1 conf]# vim /etc/security/limits.conf 	##修改系统的权限
# End of file
nginx -         nofile  65535	##在最后一行写入
当系统支持时,我们还要看内核支持该数量不,用用令 sysctl -a来查看内核信息;
[root@server1 conf]# sysctl -a |grep file
##看内核最大支持不
fs.file-max = 200067		##内核的数量大于我们写入的
fs.file-nr = 1024	0	200067
fs.xfs.filestream_centisecs = 3000
sysctl: reading key "net.ipv6.conf.all.stable_secret"
sysctl: reading key "net.ipv6.conf.default.stable_secret"
sysctl: reading key "net.ipv6.conf.eth0.stable_secret"
sysctl: reading key "net.ipv6.conf.lo.stable_secret"
- 反向代理
此处再开两台机器来观察实验效果,server2 IP 为 172.25.25.2;
server3 IP为 172.25.25.3;在新开的机子中要安装httpd并写入发布内容用以做测试;
oot@server2 ~]# yum install -y httpd
[root@server2 ~]# systemctl start httpd
[root@server2 ~]# echo server2 > /var/www/html/index.html
[root@server2 ~]# curl localhost	##测试写入的内容
server2
---
[root@server3 ~]# yum install -y httpd
[root@server3 ~]# systemctl start httpd
[root@server3 ~]# echo server3 > /var/www/html/index.html
[root@server3 ~]# curl localhost
server3
在主机中编辑配置文件;
[root@server1 conf]# pwd
/usr/local/nginx/conf
[root@server1 conf]# vim nginx.conf
 19 http {
 20     upstream westos {		##负载均衡
 21     server 172.25.25.2:80;
 22     server 172.25.25.3:80;
 23     }

 49         #location / {			##注释掉本机的发布页面
 50         #    root   html;
 51         #    index  index.php index.html index.htm;
 52         #}
 53
 54         location / {			##当有请求时全部代理到后端
 55              proxy_pass   http://westos;
 56         }
[root@server1 conf]# nginx -t		##检测语法
nginx: the configuration file /usr/local/nginx/conf/nginx.conf syntax is ok
nginx: configuration file /usr/local/nginx/conf/nginx.conf test is successful
[root@server1 conf]# nginx -s reload		##重载


此时在其他的主机中访问 172.25.25.1 时,会将请求调度到后端;
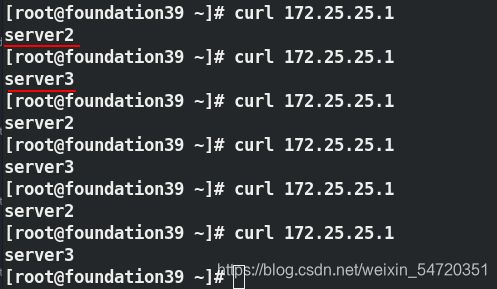
此时在负载均衡的主机中可以看到端口信息如下,会将所有访问本机的请求通过负载均衡调度到其他的主机中。

2. nginx平滑升级
平滑升级:不需要关闭当前的服务,用户端是感觉不到的。
- 下载 nginx 新版本软件,正常执行./configure 和make 但不要执行
make install
- 下载与编译
[root@server1 ~]# tar zxf nginx-1.19.1.tar.gz
[root@server1 ~]# cd nginx-1.19.1
[root@server1 nginx-1.19.1]# ls
auto  CHANGES  CHANGES.ru  conf  configure  contrib  html  LICENSE  man  README  src
[root@server1 nginx-1.19.1]# vim auto/cc/gcc
171 # debug
172 #CFLAGS="$CFLAGS -g"	##注释掉这一行内容
[root@server1 nginx-1.19.1]# ./configure --prefix=/usr/local/nginx --with-http_ssl_module --with-http_stub_status_module
[root@server1 nginx-1.19.1]# make
注:
(1). 此处只用 make 编译就可以,不能做 make install ,因为 make install会将之前的信息覆盖;
(2). 此处之前如果没有关闭 debug ,要先执行 make clean ,然后关闭 debug ,再编译再 make。
- 备份之前的数据
[root@server1 sbin]# pwd
/usr/local/nginx/sbin
[root@server1 sbin]# ls
nginx
[root@server1 sbin]# mv nginx nginx.old ##将之前的版本重命名,做备份
- 复制新版本
[root@server1 ~]# cd nginx-1.19.1/objs/
[root@server1 objs]# ls
autoconf.err  nginx    ngx_auto_config.h   ngx_modules.c  src
Makefile      nginx.8  ngx_auto_headers.h  ngx_modules.o
[root@server1 objs]# cp nginx /usr/local/nginx/sbin/
[root@server1 objs]# cd /usr/local/nginx/sbin/
[root@server1 sbin]# ls
nginx  nginx.old
[root@server1 sbin]# ./nginx.old -v	##查看两个版本是否和预期的一致
nginx version: nginx/1.18.0
[root@server1 sbin]# ./nginx -v
nginx version: nginx/1.19.1
当新的版本已经准备好之后,先检测以下当前运行的版本是否还是为未升级之前的版本;用命令 curl -I localhost
[root@server1 sbin]# curl -I localhost
HTTP/1.1 200 OK
Server: nginx/1.18.0
Date: Wed, 09 Jun 2021 13:23:29 GMT
Content-Type: text/html; charset=UTF-8
Content-Length: 8
Connection: keep-alive
Last-Modified: Wed, 09 Jun 2021 13:01:04 GMT
ETag: "8-5c454de0936a0"
Accept-Ranges: bytes
然后查看当前版本所开启的进程号端口信息;
[root@server1 sbin]# ps ax| grep nginx
 4963 ?        Ss     0:00 nginx: master process /usr/local/nginx/sbin/nginx
 6438 ?        S      0:00 nginx: worker process
 6439 ?        S      0:00 nginx: worker process
13741 pts/0    S+     0:00 grep --color=auto nginx
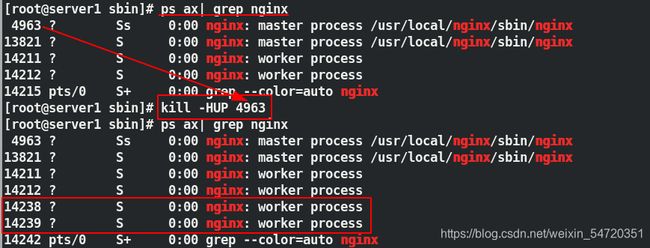
- 升级新程序
在升级之前,为了避免下线,应该先开启新的进程,然后在关闭之前的进程即可升级完毕;
[root@server1 sbin]# kill -USR2 4963	##开启接管 4963 的新进程
[root@server1 sbin]# ps ax| grep nginx
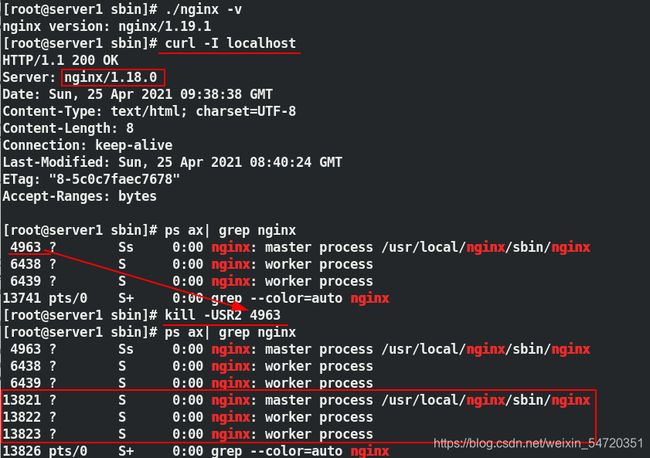
此时虽然准备接管的新进程已经开启,但是数据还是在之前的版本上;需要将之前的结束掉;
[root@server1 sbin]# curl -I localhost
HTTP/1.1 200 OK
Server: nginx/1.18.0
Date: Sun, 25 Apr 2021 09:43:05 GMT
Content-Type: text/html; charset=UTF-8
Content-Length: 8
Connection: keep-alive
Last-Modified: Sun, 25 Apr 2021 08:40:24 GMT
ETag: "8-5c0c7faec7678"
Accept-Ranges: bytes
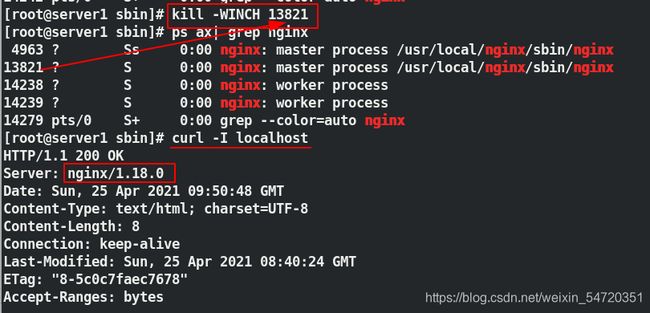
用命令 kill -WINCH 4963 来结束之前的进程,此时新进程会自动接管;
[root@server1 sbin]# kill -WINCH 4963
[root@server1 sbin]# ps ax| grep nginx
 4963 ?        Ss     0:00 nginx: master process /usr/local/nginx/sbin/nginx
 ##此时之前版本的子进程都已经结束,主进程还在是为了版本的回退
13821 ?        S      0:00 nginx: master process /usr/local/nginx/sbin/nginx
13822 ?        S      0:00 nginx: worker process
13823 ?        S      0:00 nginx: worker process
13976 pts/0    S+     0:00 grep --color=auto nginx
[root@server1 sbin]# curl -I localhost
HTTP/1.1 200 OK
Server: nginx/1.19.1		##此时版本已经更新
Date: Sun, 25 Apr 2021 09:45:14 GMT
Content-Type: text/html; charset=UTF-8
Content-Length: 8
Connection: keep-alive
Last-Modified: Sun, 25 Apr 2021 08:40:38 GMT
ETag: "8-5c0c7fbc78c68"
Accept-Ranges: bytes
- 版本回退
在做版本回退时,我们还是要先把 /usr/local/nginx/sbin/目录中的程序更改回原来的,然后再做进程的切换;
[root@server1 sbin]# ls
nginx  nginx.old
[root@server1 sbin]# mv nginx nginx.new
[root@server1 sbin]# ls
nginx.new  nginx.old
[root@server1 sbin]# mv nginx.old  nginx
[root@server1 sbin]# ls
nginx  nginx.new
#至此新版本为 nginx.new 之前的版本为 nginx
当更改完程序之后,由于之前的版本的主进程还在,用命令 kill -HUP 4963 来唤醒原进程时直接用来开启子进程,然后做切换就可以了;
[root@server1 sbin]# kill -HUP 4963
[root@server1 sbin]# ps ax| grep nginx
[root@server1 sbin]# kill -WINCH 13821
##结束新版本主进程,回退至之前的版本
[root@server1 sbin]# ps ax| grep nginx
[root@server1 sbin]# curl -I localhost
先开启之前版本的进程;
然后结束新版本的进程,回退至老版本;
当确认不需要版本回退时,便可以将之前的主进程 kill 掉就可以了。
3. nginx 的虚拟主机
- nginx的虚拟主机
[root@server1 conf]# pwd
/usr/local/nginx/conf
[root@server1 conf]# vim nginx.conf

 48
 49         location / {
 50             root   html;
 51             index  index.html index.htm;		##删除 php 的发布页面,访问 ip 时访问的是  html
 52         }
 53
 54         #location / {
 55         #     proxy_pass   http://westos;由于在最后写了,此处的便可以删除或者注释掉
 56         #}

127 server { 		##在最下方写入新的 server 语句块
128         listen 80;						##监听端口
129         server_name     www.westos.org;	##域名
130
131         location / {
132         proxy_pass   http://westos;当访问域名时做负载均衡
133         }
[root@server1 conf]# nginx -s reload
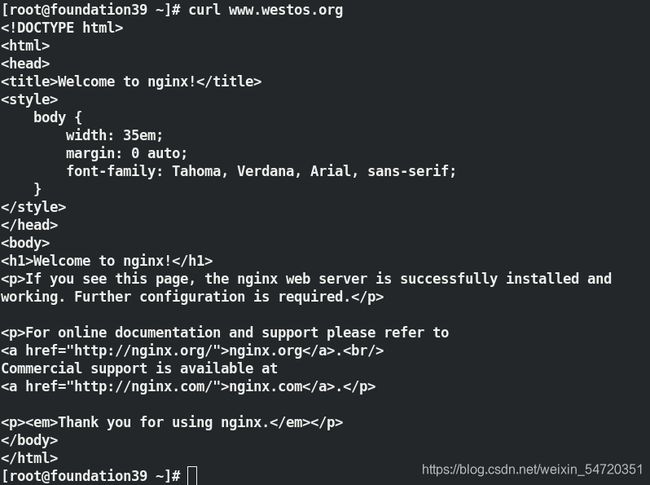
在当前主机中测试一下,当访问本机时默认访问的是 html 的发布页面;
[root@server1 conf]# curl localhost
<!DOCTYPE html>
<html>
<head>
<title>Welcome to nginx!</title>
<style>
    body {
        width: 35em;
        margin: 0 auto;
        font-family: Tahoma, Verdana, Arial, sans-serif;
    }
</style>
</head>
<body>
<h1>Welcome to nginx!</h1>
<p>If you see this page, the nginx web server is successfully installed and
working. Further configuration is required.</p>

<p>For online documentation and support please refer to
<a href="http://nginx.org/">nginx.org</a>.<br/>
Commercial support is available at
<a href="http://nginx.com/">nginx.com</a>.</p>

<p><em>Thank you for using nginx.</em></p>
</body>
</html>
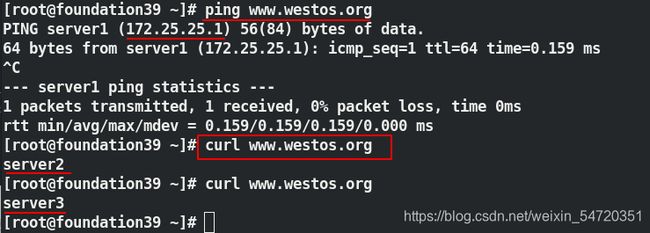
在另外的测试主机中来做测试;先写入解析:
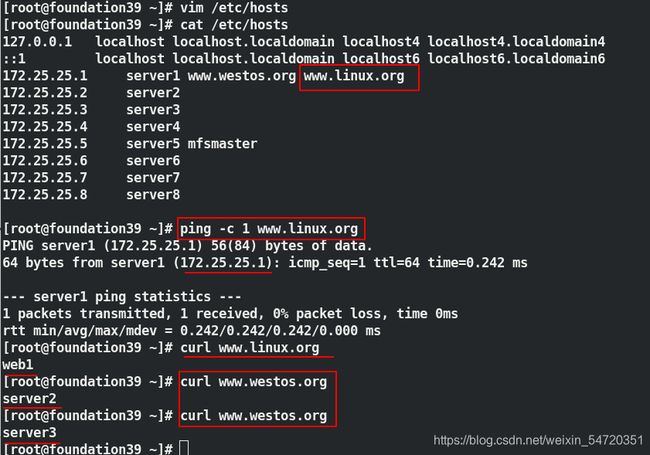
[root@foundation39 ~]# vim /etc/hosts
[root@foundation39 ~]# cat /etc/hosts
127.0.0.1   localhost localhost.localdomain localhost4 localhost4.localdomain4
::1         localhost localhost.localdomain localhost6 localhost6.localdomain6
172.25.25.1     server1 www.westos.org
172.25.25.2     server2
172.25.25.3     server3
172.25.25.4     server4
172.25.25.5     server5 mfsmaster
172.25.25.6     server6
172.25.25.7     server7
172.25.25.8     server8
在访问 nginx 虚拟主机的域名时,会被负载均衡调度到后端;
在来一个虚拟主机;编辑配置文件,修改文件内容在做测试:
[root@server1 conf]# vim nginx.conf
136 server {
137         listen 80;
138         server_name     www.linux.org;
139
140         location / {
141                 root    /web1;
142                 index   index.html;	##当访问域名时会看到写入的发布内容
143         }
144 }
[root@server1 conf]# mkdir /web1
	##新建发布目录和写入发布内容
[root@server1 conf]# cd /web1
[root@server1 web1]# vim index.html
[root@server1 web1]# cat index.html
web1
写入解析之后,再次测试:
- htpp 的测试
继续编辑配置文件:
[root@server1 conf]# vim nginx.conf
108     server {
109         listen       443 ssl;
110         server_name  localhost;
111
112         ssl_certificate      cert.pem;
113         ssl_certificate_key  cert.pem;
114
115         ssl_session_cache    shared:SSL:1m;
116         ssl_session_timeout  5m;
117
118         ssl_ciphers  HIGH:!aNULL:!MD5;
119         ssl_prefer_server_ciphers  on;
120
121         location / {
122             root   html;
123             index  index.html index.htm;
124         }
125     }

仿照机构授权:
[root@server1 conf]# cd /etc/pki/tls/certs/
[root@server1 certs]# ls
ca-bundle.crt  ca-bundle.trust.crt  make-dummy-cert  Makefile  renew-dummy-cert
[root@server1 certs]# make cert.pem		##建立认证
umask 77 ; \
PEM1=`/bin/mktemp /tmp/openssl.XXXXXX` ; \
PEM2=`/bin/mktemp /tmp/openssl.XXXXXX` ; \
/usr/bin/openssl req -utf8 -newkey rsa:2048 -keyout $PEM1 -nodes -x509 -days 365 -out $PEM2  ; \
cat $PEM1 >  cert.pem ; \
echo ""    >> cert.pem ; \
cat $PEM2 >> cert.pem ; \
rm -f $PEM1 $PEM2
Generating a 2048 bit RSA private key
..+++
.................................................................................+++
writing new private key to '/tmp/openssl.uWPPld'
-----
You are about to be asked to enter information that will be incorporated
into your certificate request.
What you are about to enter is what is called a Distinguished Name or a DN.
There are quite a few fields but you can leave some blank
For some fields there will be a default value,
If you enter '.', the field will be left blank.
-----
Country Name (2 letter code) [XX]:cn
State or Province Name (full name) []:shaanxi
Locality Name (eg, city) [Default City]:xi'an
Organization Name (eg, company) [Default Company Ltd]:westos
Organizational Unit Name (eg, section) []:linux
Common Name (eg, your name or your server's hostname) []:server1
Email Address []:westos@westos.org

[root@server1 certs]# mv cert.pem /usr/local/nginx/conf/		##将认证移动至配置文件所在的目录
[root@server1 certs]# nginx -t		##检测语法
nginx: the configuration file /usr/local/nginx/conf/nginx.conf syntax is ok
nginx: configuration file /usr/local/nginx/conf/nginx.conf test is successful
[root@server1 certs]# nginx -s reload		##重载
[root@server1 certs]# netstat -antlp | grep nginx
tcp        0      0 0.0.0.0:80              0.0.0.0:*               LISTEN      15872/nginx: master
tcp        0      0 0.0.0.0:443             0.0.0.0:*               LISTEN      15872/nginx: master
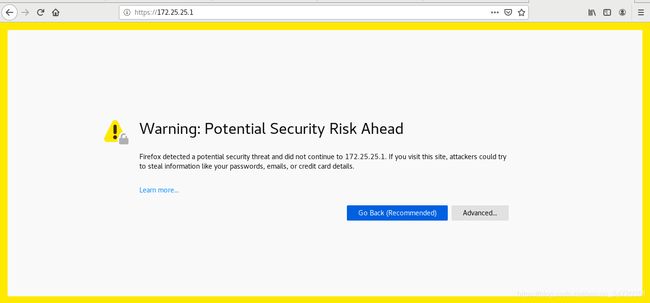
访问页面172.25.25.1 可以直接访问 nginx 的页面,也可以用命令来访问curl 172.25.25.1;

https://172.25.25.1/用 https 访问会提示证书的问题, curl https://172.25.25.1此时是加密的,可以加上参数 -k 便可以访问到信息;
4. nginx 负载均衡
此处可以直接看官网信息来测试效果:

- 负载均衡的权重
编辑配置文件
[root@server1 conf]# vim nginx.conf
http {
    upstream westos {
    server 172.25.25.2:80 weight=2;	##修改权重为2
    server 172.25.25.3:80;
    }
[root@server1 conf]# nginx -s reload
在另一台主机中测试时:
- nginx 的健康检查
nginx 默认是有健康检查的,当别的主机在访问 nginx 所在的主机时,调度到了其他主机上,当调度到的主机中某一台挂掉之后,nginx 是可以检测到的,会将请求调度到还在工作的主机中;
如当 server2 挂掉之后,此时只会调度到 server3 ,如果检测不到的话应该会是报错的页面信息;
[root@server2 ~]# systemctl stop httpd
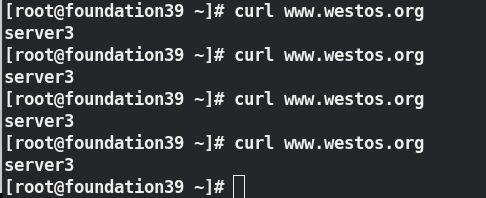
当另外一台也挂掉之后:
[root@server3 ~]# systemctl stop httpd
此时再访问时便会报错:

- 调度不到负载均衡上时显示本机的页面
修改配置文件内容如图,当负载均衡出现问题时,返回本机的 80 端口,显示本机的发布页面;

重载之后再次测试:
当有可调度的后端时,此时便会负载到后端;
[root@server2 ~]# systemctl start httpd
再次测试时:
[root@foundation39 ~]# curl www.westos.org
##当有一个开启时就不会调用本机的页面
server2
[root@foundation39 ~]# curl www.westos.org
server2
5. nginx 算法
在 nginx 中默认是有一些算法的,此处在做该实验时应该先将注释掉之前的 backup 行内容,因为 backup 不适用于算法。
- ip_hash 算法
编辑配置文件:
[root@server1 conf]# vim nginx.conf
 19 http {
 20     upstream westos {
 21     ip_hash;
 22     server 172.25.25.2:80 weight=2;
 23     server 172.25.25.3:80;
 24     #server 127.0.0.1:80 backup;
 25     }
[root@server1 conf]# nginx -t
nginx: the configuration file /usr/local/nginx/conf/nginx.conf syntax is ok
nginx: configuration file /usr/local/nginx/conf/nginx.conf test is successful
[root@server1 conf]# nginx -s reload
基于 IP 的算法,当访问 IP 不变时,调度不变;
[root@foundation39 ~]# curl www.westos.org
server2
[root@foundation39 ~]# curl www.westos.org
server2
[root@foundation39 ~]# curl www.westos.org
server2
- sticky-cookie
nginx 也可以做 cdn,但时 ip_hash 就不再合适,因为 ip_hash 解析的可能都是 cdn 的地址;
那么就要用到别的算法,此处改为sticky-cookie;
当用户在访问时,server 会给每个客户端返回一个 cookie 值; 会在浏览器中缓存,只要不关网页,当再次访问 server 时,会匹配 server 值做响应。
此处下载了一个破解版的来观察实验效果;
[root@server1 ~]# unzip nginx-goodies-nginx-sticky-module-ng-08a395c66e42.zip
[root@server1 ~]# cd nginx-1.18.0
[root@server1 nginx-1.18.0]# make clean		##清除之前的编译信息
rm -rf Makefile objs
[root@server1 nginx-1.18.0]# ./configure \
--prefix=/usr/local/nginx \
--with-http_ssl_module \
--with-http_stub_status_module \
--add-module=/root/nginx-goodies-nginx-sticky-module-ng-08a395c66e42
##此处重新编译时要加入新的模块,将解压目录的绝对路径加上
[root@server1 nginx-1.18.0]# make
注:不能 make install ,需要平滑加载。
编译完成之后,需要停掉之前的 nginx,将新编译出来的 nginx 启动脚本移动到 /usr/local/nginx/sbin/ 中覆盖之前的 nginx;
[root@server1 nginx-1.18.0]# nginx -s stop
[root@server1 nginx-1.18.0]# cd objs/
[root@server1 objs]# cp nginx /usr/local/nginx/sbin/ -f
cp: overwrite ‘/usr/local/nginx/sbin/nginx’? y
[root@server1 objs]# nginx
然后再编辑配置文件,加入 sticky-cookie 算法;
[root@server1 objs]# cd /usr/local/nginx/conf/
[root@server1 conf]# vim nginx.conf
 19 http {
 20     upstream westos {
 21     sticky;
 22     server 172.25.25.2:80 weight=2;
 23     server 172.25.25.3:80;
 24     #server 127.0.0.1:80 backup;
 25     }
[root@server1 conf]# nginx -t
nginx: the configuration file /usr/local/nginx/conf/nginx.conf syntax is ok
nginx: configuration file /usr/local/nginx/conf/nginx.conf test is successful
[root@server1 conf]# nginx -s reload
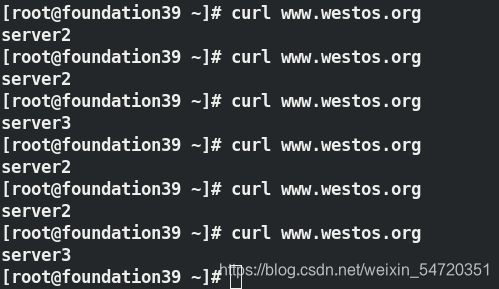
此时再访问时效果如下所示:
[root@foundation39 ~]# curl www.westos.org
server2
[root@foundation39 ~]# curl www.westos.org
server2
[root@foundation39 ~]# curl www.westos.org
server3
[root@foundation39 ~]# curl www.westos.org
server2
如果是用浏览器查看,要注意浏览器是有缓存的,要清理缓存才可以达到效果。
6. nginx 限流
在很多时候,我们在访问一个页面时,会感到访问非常慢;这可能是因为由于对访问做了限流。(多看官方文档,核心源代码 .c 结尾)
- 控制单 IP 并发连接数,
- 编辑配置文件内容:
[root@server1 ~]# cd /usr/local/nginx/conf/
[root@server1 conf]# vim nginx.conf

 44
 45         limit_conn_zone $binary_remote_addr zone=addr:10m;
 ##$binary_remote_addr 表示通过remote_addr这个标识来做限制;
 ##zone=addr:10m 表示生成一个大小为10M,名字为addr的内存区域
 46
 59
 60         location /download/ {
 61                 limit_conn addr 1;	##限制并发数
 62         }
- 在默认发布目录
/usr/local/nginx/html里新建一个目录目录,再放个图片;然后重新加载配置文件的信息;
[root@server1 html]# pwd
/usr/local/nginx/html
[root@server1 html]# mkdir download
[root@server1 html]# cp /root/vim.jpg /usr/local/nginx/html/download/
[root@server1 html]# cd /usr/local/nginx/html/download/
[root@server1 download]# ls
vim.jpg
[root@server1 download]# nginx -t
nginx: the configuration file /usr/local/nginx/conf/nginx.conf syntax is ok
nginx: configuration file /usr/local/nginx/conf/nginx.conf test is successful
[root@server1 download]# nginx -s reload
[root@server1 download]#
- 测试:
做压力测试
[root@westos ~]# ab -c 10 -n 10 http://172.25.25.1/download/vim.jpg
This is ApacheBench, Version 2.3 <$Revision: 1843412 $>
Copyright 1996 Adam Twiss, Zeus Technology Ltd, http://www.zeustech.net/
Licensed to The Apache Software Foundation, http://www.apache.org/

Benchmarking 172.25.25.1 (be patient).....done


Server Software:        nginx/1.18.0
Server Hostname:        172.25.25.1
Server Port:            80

Document Path:          /download/vim.jpg
Document Length:        494 bytes

Concurrency Level:      10
Time taken for tests:   0.003 seconds
Complete requests:      10
Failed requests:        2
   (Connect: 0, Receive: 0, Length: 2, Exceptions: 0)
Non-2xx responses:      8
Total transferred:      913132 bytes
HTML transferred:       911102 bytes
Requests per second:    2990.43 [#/sec] (mean)
Time per request:       3.344 [ms] (mean)
Time per request:       0.334 [ms] (mean, across all concurrent requests)
Transfer rate:          266665.81 [Kbytes/sec] received

Connection Times (ms)
              min  mean[+/-sd] median   max
Connect:        0    0   0.1      0       0
Processing:     1    1   0.7      2       2
Waiting:        0    1   0.6      1       2
Total:          1    2   0.6      2       3
WARNING: The median and mean for the processing time are not within a normal deviation
        These results are probably not that reliable.

Percentage of the requests served within a certain time (ms)
  50%      2
  66%      2
  75%      2
  80%      2
  90%      3
  95%      3
  98%      3
  99%      3
 100%      3 (longest request)
由于我们在配置文件中对其并发做了限制,所以会有错误,如果此时将并发量更改为1,此时再次测试时便不会在有错误;
[root@westos ~]# ab -c 1 -n 10 http://172.25.25.1/download/vim.jpg
This is ApacheBench, Version 2.3 <$Revision: 1843412 $>
Copyright 1996 Adam Twiss, Zeus Technology Ltd, http://www.zeustech.net/
Licensed to The Apache Software Foundation, http://www.apache.org/

Benchmarking 172.25.25.1 (be patient).....done


Server Software:        nginx/1.18.0
Server Hostname:        172.25.25.1
Server Port:            80

Document Path:          /download/vim.jpg
Document Length:        453575 bytes

Concurrency Level:      1
Time taken for tests:   0.014 seconds
Complete requests:      10
Failed requests:        0
Total transferred:      4538140 bytes
HTML transferred:       4535750 bytes
Requests per second:    733.62 [#/sec] (mean)
Time per request:       1.363 [ms] (mean)
Time per request:       1.363 [ms] (mean, across all concurrent requests)
Transfer rate:          325124.89 [Kbytes/sec] received

Connection Times (ms)
              min  mean[+/-sd] median   max
Connect:        0    0   0.8      0       3
Processing:     1    1   0.1      1       1
Waiting:        0    0   0.0      0       0
Total:          1    1   0.9      1       4

Percentage of the requests served within a certain time (ms)
  50%      1
  66%      1
  75%      1
  80%      1
  90%      4
  95%      4
  98%      4
  99%      4
 100%      4 (longest request)
- 编辑主配置文件,限制速度;
[root@server1 conf]# vim nginx.conf

 59
 60         location /download/ {
 61                 limit_conn addr 1;
 62                 limit_rate 50k;
 63         }
[root@server1 conf]# nginx -s reload
[root@server1 download]# ll
total 444
-rw-r--r-- 1 root root 453575 Jun 10 21:11 vim.jpg
- 测试
一个并发,两个请求,图片大小为四百多K,此时两个请求需要16s 左右的速度;
[root@westos ~]# ab -c 1 -n 2 http://172.25.25.1/download/vim.jpg
This is ApacheBench, Version 2.3 <$Revision: 1843412 $>
Copyright 1996 Adam Twiss, Zeus Technology Ltd, http://www.zeustech.net/
Licensed to The Apache Software Foundation, http://www.apache.org/

Benchmarking 172.25.25.1 (be patient).....done


Server Software:        nginx/1.18.0
Server Hostname:        172.25.25.1
Server Port:            80

Document Path:          /download/vim.jpg
Document Length:        453575 bytes

Concurrency Level:      1
Time taken for tests:   16.029 seconds	##所用时间
Complete requests:      2
Failed requests:        0
Total transferred:      907628 bytes
HTML transferred:       907150 bytes
Requests per second:    0.12 [#/sec] (mean)
Time per request:       8014.511 [ms] (mean)
Time per request:       8014.511 [ms] (mean, across all concurrent requests)
Transfer rate:          55.30 [Kbytes/sec] received

Connection Times (ms)
              min  mean[+/-sd] median   max
Connect:        0    0   0.1      0       0
Processing:  8014 8014   0.2   8014    8014
Waiting:        0    0   0.2      1       1
Total:       8014 8014   0.3   8015    8015
ERROR: The median and mean for the waiting time are more than twice the standard
       deviation apart. These results are NOT reliable.
ERROR: The median and mean for the total time are more than twice the standard
       deviation apart. These results are NOT reliable.

Percentage of the requests served within a certain time (ms)
  50%   8015
  66%   8015
  75%   8015
  80%   8015
  90%   8015
  95%   8015
  98%   8015
  99%   8015
 100%   8015 (longest request)
- 限制单位时间内的请求数目,以及速度限制:
- 编辑配置文件,将其写入 http 语句块中,下面的 server 语句块都可以用;
[root@server1 conf]# vim nginx.conf

 44
 45         limit_conn_zone $binary_remote_addr zone=addr:10m;
 46         limit_req_zone $binary_remote_addr zone=one:10m rate=1r/s;
 ##rate=1r/s表示允许相同标识的客户端的访问频次,这里限制的是每秒1次

 61         location /download/ {
 62                 limit_conn addr 1;
 63                 #limit_rate 50k;
 64                 limit_req zone=one;
 65         }
 66
[root@server1 conf]# nginx -s reload
- 测试:此时在测试时,可以看到只有一个测试成功,其他的全部错误;因为 1s 只放行一个,其他的都拒绝;
[root@westos ~]# ab -c 1 -n 10 http://172.25.25.1/download/vim.jpg
This is ApacheBench, Version 2.3 <$Revision: 1843412 $>
Copyright 1996 Adam Twiss, Zeus Technology Ltd, http://www.zeustech.net/
Licensed to The Apache Software Foundation, http://www.apache.org/

Benchmarking 172.25.25.1 (be patient).....done


Server Software:        nginx/1.18.0
Server Hostname:        172.25.25.1
Server Port:            80

Document Path:          /download/vim.jpg
Document Length:        453575 bytes

Concurrency Level:      1
Time taken for tests:   0.004 seconds
Complete requests:      10
Failed requests:        9
   (Connect: 0, Receive: 0, Length: 9, Exceptions: 0)
Non-2xx responses:      9
Total transferred:      460006 bytes
HTML transferred:       458021 bytes
Requests per second:    2347.97 [#/sec] (mean)
Time per request:       0.426 [ms] (mean)
Time per request:       0.426 [ms] (mean, across all concurrent requests)
Transfer rate:          105476.55 [Kbytes/sec] received

Connection Times (ms)
              min  mean[+/-sd] median   max
Connect:        0    0   0.1      0       0
Processing:     0    0   0.4      0       2
Waiting:        0    0   0.2      0       1
Total:          0    0   0.6      0       2

Percentage of the requests served within a certain time (ms)
  50%      0
  66%      0
  75%      0
  80%      0
  90%      2
  95%      2
  98%      2
  99%      2
 100%      2 (longest request)
- 再次修改配置文件,一次处理一个时,其他的让其派对等候,并设置队列长度;
[root@server1 conf]# vim nginx.conf

 60
 61         location /download/ {
 62                 limit_conn addr 1;
 63                 #limit_rate 50k;
 64                 limit_req zone=one burst=5;
 65         }
[root@server1 conf]# nginx -s reload
- 再次测试,此时虽然没有错误,都会处理;但是默认还是 1s 一个,此时要时队列比较长,那么后端就需要增加服务来处理其请求;
[root@westos ~]# ab -c 1 -n 10 http://172.25.25.1/download/vim.jpg
This is ApacheBench, Version 2.3 <$Revision: 1843412 $>
Copyright 1996 Adam Twiss, Zeus Technology Ltd, http://www.zeustech.net/
Licensed to The Apache Software Foundation, http://www.apache.org/

Benchmarking 172.25.25.1 (be patient).....done


Server Software:        nginx/1.18.0
Server Hostname:        172.25.25.1
Server Port:            80

Document Path:          /download/vim.jpg
Document Length:        453575 bytes

Concurrency Level:      1
Time taken for tests:   9.004 seconds
Complete requests:      10
Failed requests:        0
Total transferred:      4538140 bytes
HTML transferred:       4535750 bytes
Requests per second:    1.11 [#/sec] (mean)
Time per request:       900.352 [ms] (mean)
Time per request:       900.352 [ms] (mean, across all concurrent requests)
Transfer rate:          492.23 [Kbytes/sec] received

Connection Times (ms)
              min  mean[+/-sd] median   max
Connect:        0    0   0.1      0       0
Processing:     1  900 315.8   1000    1001
Waiting:        0  899 315.8    999    1000
Total:          2  900 315.7   1000    1001

Percentage of the requests served within a certain time (ms)
  50%   1000
  66%   1000
  75%   1001
  80%   1001
  90%   1001
  95%   1001
  98%   1001
  99%   1001
 100%   1001 (longest request)
- 再次修改文件 ,
nodelay不要延迟;
[root@server1 conf]# vim nginx.conf

 61         location /download/ {
 62                 limit_conn addr 1;
 63                 #limit_rate 50k;
 64                 limit_req zone=one burst=5 nodelay;
 65         }
[root@server1 conf]# nginx -s reload
- 测试,此时速度很快,它只会处理消息对列中的数量,其他的就不再等待。
[root@westos ~]# ab -c 1 -n 10 http://172.25.25.1/download/vim.jpg
This is ApacheBench, Version 2.3 <$Revision: 1843412 $>
Copyright 1996 Adam Twiss, Zeus Technology Ltd, http://www.zeustech.net/
Licensed to The Apache Software Foundation, http://www.apache.org/

Benchmarking 172.25.25.1 (be patient).....done


Server Software:        nginx/1.18.0
Server Hostname:        172.25.25.1
Server Port:            80

Document Path:          /download/vim.jpg
Document Length:        453575 bytes

Concurrency Level:      1
Time taken for tests:   0.007 seconds
Complete requests:      10
Failed requests:        4
   (Connect: 0, Receive: 0, Length: 4, Exceptions: 0)
Non-2xx responses:      4
Total transferred:      2725636 bytes
HTML transferred:       2723426 bytes
Requests per second:    1471.02 [#/sec] (mean)
Time per request:       0.680 [ms] (mean)
Time per request:       0.680 [ms] (mean, across all concurrent requests)
Transfer rate:          391549.56 [Kbytes/sec] received

Connection Times (ms)
              min  mean[+/-sd] median   max
Connect:        0    0   0.1      0       0
Processing:     0    1   0.4      1       1
Waiting:        0    0   0.2      0       1
Total:          0    1   0.4      1       2

Percentage of the requests served within a certain time (ms)
  50%      1
  66%      1
  75%      1
  80%      1
  90%      2
  95%      2
  98%      2
  99%      2
 100%      2 (longest request)
7. nginx 配置管理
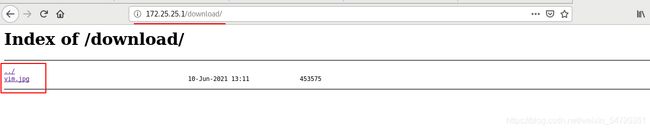
- 自动索引:下载方便;如我们在发布目录中放的文件,默认没有索引,是不能被访问到的;
修改配置文件,加入自动索引的参数;
[root@server1 conf]# vim nginx.conf

 61         location /download/ {
 62                 limit_conn addr 1;
 63                 #limit_rate 50k;
 64                 limit_req zone=one burst=5 nodelay;
 65                 autoindex on;
 66         }
[root@server1 conf]# nginx -s reload
重新加载之后,此时再次访问发布页面时会看到索引。
- Nginx expire 缓存配置: 缓存可以降低网站带宽,加速用户访问;
[root@server1 conf]# vim nginx.conf

 68         location ~ .*\.(gif|jpg|png)$ {
 69         expires 365d;
 70         root html;
 71         }
 72
[root@server1 conf]# nginx -s reload
##测试:
[root@westos ~]# curl -I http://172.25.25.1/download/vim.jpg
HTTP/1.1 200 OK
Server: nginx/1.18.0
Date: Thu, 10 Jun 2021 13:51:25 GMT
Content-Type: image/jpeg
Content-Length: 453575
Last-Modified: Thu, 10 Jun 2021 13:11:54 GMT
Connection: keep-alive
ETag: "60c20f9a-6ebc7"
Expires: Fri, 10 Jun 2022 13:51:25 GMT	##可以看到他的过期时间是1年时间
Cache-Control: max-age=31536000
Accept-Ranges: bytes
- 日志轮询:
- 查看日志量
[root@server1 conf]# ls /usr/local/nginx/logs/
access.log  error.log  nginx.pid
[root@server1 conf]# wc -l /usr/local/nginx/logs/access.log
253 /usr/local/nginx/logs/access.log
[root@server1 conf]# date +%F -d 1day
2021-06-11
[root@server1 conf]# date +%F -d -1day	##表示前一天
2021-06-09
[root@server1 conf]# date +%F	##当前的时间
2021-06-10
- 用脚本来保存日志;
[root@server1 conf]# cd /opt/
[root@server1 opt]# vim nginx_log.sh
[root@server1 opt]# cat nginx_log.sh
#!/bin/bash
cd /usr/local/nginx/logs && mv access.log access_$(date +%F -d -1day).log
kill -USR1 `cat /usr/local/nginx/logs/nginx.pid`
##kill:重载,进行日志重载
[root@server1 opt]# chmod +x nginx_log.sh
- 最好用 crontab 来定时管理日志任务
当前为了测试,直接调用脚本来观察效果:
[root@server1 opt]# ./nginx_log.sh
[root@server1 opt]# cd /usr/local/nginx/logs/
[root@server1 logs]# ls
access_2021-06-09.log  access.log  error.log  nginx.pid
[root@server1 logs]# ll
total 52
-rw-r--r-- 1 root  root 34382 Jun 10 21:51 access_2021-06-09.log
-rw-r--r-- 1 nginx root     0 Jun 10 22:01 access.log
-rw-r--r-- 1 nginx root 10073 Jun 10 21:50 error.log
-rw-r--r-- 1 root  root     5 Jun 10 20:45 nginx.pid
为了安全,日志目录不需要给你 nginx 用户访问权限
- 禁用不必要的日志记录,以节省磁盘IO的消耗;
[root@server1 conf]# vim nginx.conf

 68         location ~ .*\.(gif|jpg|png)$ {
 69         expires 365d;
 70         root html;
 71         access_log off;
 72         }
[root@server1 conf]# nginx -s reload
[root@server1 conf]# ll /usr/local/nginx/logs/
total 52		##多次访问之后,并没有记录日志信息
-rw-r--r-- 1 root  root 34382 Jun 10 21:51 access_2021-06-09.log
-rw-r--r-- 1 nginx root     0 Jun 10 22:01 access.log
-rw-r--r-- 1 nginx root 10133 Jun 10 22:04 error.log
-rw-r--r-- 1 root  root     5 Jun 10 20:45 nginx.pid
- 站点目录和文件的限制
[root@server1 conf]# vim nginx.conf

 68         location ~ .*\.(gif|jpg|png)$ {
 69         deny all;
 70         expires 365d;
 71         root html;
 72         access_log off;
 73         }
[root@server1 conf]# nginx -s reload
##测试时别限制
[root@westos ~]# curl http://172.25.25.1/download/vim.jpg
<html>
<head><title>403 Forbidden</title></head>
<body>
<center><h1>403 Forbidden</h1></center>
<hr><center>nginx/1.18.0</center>
</body>
</html>
[root@westos ~]# wget http://172.25.25.1/download/vim.jpg
--2021-06-10 22:11:42--  http://172.25.25.1/download/vim.jpg
Connecting to 172.25.25.1:80... connected.
HTTP request sent, awaiting response... 403 Forbidden
2021-06-10 22:11:42 ERROR 403: Forbidden.
可以允许某一个IP,或者限制某一个IP。
- 中文乱码
[root@server1 conf]# vim /usr/local/nginx/html/index.html

<!DOCTYPE html>
<html>
<head>
<title>Welcome to nginx!</title>
<style>
    body {
        width: 35em;
        margin: 0 auto;
        font-family: Tahoma, Verdana, Arial, sans-serif;
    }
</style>
</head>
<body>
<h1>Welcome to nginx! 最新的人</h1>
<p>If you see this page, the nginx web server is successfully installed and
working. Further configuration is required.</p>
此时在测试时,效果如下:
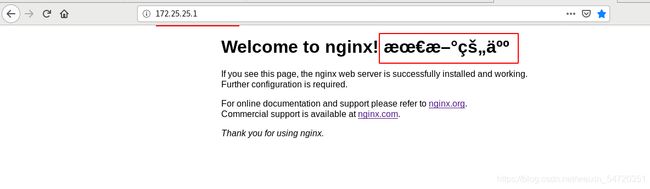
修改配置文件,识别中文:放在最外层,针对所有的都生效;
[root@server1 conf]# vim nginx.conf
 30         charset utf-8;
[root@server1 conf]# nginx -s reload
此时再次测试,效果如下所示:

- 限制 IP
一般不会限制根目录,否则别人访问不到网站信息。
8. nginx 重定向
- 重定向作用场景:
网站调整(如改变网页目录结构);
网页被移到一个新地址;
网页扩展名改变(如应用需要把.php改成.html);
这种情况下,如果不做重定向,则用户收藏夹或搜索引擎数据库中旧地址只能让访问客户得到一个404页面错误信息,访问流白白丧失;再者某些注册了多个域名的网站,也需要通过重定向让访问这些域名的用户自动跳转到主站点等。
310和302
301 redirect: 301代表永久性转移(PermanentlyMoved)
302 redirect: 302代表暂时性转移(TemporarilyMoved )
共同点:
301和302状态码都表示重定向,就是说浏览器在到服务器返回的这个状态码后会自动跳转到一个新的URL地址,这个地址可以从响应的Location首部中获取(用户看到的效果就是他输入的地址A瞬间变成了另一个地址B)
不同点:
301表示旧地址A的资源已经被永久地移除了(这个资源不可访问了) ,搜索引擎在抓取新内容的同时也将旧的网址交换为重定向之后的网址;302表示旧地址A的资源还在(仍然可以访问),这个重定向只是临时地从旧地址A跳转到地址B,搜索引擎会抓取新的内容而保存旧的网址
- 防止域名恶意解析到服务器 IP:
[root@server1 conf]# vim nginx.conf

 48     server {
 49         listen       80;
 50         server_name  localhost;
 51         return 500;
 52
[root@server1 conf]# nginx -s reload
测试结果如下:

- 也可以重定向:
[root@server1 conf]# vim nginx.conf

 48     server {
 49         listen       80;
 50         server_name  localhost;
 51         #return 500;
 52         rewrite ^(.*) http://www.westos.org permanent;
 53
[root@server1 conf]# nginx -s reload
测试:
[root@westos ~]# curl -I 172.25.25.1
HTTP/1.1 301 Moved Permanently
Server: nginx/1.18.0
Date: Thu, 10 Jun 2021 14:28:24 GMT
Content-Type: text/html
Content-Length: 169
Connection: keep-alive
Location: http://www.westos.org
- 80重定向443:
[root@server1 conf]# vim nginx.conf

128     server {
129         listen       443 ssl;
130         server_name  www.westos.org;
131

146
147     server {
148         listen 80;
149         server_name     www.westos.org;
150         rewrite ^(.*) http://www.westos.org permanent;
151
152         #location / {
153         #proxy_pass   http://westos;
154         #}
155     }
[root@server1 conf]# nginx -s reload
测试:

- www.linux.org/bbs 重定向 bbs.linux.org:
网站的扩容,站点太大,分出很多的模块;每个模块有自己的指定域名;
[root@server1 conf]# vim nginx.conf

168     server {
169         listen 80;
170         server_name     bbs.linux.org;
171
172         location / {
173                 root    /bbs;
174                 index   index.html;
175         }
176     }
[root@server1 conf]# nginx -s reload
[root@server1 conf]# mkdir /bbs
[root@server1 conf]# echo bbs.linux.org > /bbs/index.html
[root@server1 conf]# cat /web1/index.html
web1
[root@server1 conf]# echo www.linux.org > /web1/index.html
然后在测试主机中写入解析;
[root@westos ~]# vim /etc/hosts
[root@westos ~]# curl www.linux.org
www.linux.org
[root@westos ~]# curl bbs.linux.org
bbs.linux.org
此时还没有做重定向,写入文件内容之后,再次测试;
[root@server1 conf]# vim nginx.conf
157     server {
158         listen 80;
159         server_name     www.linux.org;
160         rewrite ^(.*) http://bbs.linux.org permanent;
161
162
163         location / {
164                 root    /web1;
165                 index   index.html;
166         }
167     }
[root@server1 conf]# nginx -s reload
测试结果如下所示:
[root@westos ~]# curl -I bbs.linux.org
HTTP/1.1 301 Moved Permanently
Server: nginx/1.18.0
Date: Fri, 11 Jun 2021 10:09:49 GMT
Content-Type: text/html
Content-Length: 169
Connection: keep-alive
Location: http://www.westos.org

[root@westos ~]# curl -I  www.linux.org/bbs
HTTP/1.1 301 Moved Permanently
Server: nginx/1.18.0
Date: Fri, 11 Jun 2021 10:10:17 GMT
Content-Type: text/html
Content-Length: 169
Connection: keep-alive
Location: http://bbs.linux.org
此时在网页中加入 index.html时会提示404 报错;
可加入参数表示匹配域名后的任意字符rewrite ^/bbs/(.*)$ http://bbs.linux.org/$1 permanent; 。
- bbs.linux.org 重定向 www.linux.org/bbs:
[root@server1 conf]# cd /web1/
[root@server1 web1]# ls
index.html
[root@server1 web1]# mkdir bbs
[root@server1 web1]# mv /bbs/ .
[root@server1 web1]# ls
bbs  index.html
[root@server1 conf]# vim nginx.conf
157     server {
158         listen 80;
159         server_name     www.linux.org bbs.linux.org;
160         #rewrite ^(.*) http://bbs.linux.org permanent;
161         #rewrite ^/bbs/(.*)$ http://bbs.linux.org/$1 permanent;
162
163         if ($host = "bbs.linux.org"){
164         rewrite ^/(.*)$ http://www.linux.org/bbs/$1 permanent;
165         }
166
167         location / {
168                 root    /web1;
169                 index   index.html;
170         }
171     }
[root@server1 conf]# nginx -s reload

[root@westos ~]# curl -I  www.linux.org
HTTP/1.1 200 OK
Server: nginx/1.18.0
Date: Fri, 11 Jun 2021 13:47:18 GMT
Content-Type: text/html; charset=utf-8
Content-Length: 14
Last-Modified: Fri, 11 Jun 2021 10:05:27 GMT
Connection: keep-alive
ETag: "60c33567-e"
Accept-Ranges: bytes

[root@westos ~]# curl -I bbs.linux.org
HTTP/1.1 301 Moved Permanently
Server: nginx/1.18.0
Date: Fri, 11 Jun 2021 13:47:23 GMT
Content-Type: text/html
Content-Length: 169
Connection: keep-alive
Location: http://www.linux.org/bbs/
9. nginx 防盗链
编辑配置文件,有一个发布页面;
[root@server1 conf]# vim nginx.conf
147     server {
148         listen 80;
149         server_name     www.westos.org;
150
151         #rewrite ^(.*) http://www.westos.org permanent;
152
153         location / {
154                 root html;
155                 index index.html;
156         #proxy_pass   http://westos;
157         }
158     }
[root@server1 conf]# nginx -s reload
网页测试,保证其有发布页面信息www.westos.org/download/vim.jpg
然后写入:
[root@server2 ~]# cd /var/www/html/
[root@server2 html]# ls
index.html
[root@server2 html]# vim index.html
[root@server2 html]# cat index.html
<body>
<img src="http://www.westos.org/download/vim.jpg"/>
</body>
这个是盗链,当访问 server2 时会给链接到 server1 上,消耗的是server1 的流量;
做防盗链:
[root@server1 conf]# vim nginx.conf
147     server {
148         listen 80;
149         server_name     www.westos.org;
150
151         #rewrite ^(.*) http://www.westos.org permanent;
152
153         location / {
154                 root html;
155                 index index.html;
156         #proxy_pass   http://westos;
157         }
158
159         location ~ \.(jpg|png)$ {
160                 valid_referers none blocked www.westos.org;
		##当是访问 www.westos.org 时,不做更改;
161                 if ($invalid_referer) {
162                         return 403; ##不是时就返回403
163                         #rewrite ^/ http://www2.westos.org/daolian.jpg;
164                 }
165         }
166     }
[root@server1 conf]# nginx -s reload
此时在访问正常域名时可以加载到,访问别的时便不会访问到,原因是做了防盗链。
此处也可以不返回 403,可以重定向到别的网站。
如果不做防盗链本站资源会被窃取,而且还会消耗服务器带宽和系统资源。
10. goaccess 日志可视化
软件安装:
[root@server1 ~]# tar zxf goaccess-1.4.tar.gz
[root@server1 ~]# cd goaccess-1.4
[root@server1 goaccess-1.4]# ls
ABOUT-NLS   compile       config.sub    depcomp     m4           NEWS       src
aclocal.m4  config        configure     goaccess.1  Makefile.am  po         TODO
AUTHORS     config.guess  configure.ac  INSTALL     Makefile.in  README
ChangeLog   config.rpath  COPYING       install-sh  missing      resources
[root@server1 goaccess-1.4]# ./configure --enable-utf8 --enable-geoip=legacy
此处缺少一个包,从网上下载一个,安装完成之后,再次编译;
[root@server1 ~]# yum install GeoIP-devel-1.5.0-13.el7.x86_64.rpm -y
[root@server1 goaccess-1.4]# ./configure --enable-utf8 --enable-geoip=legacy
[root@server1 goaccess-1.4]# make
[root@server1 goaccess-1.4]# make install
没有指定安装路径,默认在/usr/local/bin
软件使用:指定日志输出到默认发布目录中,指定了日志格式和更新时间;
[root@server1 logs]# ls
access_2021-06-09.log  access.log  error.log  nginx.pid
[root@server1 logs]# ll access.log
-rw-r--r-- 1 nginx root 10888 Jun 11 22:14 access.log
[root@server1 logs]# goaccess access.log -o /usr/local/nginx/html/report.html --log-format=COMBINED --real-time-html
Parsing... [0] [0/s]
WebSocket server ready to accept new client connections
在nginx配置文件中,将之前的重定向注释掉,让其可以用IP访问,然后测试日志的可视化;
[root@server1 conf]# vim nginx.conf
 48     server {
 49         listen       80;
 50         server_name  localhost;
 51         #return 500;
 52         #rewrite ^(.*) http://www.westos.org permanent;
[root@server1 conf]# nginx -s reload
