【爬虫】获取手机详细参数爬虫脚本详细解析
起始初衷
朋友工作需要手机的性能详细列表,本来以为网络上应该已经有很多相关的文件可以直接下载了,但是依旧没有找到比较满意的。这时候正好被推荐了PCOnline上的手机详细参数,突发奇想闲着没事用Python写了一个整理手机详细信息的脚本。
工具
1. python 语言和解释器
2. python 的requests,BeautifulSoup4,xlwt(因为朋友希望整合成excel, 也可以替换成pandas,毕竟xlwt无法保存成xlsx)
编码干活
1. 获取目标网址
https://product.pconline.com.cn/mobile/ , 通过点击第二页 https://product.pconline.com.cn/mobile/25s1.shtml 以及第三页 https://product.pconline.com.cn/mobile/50s1.shtml
很容易可以知道页数和连接的关系为
“https://product.pconline.com.cn/mobile/“ + 25 * i + "s1.shtml"
2. 大家都会写的request,这边就不多解释直接上代码了
def request_html(url):
    headers = {'User-Agent': 'Mozilla/5.0 ' \
                             '(Macintosh; U; Intel Mac OS X 10_6_8; en-us) AppleWebKit/534.50 ' \
                             '(KHTML, like Gecko) Version/5.1 Safari/534.50'}
    response = requests.get(url, headers=headers)
    response.encoding = "utf-8"
    return response
3. 获取每个Item的链接。
利用chrome或者firefox的检查(inspect)工具,可以了解到每项产品的链接和图片链接。
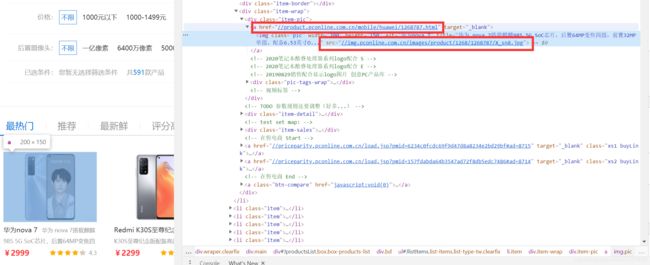
点击到产品详情页,举个例子,https://product.pconline.com.cn/mobile/huawei/1268787_detail.html页面,这个详细页面解释上面的产品连接加上 "_detail"的标签。
于是我们可以对之前的response进行解析。获取每个
def parse_items(text):
    global link_list
    soup = BeautifulSoup(text, 'lxml')  # 声明BeautifulSoup对象
    item_list = soup.find_all('li', attrs={"class": "item"})
    for item in item_list:
        link = item.find('a', attrs={"target": "_blank"})
        if link is not None:
            url = link.attrs['href']
link_list.append(url)(这里存在一个问题,如果我们通过应该能够获取到图片的连接地址,不过在实际操作过程中,获取到的地址是一个blank.gif, 说明这个地址是被替换过了。对于该问题这里倒没有想办法处理,而是另辟蹊径,后续会讲解。)
4. 获取每个设备的详细参数
进入到detail页面,同样通过检查工具获取相应的html源码

和步骤3的流程一样,解析一下Html,获取里面的text,先上代码再做解释
def collect_param():
    global link_list
    global device_list
    for link in link_list:
        url = "https://" + link[2:-5] + "_detail.html"
        response = request_html(url)
        param = BeautifulSoup(response.content, "lxml").find_all("tbody")
        total = {}
        for item in param:
            if item != '\n':
                for tr in item.find_all("tr"):
                    if tr.find("th") is not None:
                        try:
                            key = tr.find("th").text
                            val = tr.find("td").text.strip()
                            if '•' in val:
                                val = val.split('•')[0]
                            if key == 'CPU' and tr.find("td").find('a', attrs={"class": "poptxt"}) is not None:
                                val = tr.find("td").find('a', attrs={"class": "poptxt"}).text.strip()
                            if key == '型号':
                                img_url = parse_img_url("https:" + link)
                                download_img(img_url, val)
                            total[key] = val
                        except AttributeError as e:
                            print(tr)

        device_list.append(total)
        # print(total)
代码中有几个点需要解析一下,就是在文本页面中存在一些超链接和标签问题需要过滤。针对上面代码中的几处 “if” 进行解释下
(1)在获取操作系统或者手机类型的时候,页面会弹出如下的Tab。
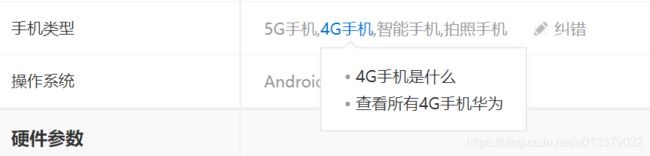
这里为了偷懒,不对详细的内容进行解析,但是从获取到的文本中可以看到在显示这些内容的时候都会带有 '•'符号,因此直接过滤就行了。
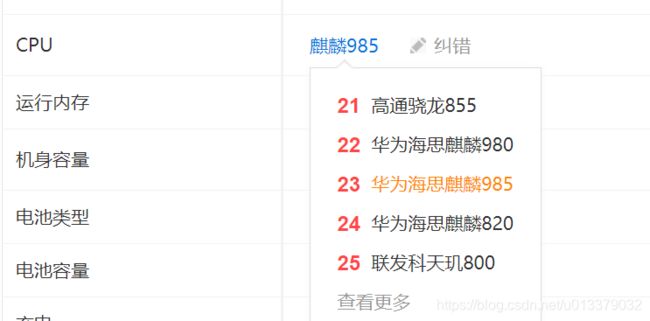
(2) 在获取CPU数据的时候会出现排行表,同样需要进行过滤,但是这边的排位比较随机,虽然也可以通过正则表达式进行过滤,感觉还是比较麻烦,所以还是处理了一下。
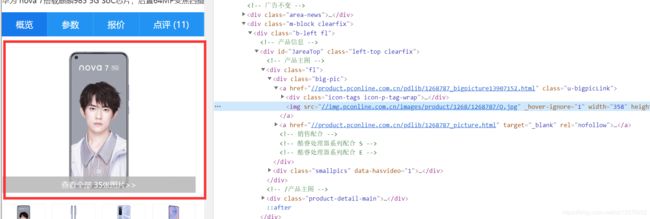
(3) 当获取到手机型号的时候,由于之前所要求的要下载手机图片,所以这里以手机型号为名称保存图片。先上代码:
def parse_img_url(url):
    response = request_html(url)
    div = BeautifulSoup(response.content, "lxml").find("div", attrs={"class": "big-pic"})
    img_url = div.find("img").get("src")
    return "https:" + img_url


def download_img(url, name):
    headers = {'User-Agent': 'Mozilla/5.0 ' \
                             '(Macintosh; U; Intel Mac OS X 10_6_8; en-us) AppleWebKit/534.50 ' \
                             '(KHTML, like Gecko) Version/5.1 Safari/534.50'}
    r = requests.get(url, headers=headers, stream=True)
    # print(r.status_code)  # 返回状态码
    if r.status_code == 200:
        open('img/' + name + ".png", 'wb').write(r.content)  # 将内容写入图片
        # print("done")
    del r
之前说到了,图片的src地址获取到的是一个"blank.gif",这里不做深入研究,直接另辟蹊径,下载的是item概览的那张图片,并且以手机型号作为名称保存在本地的img文件夹里,对路径的解析同之前一样。
5. 整合成excel表格
没有太多的解释,直接上代码把。
def write_excel():
    workbook = xlwt.Workbook(encoding='utf-8')
    worksheet = workbook.add_sheet('phonesheet')
    title = list(device_list[0])
    for i in range(len(title)):
        worksheet.write(0, i, title[i])

    for i in range(len(device_list)):
        for j in range(len(title)):
            if title[j] not in device_list[i]:
                worksheet.write(i+1, j, "None")
            else:
                worksheet.write(i+1, j, device_list[i][title[j]])

    workbook.save("phone.xls")
第一行写入所有的参数名称,也就是Key,后面逐行写入参数值,最后保存成文件。这边不太需要解释。
6. 总结
这里得感谢网站没有做太多的反爬虫设置把,大多数的过程都比较简单。保存一下当一次经验谈。因为是比较清晰简单的脚本因此也没必要上源码了。如果想要运行的话把上面的所有函数复制下来,然后加上如下的main函数就行了。
if __name__ == "__main__":
    data = request_html('https://product.pconline.com.cn/mobile/')
    parse_items(data.content)
    collect_param()
    print(len(device_list))
    with open("phone.json", "w", encoding='utf-8') as f:
        f.write(str(device_list))
    write_excel()