VS2019最简单编译V8引擎方法
文章目录
- 1.编译前的配置工作
-
- 1.1配置代理
- 1.2下载depot tools
- 1.3下载Windows SDK10
- 2.获取源码
-
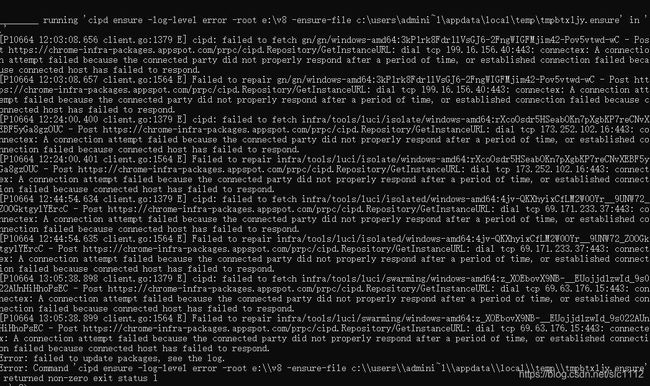
- 2.1可能出现的错误
- 3.编译源码
-
- 3.1 VS2019编译(1)
- 3.2 VS2019编译(2)
- 3.3另外一种编译的方式
- 3.4直接编译方法(独创)★★
- 4.补充代码
- 4.1补充代码(1)
- 4.2补充代码(2)
- 5.使用V8引擎
- 6.心得总结
本篇文章的方法在2021-3-31测试正常使用。
看到这篇文章的时候,如果你也向我一样曾经对编译v8感到迷茫,不知道怎么才能正确编译好的话,我希望这篇文章能够帮助你实现v8引擎编译并且使用。我研究了两天时间,终于成功编译了v8代码(WIN10环境),发现编译v8没有像网上说的那么困难(首先你需要一个网络代理),所以我决心想写一篇细致的文章解决目前大家编译中的问题,一些共犯的基础问题不再仔细阐述,重点写编译过程中的问题,如果你是在下载源码过程中遇到问题的话,一定要检查代理的问题。如果你是在linux等系统的话,建议仔细查看文档,文档里面linux介绍比win的要多。Linux系统编译成功的机会更大!所以如果实在没有办法,不妨在其他系统编译好之后复制到本系统使用。
我特地让一个朋友测试,在没有阅读其他文章的时候,仅仅阅读本篇文章再加上官方文档也能成功安装V8引擎。所以不一定把每篇文章都读,一定要找到重点来看。
如果你没有时间仔细阅读文章的话我把所有重点全部加粗的方式标注出来,方便快速读到重点。所谓重点其实就是你出错的原因,比如你gclient出错,那么就检查gclient之前的那一步,解决完再进行下面的一步。在执行最后一步之前,一定要保证前面的步骤全部正确。由于源码的head有用户电脑签名信息,所以不方便发布源码,大家还是自己动手gclient下载源码吧,看到这篇文章的人应该都是有一定技术的,下载源码这个是小事,之后如何编译,如何使用才是重点。
1.编译前的配置工作
1.1配置代理
以管理员的身份运行控制台(win+r键 cmd),之后输入以下:
set HTTP_PROXY=http://127.0.0.1:8990
set HTTPS_PROXY=http://127.0.0.1:8990
其中的8990为你们自己设置的代理端口,有些程序默认为8080,视不同程序而定。只需要输入这两行代码就可以,用这种方式设置代理的话,重启控制台就会失效,需要重新设置。有了代理是之后的gclient得以正常运行的前提。
1.2下载depot tools
在下载工具之前首先要明确为何要下载这个工具?这个工具其实是便于下载谷歌源码的一个工具,直接使用git的方式也可以下载源码,但是下载v8源码不全,所以直接建议使用这个工具下载完整源码,而不需要使用git等方法下载部分残缺源码。 因为即使下载了源码也不全,后来还得继续下载完整版才行。
v8源码地址(只下载depot工具,不下载源码即可)

下载完之后设置环境变量,比如我把deptot放在了F:\depot下。设置环境变量只需要按照我这一个方式设置即可。
之后还需要设置一个环境变量,直接用控制台然后输入
DEPOT_TOOLS_WIN_TOOLCHAIN=0
#再输入一行代码 来检查depot
gclient
1.3下载Windows SDK10
直接在百度搜索windowskit10,然后安装,大概10分钟的时间。
1.3步做完之后,就可以开始下载v8全套源码了!
2.获取源码
比如我想安装到c盘的v8文件夹
#以下代码必须一行一行输入,不能直接全部复制
cd c:\v8
fetch v8
这两行代码就需要执行相当长的时间,如果你网速好的话可能20分钟可以下完,网速差的话可能长达几小时时间。中途要是网络中断的话输入gclient sync -v来重新下载代码。
当出现finished字样代表即将安装完成,我们再等待几分钟让源码完整安装完。之后就可以编译 了。
最终会有类似下图的结果,代表全部代码安装完。
目前来看,最新版代码安装好之后为2.48GB。建议直接使用最新版源码。

2.1可能出现的错误
3.编译源码
3.1 VS2019编译(1)
在编译之前,首先要做的是把全部代码备份。因为可能会遇到奇怪的错误,备份代码以防万一。
使用VS2019的控制台(而不是默认的控制台)输入以下代码(特别注意其中的\转义字符,十分重要):
gn gen out.gn\x64.release_vs --sln=v8 --ide=vs2019 --args="is_debug=false target_cpu=\ “x64\ " is_component_build=true v8_static_library=false use_custom_libcxx=false use_custom_libcxx_for_host=false v8_use_external_startup_data=false is_clang=false v8_use_external_startup_data=false”
gn gen out.gn\x64.release_vs --sln=v8 --ide=vs2019 --args="is_debug=false target_cpu=\"x64\" is_component_build=true v8_static_library=false use_custom_libcxx=false use_custom_libcxx_for_host=false v8_use_external_startup_data=false is_clang=false v8_use_external_startup_data=false"
然后打开VS2019,直接BUILD gn_all这个项目(注意不是全部项目,只编译154个项目中的这个项目)
但是即使是这个项目也要花费相当长的时间编译!
下图证明我是实际经过编译写的文章,这一步骤需要花费的时间更长。然而我在使用这个编译的时候仍然报错了。

3.2 VS2019编译(2)
在VS2019的控制台输入以下代码gn gen --ide=vs out.gn\x64_solution
然后编译gn_all
我推荐使用这个方法,这个方法最简单,第一个方法相当于加上了参数,这里相当于把参数设置为默认,还是推荐在X64环境下编译,如果你是64位 系统的话推荐在64位环境编译。
这里要注意到,如果你输入gn …等等代码的时候,提示找不到gn.exe,说明在获取源码出现问题,首先要做的是重新输入gclient sync -v重新获取源码,如果不行的话重新fetch v8!获得源码。以上的gn~命令必须正确运行才能使用VS2019进行编译。
由于方法2和方法1几乎是同一个方法,所以如果报错的话报错的原因也基本类似。
3.3另外一种编译的方式
这个方式需要python老版本的支持。我还是推荐使用VS2019编译,能用新版本就用新版本。软件更新换代的时候要紧跟时代潮流。
python tools\dev\v8gen.py x64.release
ninja -C out.gn\x64.release
最终编译后生成很多文件,有dll,有lib,其中关键的是v8.dll和v8.dll.lib文件生成。但是这种方法使用到了v8gen.py,而这个文件的函数容易出现错误。
3.4直接编译方法(独创)★★
本人由于其他原因在VS编译报错,网上探究了很长时间,最终发现了一个目前最好的编译方法(其实官方文档有写,但是比较隐晦,导致国内很多人不知道这个方法)。特别奇怪的是网上很多教程都是打开VS2019的,其实不用打开就能编译,调用Ninja即可。此方法为网上独创方法,其他博客写的方法虽有类似,但是执行过程中仍然会有困难,本人终于使用这个方法成功编译出了v8.dll
直接在VS的控制台(注意不是系统自带的控制台)输入gn args out/x64.debug
之后会弹出一个记事本文件。输入以下内容
is_debug=true
target_cpu="x64"
v8_enable_i18n_support=false
v8_use_external_startup_data=false
#use_custom_libcxx=false
is_component_build=true
紧接着直接使用ninja -C out/x64.debug v8
就可以编译了(一定要注意执行过程中是否有出错,一般debug出错的概率更低一些)!如下图所示,能够成功编译

最终编译效果图(供参考,实际不一定一致)

4.补充代码
4.1补充代码(1)
这一模块所列代码有些包含了之前的代码,有些是经常在控制台需要反复输入的代码,有些是额外辅助代码。如果你之前步骤都没有错误到第三步已经可以使用了。第四步的代码是额外辅助用的。我把补充的代码也贴在这里,方便大家查询,同时自己也相当于做一个备份。
#如果你想换老版本的话使用
#必须进入到完整v8代码目录下输入git checkout才有效果
git checkout 4.5.103.35
#设置代理(可选代码)
git config --global http.proxy http://127.0.0.1:8990
git config --global https.proxy http://127.0.0.1:8990
netsh winhttp set proxy 127.0.0.1:8990
set HTTP_PROXY=http://127.0.0.1:8990
set HTTPS_PROXY=http://127.0.0.1:8990
#清除代理(可选代码)
git config --global --unset http.proxy
git config --global --unset https.proxy
netsh winhttp reset proxy
set HTTP_PROXY=
set HTTPS_PROXY=
#控制台设置变量
SET DEPOT_TOOLS_WIN_TOOLCHAIN=0
#开始下载
fetch v8
#下面是切换版本 如果不切换版本就是最新版
cd v8
git checkout 8.8-lkgr
gclient sync -v
#编译1
gn gen --ide=vs out.gn\x64_solution
#编译2
gn gen out.gn\x64.release_vs --sln=v8 --ide=vs2019 --args="is_debug=false target_cpu=\"x64\" is_component_build=true v8_static_library=false use_custom_libcxx=false use_custom_libcxx_for_host=false v8_use_external_startup_data=false is_clang=false v8_use_external_startup_data=false"
4.2补充代码(2)
#### fetch
cd v8-
git checkout branch-heads/8.3 #(失效)
git pull branch-heads/8.3 #(失效)
gclient sync -D
#### debug
gn args out/x64.debug
is_debug=true
target_cpu="x64"
v8_enable_i18n_support=false
v8_use_external_startup_data=false
#use_custom_libcxx=false
is_component_build=true
ninja -C out/x64.debug v8
#### clean
ninja -C out/x64.debug -t clean
#### release
gn args out/x64.release
is_debug=false
target_cpu="x64"
v8_enable_i18n_support=false
v8_use_external_startup_data=false
use_custom_libcxx=false
is_component_build=true
ninja -C out/x64.release v8
#### clean
ninja -C out/x64.release -t clean
5.使用V8引擎
直接把代码复制进去,然后需要注意的是,包含目录、附加库目录、附加依赖项三个。具体一些:
A、添加工程的头文件目录:工程—属性—配置属性—C/C+±–常规—附加包含目录:加上头文件存放目录。
B、添加文件引用的lib静态库路径:工程—属性—配置属性—链接器—常规—附加库目录:加上lib文件存放目录。
C 然后添加工程引用的lib文件名:工程—属性—配置属性—链接器—输入—附加依赖项:加上lib文件名
// Copyright 2012 the V8 project authors. All rights reserved.
// Redistribution and use in source and binary forms, with or without
// modification, are permitted provided that the following conditions are
// met:
//
// * Redistributions of source code must retain the above copyright
// notice, this list of conditions and the following disclaimer.
// * Redistributions in binary form must reproduce the above
// copyright notice, this list of conditions and the following
// disclaimer in the documentation and/or other materials provided
// with the distribution.
// * Neither the name of Google Inc. nor the names of its
// contributors may be used to endorse or promote products derived
// from this software without specific prior written permission.
//
// THIS SOFTWARE IS PROVIDED BY THE COPYRIGHT HOLDERS AND CONTRIBUTORS
// "AS IS" AND ANY EXPRESS OR IMPLIED WARRANTIES, INCLUDING, BUT NOT
// LIMITED TO, THE IMPLIED WARRANTIES OF MERCHANTABILITY AND FITNESS FOR
// A PARTICULAR PURPOSE ARE DISCLAIMED. IN NO EVENT SHALL THE COPYRIGHT
// OWNER OR CONTRIBUTORS BE LIABLE FOR ANY DIRECT, INDIRECT, INCIDENTAL,
// SPECIAL, EXEMPLARY, OR CONSEQUENTIAL DAMAGES (INCLUDING, BUT NOT
// LIMITED TO, PROCUREMENT OF SUBSTITUTE GOODS OR SERVICES; LOSS OF USE,
// DATA, OR PROFITS; OR BUSINESS INTERRUPTION) HOWEVER CAUSED AND ON ANY
// THEORY OF LIABILITY, WHETHER IN CONTRACT, STRICT LIABILITY, OR TORT
// (INCLUDING NEGLIGENCE OR OTHERWISE) ARISING IN ANY WAY OUT OF THE USE
// OF THIS SOFTWARE, EVEN IF ADVISED OF THE POSSIBILITY OF SUCH DAMAGE.
#include platform = v8::platform::NewDefaultPlatform();
//std::unique_ptr platform;
v8::V8::InitializePlatform(platform.get());
v8::V8::Initialize();
// Create a new Isolate and make it the current one.
v8::Isolate::CreateParams create_params;
create_params.array_buffer_allocator =
v8::ArrayBuffer::Allocator::NewDefaultAllocator();
v8::Isolate* isolate = v8::Isolate::New(create_params);
{
v8::Isolate::Scope isolate_scope(isolate);
// Create a stack-allocated handle scope.
v8::HandleScope handle_scope(isolate);
// Create a new context.
v8::Local context = v8::Context::New(isolate);
// Enter the context for compiling and running the hello world script.
v8::Context::Scope context_scope(context);
{
// Create a string containing the JavaScript source code.
v8::Local source =
v8::String::NewFromUtf8Literal(isolate, "'Hello' + ', World!'");
// Compile the source code.
v8::Local script =
v8::Script::Compile(context, source).ToLocalChecked();
// Run the script to get the result.
v8::Local result = script->Run(context).ToLocalChecked();
// Convert the result to an UTF8 string and print it.
v8::String::Utf8Value utf8(isolate, result);
printf("%s\n", *utf8);
}
{
// Use the JavaScript API to generate a WebAssembly module.
//
// |bytes| contains the binary format for the following module:
//
// (func (export "add") (param i32 i32) (result i32)
// get_local 0
// get_local 1
// i32.add)
//
const char csource[] = R"(
let bytes = new Uint8Array([
0x00, 0x61, 0x73, 0x6d, 0x01, 0x00, 0x00, 0x00, 0x01, 0x07, 0x01,
0x60, 0x02, 0x7f, 0x7f, 0x01, 0x7f, 0x03, 0x02, 0x01, 0x00, 0x07,
0x07, 0x01, 0x03, 0x61, 0x64, 0x64, 0x00, 0x00, 0x0a, 0x09, 0x01,
0x07, 0x00, 0x20, 0x00, 0x20, 0x01, 0x6a, 0x0b
]);
let module = new WebAssembly.Module(bytes);
let instance = new WebAssembly.Instance(module);
instance.exports.add(3, 4);
)";
// Create a string containing the JavaScript source code.
v8::Local source =
v8::String::NewFromUtf8Literal(isolate, csource);
// Compile the source code.
v8::Local script =
v8::Script::Compile(context, source).ToLocalChecked();
// Run the script to get the result.
v8::Local result = script->Run(context).ToLocalChecked();
// Convert the result to a uint32 and print it.
uint32_t number = result->Uint32Value(context).ToChecked();
printf("3 + 4 = %u\n", number);
}
}
// Dispose the isolate and tear down V8.
isolate->Dispose();
v8::V8::Dispose();
v8::V8::ShutdownPlatform();
delete create_params.array_buffer_allocator;
return 0;
}
6.心得总结
这个基本上是目前我调试环境变量最复杂的一个引擎(主要是方法不对绕弯路),但我还是希望用简单的方式来指导更多人学会使用这个引擎,v8真的很强大,仔细阅读源码也能收获很多(代码写的相当规范,几百人Google团队开发10年代码不是随便的人就能实现的)
但是使用v8比编译的难度更大,国内几乎没多少人在用,讨论交流比较困难,要想学习还需要多多涉猎,特别是一些底层的知识原理。
另外,本人是直接使用的最新版本进行编译的,但是这样做其实不好,最新版本bug可能比较多(Google更新速度太快,真的有可能出BUG),不妨换版本,换成低版本的方法,说不定你在低版本就可以使用了。
git checkout 8.4-lkgr
gclient sync -D
其中的-D命令为删除多余文件,释放空间用。
PS:本篇文章持续更新,发现新问题新方法会补充在文章之中。
