扩散模型学习(四)
文章目录
- 一、DDIM反转
- 二、音频扩散模型
-
- 1. 使用预训练音频扩散模型
- 2. 微调一个音频扩散模型
一、DDIM反转
import torch
import requests
import torch.nn as nn
import torch.nn.functional as F
from PIL import Image
from io import BytesIO
from tqdm.auto import tqdm
from matplotlib import pyplot as plt
from torchvision import transforms as tfms
from diffusers import StableDiffusionPipeline, DDIMScheduler

# Useful function for later
def load_image(url, size=None):
    response = requests.get(url,timeout=0.2)
    img = Image.open(BytesIO(response.content)).convert('RGB')
    if size is not None:
        img = img.resize(size)
    return img

device = torch.device("cuda" if torch.cuda.is_available() else "cpu")
加载一个已训练的pipeline
# Load a pipeline
pipe = StableDiffusionPipeline.from_pretrained("runwayml/stable-diffusion-v1-5").to(device)

# Set up a DDIM scheduler:
pipe.scheduler = DDIMScheduler.from_config(pipe.scheduler.config)

# Sample an image to make sure it is all working
prompt = 'Beautiful DSLR Photograph of a penguin on the beach, golden hour'
negative_prompt = 'blurry, ugly, stock photo'
im = pipe(prompt, negative_prompt=negative_prompt).images[0]
im.resize((256, 256)) # resize for convenient viewing
DDIM的采样过程
@torch.no_grad()
def sample(prompt, start_step=0, start_latents=None,
           guidance_scale=3.5, num_inference_steps=30,
           num_images_per_prompt=1, do_classifier_free_guidance=True,
           negative_prompt='', device=device):

    # Encode prompt
    text_embeddings = pipe._encode_prompt(
            prompt, device, num_images_per_prompt, do_classifier_free_guidance, negative_prompt
    )

    # Set num inference steps
    pipe.scheduler.set_timesteps(num_inference_steps, device=device)

    # Create a random starting point if we don't have one already
    if start_latents is None:
        start_latents = torch.randn(1, 4, 64, 64, device=device)
        start_latents *= pipe.scheduler.init_noise_sigma

    latents = start_latents.clone()

    for i in tqdm(range(start_step, num_inference_steps)):

        t = pipe.scheduler.timesteps[i]

        # expand the latents if we are doing classifier free guidance
        latent_model_input = torch.cat([latents] * 2) if do_classifier_free_guidance else latents
        latent_model_input = pipe.scheduler.scale_model_input(latent_model_input, t)

        # predict the noise residual
        noise_pred = pipe.unet(latent_model_input, t, encoder_hidden_states=text_embeddings).sample

        # perform guidance
        if do_classifier_free_guidance:
            noise_pred_uncond, noise_pred_text = noise_pred.chunk(2)
            noise_pred = noise_pred_uncond + guidance_scale * (noise_pred_text - noise_pred_uncond)


        # Normally we'd rely on the scheduler to handle the update step:
        # latents = pipe.scheduler.step(noise_pred, t, latents).prev_sample

        # Instead, let's do it ourselves:
        prev_t = max(1, t.item() - (1000//num_inference_steps)) # t-1
        alpha_t = pipe.scheduler.alphas_cumprod[t.item()]
        alpha_t_prev = pipe.scheduler.alphas_cumprod[prev_t]
        predicted_x0 = (latents - (1-alpha_t).sqrt()*noise_pred) / alpha_t.sqrt()
        direction_pointing_to_xt = (1-alpha_t_prev).sqrt()*noise_pred
        latents = alpha_t_prev.sqrt()*predicted_x0 + direction_pointing_to_xt

    # Post-processing
    images = pipe.decode_latents(latents)
    images = pipe.numpy_to_pil(images)

    return images
DDIM的反转过程
@torch.no_grad()
def invert(start_latents, prompt, guidance_scale=3.5, num_inference_steps=80,
           num_images_per_prompt=1, do_classifier_free_guidance=True,
           negative_prompt='', device=device):

    # Encode prompt
    text_embeddings = pipe._encode_prompt(
            prompt, device, num_images_per_prompt, do_classifier_free_guidance, negative_prompt
    )

    # latents are now the specified start latents
    latents = start_latents.clone()

    # We'll keep a list of the inverted latents as the process goes on
    intermediate_latents = []

    # Set num inference steps
    pipe.scheduler.set_timesteps(num_inference_steps, device=device)

    # Reversed timesteps <<<<<<<<<<<<<<<<<<<<
    timesteps = reversed(pipe.scheduler.timesteps)

    for i in tqdm(range(1, num_inference_steps), total=num_inference_steps-1):

        # We'll skip the final iteration
        if i >= num_inference_steps - 1: continue

        t = timesteps[i]

        # expand the latents if we are doing classifier free guidance
        latent_model_input = torch.cat([latents] * 2) if do_classifier_free_guidance else latents
        latent_model_input = pipe.scheduler.scale_model_input(latent_model_input, t)

        # predict the noise residual
        noise_pred = pipe.unet(latent_model_input, t, encoder_hidden_states=text_embeddings).sample

        # perform guidance
        if do_classifier_free_guidance:
            noise_pred_uncond, noise_pred_text = noise_pred.chunk(2)
            noise_pred = noise_pred_uncond + guidance_scale * (noise_pred_text - noise_pred_uncond)

        current_t = max(0, t.item() - (1000//num_inference_steps))#t
        next_t = t # min(999, t.item() + (1000//num_inference_steps)) # t+1
        alpha_t = pipe.scheduler.alphas_cumprod[current_t]
        alpha_t_next = pipe.scheduler.alphas_cumprod[next_t]

        # Inverted update step (re-arranging the update step to get x(t) (new latents) as a function of x(t-1) (current latents)
        latents = (latents - (1-alpha_t).sqrt()*noise_pred)*(alpha_t_next.sqrt()/alpha_t.sqrt()) + (1-alpha_t_next).sqrt()*noise_pred


        # Store
        intermediate_latents.append(latents)

    return torch.cat(intermediate_latents)
def edit(input_image, input_image_prompt, edit_prompt, num_steps=100, start_step=30, guidance_scale=3.5):
    with torch.no_grad(): latent = pipe.vae.encode(tfms.functional.to_tensor(input_image).unsqueeze(0).to(device)*2-1)
    l = 0.18215 * latent.latent_dist.sample()
    inverted_latents = invert(l, input_image_prompt,num_inference_steps=num_steps)
    final_im = sample(edit_prompt, start_latents=inverted_latents[-(start_step+1)][None],
                      start_step=start_step, num_inference_steps=num_steps, guidance_scale=guidance_scale)[0]
    return final_im
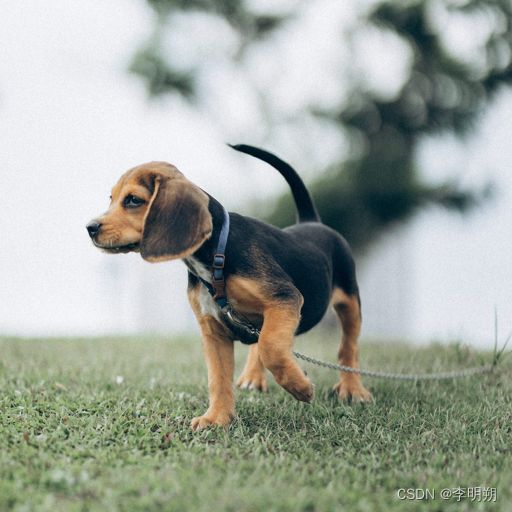
原图片
input_image = load_image('https://images.pexels.com/photos/8306128/pexels-photo-8306128.jpeg', size=(512, 512))
替换后的图片
edit(input_image, 'A puppy on the grass', 'an old grey dog on the grass', num_steps=50, start_step=10)

二、音频扩散模型
1. 使用预训练音频扩散模型
import torch, random
import numpy as np
import torch.nn.functional as F
from tqdm.auto import tqdm
from IPython.display import Audio
from matplotlib import pyplot as plt
from diffusers import DiffusionPipeline
from torchaudio import transforms as AT
from torchvision import transforms as IT

# Load a pre-trained audio diffusion pipeline
device = "cuda" if torch.cuda.is_available() else "cpu"
pipe = DiffusionPipeline.from_pretrained("teticio/audio-diffusion-instrumental-hiphop-256").to(device)
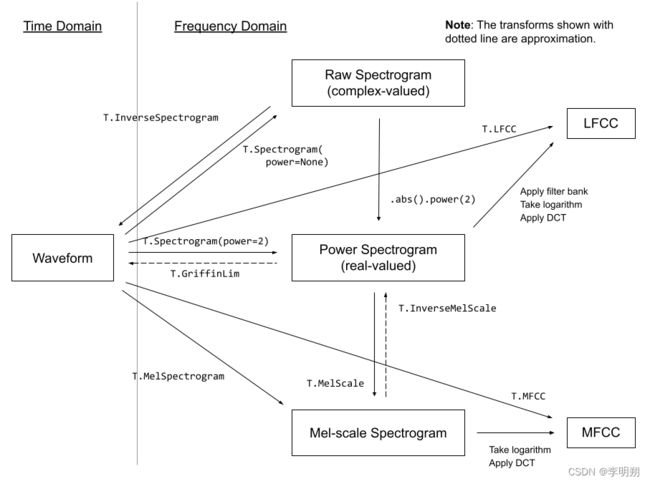
音频不是直接被扩散模型生成, 而是这个pipeline有着与图像生成pipelines类似的2D Unet结构。首先 用它来生成频谱,之后再在后处理中把它变化为最终的音频。我们可以通过pipe.mel来处理这个变化。
# Sample from the pipeline and display the outputs:
output = pipe()
display(output.images[0])
display(Audio(output.audios[0], rate=pipe.mel.get_sample_rate()))
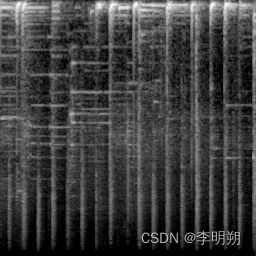
音频的’波形’从时间上表现出了源音频 - 比如,这可能是接收自麦克风的电信号。从这种’时域’的表达方式上做处理会有些棘手,所以有种更普遍的做法把它转换成其他形式,通常把这叫做频谱。频谱直接展示出在不同频率(y轴)与时间(x轴)上的剧烈程度。
我们通过pipeline中的mel功能来实现图片频谱和音频的互相转换
a = pipe.mel.image_to_audio(output.images[0])
pipe.mel.load_audio(raw_audio=a)
im = pipe.mel.audio_slice_to_image(0)
音频被表现为一串很长的数字数组。要把它播放出来的话,我们还需要一个关键信息:采样率。我们可以在pipeline中这样来看使用的采样率:22050
sample_rate_pipeline = pipe.mel.get_sample_rate()
2. 微调一个音频扩散模型
首先加载数据集,查看数据集的大小和采样率,此数据集采样率为44100
from datasets import load_dataset
dataset = load_dataset('lewtun/music_genres', split='train')

audio_array = dataset[0]['audio']['array']
sample_rate_dataset = dataset[0]['audio']['sampling_rate']
print('Audio array shape:', audio_array.shape)
print('Sample rate:', sample_rate_dataset)
display(Audio(audio_array, rate=sample_rate_dataset))
这条音频的采样率会更高 - 如果我们想用目前的这个pipeline,需要对它’重采样’来匹配。这个片段也比pipeline所预设的长度更长。幸运的是,当我们使用pipe.mel在加载音频时,会自动把它切片成更短的片区。
sample_rate_dataset = dataset[0]['audio']['sampling_rate']
sample_rate_pipeline = pipe.mel.get_sample_rate()

resampler = AT.Resample(sample_rate_dataset, sample_rate_pipeline, dtype=torch.float32)
to_t = IT.ToTensor()

def to_image(audio_array):
  audio_tensor = torch.tensor(audio_array).to(torch.float32)
  audio_tensor = resampler(audio_tensor)
  pipe.mel.load_audio(raw_audio=np.array(audio_tensor))
  num_slices = pipe.mel.get_number_of_slices()
  slice_idx = random.randint(0, num_slices-1) # Pic a random slice each time (excluding the last short slice)
  im = pipe.mel.audio_slice_to_image(slice_idx)
  return im
def collate_fn(examples):
  # to image -> to tensor -> rescale to (-1, 1) -> stack into batch
  audio_ims = [to_t(to_image(x['audio']['array']))*2-1 for x in examples]
  return torch.stack(audio_ims)

# Create a dataset with only the 'Chiptune / Glitch' genre of songs
batch_size=4 # 4 on colab, 12 on A100
chosen_genre = 'Electronic' # <<< Try training on different genres <<<
indexes = [i for i, g in enumerate(dataset['genre']) if g == chosen_genre]
filtered_dataset = dataset.select(indexes)
dl = torch.utils.data.DataLoader(filtered_dataset.shuffle(), batch_size=batch_size, collate_fn=collate_fn, shuffle=True)
batch = next(iter(dl))
print(batch.shape)
开始训练
epochs = 3
lr = 1e-4

pipe.unet.train()
pipe.scheduler.set_timesteps(1000)
optimizer = torch.optim.AdamW(pipe.unet.parameters(), lr=lr)

for epoch in range(epochs):
    for step, batch in tqdm(enumerate(dl), total=len(dl)):

        # Prepare the input images
        clean_images = batch.to(device)
        bs = clean_images.shape[0]

        # Sample a random timestep for each image
        timesteps = torch.randint(
            0, pipe.scheduler.num_train_timesteps, (bs,), device=clean_images.device
        ).long()

        # Add noise to the clean images according to the noise magnitude at each timestep
        noise = torch.randn(clean_images.shape).to(clean_images.device)
        noisy_images = pipe.scheduler.add_noise(clean_images, noise, timesteps)

        # Get the model prediction
        noise_pred = pipe.unet(noisy_images, timesteps, return_dict=False)[0]

        # Calculate the loss
        loss = F.mse_loss(noise_pred, noise)
        loss.backward(loss)

        # Update the model parameters with the optimizer
        optimizer.step()
        optimizer.zero_grad()
查看结果
output = pipe()
display(output.images[0])
display(Audio(output.audios[0], rate=22050))
# Make a longer sample by passing in a starting noise tensor with a different shape
noise = torch.randn(1, 1, pipe.unet.sample_size[0],pipe.unet.sample_size[1]*4).to(device)
output = pipe(noise=noise)
display(output.images[0])
display(Audio(output.audios[0], rate=22050))