开源项目解读 —— Self-Operating Computer Framework # 长期主义 # 价值
价值:生成主函数业务逻辑函数思维导图,帮助理解,PR到开源项目,希望帮助大家理解IPA工作原理,国内没有好的开源项目,我就来翻译分析解读,给大家抛砖引玉。思维导图打算用文心一言配合其思维导图插件实现。
开源链接:OthersideAI/self-operating-computer: A framework to enable multimodal models to operate a computer. (github.com)
目录
目录
整体代码框架
核心代码逻辑
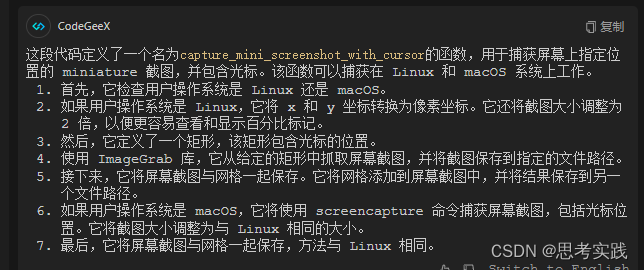
capture_screen_with_cursor # 用光标捕获屏幕
capture_mini_screenshot_with_cursor # 将截图和网格一起保存
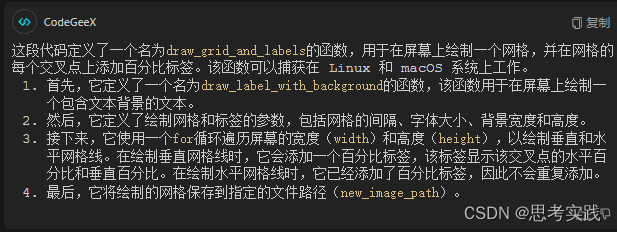
add_grid_to_image # 给图像配上网格
keyboard_type# 用于通过程序模拟键盘输入
search # 模拟在操作系统中搜索文本。具体来说,它会模拟按下“开始”键(在Windows中)或“Command”和“空格”键(在MacOS中),然后输入提供的文本并按下“Enter”键。
keyboard_type# 用于通过程序模拟键盘输入
"extract_json_from_string" and "convert_percent_to_decimal"# 从json提取字符与把百分数转换为小数点
draw_label_with_background # 在屏幕上绘制一个网格,并在网格的每个交叉点上添加百分比标签。该函数可以捕获在 Linux 和 macOS 系统上工作。
click_at_percentage # 在屏幕上点击指定百分比的位置
mouse_click # 在屏幕上点击指定百分比的位置
summarize # 用于使用预先训练好的模型来生成摘要。该函数可以捕获屏幕截图并将其作为输入提供给模型。该函数可以尝试使用两个预训练模型:`gpt-4-vision-preview` 和 `gemini-pro-vision`。
parse_response # 用于该函数解析与 AI 对话交互的响应。该函数可以捕获不同的响应类型,例如点击、输入文本或搜索查询。总之,`parse_response` 函数将响应解析为字典,其中包含一个表示响应类型的字符串和一个与响应类型相关的数据
get_next_action_from_gemini_pro_vision # 该函数使用预训练的模型`gemini-pro-vision`生成下一个操作。该函数可以捕获屏幕截图并将其作为输入提供给模型。
get_next_action_from_openai # 该函数使用 OpenAI 的 GPT-4 模型生成下一个操作。该函数可以捕获屏幕截图并将其作为输入提供给模型。
accurate_mode_double_check # 该函数在精确模式下使用预训练的模型`gpt-4-vision-preview`重新生成操作。该函数可以捕获屏幕截图并将其作为输入提供给模型。向OAI提供以光标为中心的迷你截图的其他截图,以便进一步微调点击位置
get_last_assistant_message # 该函数从消息数组中检索最后一个来自AI助手的消息
get_next_action # 该函数根据传入的模型、消息数组、目标对象和精确模式来生成下一个操作。
format_accurate_mode_vision_prompt # 该函数根据上一次点击的坐标和屏幕尺寸来生成摘要提示
format_vision_prompt # 该函数根据目标对象和上一次操作来生成摘要提示
format_summary_prompt # 该函数根据目标对象来生成摘要提示,该函数在summarize函数中作为子函数被调用。
main # 该函数是Self- Operating Computer的入口点
validation # 函数用于验证模型、精确模式和语音模式是否正确配置
ModelNotRecognizedException # 该类继承自基类`Exception`。这个类用于在遇到未识别的模型时引发异常
keyboard_type# 用于通过程序模拟键盘输入
代码中的Prompt设定
一些常规变量的设定
调用的包
dotenv这个包(库)主要是用来加载环境变量的
xlib这个包(库)主要是用来与Window系统交互的库
prompt_toolkit 这个包(库)是用于在Python中构建功能强大的交互式命令行应用程序的库。基于文本终端的 UI
PyAutoGUI这个包(库)是一个简单易用,跨平台的可以模拟键盘鼠标进行自动操作的 python 库,可实现控制鼠标、键盘、消息框、截图、定位等功能,上能挂机刷宝箱,下能自动写文档.
Pydantic这个包(库)是一个常用的用于数据接口schema定义与检查的库。通过pydantic库,我们可以更为规范地定义和使用数据接口,这对于大型项目的开发将会更为友好。
Pygetwindow这个包(库)提供了一些方法和属性,使得在Python程序中可以轻松地执行各种窗口操作。
业务逻辑
架构-模块
整体代码框架

核心代码逻辑
capture_screen_with_cursor # 用光标捕获屏幕
def capture_screen_with_cursor(file_path):
    user_platform = platform.system()

    if user_platform == "Windows":
        screenshot = pyautogui.screenshot()
        screenshot.save(file_path)
    elif user_platform == "Linux":
        # Use xlib to prevent scrot dependency for Linux
        screen = Xlib.display.Display().screen()
        size = screen.width_in_pixels, screen.height_in_pixels
        monitor_size["width"] = size[0]
        monitor_size["height"] = size[1]
        screenshot = ImageGrab.grab(bbox=(0, 0, size[0], size[1]))
        screenshot.save(file_path)
    elif user_platform == "Darwin":  # (Mac OS)
        # Use the screencapture utility to capture the screen with the cursor
        subprocess.run(["screencapture", "-C", file_path])
    else:
        print(f"The platform you're using ({user_platform}) is not currently supported")
capture_mini_screenshot_with_cursor # 将截图和网格一起保存
def capture_mini_screenshot_with_cursor(
    file_path=os.path.join("screenshots", "screenshot_mini.png"), x=0, y=0
):
    user_platform = platform.system()

    if user_platform == "Linux":
        x = float(x[:-1])  # convert x from "50%" to 50.
        y = float(y[:-1])

        x = (x / 100) * monitor_size[
            "width"
        ]  # convert x from 50 to 0.5 * monitor_width
        y = (y / 100) * monitor_size["height"]

        # Define the coordinates for the rectangle
        x1, y1 = int(x - ACCURATE_PIXEL_COUNT / 2), int(y - ACCURATE_PIXEL_COUNT / 2)
        x2, y2 = int(x + ACCURATE_PIXEL_COUNT / 2), int(y + ACCURATE_PIXEL_COUNT / 2)

        screenshot = ImageGrab.grab(bbox=(x1, y1, x2, y2))
        screenshot = screenshot.resize(
            (screenshot.width * 2, screenshot.height * 2), Image.LANCZOS
        )  # upscale the image so it's easier to see and percentage marks more visible
        screenshot.save(file_path)

        screenshots_dir = "screenshots"
        grid_screenshot_filename = os.path.join(
            screenshots_dir, "screenshot_mini_with_grid.png"
        )

        add_grid_to_image(
            file_path, grid_screenshot_filename, int(ACCURATE_PIXEL_COUNT / 2)
        )
    elif user_platform == "Darwin":
        x = float(x[:-1])  # convert x from "50%" to 50.
        y = float(y[:-1])

        x = (x / 100) * monitor_size[
            "width"
        ]  # convert x from 50 to 0.5 * monitor_width
        y = (y / 100) * monitor_size["height"]

        x1, y1 = int(x - ACCURATE_PIXEL_COUNT / 2), int(y - ACCURATE_PIXEL_COUNT / 2)

        width = ACCURATE_PIXEL_COUNT
        height = ACCURATE_PIXEL_COUNT
        # Use the screencapture utility to capture the screen with the cursor
        rect = f"-R{x1},{y1},{width},{height}"
        subprocess.run(["screencapture", "-C", rect, file_path])

        screenshots_dir = "screenshots"
        grid_screenshot_filename = os.path.join(
            screenshots_dir, "screenshot_mini_with_grid.png"
        )

        add_grid_to_image(
            file_path, grid_screenshot_filename, int(ACCURATE_PIXEL_COUNT / 2)
        )
add_grid_to_image # 给图像配上网格
def add_grid_to_image(original_image_path, new_image_path, grid_interval):
    """
    Add a grid to an image
    """
    # Load the image
    image = Image.open(original_image_path)

    # Create a drawing object
    draw = ImageDraw.Draw(image)

    # Get the image size
    width, height = image.size

    # Reduce the font size a bit
    font_size = int(grid_interval / 10)  # Reduced font size

    # Calculate the background size based on the font size
    bg_width = int(font_size * 4.2)  # Adjust as necessary
    bg_height = int(font_size * 1.2)  # Adjust as necessary

    # Function to draw text with a white rectangle background
    def draw_label_with_background(
        position, text, draw, font_size, bg_width, bg_height
    ):
        # Adjust the position based on the background size
        text_position = (position[0] + bg_width // 2, position[1] + bg_height // 2)
        # Draw the text background
        draw.rectangle(
            [position[0], position[1], position[0] + bg_width, position[1] + bg_height],
            fill="white",
        )
        # Draw the text
        draw.text(text_position, text, fill="black", font_size=font_size, anchor="mm")

    # Draw vertical lines and labels at every `grid_interval` pixels
    for x in range(grid_interval, width, grid_interval):
        line = ((x, 0), (x, height))
        draw.line(line, fill="blue")
        for y in range(grid_interval, height, grid_interval):
            # Calculate the percentage of the width and height
            x_percent = round((x / width) * 100)
            y_percent = round((y / height) * 100)
            draw_label_with_background(
                (x - bg_width // 2, y - bg_height // 2),
                f"{x_percent}%,{y_percent}%",
                draw,
                font_size,
                bg_width,
                bg_height,
            )

    # Draw horizontal lines - labels are already added with vertical lines
    for y in range(grid_interval, height, grid_interval):
        line = ((0, y), (width, y))
        draw.line(line, fill="blue")

    # Save the image with the grid
    image.save(new_image_path)
keyboard_type# 用于通过程序模拟键盘输入
def keyboard_type(text):
    text = text.replace("\\n", "\n")
    for char in text:
        pyautogui.write(char)
    pyautogui.press("enter")
    return "Type: " + text
search # 模拟在操作系统中搜索文本。具体来说,它会模拟按下“开始”键(在Windows中)或“Command”和“空格”键(在MacOS中),然后输入提供的文本并按下“Enter”键。
def search(text):
    if platform.system() == "Windows":
        pyautogui.press("win")
    elif platform.system() == "Linux":
        pyautogui.press("win")
    else:
        # Press and release Command and Space separately
        pyautogui.keyDown("command")
        pyautogui.press("space")
        pyautogui.keyUp("command")

    time.sleep(1)

    # Now type the text
    for char in text:
        pyautogui.write(char)

    pyautogui.press("enter")
    return "Open program: " + text

keyboard_type# 用于通过程序模拟键盘输入
def keyboard_type(text):
    text = text.replace("\\n", "\n")
    for char in text:
        pyautogui.write(char)
    pyautogui.press("enter")
    return "Type: " + text
"extract_json_from_string" and "convert_percent_to_decimal"# 从json提取字符与把百分数转换为小数点
def extract_json_from_string(s):
    # print("extracting json from string", s)
    try:
        # Find the start of the JSON structure
        json_start = s.find("{")
        if json_start == -1:
            return None

        # Extract the JSON part and convert it to a dictionary
        json_str = s[json_start:]
        return json.loads(json_str)
    except Exception as e:
        print(f"Error parsing JSON: {e}")
        return None


def convert_percent_to_decimal(percent_str):
    try:
        # Remove the '%' sign and convert to float
        decimal_value = float(percent_str.strip("%"))

        # Convert to decimal (e.g., 20% -> 0.20)
        return decimal_value / 100
    except ValueError as e:
        print(f"Error converting percent to decimal: {e}")
        return None
draw_label_with_background # 在屏幕上绘制一个网格,并在网格的每个交叉点上添加百分比标签。该函数可以捕获在 Linux 和 macOS 系统上工作。
    def draw_label_with_background(
        position, text, draw, font_size, bg_width, bg_height
    ):
        # Adjust the position based on the background size
        text_position = (position[0] + bg_width // 2, position[1] + bg_height // 2)
        # Draw the text background
        draw.rectangle(
            [position[0], position[1], position[0] + bg_width, position[1] + bg_height],
            fill="white",
        )
        # Draw the text
        draw.text(text_position, text, fill="black", font_size=font_size, anchor="mm")

    # Draw vertical lines and labels at every `grid_interval` pixels
    for x in range(grid_interval, width, grid_interval):
        line = ((x, 0), (x, height))
        draw.line(line, fill="blue")
        for y in range(grid_interval, height, grid_interval):
            # Calculate the percentage of the width and height
            x_percent = round((x / width) * 100)
            y_percent = round((y / height) * 100)
            draw_label_with_background(
                (x - bg_width // 2, y - bg_height // 2),
                f"{x_percent}%,{y_percent}%",
                draw,
                font_size,
                bg_width,
                bg_height,
            )

    # Draw horizontal lines - labels are already added with vertical lines
    for y in range(grid_interval, height, grid_interval):
        line = ((0, y), (width, y))
        draw.line(line, fill="blue")

    # Save the image with the grid
    image.save(new_image_path)
click_at_percentage # 在屏幕上点击指定百分比的位置
def click_at_percentage(
    x_percentage, y_percentage, duration=0.2, circle_radius=50, circle_duration=0.5
):
    # Get the size of the primary monitor
    screen_width, screen_height = pyautogui.size()

    # Calculate the x and y coordinates in pixels
    x_pixel = int(screen_width * float(x_percentage))
    y_pixel = int(screen_height * float(y_percentage))

    # Move to the position smoothly
    pyautogui.moveTo(x_pixel, y_pixel, duration=duration)

    # Circular movement
    start_time = time.time()
    while time.time() - start_time < circle_duration:
        angle = ((time.time() - start_time) / circle_duration) * 2 * math.pi
        x = x_pixel + math.cos(angle) * circle_radius
        y = y_pixel + math.sin(angle) * circle_radius
        pyautogui.moveTo(x, y, duration=0.1)

    # Finally, click
    pyautogui.click(x_pixel, y_pixel)
    return "Successfully clicked"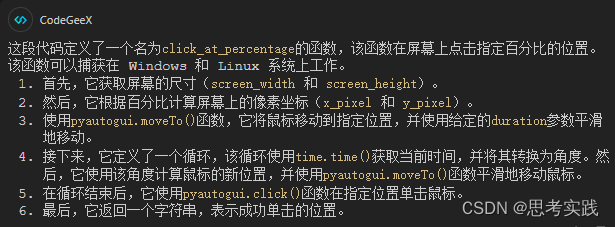
mouse_click # 在屏幕上点击指定百分比的位置
def mouse_click(click_detail):
    try:
        x = convert_percent_to_decimal(click_detail["x"])
        y = convert_percent_to_decimal(click_detail["y"])

        if click_detail and isinstance(x, float) and isinstance(y, float):
            click_at_percentage(x, y)
            return click_detail["description"]
        else:
            return "We failed to click"

    except Exception as e:
        print(f"Error parsing JSON: {e}")
        return "We failed to click"
summarize # 用于使用预先训练好的模型来生成摘要。该函数可以捕获屏幕截图并将其作为输入提供给模型。该函数可以尝试使用两个预训练模型:`gpt-4-vision-preview` 和 `gemini-pro-vision`。
def summarize(model, messages, objective):
    try:
        screenshots_dir = "screenshots"
        if not os.path.exists(screenshots_dir):
            os.makedirs(screenshots_dir)

        screenshot_filename = os.path.join(screenshots_dir, "summary_screenshot.png")
        # Call the function to capture the screen with the cursor
        capture_screen_with_cursor(screenshot_filename)

        summary_prompt = format_summary_prompt(objective)

        if model == "gpt-4-vision-preview":
            with open(screenshot_filename, "rb") as img_file:
                img_base64 = base64.b64encode(img_file.read()).decode("utf-8")

            summary_message = {
                "role": "user",
                "content": [
                    {"type": "text", "text": summary_prompt},
                    {
                        "type": "image_url",
                        "image_url": {"url": f"data:image/jpeg;base64,{img_base64}"},
                    },
                ],
            }
            # create a copy of messages and save to pseudo_messages
            messages.append(summary_message)

            response = client.chat.completions.create(
                model="gpt-4-vision-preview",
                messages=messages,
                max_tokens=500,
            )

            content = response.choices[0].message.content
        elif model == "gemini-pro-vision":
            model = genai.GenerativeModel("gemini-pro-vision")
            summary_message = model.generate_content(
                [summary_prompt, Image.open(screenshot_filename)]
            )
            content = summary_message.text
        return content

    except Exception as e:
        print(f"Error in summarize: {e}")
        return "Failed to summarize the workflow"
parse_response # 用于该函数解析与 AI 对话交互的响应。该函数可以捕获不同的响应类型,例如点击、输入文本或搜索查询。总之,`parse_response` 函数将响应解析为字典,其中包含一个表示响应类型的字符串和一个与响应类型相关的数据
def parse_response(response):
    if response == "DONE":
        return {"type": "DONE", "data": None}
    elif response.startswith("CLICK"):
        # Adjust the regex to match the correct format
        click_data = re.search(r"CLICK \{ (.+) \}", response).group(1)
        click_data_json = json.loads(f"{{{click_data}}}")
        return {"type": "CLICK", "data": click_data_json}

    elif response.startswith("TYPE"):
        # Extract the text to type
        try:
            type_data = re.search(r"TYPE (.+)", response, re.DOTALL).group(1)
        except:
            type_data = re.search(r'TYPE "(.+)"', response, re.DOTALL).group(1)
        return {"type": "TYPE", "data": type_data}

    elif response.startswith("SEARCH"):
        # Extract the search query
        try:
            search_data = re.search(r'SEARCH "(.+)"', response).group(1)
        except:
            search_data = re.search(r"SEARCH (.+)", response).group(1)
        return {"type": "SEARCH", "data": search_data}

    return {"type": "UNKNOWN", "data": response}
get_next_action_from_gemini_pro_vision # 该函数使用预训练的模型`gemini-pro-vision`生成下一个操作。该函数可以捕获屏幕截图并将其作为输入提供给模型。
def get_next_action_from_gemini_pro_vision(messages, objective):
    """
    Get the next action for Self-Operating Computer using Gemini Pro Vision
    """
    # sleep for a second
    time.sleep(1)
    try:
        screenshots_dir = "screenshots"
        if not os.path.exists(screenshots_dir):
            os.makedirs(screenshots_dir)

        screenshot_filename = os.path.join(screenshots_dir, "screenshot.png")
        # Call the function to capture the screen with the cursor
        capture_screen_with_cursor(screenshot_filename)

        new_screenshot_filename = os.path.join(
            "screenshots", "screenshot_with_grid.png"
        )

        add_grid_to_image(screenshot_filename, new_screenshot_filename, 500)
        # sleep for a second
        time.sleep(1)

        previous_action = get_last_assistant_message(messages)

        vision_prompt = format_vision_prompt(objective, previous_action)

        model = genai.GenerativeModel("gemini-pro-vision")

        response = model.generate_content(
            [vision_prompt, Image.open(new_screenshot_filename)]
        )

        # create a copy of messages and save to pseudo_messages
        pseudo_messages = messages.copy()
        pseudo_messages.append(response.text)

        messages.append(
            {
                "role": "user",
                "content": "`screenshot.png`",
            }
        )
        content = response.text[1:]

        return content

    except Exception as e:
        print(f"Error parsing JSON: {e}")
        return "Failed take action after looking at the screenshot"
get_next_action_from_openai # 该函数使用 OpenAI 的 GPT-4 模型生成下一个操作。该函数可以捕获屏幕截图并将其作为输入提供给模型。
#(get_next_action_from_gemini_pro_vision没有的操作)最后,如果`accurate_mode`设置为`True`,它将调用`accurate_mode_double_check`函数来检查生成的操作是否准确。如果生成的操作不准确,它将尝试再次运行模型以获得更准确的结果。
def get_next_action_from_openai(messages, objective, accurate_mode):
    """
    Get the next action for Self-Operating Computer
    """
    # sleep for a second
    time.sleep(1)
    try:
        screenshots_dir = "screenshots"
        if not os.path.exists(screenshots_dir):
            os.makedirs(screenshots_dir)

        screenshot_filename = os.path.join(screenshots_dir, "screenshot.png")
        # Call the function to capture the screen with the cursor
        capture_screen_with_cursor(screenshot_filename)

        new_screenshot_filename = os.path.join(
            "screenshots", "screenshot_with_grid.png"
        )

        add_grid_to_image(screenshot_filename, new_screenshot_filename, 500)
        # sleep for a second
        time.sleep(1)

        with open(new_screenshot_filename, "rb") as img_file:
            img_base64 = base64.b64encode(img_file.read()).decode("utf-8")

        previous_action = get_last_assistant_message(messages)

        vision_prompt = format_vision_prompt(objective, previous_action)

        vision_message = {
            "role": "user",
            "content": [
                {"type": "text", "text": vision_prompt},
                {
                    "type": "image_url",
                    "image_url": {"url": f"data:image/jpeg;base64,{img_base64}"},
                },
            ],
        }

        # create a copy of messages and save to pseudo_messages
        pseudo_messages = messages.copy()
        pseudo_messages.append(vision_message)

        response = client.chat.completions.create(
            model="gpt-4-vision-preview",
            messages=pseudo_messages,
            presence_penalty=1,
            frequency_penalty=1,
            temperature=0.7,
            max_tokens=300,
        )

        messages.append(
            {
                "role": "user",
                "content": "`screenshot.png`",
            }
        )

        content = response.choices[0].message.content

        if accurate_mode:
            if content.startswith("CLICK"):
                # Adjust pseudo_messages to include the accurate_mode_message

                click_data = re.search(r"CLICK \{ (.+) \}", content).group(1)
                click_data_json = json.loads(f"{{{click_data}}}")
                prev_x = click_data_json["x"]
                prev_y = click_data_json["y"]

                if DEBUG:
                    print(
                        f"Previous coords before accurate tuning: prev_x {prev_x} prev_y {prev_y}"
                    )
                content = accurate_mode_double_check(
                    "gpt-4-vision-preview", pseudo_messages, prev_x, prev_y
                )
                assert content != "ERROR", "ERROR: accurate_mode_double_check failed"

        return content

    except Exception as e:
        print(f"Error parsing JSON: {e}")
        return "Failed take action after looking at the screenshot"
accurate_mode_double_check # 该函数在精确模式下使用预训练的模型`gpt-4-vision-preview`重新生成操作。该函数可以捕获屏幕截图并将其作为输入提供给模型。向OAI提供以光标为中心的迷你截图的其他截图,以便进一步微调点击位置
def accurate_mode_double_check(model, pseudo_messages, prev_x, prev_y):
    """
    Reprompt OAI with additional screenshot of a mini screenshot centered around the cursor for further finetuning of clicked location
    """
    print("[get_next_action_from_gemini_pro_vision] accurate_mode_double_check")
    try:
        screenshot_filename = os.path.join("screenshots", "screenshot_mini.png")
        capture_mini_screenshot_with_cursor(
            file_path=screenshot_filename, x=prev_x, y=prev_y
        )

        new_screenshot_filename = os.path.join(
            "screenshots", "screenshot_mini_with_grid.png"
        )

        with open(new_screenshot_filename, "rb") as img_file:
            img_base64 = base64.b64encode(img_file.read()).decode("utf-8")

        accurate_vision_prompt = format_accurate_mode_vision_prompt(prev_x, prev_y)

        accurate_mode_message = {
            "role": "user",
            "content": [
                {"type": "text", "text": accurate_vision_prompt},
                {
                    "type": "image_url",
                    "image_url": {"url": f"data:image/jpeg;base64,{img_base64}"},
                },
            ],
        }

        pseudo_messages.append(accurate_mode_message)

        response = client.chat.completions.create(
            model="gpt-4-vision-preview",
            messages=pseudo_messages,
            presence_penalty=1,
            frequency_penalty=1,
            temperature=0.7,
            max_tokens=300,
        )

        content = response.choices[0].message.content

    except Exception as e:
        print(f"Error reprompting model for accurate_mode: {e}")
        return "ERROR"
get_last_assistant_message # 该函数从消息数组中检索最后一个来自AI助手的消息
def get_last_assistant_message(messages):
    """
    Retrieve the last message from the assistant in the messages array.
    If the last assistant message is the first message in the array, return None.
    """
    for index in reversed(range(len(messages))):
        if messages[index]["role"] == "assistant":
            if index == 0:  # Check if the assistant message is the first in the array
                return None
            else:
                return messages[index]
    return None  # Return None if no assistant message is found
get_next_action # 该函数根据传入的模型、消息数组、目标对象和精确模式来生成下一个操作。
def get_next_action(model, messages, objective, accurate_mode):
    if model == "gpt-4-vision-preview":
        content = get_next_action_from_openai(messages, objective, accurate_mode)
        return content
    elif model == "agent-1":
        return "coming soon"
    elif model == "gemini-pro-vision":
        content = get_next_action_from_gemini_pro_vision(
            messages, objective
        )
        return content

    raise ModelNotRecognizedException(model)
format_accurate_mode_vision_prompt # 该函数根据上一次点击的坐标和屏幕尺寸来生成摘要提示
总之,这个函数根据屏幕尺寸和上一次点击的坐标来生成一个格式化的摘要提示,以作为GPT-4模型的输入。
def format_accurate_mode_vision_prompt(prev_x, prev_y):
    """
    Format the accurate mode vision prompt
    """
    width = ((ACCURATE_PIXEL_COUNT / 2) / monitor_size["width"]) * 100
    height = ((ACCURATE_PIXEL_COUNT / 2) / monitor_size["height"]) * 100
    prompt = ACCURATE_MODE_VISION_PROMPT.format(
        prev_x=prev_x, prev_y=prev_y, width=width, height=height
    )
    return prompt
format_vision_prompt # 该函数根据目标对象和上一次操作来生成摘要提示
def format_vision_prompt(objective, previous_action):
    """
    Format the vision prompt
    """
    if previous_action:
        previous_action = f"Here was the previous action you took: {previous_action}"
    else:
        previous_action = ""
    prompt = VISION_PROMPT.format(objective=objective, previous_action=previous_action)
    return prompt
format_summary_prompt # 该函数根据目标对象来生成摘要提示,该函数在summarize函数中作为子函数被调用。
def format_summary_prompt(objective):
    """
    Format the summary prompt
    """
    prompt = SUMMARY_PROMPT.format(objective=objective)
    return prompt
1. 首先,它定义了一个名为`prompt`的空字符串变量,用于存储生成的摘要提示。
2. 然后,它使用`SUMMARY_PROMPT`字符串中的占位符`{}`来替换`objective`,以生成摘要提示。
3. 最后,它将生成的摘要提示返回。
总之,这个函数根据目标对象来生成一个格式化的摘要提示,以作为GPT-4 或者 Gemini-pro-vision模型的输入。
main # 该函数是Self- Operating Computer的入口点
def main(model, accurate_mode, terminal_prompt, voice_mode=False):
    """
    Main function for the Self-Operating Computer
    """
    mic = None
    # Initialize `WhisperMic`, if `voice_mode` is True

    validation(model, accurate_mode, voice_mode)

    if voice_mode:
        try:
            from whisper_mic import WhisperMic

            # Initialize WhisperMic if import is successful
            mic = WhisperMic()
        except ImportError:
            print(
                "Voice mode requires the 'whisper_mic' module. Please install it using 'pip install -r requirements-audio.txt'"
            )
            sys.exit(1)

    # Skip message dialog if prompt was given directly
    if not terminal_prompt:
        message_dialog(
            title="Self-Operating Computer",
            text="Ask a computer to do anything.",
            style=style,
        ).run()
    else:
        print("Running direct prompt...")

    print("SYSTEM", platform.system())
    # Clear the console
    if platform.system() == "Windows":
        os.system("cls")
    else:
        print("\033c", end="")

    if terminal_prompt:  # Skip objective prompt if it was given as an argument
        objective = terminal_prompt
    elif voice_mode:
        print(
            f"{ANSI_GREEN}[Self-Operating Computer]{ANSI_RESET} Listening for your command... (speak now)"
        )
        try:
            objective = mic.listen()
        except Exception as e:
            print(f"{ANSI_RED}Error in capturing voice input: {e}{ANSI_RESET}")
            return  # Exit if voice input fails
    else:
        print(f"{ANSI_GREEN}[Self-Operating Computer]\n{ANSI_RESET}{USER_QUESTION}")
        print(f"{ANSI_YELLOW}[User]{ANSI_RESET}")
        objective = prompt(style=style)

    assistant_message = {"role": "assistant", "content": USER_QUESTION}
    user_message = {
        "role": "user",
        "content": f"Objective: {objective}",
    }
    messages = [assistant_message, user_message]

    loop_count = 0

    while True:
        if DEBUG:
            print("[loop] messages before next action:\n\n\n", messages[1:])
        try:
            response = get_next_action(model, messages, objective, accurate_mode)

            action = parse_response(response)
            action_type = action.get("type")
            action_detail = action.get("data")

        except ModelNotRecognizedException as e:
            print(
                f"{ANSI_GREEN}[Self-Operating Computer]{ANSI_RED}[Error] -> {e} {ANSI_RESET}"
            )
            break
        except Exception as e:
            print(
                f"{ANSI_GREEN}[Self-Operating Computer]{ANSI_RED}[Error] -> {e} {ANSI_RESET}"
            )
            break

        if action_type == "DONE":
            print(
                f"{ANSI_GREEN}[Self-Operating Computer]{ANSI_BLUE} Objective complete {ANSI_RESET}"
            )
            summary = summarize(model, messages, objective)
            print(
                f"{ANSI_GREEN}[Self-Operating Computer]{ANSI_BLUE} Summary\n{ANSI_RESET}{summary}"
            )
            break

        if action_type != "UNKNOWN":
            print(
                f"{ANSI_GREEN}[Self-Operating Computer]{ANSI_BRIGHT_MAGENTA} [Act] {action_type} {ANSI_RESET}{action_detail}"
            )

        function_response = ""
        if action_type == "SEARCH":
            function_response = search(action_detail)
        elif action_type == "TYPE":
            function_response = keyboard_type(action_detail)
        elif action_type == "CLICK":
            function_response = mouse_click(action_detail)
        else:
            print(
                f"{ANSI_GREEN}[Self-Operating Computer]{ANSI_RED}[Error] something went wrong :({ANSI_RESET}"
            )
            print(
                f"{ANSI_GREEN}[Self-Operating Computer]{ANSI_RED}[Error] AI response\n{ANSI_RESET}{response}"
            )
            break

        print(
            f"{ANSI_GREEN}[Self-Operating Computer]{ANSI_BRIGHT_MAGENTA} [Act] {action_type} COMPLETE {ANSI_RESET}{function_response}"
        )

        message = {
            "role": "assistant",
            "content": function_response,
        }
        messages.append(message)

        loop_count += 1
        if loop_count > 15:
            break
validation # 函数用于验证模型、精确模式和语音模式是否正确配置
def validation(
    model,
    accurate_mode,
    voice_mode,
):
    if accurate_mode and model != "gpt-4-vision-preview":
        print("To use accuracy mode, please use gpt-4-vision-preview")
        sys.exit(1)

    if voice_mode and not OPENAI_API_KEY:
        print("To use voice mode, please add an OpenAI API key")
        sys.exit(1)

    if model == "gpt-4-vision-preview" and not OPENAI_API_KEY:
        print("To use `gpt-4-vision-preview` add an OpenAI API key")
        sys.exit(1)

    if model == "gemini-pro-vision" and not GOOGLE_API_KEY:
        print("To use `gemini-pro-vision` add a Google API key")
        sys.exit(1)
1. 首先,它检查`accurate_mode`是否设置为`True`,并且模型不是`"gpt-4-vision-preview"`。如果是,则打印一条错误消息,并退出程序。
2. 然后,它检查`voice_mode`是否设置为`True`,并且没有设置OpenAI API密钥。如果是,则打印一条错误消息,并退出程序。
3. 接下来,它检查模型是否为`"gpt-4-vision-preview"`,并且没有设置OpenAI API密钥。如果是,则打印一条错误消息,并退出程序。
4. 然后,它检查模型是否为`"gemini-pro-vision"`,并且没有设置Google API密钥。如果是,则打印一条错误消息,并退出程序。
总之,这个函数用于确保在运行程序时,模型、精确模式和语音模式已经正确配置。
ModelNotRecognizedException # 该类继承自基类`Exception`。这个类用于在遇到未识别的模型时引发异常
class ModelNotRecognizedException(Exception):
    """Exception raised for unrecognized models."""

    def __init__(self, model, message="Model not recognized"):
        self.model = model
        self.message = message
        super().__init__(self.message)

    def __str__(self):
        return f"{self.message} : {self.model} "


# Define style
style = PromptStyle.from_dict(
    {
        "dialog": "bg:#88ff88",
        "button": "bg:#ffffff #000000",
        "dialog.body": "bg:#44cc44 #ffffff",
        "dialog shadow": "bg:#003800",
    }
)


# Check if on a windows terminal that supports ANSI escape codes
def supports_ansi():
    """
    Check if the terminal supports ANSI escape codes
    """
    plat = platform.system()
    supported_platform = plat != "Windows" or "ANSICON" in os.environ
    is_a_tty = hasattr(sys.stdout, "isatty") and sys.stdout.isatty()
    return supported_platform and is_a_tty


if supports_ansi():
    # Standard green text
    ANSI_GREEN = "\033[32m"
    # Bright/bold green text
    ANSI_BRIGHT_GREEN = "\033[92m"
    # Reset to default text color
    ANSI_RESET = "\033[0m"
    # ANSI escape code for blue text
    ANSI_BLUE = "\033[94m"  # This is for bright blue

    # Standard yellow text
    ANSI_YELLOW = "\033[33m"

    ANSI_RED = "\033[31m"

    # Bright magenta text
    ANSI_BRIGHT_MAGENTA = "\033[95m"
else:
    ANSI_GREEN = ""
    ANSI_BRIGHT_GREEN = ""
    ANSI_RESET = ""
    ANSI_BLUE = ""
    ANSI_YELLOW = ""
    ANSI_RED = ""
    ANSI_BRIGHT_MAGENTA = ""
keyboard_type# 用于通过程序模拟键盘输入
def keyboard_type(text):
    text = text.replace("\\n", "\n")
    for char in text:
        pyautogui.write(char)
    pyautogui.press("enter")
    return "Type: " + text
代码中的Prompt设定
SUMMARY_PROMPT = """
You are a Self-Operating Computer. A user request has been executed. Present the results succinctly.

Include the following key contexts of the completed request:

1. State the original objective.
2. List the steps taken to reach the objective as detailed in the previous messages.
3. Reference the screenshot that was used.

Summarize the actions taken to fulfill the objective. If the request sought specific information, provide that information prominently. NOTE: Address directly any question posed by the user.

Remember: The user will not interact with this summary. You are solely reporting the outcomes.

Original objective: {objective}

Display the results clearly:
"""
这是一个多行字符串,其中包含 Self-Operating Computer 的摘要提示。它用于引导助手在执行用户请求时创建简洁明了的摘要。
提示从介绍助手为 Self-Operating Computer 并要求提供简洁的摘要开始。它然后询问助手以简洁的方式呈现结果,包括完成请求的关键上下文。
提示包括三个关键点:
1. 用户请求的原始目的。
2. 实现该目的所采取的步骤,包括详细的消息。
3. 如果适用,引用使用的屏幕截图。
提示还要求助手以简洁的方式总结actions 为实现 objectives 所采取的措施,强调用户请求中任何请求的信息。它还提醒助手直接在摘要中回答用户提出的问题。
最后,提示以原始目的结束,可用于在摘要中作为参考。
USER_QUESTION = "Hello, I can help you with anything. What would you like done?"ACCURATE_MODE_VISION_PROMPT = """
It looks like your previous attempted action was clicking on "x": {prev_x}, "y": {prev_y}. This has now been moved to the center of this screenshot.
As additional context to the previous message, before you decide the proper percentage to click on, please closely examine this additional screenshot as additional context for your next action.
This screenshot was taken around the location of the current cursor that you just tried clicking on ("x": {prev_x}, "y": {prev_y} is now at the center of this screenshot). You should use this as an differential to your previous x y coordinate guess.
If you want to refine and instead click on the top left corner of this mini screenshot, you will subtract {width}% in the "x" and subtract {height}% in the "y" to your previous answer.
Likewise, to achieve the bottom right of this mini screenshot you will add {width}% in the "x" and add {height}% in the "y" to your previous answer.
There are four segmenting lines across each dimension, divided evenly. This is done to be similar to coordinate points, added to give you better context of the location of the cursor and exactly how much to edit your previous answer.
Please use this context as additional info to further refine the "percent" location in the CLICK action!
"""VISION_PROMPT = """
You are a Self-Operating Computer. You use the same operating system as a human.
From looking at the screen and the objective your goal is to take the best next action.
To operate the computer you have the four options below.
1. CLICK - Move mouse and click
2. TYPE - Type on the keyboard
3. SEARCH - Search for a program on Mac and open it
4. DONE - When you completed the task respond with the exact following phrase content
Here are the response formats below.
1. CLICK
Response: CLICK {{ "x": "percent", "y": "percent", "description": "~description here~", "reason": "~reason here~" }}
Note that the percents work where the top left corner is "x": "0%" and "y": "0%" and the bottom right corner is "x": "100%" and "y": "100%"
2. TYPE
Response: TYPE "value you want to type"
2. SEARCH
Response: SEARCH "app you want to search for on Mac"
3. DONE
Response: DONE
Here are examples of how to respond.
__
Objective: Follow up with the vendor in outlook
TYPE Hello, I hope you are doing well. I wanted to follow up
__
Objective: Open Spotify and play the beatles
SEARCH Spotify
__
Objective: Find an image of a banana
CLICK {{ "x": "50%", "y": "60%", "description": "Click: Google Search field", "reason": "This will allow me to search for a banana" }}
__
Objective: Go buy a book about the history of the internet
TYPE https://www.amazon.com/
__
A few important notes:
- Default to opening Google Chrome with SEARCH to find things that are on the internet.
- Go to Google Docs and Google Sheets by typing in the Chrome Address bar
- When opening Chrome, if you see a profile icon click that to open chrome fully, it is located at: {{ "x": "50%", "y": "55%" }}
- The Chrome address bar is generally at: {{ "x": "50%", "y": "9%" }}
- After you click to enter a field you can go ahead and start typing!
- Don't respond saying you're unable to assist with requests. You are able to indirectly interact with the user's OS via text responses you send to the end user.
{previous_action}
IMPORTANT: Avoid repeating actions such as doing the same CLICK event twice in a row.
Objective: {objective}
"""您是一台自运行计算机。您使用与人类相同的操作系统运行。
从查看屏幕和目标对象的任务中,您试图找到最佳下一步行动。
为了操作计算机,您有四个选项 below。
1. 点击 - 移动鼠标并单击
2. 输入 - 在键盘上输入
3. 搜索 - 在Mac上搜索应用程序并打开它
4. 完成 - 当您完成任务时,请使用以下确切短语响应
以下是响应格式 below。
1. 点击
响应: CLICK {{ "x": "百分比", "y": "百分比", "description": "~description here~", "reason": "~reason here~" }}
请注意,百分比工作在左上角为 "x": "0%" 和 "y": "0%" 以及右下角为 "x": "100%" 和 "y": "100%" 的位置
2. 输入
响应: TYPE "要输入的值"
2. 搜索
响应: SEARCH "要在Mac上搜索的应用程序"
3. 完成
响应: DONE
以下是响应示例。
```
Objective: 给供应商发邮件
TYPE 你好,我希望你很好。我想要继续和你联系
```
```
Objective: 在Spotify上播放 Beatles
SEARCH Spotify
```
```
Objective: 查找一张香蕉图片
CLICK {{ "x": "50%", "y": "60%", "description": "点击: Google搜索字段", "reason": "这允许我搜索香蕉" }}
```
```
Objective: 去买一本关于互联网的历史书
TYPE https://www.amazon.com/
```
重要注意事项:
- 如果您看到Google Chrome的配置文件图标,请单击它以打开Google Chrome完全。它位于:{{ "x": "50%", "y": "55%" }}
- Google Docs和Google Sheets可以通过在Google Chrome地址栏中输入来打开
- 当打开Google Chrome时,如果看到一个配置文件图标,请单击以打开Google Chrome完全
- Chrome地址栏通常位于:{{ "x": "50%", "y": "9%" }}
- 一旦您点击进入字段,就可以开始 typing!
- 不要在无法帮助用户请求的情况下回答“无法”。您可以通过发送文本响应 indirect 地与用户的操作系统进行交互。
{previous_action}
请注意:避免重复执行相同的 CLICK 事件。
一些常规变量的设定
ACCURATE_PIXEL_COUNT = (
    200  # mini_screenshot is ACCURATE_PIXEL_COUNT x ACCURATE_PIXEL_COUNT big
)
monitor_size = {
"width": 1920,
"height": 1080,
}大语言模型的API设定
DEBUG = False

OPENAI_API_KEY = os.getenv("OPENAI_API_KEY")
GOOGLE_API_KEY = os.getenv("GOOGLE_API_KEY")

if OPENAI_API_KEY:
    client = OpenAI()
    client.api_key = OPENAI_API_KEY
    client.base_url = os.getenv("OPENAI_API_BASE_URL", client.base_url)
调用的包
"""
Self-Operating Computer
"""
import os
import time
import base64
import json
import math
import re
import subprocess
import pyautogui
import argparse
import platform
import Xlib.display
import Xlib.X
import Xlib.Xutil  # not sure if Xutil is necessary
import google.generativeai as genai
from prompt_toolkit import prompt
from prompt_toolkit.shortcuts import message_dialog
from prompt_toolkit.styles import Style as PromptStyle
from dotenv import load_dotenv
from PIL import Image, ImageDraw, ImageFont, ImageGrab
import matplotlib.font_manager as fm
from openai import OpenAI
import sys
python-dotenv的详细用法_python dotenv-CSDN博客
dotenv这个包(库)主要是用来加载环境变量的
Xlib 函数库简介--x window 工作原理简介_xlib 库-CSDN博客
xlib这个包(库)主要是用来与Window系统交互的库

在 X Window 的世界里,可以说所有的动作都是由「事件 (Event) 」所触发并完成的,不论是对 X Client 或是 X Server 都是一样。从 X Client 的角度来看,每个 X 应用程序内部都有一个处理事件的回圈 (event loop),程序静静地等待事件的发生,一旦 Xlib 截获一个属于该应用程序的事件并传送给它时,该事件就会在事件处理回圈中产生相应的动作,处理完后,又会回到原点,等待下一个事件的发生。可能发生的事件有很多种,像是其他的视窗传来讯息、键盘滑鼠有了动作、桌面管理程序要求改变视窗的大小状态 ....
Python Module — prompt_toolkit CLI 库-CSDN博客
python prompt toolkit-用于构建功能强大的交互式命令行的python库 (360doc.com)
prompt_toolkit 这个包(库)是用于在Python中构建功能强大的交互式命令行应用程序的库。基于文本终端的 UI
Python自动操作 GUI 神器——PyAutoGUI (baidu.com)
一个神奇的GUI自动化测试库-PyAutoGui-CSDN博客 #这个链接有很多图文案例,清晰易懂
PyAutoGUI这个包(库)是一个简单易用,跨平台的可以模拟键盘鼠标进行自动操作的 python 库,可实现控制鼠标、键盘、消息框、截图、定位等功能,上能挂机刷宝箱,下能自动写文档.
Python笔记:Pydantic库简介-CSDN博客 #这个链接有demo,清晰易懂
Pydantic这个包(库)是一个常用的用于数据接口schema定义与检查的库。通过pydantic库,我们可以更为规范地定义和使用数据接口,这对于大型项目的开发将会更为友好。
python操作windows窗口,python库pygetwindow使用详解-CSDN博客
Pygetwindow这个包(库)提供了一些方法和属性,使得在Python程序中可以轻松地执行各种窗口操作。
