MySQL备份还原(多种不同的方式备份还原)
一、mysqldump+binlog 实现完全+增量备份
1)素材准备:
mysql> create database school;
Query OK, 1 row affected (0.01 sec)

mysql> use school
Database changed
mysql> CREATE TABLE `Student` (
    ->   `Sno` int(10) NOT NULL COMMENT '学号',  `Sname` varchar(16) NOT NULL COMMENT '姓名',
    ->   `Ssex` char(2) NOT NULL COMMENT '性别',  `Sage` tinyint(2) NOT NULL DEFAULT '0' COMMENT '学生年龄',
    ->   `Sdept` varchar(16) DEFAULT 'NULL' COMMENT '学生所在系别',  PRIMARY KEY (`Sno`)
    -> ) ;
Query OK, 0 rows affected, 2 warnings (0.09 sec)

mysql> INSERT INTO `Student` VALUES (1, '陆亚', '男', 24, '计算机网络'),(2, 'tom', '男', 26, '英语'),(3, '张阳', '男', 21, '物流管理'), (4, 'alex', '女', 22, '电子商务');
Query OK, 4 rows affected (0.02 sec)
Records: 4  Duplicates: 0  Warnings: 0
2)完全备份:
# 备份文件路径(没有则创建)
[root@openEuler-1 dumpe_binlog_bak]# pwd
/mysql/dumpe_binlog_bak

[root@openEuler-1 dumpe_binlog_bak]# mysqldump --opt -B school > school.sql
3)增量备份数据准备:
mysql> INSERT INTO Student values(0005,'xumubin','男',29,'中文专业'),(0006,'wangzhao','男',21,'导弹专业');

# 模拟数据损坏:
mysql> drop database school;
Query OK, 1 row affected (0.04 sec)
4)刷新并查看日志:
mysql> flush logs;
Query OK, 0 rows affected (0.03 sec)

mysql> show binary logs;
+---------------+-----------+-----------+
| Log_name      | File_size | Encrypted |
+---------------+-----------+-----------+
| binlog.000001 |      1822 | No        |
| binlog.000002 |       157 | No        |
+---------------+-----------+-----------+
2 rows in set (0.00 sec)
5)使用binlog查看二进制文件:
# 注意5.7版本,insert语句已经加密,查看时加上选项:--base64-output=DECODE-ROWS -vv
[root@openEuler-1 dumpe_binlog_bak]# mysqlbinlog /var/lib/mysql/binlog.000001 --base64-output=DECODE-ROWS -vv

# 找到完全备份后插入的数据时间点,进行增量备份
[root@openEuler-1 dumpe_binlog_bak]# mysqlbinlog /var/lib/mysql/binlog.000001 --start-datetime="25-01-17 15:31:51" --stop-datetime="25-01-17 15:31:59" -r time1.sql
6)还原完全备份:
mysql> source /mysql/dumpe_binlog_bak/school.sql
mysql> select * from school.Student;
+-----+--------+------+------+-----------------+
| Sno | Sname  | Ssex | Sage | Sdept           |
+-----+--------+------+------+-----------------+
|   1 | 陆亚   | 男   |   24 | 计算机网络      |
|   2 | tom    | 男   |   26 | 英语            |
|   3 | 张阳   | 男   |   21 | 物流管理        |
|   4 | alex   | 女   |   22 | 电子商务        |
+-----+--------+------+------+-----------------+
4 rows in set (0.01 sec)
7)还原增量备份:
mysql> source /mysql/dumpe_binlog_bak/time1.sql
mysql> select * from school.Student;
+-----+----------+------+------+-----------------+
| Sno | Sname    | Ssex | Sage | Sdept           |
+-----+----------+------+------+-----------------+
|   1 | 陆亚     | 男   |   24 | 计算机网络      |
|   2 | tom      | 男   |   26 | 英语            |
|   3 | 张阳     | 男   |   21 | 物流管理        |
|   4 | alex     | 女   |   22 | 电子商务        |
|   5 | xumubin  | 男   |   29 | 中文专业        |
|   6 | wangzhao | 男   |   21 | 导弹专业        |
+-----+----------+------+------+-----------------+
6 rows in set (0.00 sec)
二、mydumper 备份数据库
1)安装mydumper:
# 安装mydumper
[root@openEuler-1 ~]# ls
anaconda-ks.cfg  jdk-8u60-linux-x64.tar.gz  mydumper-0.17.2-18.el8.x86_64.rpm
[root@openEuler-1 ~]# dnf install mydumper-0.17.2-18.el8.x86_64.rpm

# 安装依赖包
[root@openEuler-1 dumper_bak]# yum install -y pcre-devel.x86_64
2)备份数据库:
[root@openEuler-1 dumper_bak]# mydumper -B school -o /mysql/dumper_bak
[root@openEuler-1 dumper_bak]# ll
total 16
-rw-r--r-- 1 root root 477 Jan 17 16:27 metadata
-rw-r----- 1 root root 404 Jan 17 16:27 school-schema-create.sql
-rw-r----- 1 root root 501 Jan 17 16:27 school.Student.00000.sql
-rw-r----- 1 root root 625 Jan 17 16:27 school.Student-schema.sql
3)模拟数据丢失:
mysql> drop database school;
Query OK, 1 row affected (0.03 sec)
4)还原数据库:
[root@openEuler-1 dumper_bak]# myloader -d /mysql/dumper_bak/ -o

# 查看数据库
[root@openEuler-1 dumper_bak]# mysql -e "select * from school.Student"
+-----+----------+------+------+-----------------+
| Sno | Sname    | Ssex | Sage | Sdept           |
+-----+----------+------+------+-----------------+
|   1 | 陆亚     | 男   |   24 | 计算机网络      |
|   2 | tom      | 男   |   26 | 英语            |
|   3 | 张阳     | 男   |   21 | 物流管理        |
|   4 | alex     | 女   |   22 | 电子商务        |
|   5 | xumubin  | 男   |   29 | 中文专业        |
|   6 | wangzhao | 男   |   21 | 导弹专业        |
+-----+----------+------+------+-----------------+
三、lvm 快照备份
前提:
- 数据文件要在逻辑卷上;
- 此逻辑卷所在卷组必须有足够空间使用快照卷;
- 数据文件和事务日志要在同一个逻辑卷上;
优点:
- 几乎是热备(创建快照前把表上锁,创建完毕后立即释放);
- 支持所有的存储引擎;
- 备份速度快;
- 无需使用昂贵的商业软件(操作系统级别的);
缺点:
- 可能需要部门协调(使用操作系统级别的命令,DBA一般没有权限);
- 无法预计服务停止时间;
- 数据如果分布在多个卷上比较麻烦;
操作流程:
- 锁表 flush table with read lock;
- 查看position号并记录,便于后期恢复 show master status;
- 创建snapshot快照 create snapshop;
- 解表 unlock tables;
- 挂载snapshot;
- 拷贝snapshot数据,进行备份。备份整个数据库之前,要关闭mysql服务(保护ibdata1文件);
- 卸载;
- 移除快照;
# 创建逻辑卷
[root@openEuler-1 ~]# vgcreate mysql /dev/sdbd
[root@openEuler-1 ~]# lvcreate -n lv_mysql -L 5G mysql
[root@openEuler-1 ~]# mkfs.ext4 /dev/mysql/lv_mysql

# 停止mysql服务
[root@openEuler-1 ~]# systemctl stop mysqld

# 备份所有的数据文件到指定的地方
[root@openEuler-1 ~]# cd /var/lib/mysql
[root@openEuler-1 mysql]# tar czf /tmp/mysql.tar.gz *

# 挂载逻辑卷到当前mysql的数据目录里
[root@openEuler-1 mysql]# cd
[root@openEuler-1 ~]# mount /dev/mysql/lv_mysql /var/lib/mysql

# 将刚刚备份的数据解压到数据目录里
[root@openEuler-1 ~]# tar xf /tmp/mysql.tar.gz -C /var/lib/mysql

# 更改权限重新启动
[root@openEuler-1 ~]# chown mysql. -R /var/lib/mysql/
[root@openEuler-1 ~]# systemctl restart mysqld

# 编写备份脚本
[root@openEuler-1 ~]# vim bak_mysql.sh
[root@openEuler-1 ~]# cat bak_mysql.sh
#!/bin/bash
#########################
#File name:bak_mysql.sh
#Email:[email protected]
#Created time:2025-01-19 12:16:20
#Description:
#########################

bak_dir=/mysql/lvm_bak/$(date +%F)
[ -d ${bak_dir} ] || mkdir -p ${bak_dir}

echo "flush tables with read lock; system lvcreate -n lv_mysql_s -L 500M -s /dev/mysql/lv_mysql; unlock tables;"
 | mysql -uroot -p123456

[ -d /mnt/mysql/ ] || mkdir /mnt/mysql
mount /dev/mysql/lv_mysql_s /mnt/mysql

rsync -az /mnt/mysql/ ${bak_dir}
if [ $? -eq 0 ]
then
  umount /mnt/mysql/ && lvremove -f /dev/mysql/lv_mysql_s &>/dev/null


# 测试:
[root@openEuler-1 ~]# bash bak_mysql.sh
# 修改配置文件(一般是在/etc/my.cnf内)
[root@openEuler-1 ~]# vim /etc/my.cnf.d/mysql-server.cnf
#datadir=/var/lib/mysql
datadir=/mysql/lvm_bak/2025-01-19
# 修改目录权限
[root@openEuler-1 ~]# chown -R mysql.mysql /mysql/lvm_bak/2025-01-19/
# 重启服务
[root@openEuler-1 ~]# systemctl restart mysqld
# 查看数据库
[root@openEuler-1 ~]# mysql -e "select * from school.Student"
+-----+----------+------+------+-----------------+
| Sno | Sname    | Ssex | Sage | Sdept           |
+-----+----------+------+------+-----------------+
|   1 | 陆亚     | 男   |   24 | 计算机网络      |
|   2 | tom      | 男   |   26 | 英语            |
|   3 | 张阳     | 男   |   21 | 物流管理        |
|   4 | alex     | 女   |   22 | 电子商务        |
|   5 | xumubin  | 男   |   29 | 中文专业        |
|   6 | wangzhao | 男   |   21 | 导弹专业        |
+-----+----------+------+------+-----------------+
四、binlog gtid
1、 GTID 介绍
(1)什么是GTID
GTID(Global Transaction ID),全局事务标识符。是对于一个已提交事务的编号,并且是一个全局唯一的编号。它是MySQL 5.6加入的一个强大特性,目的在于能够实现主从自动定位和切换,而不像以前需要指定文件和位置。
(2)GTID的格式与存储
1.单个GTID
GTID与主库上提交的每个事务相关联。此标识符不仅对发起事务的库是唯一的,而且在给定复制拓扑中的所有库中都是唯一的。GTID用冒号分隔的一对坐标表示,例如:
8eed0f5b-6f9b-11e9-94a9-005056a57a4e:23
前一部分是主库的server_uuid,后面一部分是主库上按提交事务的顺序确定的序列号,提交的事务序号从1开始。GTID = server_uuid :transaction_id
2.GTID集
GTID集是包括一个或多个单个GTID或GTID范围的集合。源自同一服务器的一系列GTID可以折叠为单个表达式,例如:
8eed0f5b-6f9b-11e9-94a9-005056a57a4e:1-321
上面的示例表示源自server_uuid为8eed0f5b-6f9b-11e9-94a9-005056a57a4e服务器的第1到第321个事务。源自同一服务器的多个单GTID或GTID范围可以同时包含在由冒号分隔的单个表达式中,例如:
8eed0f5b-6f9b-11e9-94a9-005056a57a4e:1-3:11:47-49
3.mysql.gtid_executed表
mysql.gtid_executed表结构如下:
mysql> desc mysql.gtid_executed;
+----------------+------------+------+-----+---------+-------+
| Field          | Type       | Null | Key | Default | Extra |
+----------------+------------+------+-----+---------+-------+
| source_uuid    | char(36)   | NO   | PRI | NULL    |       |
| interval_start | bigint(20) | NO   | PRI | NULL    |       |
| interval_end   | bigint(20) | NO   |     | NULL    |       |
+----------------+------------+------+-----+---------+-------+
mysql.gtid_executed表记录的是服务器上已经执行事务的GTID。三个字段分别表示发起事务的服务器UUID、UUID集的起始和结束事务ID。对于单个GTID,后两个字段的值相同。
(3)版本支持
5.6 版本新加的特性;5.7中做了加强。
5.6 中不开启,没有这个功能;5.7 中的GTID,即使不开也会有自动生成。
mysql> show variables like '%gtid%';
+----------------------------------+-----------+
| Variable_name                    | Value     |
+----------------------------------+-----------+
| binlog_gtid_simple_recovery      | ON        |
| enforce_gtid_consistency         | OFF       |
| gtid_executed_compression_period | 1000      |
| gtid_mode                        | OFF       |
| gtid_next                        | AUTOMATIC |
| gtid_owned                       |           |
| gtid_purged                      |           |
| session_track_gtids              | OFF       |
+----------------------------------+-----------+
8 rows in set (0.01 sec)
永久开启:
# 加入下面两行
[root@openEuler-2 ~]# vim /etc/my.cnf
gtid-mode=on
enforce-gtid-consistency=true

# 重启服务查看
[root@openEuler-2 ~]# systemctl restart mysqld.service
[root@openEuler-2 ~]# mysql -e "show variables like '%gtid%';"
+----------------------------------+-----------+
| Variable_name                    | Value     |
+----------------------------------+-----------+
| binlog_gtid_simple_recovery      | ON        |
| enforce_gtid_consistency         | ON        |
| gtid_executed                    |           |
| gtid_executed_compression_period | 0         |
| gtid_mode                        | ON        |
| gtid_next                        | AUTOMATIC |
| gtid_owned                       |           |
| gtid_purged                      |           |
| session_track_gtids              | OFF       |
+----------------------------------+-----------+
2、DDL和DML语句查看gtid
(1)DDL
DDL一个语句产生一个gtid
mysql> create database db1;
Query OK, 1 row affected (0.02 sec)

mysql> show master status;
+---------------+----------+--------------+------------------+----------------------------------------+
| File          | Position | Binlog_Do_DB | Binlog_Ignore_DB | Executed_Gtid_Set                      |
+---------------+----------+--------------+------------------+----------------------------------------+
| binlog.000002 |      339 |              |                  | 859c5de3-d420-11ef-ba36-000c29c84684:1 |
+---------------+----------+--------------+------------------+----------------------------------------+
1 row in set (0.00 sec)

mysql> use db1;
Database changed

mysql> create table t1(id int);
Query OK, 0 rows affected (0.04 sec)

mysql> show master status;
+---------------+----------+--------------+------------------+------------------------------------------+
| File          | Position | Binlog_Do_DB | Binlog_Ignore_DB | Executed_Gtid_Set                        |
+---------------+----------+--------------+------------------+------------------------------------------+
| binlog.000002 |      525 |              |                  | 859c5de3-d420-11ef-ba36-000c29c84684:1-2 |
+---------------+----------+--------------+------------------+------------------------------------------+
1 row in set (0.00 sec)

mysql> create table t2(id int);
Query OK, 0 rows affected (0.04 sec)

mysql> show master status;
+---------------+----------+--------------+------------------+------------------------------------------+
| File          | Position | Binlog_Do_DB | Binlog_Ignore_DB | Executed_Gtid_Set                        |
+---------------+----------+--------------+------------------+------------------------------------------+
| binlog.000002 |      711 |              |                  | 859c5de3-d420-11ef-ba36-000c29c84684:1-3 |
+---------------+----------+--------------+------------------+------------------------------------------+
1 row in set (0.00 sec)
(2)DML
DML一个事务产生一个gtid
mysql> begin;
Query OK, 0 rows affected (0.00 sec)

mysql> insert into t1 values(1);
Query OK, 1 row affected (0.02 sec)

mysql> insert into t1 values(2);
Query OK, 1 row affected (0.00 sec)

mysql> commit;
Query OK, 0 rows affected (0.01 sec)

mysql> show master status;
+---------------+----------+--------------+------------------+------------------------------------------+
| File          | Position | Binlog_Do_DB | Binlog_Ignore_DB | Executed_Gtid_Set                        |
+---------------+----------+--------------+------------------+------------------------------------------+
| binlog.000002 |     1069 |              |                  | 859c5de3-d420-11ef-ba36-000c29c84684:1-4 |
+---------------+----------+--------------+------------------+------------------------------------------+
1 row in set (0.01 sec)
(3)基于GTID进行查看binlog
mysql> SHOW BINLOG EVENTS IN 'binlog.000002';
+---------------+------+----------------+-----------+-------------+-------------------------------------------------------------------+
| Log_name      | Pos  | Event_type     | Server_id | End_log_pos | Info                                                              |
+---------------+------+----------------+-----------+-------------+-------------------------------------------------------------------+
| binlog.000002 |    4 | Format_desc    |         1 |         126 | Server ver: 8.0.40, Binlog ver: 4                                 |
| binlog.000002 |  126 | Previous_gtids |         1 |         157 |                                                                   |
| binlog.000002 |  157 | Gtid           |         1 |         234 | SET @@SESSION.GTID_NEXT= '859c5de3-d420-11ef-ba36-000c29c84684:1' |
| binlog.000002 |  234 | Query          |         1 |         339 | create database db1 /* xid=11 */                                  |
| binlog.000002 |  339 | Gtid           |         1 |         416 | SET @@SESSION.GTID_NEXT= '859c5de3-d420-11ef-ba36-000c29c84684:2' |
| binlog.000002 |  416 | Query          |         1 |         525 | use `db1`; create table t1(id int) /* xid=19 */                   |
| binlog.000002 |  525 | Gtid           |         1 |         602 | SET @@SESSION.GTID_NEXT= '859c5de3-d420-11ef-ba36-000c29c84684:3' |
| binlog.000002 |  602 | Query          |         1 |         711 | use `db1`; create table t2(id int) /* xid=21 */                   |
| binlog.000002 |  711 | Gtid           |         1 |         790 | SET @@SESSION.GTID_NEXT= '859c5de3-d420-11ef-ba36-000c29c84684:4' |
| binlog.000002 |  790 | Query          |         1 |         864 | BEGIN                                                             |
| binlog.000002 |  864 | Table_map      |         1 |         911 | table_id: 92 (db1.t1)                                             |
| binlog.000002 |  911 | Write_rows     |         1 |         951 | table_id: 92 flags: STMT_END_F                                    |
| binlog.000002 |  951 | Table_map      |         1 |         998 | table_id: 92 (db1.t1)                                             |
| binlog.000002 |  998 | Write_rows     |         1 |        1038 | table_id: 92 flags: STMT_END_F                                    |
| binlog.000002 | 1038 | Xid            |         1 |        1069 | COMMIT /* xid=24 */                                               |
+---------------+------+----------------+-----------+-------------+-------------------------------------------------------------------+
15 rows in set (0.00 sec)
具备GTID后,截取查看某些事务日志:
--include-gtids
--exclude-gtids
3、跨binlog文件截取日志还原数据库
1)第一次操作:
mysql> show master status;
+---------------+----------+--------------+------------------+------------------------------------------+
| File          | Position | Binlog_Do_DB | Binlog_Ignore_DB | Executed_Gtid_Set                        |
+---------------+----------+--------------+------------------+------------------------------------------+
| binlog.000002 |     1069 |              |                  | 859c5de3-d420-11ef-ba36-000c29c84684:1-4 |
+---------------+----------+--------------+------------------+------------------------------------------+
1 row in set (0.00 sec)

mysql> create database gtid;
Query OK, 1 row affected (0.02 sec)

mysql> use gtid
Database changed
mysql> create table t1(id int);
Query OK, 0 rows affected (0.04 sec)

mysql> begin;
Query OK, 0 rows affected (0.00 sec)

mysql> insert into t1 values(1);
Query OK, 1 row affected (0.01 sec)

mysql> commit;
Query OK, 0 rows affected (0.01 sec)

mysql> flush logs;
Query OK, 0 rows affected (0.03 sec)
2)第二次操作:
mysql> create table t2(id int);
Query OK, 0 rows affected (0.03 sec)

mysql> begin;
Query OK, 0 rows affected (0.01 sec)

mysql> insert into t2 values(1);
Query OK, 1 row affected (0.00 sec)

mysql> commit;
Query OK, 0 rows affected (0.02 sec)

mysql> flush logs;
Query OK, 0 rows affected (0.01 sec)
3)第三次操作:
mysql> create table t3(id int);
Query OK, 0 rows affected (0.04 sec)

mysql> begin;
Query OK, 0 rows affected (0.00 sec)

mysql> insert into t3 values(1);
Query OK, 1 row affected (0.00 sec)

mysql> commit;
Query OK, 0 rows affected (0.00 sec)

mysql> drop database gtid;
Query OK, 3 rows affected (0.06 sec)
4)使用binlog日志恢复误删除的gitd数据库,首先要确定gtid的起始和结束:
mysql> show binlog events in 'binlog.000002';
+---------------+------+----------------+-----------+-------------+-------------------------------------------------------------------+
| Log_name      | Pos  | Event_type     | Server_id | End_log_pos | Info                                                              |
+---------------+------+----------------+-----------+-------------+-------------------------------------------------------------------+
| binlog.000002 |    4 | Format_desc    |         1 |         126 | Server ver: 8.0.40, Binlog ver: 4                                 |
| binlog.000002 |  126 | Previous_gtids |         1 |         157 |                                                                   |
| binlog.000002 |  157 | Gtid           |         1 |         234 | SET @@SESSION.GTID_NEXT= '859c5de3-d420-11ef-ba36-000c29c84684:1' |
| binlog.000002 |  234 | Query          |         1 |         339 | create database db1 /* xid=11 */                                  |
| binlog.000002 |  339 | Gtid           |         1 |         416 | SET @@SESSION.GTID_NEXT= '859c5de3-d420-11ef-ba36-000c29c84684:2' |
| binlog.000002 |  416 | Query          |         1 |         525 | use `db1`; create table t1(id int) /* xid=19 */                   |
| binlog.000002 |  525 | Gtid           |         1 |         602 | SET @@SESSION.GTID_NEXT= '859c5de3-d420-11ef-ba36-000c29c84684:3' |
| binlog.000002 |  602 | Query          |         1 |         711 | use `db1`; create table t2(id int) /* xid=21 */                   |
| binlog.000002 |  711 | Gtid           |         1 |         790 | SET @@SESSION.GTID_NEXT= '859c5de3-d420-11ef-ba36-000c29c84684:4' |
| binlog.000002 |  790 | Query          |         1 |         864 | BEGIN                                                             |
| binlog.000002 |  864 | Table_map      |         1 |         911 | table_id: 92 (db1.t1)                                             |
| binlog.000002 |  911 | Write_rows     |         1 |         951 | table_id: 92 flags: STMT_END_F                                    |
| binlog.000002 |  951 | Table_map      |         1 |         998 | table_id: 92 (db1.t1)                                             |
| binlog.000002 |  998 | Write_rows     |         1 |        1038 | table_id: 92 flags: STMT_END_F                                    |
| binlog.000002 | 1038 | Xid            |         1 |        1069 | COMMIT /* xid=24 */                                               |
| binlog.000002 | 1069 | Gtid           |         1 |        1146 | SET @@SESSION.GTID_NEXT= '859c5de3-d420-11ef-ba36-000c29c84684:5' |
| binlog.000002 | 1146 | Query          |         1 |        1254 | create database gtid /* xid=31 */                                 |
| binlog.000002 | 1254 | Gtid           |         1 |        1331 | SET @@SESSION.GTID_NEXT= '859c5de3-d420-11ef-ba36-000c29c84684:6' |
| binlog.000002 | 1331 | Query          |         1 |        1442 | use `gtid`; create table t1(id int) /* xid=36 */                  |
| binlog.000002 | 1442 | Gtid           |         1 |        1521 | SET @@SESSION.GTID_NEXT= '859c5de3-d420-11ef-ba36-000c29c84684:7' |
| binlog.000002 | 1521 | Query          |         1 |        1596 | BEGIN                                                             |
| binlog.000002 | 1596 | Table_map      |         1 |        1644 | table_id: 93 (gtid.t1)                                            |
| binlog.000002 | 1644 | Write_rows     |         1 |        1684 | table_id: 93 flags: STMT_END_F                                    |
| binlog.000002 | 1684 | Xid            |         1 |        1715 | COMMIT /* xid=38 */                                               |
| binlog.000002 | 1715 | Rotate         |         1 |        1759 | binlog.000003;pos=4                                               |
+---------------+------+----------------+-----------+-------------+-------------------------------------------------------------------+
25 rows in set (0.00 sec)

mysql> show master status;
+---------------+----------+--------------+------------------+-------------------------------------------+
| File          | Position | Binlog_Do_DB | Binlog_Ignore_DB | Executed_Gtid_Set                         |
+---------------+----------+--------------+------------------+-------------------------------------------+
| binlog.000004 |      839 |              |                  | 859c5de3-d420-11ef-ba36-000c29c84684:1-12 |
+---------------+----------+--------------+------------------+-------------------------------------------+
1 row in set (0.00 sec)

mysql> show binlog events in 'binlog.000004';
+---------------+-----+----------------+-----------+-------------+--------------------------------------------------------------------+
| Log_name      | Pos | Event_type     | Server_id | End_log_pos | Info                                                               |
+---------------+-----+----------------+-----------+-------------+--------------------------------------------------------------------+
| binlog.000004 |   4 | Format_desc    |         1 |         126 | Server ver: 8.0.40, Binlog ver: 4                                  |
| binlog.000004 | 126 | Previous_gtids |         1 |         197 | 859c5de3-d420-11ef-ba36-000c29c84684:1-9                           |
| binlog.000004 | 197 | Gtid           |         1 |         274 | SET @@SESSION.GTID_NEXT= '859c5de3-d420-11ef-ba36-000c29c84684:10' |
| binlog.000004 | 274 | Query          |         1 |         385 | use `gtid`; create table t3(id int) /* xid=59 */                   |
| binlog.000004 | 385 | Gtid           |         1 |         464 | SET @@SESSION.GTID_NEXT= '859c5de3-d420-11ef-ba36-000c29c84684:11' |
| binlog.000004 | 464 | Query          |         1 |         539 | BEGIN                                                              |
| binlog.000004 | 539 | Table_map      |         1 |         587 | table_id: 95 (gtid.t3)                                             |
| binlog.000004 | 587 | Write_rows     |         1 |         627 | table_id: 95 flags: STMT_END_F                                     |
| binlog.000004 | 627 | Xid            |         1 |         658 | COMMIT /* xid=61 */                                                |
| binlog.000004 | 658 | Gtid           |         1 |         735 | SET @@SESSION.GTID_NEXT= '859c5de3-d420-11ef-ba36-000c29c84684:12' |
| binlog.000004 | 735 | Query          |         1 |         839 | drop database gtid /* xid=63 */                                    |
+---------------+-----+----------------+-----------+-------------+--------------------------------------------------------------------+
11 rows in set (0.00 sec)
由上面操作可以得出:
- 文件开始:binlog.000002
- 文件结束:binlog.000004
- gtid开始:859c5de3-d420-11ef-ba36-000c29c84684:5
- gtid结束:859c5de3-d420-11ef-ba36-000c29c84684:11
5)binlog使用gtid截取日志 :
[root@openEuler-2 ~]# cd /var/lib/mysql
[root@openEuler-2 mysql]# mysqlbinlog --skip-gtids --include-gtids='859c5de3-d420-11ef-ba36-000c29c84684:5-11' binlog.000002 binlog.000003 binlog.000004 -r /tmp/gtid.sql
开启GTID后,MySQL恢复Binlog时,重复GTID的事务不会再执行了,就想恢复就需要截取日志时添加--skip-gtids
6)恢复数据:
# 设为0后,在数据库上执行的语句都不记录binlog,减少重复日志
mysql> set sql_log_bin=0;
Query OK, 0 rows affected (0.00 sec)

mysql> source /tmp/gtid2.sql

mysql> set sql_log_bin=1;
Query OK, 0 rows affected (0.00 sec)
7)查看恢复的数据:
mysql> show databases;
+--------------------+
| Database           |
+--------------------+
| db1                |
| gtid               |
| information_schema |
| mysql              |
| performance_schema |
| sys                |
+--------------------+
6 rows in set (0.00 sec)

mysql> use gtid
Database changed

mysql> show tables;
+----------------+
| Tables_in_gtid |
+----------------+
| t1             |
| t2             |
| t3             |
+----------------+
3 rows in set (0.01 sec)

mysql> select * from t1;
+------+
| id   |
+------+
|    1 |
+------+
1 row in set (0.00 sec)

mysql> select * from t2;
+------+
| id   |
+------+
|    1 |
+------+
1 row in set (0.00 sec)

mysql> select * from t3;
+------+
| id   |
+------+
|    1 |
+------+
1 row in set (0.00 sec)
五、xtrabackup 备份
1)安装xtrabackup:
[root@openEuler-1 ~]# ls
anaconda-ks.cfg   jdk-8u60-linux-x64.tar.gz  mydumper-0.17.2-18.el8.x86_64.rpm
percona-xtrabackup-8.0.35-30-Linux-x86_64.glibc2.17.tar.gz
[root@openEuler-1 ~]# tar xf percona-xtrabackup-8.0.35-30-Linux-x86_64.glibc2.17.tar.gz

# 创建软链接可以省去配置环境变量的步骤
[root@openEuler-1 ~]# ln -sv /root/percona-xtrabackup-8.0.35-30-Linux-x86_64.glibc2.17/bin/xtrabackup /usr/bin/xtrabackup
2)准备工作:
mysql> CREATE USER 'bkpuser'@'%'IDENTIFIED with mysql_native_password  BY '[email protected]';
Query OK, 0 rows affected (0.03 sec)

mysql> GRANT BACKUP_ADMIN, PROCESS, RELOAD, LOCK TABLES, REPLICATION CLIENT ON *.* TO 'bkpuser'@'%';
Query OK, 0 rows affected (0.00 sec)

mysql> GRANT SELECT ON performance_schema.log_status TO 'bkpuser'@'%';
Query OK, 0 rows affected (0.02 sec)

mysql> GRANT SELECT ON performance_schema.keyring_component_status TO bkpuser@'%';
Query OK, 0 rows affected (0.00 sec)

mysql> GRANT SELECT ON performance_schema.replication_group_members TO bkpuser@'%';
Query OK, 0 rows affected (0.00 sec)

mysql> FLUSH PRIVILEGES;
Query OK, 0 rows affected (0.01 sec)
3)完全备份:
[root@openEuler-1 ~]# mkdir /mysql/xtra_bak
[root@openEuler-1 ~]# xtrabackup --backup --target-dir=/mysql/xtra_bak/ -u bkpuser -p'[email protected]'
4)增量备份:
# 插入数据
mysql> insert into school.Student values(7,'john','男',22,'电子商务');
Query OK, 1 row affected (0.02 sec)

mysql> insert into school.Student values(8,'bob','女',21,'英语');
Query OK, 1 row affected (0.00 sec)

mysql> insert into school.Student values(9,'smith','男',20,'计算机网络');
Query OK, 1 row affected (0.00 sec)


# 增量备份
[root@openEuler-1 ~]# xtrabackup --backup --target-dir=/mysql/xtra_bak_incr/ -u bkpuser -p'[email protected]' -S /var/lib/mysql/mysql.sock --incremental-basedir=/mysql/xtra_bak/
5)还原备份:
# 模拟数据损坏
mysql> drop database school;
Query OK, 1 row affected (0.05 sec)

# 准备完全备份
[root@openEuler-1 ~]# xtrabackup --prepare --apply-log-only --target-dir=/mysql/xtra_bak/

# 准备增量备份
[root@openEuler-1 ~]# xtrabackup --prepare --apply-log-only --target-dir=/mysql/xtra_bak/ --incremental-dir=/mysql/xtra_bak_incr/

# 最后执行(完全备份的路径)
[root@openEuler-1 ~]# xtrabackup --prepare --target-dir=/mysql/xtra_bak/

# 准备恢复工作(需停止服务,并清空主目录)
[root@openEuler-1 ~]# systemctl stop mysqld
[root@openEuler-1 ~]# rm -rf /var/lib/mysql/*

# 恢复备份
[root@openEuler-1 ~]# xtrabackup --copy-back --target-dir=/mysql/xtra_bak/

# 修改权限(还原后目录权限变了,需要还原回来)
[root@openEuler-1 ~]# chown -R mysql:mysql /var/lib/mysql

# 重启服务
[root@openEuler-1 ~]# systemctl start mysqld
6)查看数据:
mysql> show databases;
+--------------------+
| Database           |
+--------------------+
| information_schema |
| mysql              |
| performance_schema |
| school             |
| sys                |
+--------------------+
5 rows in set (0.01 sec)

mysql> select * from school.Student;
+-----+----------+------+------+-----------------+
| Sno | Sname    | Ssex | Sage | Sdept           |
+-----+----------+------+------+-----------------+
|   1 | 陆亚     | 男   |   24 | 计算机网络      |
|   2 | tom      | 男   |   26 | 英语            |
|   3 | 张阳     | 男   |   21 | 物流管理        |
|   4 | alex     | 女   |   22 | 电子商务        |
|   5 | xumubin  | 男   |   29 | 中文专业        |
|   6 | wangzhao | 男   |   21 | 导弹专业        |
|   7 | john     | 男   |   22 | 电子商务        |
|   8 | bob      | 女   |   21 | 英语            |
|   9 | smith    | 男   |   20 | 计算机网络      |
+-----+----------+------+------+-----------------+
9 rows in set (0.01 sec)
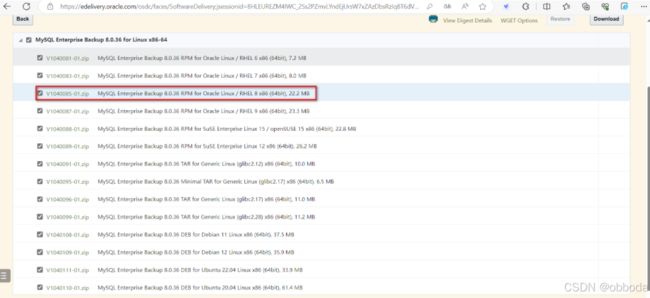
六、mysqlbackup 全量备份(backup-to-image)
1)获取软件:
2)安装软件:
[root@localhost ~]# unzip V1040085-01.zip
[root@localhost ~]# dnf install mysql-commercial-backup-8.0.36-1.1.el8.x86_64.rpm
3)备份管理员
CREATE USER 'mysqlbackup'@'localhost' IDENTIFIED BY 'MySQL@123';
GRANT SELECT, BACKUP_ADMIN, RELOAD, PROCESS, SUPER, REPLICATION CLIENT ON *.*
    TO `mysqlbackup`@`localhost`;
GRANT CREATE, INSERT, DROP, UPDATE ON mysql.backup_progress TO 'mysqlbackup'@'localhost';
GRANT CREATE, INSERT, DROP, UPDATE, SELECT, ALTER ON mysql.backup_history
    TO 'mysqlbackup'@'localhost';
GRANT LOCK TABLES, CREATE, DROP, FILE, INSERT, ALTER ON *.* TO 'mysqlbackup'@'localhost';
GRANT CREATE, DROP, UPDATE ON mysql.backup_sbt_history TO 'mysqlbackup'@'localhost';
GRANT ENCRYPTION_KEY_ADMIN ON *.* TO 'mysqlbackup'@'localhost';
GRANT INNODB_REDO_LOG_ARCHIVE ON *.* TO 'mysqlbackup'@'localhost';
GRANT CREATE, INSERT, DROP ON mysql.backup_progress_old TO 'mysqlbackup'@'localhost';
GRANT CREATE, INSERT, DROP, ALTER ON mysql.backup_progress_new TO 'mysqlbackup'@'localhost';
GRANT CREATE, INSERT, DROP ON mysql.backup_history_old TO 'mysqlbackup'@'localhost';
GRANT CREATE, INSERT, DROP, ALTER ON mysql.backup_history_new TO 'mysqlbackup'@'localhost';
GRANT CREATE, INSERT, DROP ON mysql.backup_sbt_history_old TO 'mysqlbackup'@'localhost';
GRANT CREATE, INSERT, DROP, ALTER ON mysql.backup_sbt_history_new TO 'mysqlbackup'@'localhost';
4)备份命令:
mysqlbackup --user=mysqlbackup --password=MySQL@123 --socket=/var/lib/mysql/mysql.sock \
--backup-image=my_full_bak.mbi  \
--backup-dir=/data/backup \
--show-progress \
--compress \
--with-timestamp \
backup-to-image
参数解读:
-
–backup-image:生成的备份image名称
-
–backup-dir:生成的备份image所在目录
-
–show-progress:显示备份进度[可选项]
-
–compress:对备份image进行压缩节省空间[可选项]
-
–with-timestamp:在backup-dir目录下生成’年-月-日-时-分-秒’的目录存储备份image以及其它相关文件
-
backup-to-image:声明这是备份为image的备份
5)通过list-image查看备份image中的文件内容:
[root@localhost ~]# mysqlbackup --backup-image=/data/backup/2025-01-19_7-15-31/my_full_bak.mbi list-image6)通过validate验证备份image的有效性:
[root@localhost ~]# mysqlbackup --backup-image=/data/backup/2025-01-19_7-15-31/my_full_bak.mbi validate7)还原image命令:
mysqlbackup --datadir=/var/lib/mysql --backup-image=/data/backup/2025-01-19_7-15-31/my_full_bak.mbi \
--backup-dir=/data/backup/2025-01-19_7-15-31/tmp \
--uncompress \
copy-back-and-apply-log
参数解读:
-
–datadir : mysql server的数据库datadir,数据将还原至此
-
–backup-image:image备份的路径与名称
-
–backup-dir: image临时工作目录用于释放image都此目录,必须为空
-
–uncompress[可选项]
-
copy-back-and-apply-log:应用redolog并且copy datafile至datadir
注意:
- 还原备份前:需要关闭mysqld服务
- 还原备份前:需要清空mysql的datadir目录
- 还原备份后:需要将mysql的datadir目录权限改回来