在RHEL6.4下安装AdobeMediaServer5
1 软硬件环境
1.1 硬件环境
CPU |
Intel(R) Core(TM)2 Quad CPU Q9300 @ 2.50GHz |
内存 |
8GB |
硬盘 |
80GB |
网卡 |
Atheros Communitions PCI-E Gigabit Etherent Controller (NDIS 6.20) |
1.2 软件环境
操作系统 |
RHEL6.4_x86_64 |
Media Server |
AdobeMediaServerStarter_5_x64_LS1_All(开发试用版本) Apache |
Media Client |
Firefox; Adobe Flash Player |
2 安装配置
2.1 安装前准备
2.1.1 选择部署方式
AMS(Adobe Media Server)可以单独部署在一台服务器上,也可以作为集群环境部署到多台服务器上。
本次仅简单部署到一台机器上。
2.1.2 选择安装Apache HTTP服务器
如果安装Apache服务器的话,媒体文件将通过HTTP以流的方式发布出去,客户端将不用等待整个媒体文件完全下载就可以播放了。
AMS默认会安装Apache服务器。
2.1.3 下载AMS软件包
登录https://www.adobe.com/cfusion/tdrc/index.cfm?product=adobemediaserver,选择安装平台之后就可以进行下载。
2.1.4 准备AMS序列号
安装AMS的时候会提示输入AMS序列号,因此需要提前准备好。如果安装的时候不输入这个序列号,那么就会安装AMS的免费试用版,但是有些功能可能会受限。
2.2 安装步骤
2.2.1 解压安装文件
以root用户登录Linux系统,使用如下命令解压缩安装文件:
tar -xzf AdobeMediaServer_5_LS1_linux64.tar.gz
解压出来如下目录:AMS_5_0_1_r1076。
2.2.2 执行安装程序
使用cd命令进入AMS_5_0_1_r1076目录,执行如下命令进行安装:./installAMS。接下来就将是AMS的文本安装界面了,下面将会按照提示进行一步步的操作:
1) 首先,会出现很长的License阅读,按空格进行翻页,在License的最后会出现是否接受的选项,输入y然后回车即可:
Do you agree with the license agreement? (y/n): y |
2) 接下来就是输入AMS序列号的时候了,本次将试用其免费版,直接回车即可。然后会提示是否重试,默认不重试,直接回车即可:
Please enter your Adobe Media Server 5 serial number. Would you like to try again? y/n: Default [n]: |
3) 下面将会设置AMS的安装目录,默认是/opt/adobe/ams,也可以改为自己特定的目录:
The installer will install Adobe Media Server 5 in the following directory Default [/opt/adobe/ams]: |
4) 下面设置管理员用户名和密码,用于登录AMS的管理控制台,这一步自定义即可:
Please enter the administrative username: admin For increased security, enter a password of at least 8 characters. Please enter the administrative password: Confirm password: |
5) 下面设置运行AMS的用户和组,默认都是ams,也可以自定义,如果不存在将会创建:
Please enter the user that the Adobe Media Server service will run as Default user [ams]: User "ams" does not exist. Do you want to create it?(y/n) Default [y]: Please enter a valid user group for the "ams" user. Default group [ams]: Group "ams" does not exist!. This installer will create one ... User "ams" created and added to group "ams" |
6) 下面是Apache配置:如果选择不安装Apache,这一步将会跳过。如果选择安装Aapche,则还需要配置Apache监听端口号、AMS监听的IP地址、Apache运行的用户等:
Do you want to install apache? (y/n) Default [y]: You have chosen to install Apache. Would you like for Apache or AMS to listen on port 80? Enter 'y' for Apache, 'n' for AMS. (y/n) Default [y]: If you know the interface(IP address) that AMS will listen on, please enter it here. If not, AMS will try to auto-detect it. Default []: 10.120.112.35 Apache is started as root but once it has acquired its port it starts theworker processes as a non-priviledged user. Please enter the user that Apache will eventually run as. Default user [ams]: |
7) 下面是配置AMS的步骤,主要包括:AMS监听端口号、AMS Admin服务监听的端口号、是否将AMS作为守护进程来运行、安装成功之后是否启动AMS等。
The Adobe Media Server communicates on the IANA-assigned port of 1935, which is the port most Flash applications expect, and can also communicate on port 80 over RTMPT, HTTP webserver proxy, and for HTTP Dynamic Streaming origin services. Please enter the Adobe Media Server port(s), comma-separated Default [1935]: 1935 Please enter the port to use for the Admin service. You can only specify one admin port. Default [1111]: Do you want the Adobe Media Server service to run as a daemon? (y/n) Default [y]: Do you want to start the Adobe Media Server after the installation is done? (y/n) Default [y]: |
8) 接下来会显示一下之前配置的摘要,检查是否正确,如果全部OK,输入y然后回车就可以开始安装了。
----------- Install Action Summary ----------- Installation directory = /opt/adobe/ams Adobe Media Server Port = 1935 Adobe Media Admin Server Port = 1111 Interface (IP address) AMS will listen on = 10.120.112.35 Apache Install = Yes Administrative username = admin Administrative password = (suppressed) service owner = ams service user = ams service group = ams Run as daemon = Yes Start Adobe Media Server = Yes Proceed with the installation? (y/n/q): y |
9) 经过几分钟之后,安装就会完成,会出现如下信息:
Installing Adobe Media Server files... Configuring Adobe Media Server... Adding "ams" service. Setting default admin to "ams". Setting autostart for "ams". Server:ams command:start NPTL 2.12 Starting Adobe Media Server (please check /var/log/messages) Admin server:amsadmin command:start Starting Adobe Media Admin Server (please check /var/log/messages) The Adobe Media Server installation is complete. |
2.3 检查安装结果
2.3.1 检查端口号
以root用户登录Linux系统,执行如下命令:netstat -anp |grep "LISTEN "检查端口号。
[root@yuanhuan AMS_5_0_1_r1076]# netstat -anp |grep "LISTEN " tcp 0 0 0.0.0.0:1935 0.0.0.0:* LISTEN 4168/amsedge tcp 0 0 0.0.0.0:111 0.0.0.0:* LISTEN 1731/rpcbind tcp 0 0 127.0.0.1:19350 0.0.0.0:* LISTEN 4168/amsedge tcp 0 0 0.0.0.0:22 0.0.0.0:* LISTEN 2006/sshd tcp 0 0 0.0.0.0:54006 0.0.0.0:* LISTEN 1778/rpc.statd tcp 0 0 0.0.0.0:1111 0.0.0.0:* LISTEN 4406/./amsadmin tcp 0 0 127.0.0.1:631 0.0.0.0:* LISTEN 1844/cupsd tcp 0 0 127.0.0.1:25 0.0.0.0:* LISTEN 2088/master tcp 0 0 127.0.0.1:11110 0.0.0.0:* LISTEN 4406/./amsadmin tcp 0 0 :::111 :::* LISTEN 1731/rpcbind tcp 0 0 :::80 :::* LISTEN 4163/httpd tcp 0 0 :::22 :::* LISTEN 2006/sshd tcp 0 0 ::1:631 :::* LISTEN 1844/cupsd tcp 0 0 ::1:25 :::* LISTEN 2088/master tcp 0 0 :::8134 :::* LISTEN 4163/httpd tcp 0 0 :::35050 :::* LISTEN 1778/rpc.statd |
红色部分表示AMS、Apache所监听的端口号都启起来了。
2.3.2 检查进程
执行如下命令检查AMS启动的进程:ps -ef |grep ams。
[root@yuanhuan AMS_5_0_1_r1076]# ps -ef |grep ams root 4142 1 0 13:57 pts/0 00:00:00 ./amsmaster -console root 4163 1 0 13:57 ? 00:00:00 /opt/adobe/ams/Apache2.2/bin/httpd -f ./conf/httpd.conf -d /opt/adobe/ams/Apache2.2 -k start root 4166 1 0 13:57 ? 00:00:00 /opt/adobe/ams/Apache2.2/bin/htcacheclean -n -t �Ci -p/opt/adobe/ams/Apache2.2/cacheroot -d5 -l1024K ams 4168 4142 0 13:57 pts/0 00:00:00 /opt/adobe/ams/amsedge -edgeports :1935 -coreports localhost:19350 �Cconf /opt/adobe/ams/conf/Server.xml -adaptor _defaultRoot_ -name _defaultRoot__edge1 -edgename edge1 ams 4223 4163 0 13:57 ? 00:00:00 /opt/adobe/ams/Apache2.2/bin/httpd -f ./conf/httpd.conf �Cd /opt/adobe/ams/Apache2.2 -k start ams 4224 4163 0 13:57 ? 00:00:00 /opt/adobe/ams/Apache2.2/bin/httpd -f ./conf/httpd.conf �Cd /opt/adobe/ams/Apache2.2 -k start ams 4226 4163 0 13:57 ? 00:00:00 /opt/adobe/ams/Apache2.2/bin/httpd -f ./conf/httpd.conf �Cd /opt/adobe/ams/Apache2.2 -k start root 4406 1 0 13:57 pts/0 00:00:00 ./amsadmin -console �Cconf ./conf/Server.xml root 4494 2793 0 14:00 pts/0 00:00:00 grep ams |
2.3.3 检查AMS是否开机自启动
执行chkconfig --list |grep -i ams进行检查:
[root@yuanhuan AMS_5_0_1_r1076]# chkconfig --list |grep -i ams ams 0:关闭 1:关闭 2:关闭 3:启用 4:启用 5:启用 6:关闭 |
可以发现,Linux的3、4、5运行级别都是启动ams的。如果都是关闭,则使用chkconfig命令设置为“on”或者“启用”即可
2.3.4 在浏览器中检查AMS是否运行正常
主要是检查AMS启动的Apache服务是否运行正常。
在浏览器中输入http://[配置的IP]: [端口号],本例中输入:http://10.120.112.35,将会出现下面页面,中间有一个AMS自带的一个视频,如果安装了Adobe Flash Player的话就可以正常播放,如下图所示。
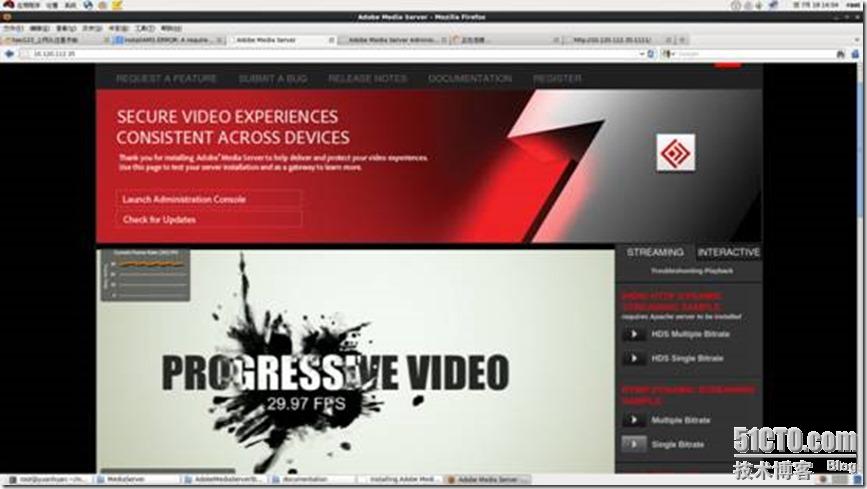
点击左上角的![]() ,就可以进入管理控制台了,这里将会输入安装过程中设置的管理员用户名和密码,如下图所示:
,就可以进入管理控制台了,这里将会输入安装过程中设置的管理员用户名和密码,如下图所示:
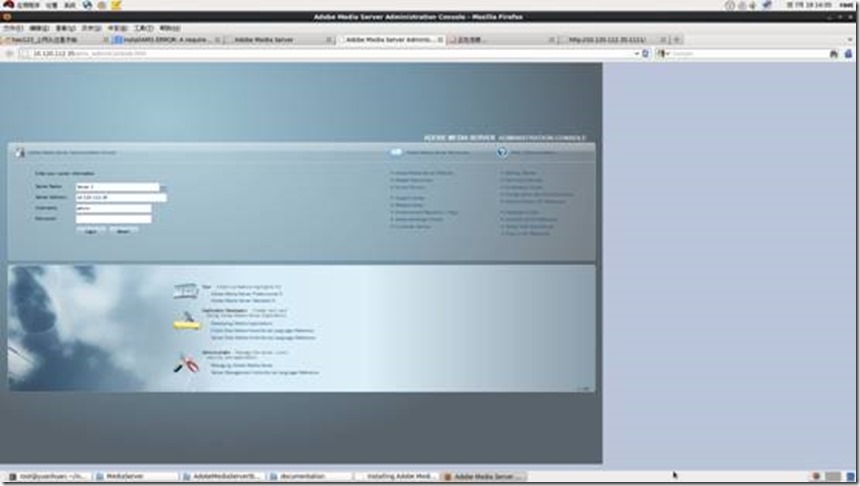
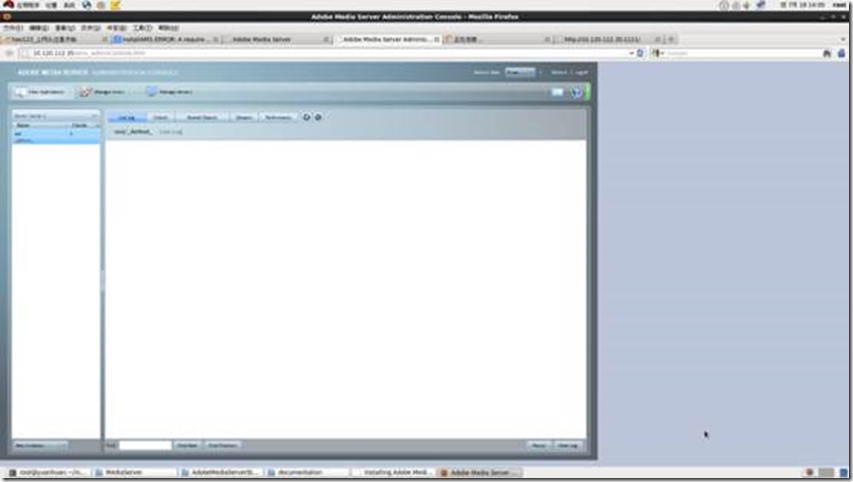
登录之后,就可以进入到管理控制台了,如下图所示。
3 使用AMS发布自己的视频
3.1 发布RTMP协议的mp4视频
将北京遇上西雅图视频片段beijing5-360p.mp4文件上传到AMS安装目录的webroot/vod下,那么发布出来的RTMP协议的视频地址将会是:rtmp://10.120.112.35:1935/vod/mp4:beijing5-360p.mp4。
3.2 发布HTTP协议的mp4视频
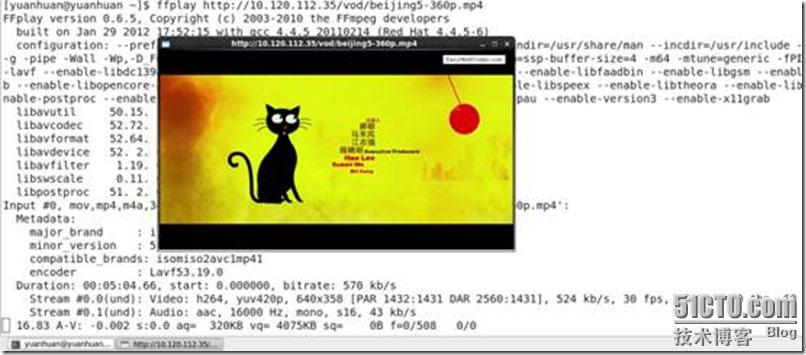
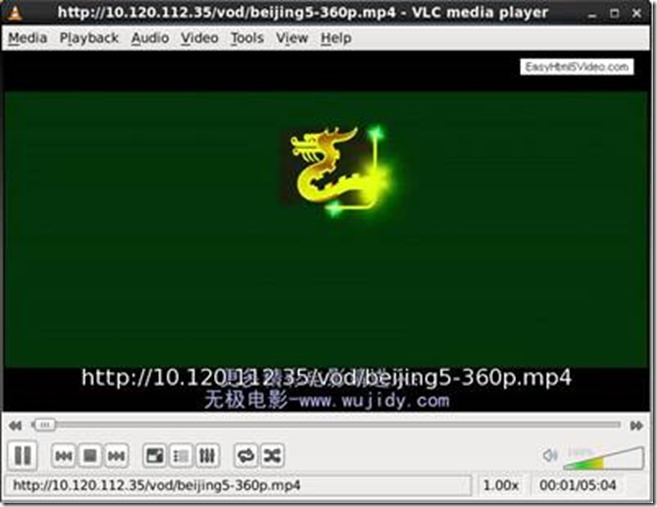
将北京遇上西雅图视频片段beijing5-360p.mp4文件上传到AMS安装目录的webroot/vod下,那么发布出来的HTTP协议的视频地址将会是:http://10.120.112.35/vod/beijing5-360p.mp4。
3.3 播放发布视频
3.3.1 使用ffplay命令播放
3.3.2 使用VLC播放器播放
4 管理AMS
4.1 服务启停
可以使用如下命令对AMS进行启动、停止、重启操作:
service ams start/stop/restart
说明:自从5.0版本之后,Flash Media Server改名为Adobe Media Server,缩写由原来的fms改为ams。所以在5.0之前的老版本(例如4.5版本),服务启停命令是:service fms start/stop/restart,老版本默认是运行在fms用户和fms组下面的,新版本运行在ams.ams下面。
本文出自 “烟花易冷” 博客,转载请与作者联系!