Silverlight 3 Beta 新特性解析(7)- Child Window和Shader Effect篇
前提条件:
阅读本文之前请确认你已经安装了如下软件
- Visual Studio 2008 (Express) SP1
- Silverlight 3 Tools For Visual Studio
- Microsoft Expression Blend 3 MIX 09 Preview
- .Net RIA Service Preview
本篇主要内容:
- Child Window
- Shader Effect
- Assembly Cache
Child Window:
Silverlight 3增加了两种新类型的空间
除了Silverlight 3 Beta 新特性解析(6) - Navigation和Deep Linking篇介绍的Page控件
还有就是本节将介绍的Child Window控件
(WPF也有这两种控件,现在都被Silverlight借用过来了。事实上大家可以通过自定义控件的方式来实现上述两种控件)
Page控件继承自UserControl
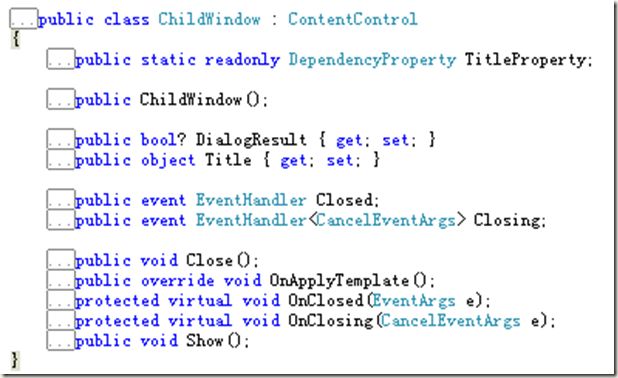
而Child Window控件继承自ContentControl,其属性和方法如下
调用Show显示子窗口,并使得App.Current.RootVisual不可点击,而点击关闭按钮
如下图,将去调用Close方法,关闭子窗口,并使得App.Current.RootVisual重新可以响应事件
在这个介绍中将使用Silverlight 3 Beta 新特性解析(6) - Navigation和Deep Linking篇中的范例
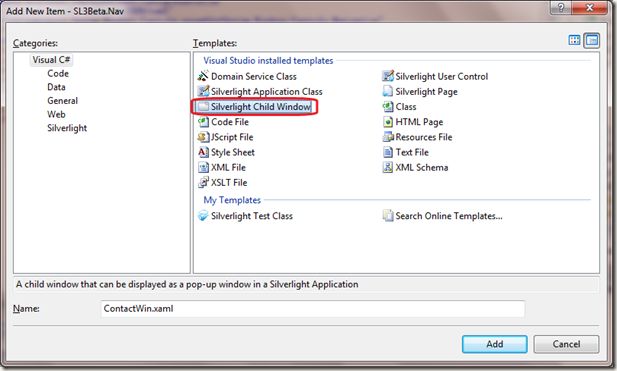
我们在Views目录下创建一个Child Window控件如下
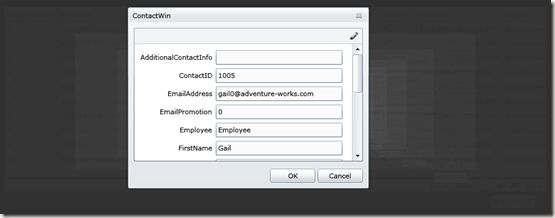
下面我们将不在通过切换页面的形式来显示详细的联系信息内容,而是弹出个对话框,来显示结果
修改ContactWin.xaml如下:
<controls:ChildWindow x:Class="SL3Beta.Nav.Views.ContactWin"
xmlns="http://schemas.microsoft.com/winfx/2006/xaml/presentation"
xmlns:x="http://schemas.microsoft.com/winfx/2006/xaml"
xmlns:controls="clr-namespace:System.Windows.Controls;assembly=System.Windows.Controls"
xmlns:dataControls="clr-namespace:System.Windows.Controls;assembly=System.Windows.Controls.Data.DataForm"
Width="400" Height="300"
Title="ContactWin">
<Grid x:Name="LayoutRoot" Margin="2">
<Grid.RowDefinitions>
<RowDefinition />
<RowDefinition Height="Auto" />
</Grid.RowDefinitions>
<dataControls:DataForm x:Name="ContactForm"></dataControls:DataForm>
<Button x:Name="CancelButton" Content="Cancel" Click="CancelButton_Click" Width="75" Height="23" HorizontalAlignment="Right" Margin="0,12,0,0" Grid.Row="1" />
<Button x:Name="OKButton" Content="OK" Click="OKButton_Click" Width="75" Height="23" HorizontalAlignment="Right" Margin="0,12,79,0" Grid.Row="1" />
</Grid>
</controls:ChildWindow>
而ContactWin.xaml.cs为:
private PersonDomainContext _personContext = new PersonDomainContext();
public ContactWin(int contactID)
{
InitializeComponent();
_personContext.Loaded += (sender, e2) =>
{
if (_personContext.Contacts.Count > 0)
this.ContactForm.CurrentItem = _personContext.Contacts[0];
};
_personContext.LoadContactByContactID(contactID);
}
修改EmployeePage.xaml.cs代码如下:
private void ViewContactButton_Click(object sender, RoutedEventArgs e)
{
Employee employee = this.EmployeeGrid.SelectedItem as Employee;
if (employee != null)
{
ContactWin contactWin = new ContactWin(employee.ContactID);
contactWin.Show();
//this.NavigationService.Navigate(new Uri(String.Format("ContactID={0}", employee.ContactID), UriKind.Relative));
}
}
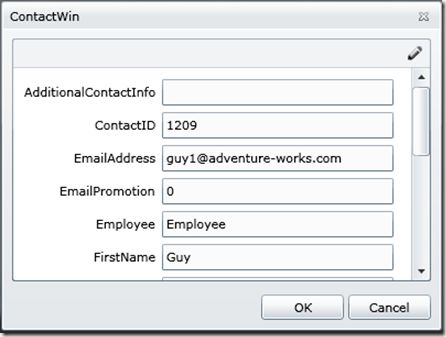
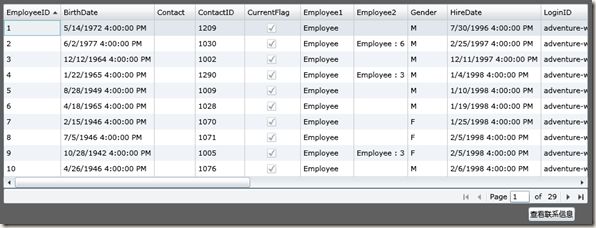
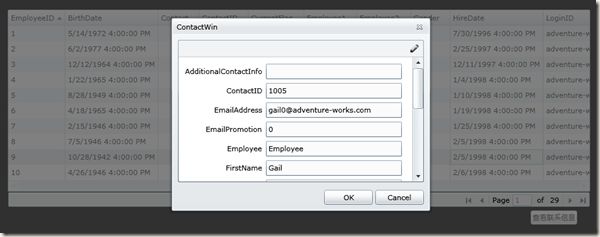
启动工程后得到如下的效果图:
没弹出对话框之前
弹出对话框之后
有人可能觉得上述界面不够美观,比如关闭按钮
没关系,由于ChildWindow继承自ContentControl
意味着我们可能修改其Template或者Style
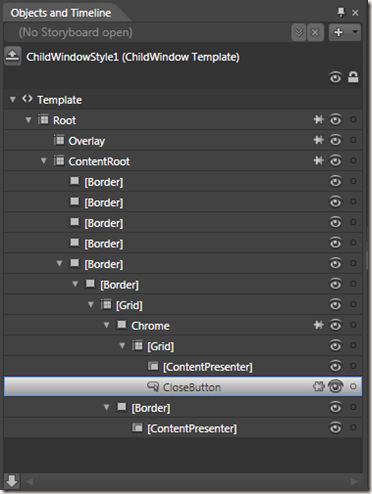
用Blend 3打开工程,并打开ContactWin.xaml文件,并按下图选择Edit a Copy…来重新定义其Style
选择一个新的Style的名字并按确定后,我们就见到默认的ChildWindow的样式了(查看其他控件的默认样式也是这样的)
现在你就可以修改CloseButton等的样式或者模板来获得更好用户界面了
此外有人可能想要添加好的表现特效来获得更好的用户体验
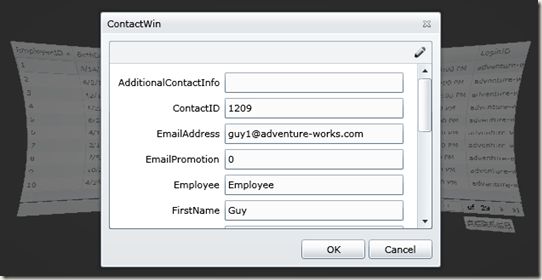
比如,弹出ChildWindow后,背景模糊化或者扭曲化
这就需要借助Shader Effect的帮助了
Shader Effect:
Shader Effect叫做像素处理技术
如果刨根究底的话,这是一门科学,叫做数字图像处理
在这里就不介绍如何对图像进行处理了,因为那是门需要几百页篇幅的书籍才能讲得完的学问
先来看些实际效果吧
目前微软内置提供的只有两个像素特效效果,分别为BlurEffect和DropdownEffect
这两种特效的使用已经在Silverlight 3 Beta 新特性解析(2)-Graphics篇做了介绍
多亏了新的Bitmap API,使得我们可以操纵每个像素,因此我们也可能制作自己的特效
但是相信很多人都非常头疼去自己定义特效效果
而且这也非常不可能,毕竟很多人都没有学过数字图像处理的知识
幸好国外有人提供了拥有诸多特效的特效包ShaderEffectLibrary
其包含了22种全新的特效,如下
- BandedSwirlEffect
- BloomEffect
- BrightExtractEffect
- ColorKeyAlphaEffect
- ColorToneEffect
- ContrastAdjustEffect
- DirectionalBlurEffect
- EmbossedEffect
- GloomEffect
- GrowablePoissonDiskEffect
- InvertColorEffect
- LightStreakEffect
- MagnifyEffect
- MonochromeEffect
- PinchEffect
- PixelateEffect
- RippleEffect
- SharpenEffect
- SmoothMagnifyEffect
- ToneMappingEffect
- ToonShaderEffect
- ZoomBlurEffect
下面我们将ShaderEffectLibrary导入Silverlight工程
修改EmployeePage.xaml.cs的ViewContactButton_Click事件如下
1: private void ViewContactButton_Click(object sender, RoutedEventArgs e)
2: {
3: Employee employee = this.EmployeeGrid.SelectedItem as Employee;
4: if (employee != null)
5: {
6: ContactWin contactWin = new ContactWin(employee.ContactID);
7: RippleEffect rippleEff = new RippleEffect();
8: rippleEff.Amplitude = 1;
9: rippleEff.Frequency = 1;
10: App.Current.RootVisual.Effect = rippleEff;
11:
12: contactWin.Closed += (sender2, e2) =>
13: {
14: App.Current.RootVisual.Effect = null;
15: };
16:
17: contactWin.Show();
18: //this.NavigationService.Navigate(new Uri(String.Format("ContactID={0}", employee.ContactID), UriKind.Relative));
19: }
20: }
由于所有继承自UIElement的控件都有Effect这个属性
所以我们可以给App.Current.RootVisual设置特效(这里设置的是RippleEffect)
而12~15将在ChildWindow关闭后,让App.Current.RootVisual恢复原状
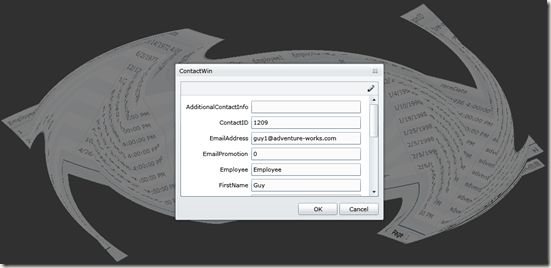
其他的个别几种特效效果例举如下:
BandedSwirlEffect
ZoomBlurEffect
Assembly Cache:
由于Silverlight是网络应用
所以对下载的包的大小非常敏感
毕竟用户都是比较没有耐心的,如果让他们等待载入一个网站需要2分钟
可能他们就干脆关闭浏览器了
所以微软在Silverlight 3引进了Assembly Cache来缩小xap的大小
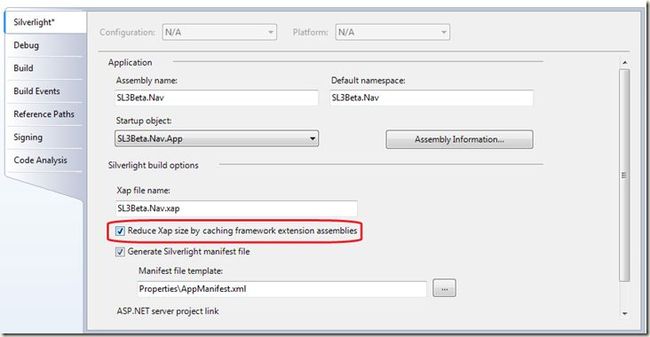
使得项目支持Assembly Cache的方式如下:
勾选Reduce Xap Size by caching framework extension assemblies(默认是不勾选的)
如下是我们已经生成的xap文件
在没有勾选和勾选了Reduce Xap Size by caching framework extension assemblies的xap大小如下
不支持Assembly Cache
支持Assembly Cache
可以看出,通过Assembly Cache技术,.xap的大小急剧下降,为了查看原因
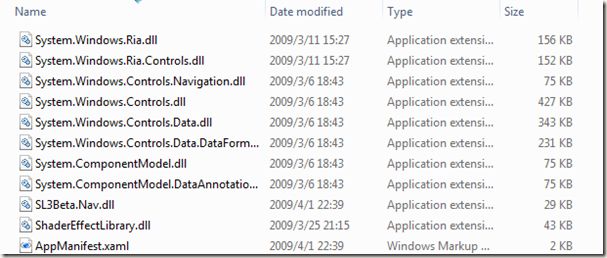
更改.xap包的扩展名为.zip,并解压
我们可以看到不支持Assembly Cache的情况下
而支持Assembly Cache的情况下
我们再AppManifest.xaml文件的定义如下
<Deployment xmlns="http://schemas.microsoft.com/client/2007/deployment" xmlns:x="http://schemas.microsoft.com/winfx/2006/xaml" EntryPointAssembly="SL3Beta.Nav" EntryPointType="SL3Beta.Nav.App" RuntimeVersion="3.0.40307.0">
<Deployment.Parts>
<AssemblyPart x:Name="SL3Beta.Nav" Source="SL3Beta.Nav.dll" />
<AssemblyPart x:Name="ShaderEffectLibrary" Source="ShaderEffectLibrary.dll" />
<AssemblyPart x:Name="System.ComponentModel.DataAnnotations" Source="System.ComponentModel.DataAnnotations.dll" />
<AssemblyPart x:Name="System.ComponentModel" Source="System.ComponentModel.dll" />
<AssemblyPart x:Name="System.Windows.Controls.Data.DataForm" Source="System.Windows.Controls.Data.DataForm.dll" />
<AssemblyPart x:Name="System.Windows.Controls.Data" Source="System.Windows.Controls.Data.dll" />
<AssemblyPart x:Name="System.Windows.Controls" Source="System.Windows.Controls.dll" />
<AssemblyPart x:Name="System.Windows.Controls.Navigation" Source="System.Windows.Controls.Navigation.dll" />
<AssemblyPart x:Name="System.Windows.Ria.Controls" Source="System.Windows.Ria.Controls.dll" />
<AssemblyPart x:Name="System.Windows.Ria" Source="System.Windows.Ria.dll" />
</Deployment.Parts>
</Deployment>
不支持Assembly Cache
<Deployment xmlns="http://schemas.microsoft.com/client/2007/deployment" xmlns:x="http://schemas.microsoft.com/winfx/2006/xaml" EntryPointAssembly="SL3Beta.Nav" EntryPointType="SL3Beta.Nav.App" RuntimeVersion="3.0.40307.0">
<Deployment.Parts>
<AssemblyPart x:Name="SL3Beta.Nav" Source="SL3Beta.Nav.dll" />
<AssemblyPart x:Name="ShaderEffectLibrary" Source="ShaderEffectLibrary.dll" />
<AssemblyPart x:Name="System.Windows.Ria.Controls" Source="System.Windows.Ria.Controls.dll" />
<AssemblyPart x:Name="System.Windows.Ria" Source="System.Windows.Ria.dll" />
</Deployment.Parts>
<Deployment.ExternalParts>
<ExtensionPart Source="http://go.microsoft.com/fwlink/?LinkID=142565" />
<ExtensionPart Source="http://go.microsoft.com/fwlink/?LinkID=141727" />
<ExtensionPart Source="http://go.microsoft.com/fwlink/?LinkID=142573" />
<ExtensionPart Source="http://go.microsoft.com/fwlink/?LinkID=142572" />
<ExtensionPart Source="http://go.microsoft.com/fwlink/?LinkID=142571" />
<ExtensionPart Source="http://go.microsoft.com/fwlink/?LinkID=142575" />
</Deployment.ExternalParts>
</Deployment>
支持Assembly Cache
原来微软通过不将Silverlight 3原生支持的dll放置进去.xap包中来降低下载包的大小
而原生支持的dll包将通过网络来获取,而其只在第一访问Silverlight应用程序的时候才下载并缓存在用户的硬盘上
下次将直接从缓存中读取,从而节省了带宽,也减少了下载包的大小,一举两得
结束语:
到这里,我想将讲述的Silverlight 3 Beta的新特性也终于要告一个段落了
下面一阶段就是用Silverlight 3 Beta构建几个小的Demo
大家可以回复给出自己希望看到的Demo,我将酌情实现下
比如:
图片幻灯片
视频播放器
网络即时聊天工具
等等
出处:http://ibillguo.cnblogs.com/
本文版权由作者和博客园共同所有,转载请注明出
