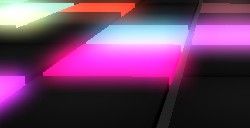
辉光特效
Glows (aka Bloom)
Introduction介绍
Glow effects simulate the characteristics of a lens that suffers from light bleeding due to a high dynamic range. In photography, most cameras are set to use an average metering algorithm. The camera will analyze the frame and take the average exposure as the midpoint. Anything outside the camera's dynamic range will either become underexposed or overexposed. Due to the physics of camera lenses, overexposures can bleed into the image, giving off that glowish aura or whiteout if you're staring at a very bright source. This article will go over the process of how to produce these auras as well as examine some techniques for blending the result.辉光效果模拟动态范围的光线发散的镜头特征。在摄影中,大多数的摄像机使用平均计算算法。摄像机将分析帧并且将曝光的平均值作为中间点。任何在摄像机的动态范围之外的图像要么曝光不足要么曝光过度。由于摄像机的镜头的物理特性,过度曝光的部分能够渗透到图像中,发出辉光或者像你盯着一个非常明亮的光源时的乳白色的光。这篇文章将会重温怎样产生这些光晕的过程以及检查一些技术混合的结果。
The Technique
First Pass第一个通道
Rendering glows is done in two main stages. The first stage is to create what's called a glowmap. A glowmap is a texture object that contains only the emissive objects in the viewable area, but these objects must still be occluded by the non-emissive objects. A glowing lamp behind a wall should not be visible in the glowmap, for example. To do this, disable colour writes by calling gl.colorMask(false, false, false, false) and then draw all non-emissive geometry to the framebuffer object (FBO). The GPU will just write the depth values to the FBO. On the second pass, reenable colour writes and draw all emissive objects. You can render emissive objects with full lighting or you can disable lighting and render only the ambient/emissive lighting. It depends on the type of effect you're going for.绘制辉光在两个主要步骤中完成 。第一步是创建一个glowmap。一个glowmap是一个纹理对象,它只包含在可见区域的发光对象,但是这些对象仍然被不发光的对象阻挡。一个在墙后面的发光的灯在glowmap中不应该可见。例如,为了做到这这种效果,调用gl.colorMask(false, false, false, false)来禁止写入颜色,然后绘制不发光的对象到帧缓冲对象中(FBO).GPU将仅仅向FBO写入深度值。在第二步,重新打开颜色写入,绘制所有的发光对象。你可以完全光照来绘制发光对象,或者禁止光照,只使用环境光或发射光。这信赖于你想要绘制的效果的类型。
Glowmap Resolution Glowmap分辨率
Glowmaps don't need to use the same resolution as the window. It's best if you use a much lower resolution, typically in the range 64x64 to 256x256. At these lower resolutions, you don't need to use a large blurring kernel, which means you sample fewer pixels and thus improve performance. Glowmaps also don't need a whole lot of detail, so using a lower texture resolution is not that noticable.Glowmap并不需要使用和窗口一样的分辨率。最好使用尽可能低的分辨率,典型值是在64x64到256x256的范围内。在这些低分辨率下,你不需要使用一个大的模糊核(做模型处理的卷积的模板),它意味着你对像素的采样越少,因此提供了性能。Glowmaps不需要很多细节,所以使用一个低分辨率的纹理并不引人注意。
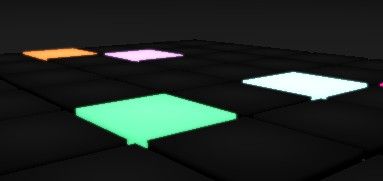
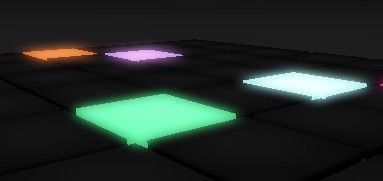
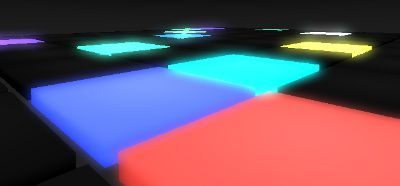
Low resolution glowmap (128x128) with a 10 pixel blurring kernel.低分辨率的glowmap(128x128)以及10像素的模糊核
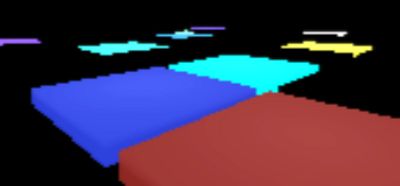
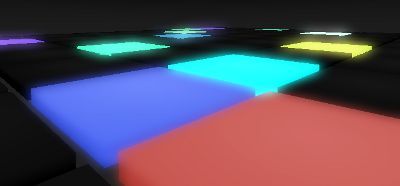
High resolution glowmap (1024x1024) with a 10 pixel blurring kernel. Notice how the aura is practically invisible? This is because the blur kernel is to small for this resolution. To compensate for using a high resolution glowmap, you need to increase the kernel size to 30 - 40 pixels, which would significantly impact performance. One workaround for using such higher resolutions is to use a blur scale.高分辨率的glowmap(1024x1024)以及10像素的模糊核。注意,光环基本上不可见。这是因为对这个分辨率来说,模糊核太小了。当使用高分辨率的glowmap时,作为补偿,你需要增加模糊核的大小到30-40像素,这将显著的影响性能。一种使用如此高的分辨率的变通方案是使用模糊缩放。
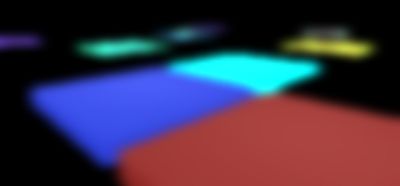
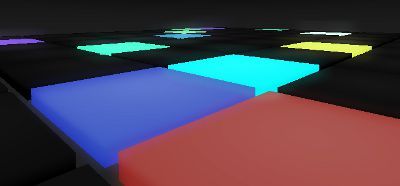
The same high resolution glowmap with a 4x blur scale. When scaling the blur, you continue to sample with a 10 pixel blur kernel, but at each iteration you jump X number of pixels (called the blur scale). This will simulate using a larger kernel, but image quality will suffer if you use a large enough scale. You need to find the right balance, or simply stick to using a smaller resolution.相同高分辨率的glowamp以及4倍的模糊核缩放。当放大模糊核时,你继承以10像素的模糊核采样,但是在第一次迭代时,你跳过X数量的像素(称为模糊放大)。这将将会模拟使用大核,但是如果使用一个太大的缩放,图形质量将会受损。你需要找到一个平衡点,或者简单的坚持使用低分辨率的glowmap。
Step 1: Render the Glowmap 步骤1:绘制Glowmap
Once you render the glowmap, blur it using a Gaussian blurring algorithm. This type of blurring will produce a nice smooth falloff the further away the blurred pixel is from the source.一旦你绘制glowmap, 使用高斯模糊算法进行模糊处理。这种模糊算法能够产生非常光滑的衰减:距离越远,越模糊。
Step 2: Blur the Glowmap 步骤2:模糊Glowmap
Once you blur the glowmap, blend it with the fully rendered scene using some sort of overlay algorithm such as additive blending or screening. The blending operation you chose will have an effect on the result that is shown, so you need to play with the formulae and see what works best for you. Three blending operations are provided below.一旦你模糊了glowmap, 将它与完整绘制的场景进行混合,使用一些叠加算法,例如添加混合或筛选算法。你选择的混合操作将对显示的结果有影响,所以你需要使用相关的公式,并且看哪一种最适合你。下面提供了三种混合操作。
Step 3: Blend the Glowmap 步骤3:混合Glowmap
src = glowmap
dst = rendered scene
Additive blending加法混合
pixel = src + dst
This is the easiest and fastest of the blending modes and is suitable for producing strong, overexposed auras.这是最简单和最快的混合模式,它适用于产生过度曝光的光晕
Screen blending筛选混合
pixel = (src + dst) - (src * dst)
This is the most common technique used for glows as it does not blowout an image like additive blending and it produces a nice subtle glow suitable for most applications.这是使用辉光最通用的方法,因为它不会像加法混合那样使图像过度曝光,它对绝大多数的程序都能产生较为精细的辉光。
Soft lighting软光照
pixel=<<<---(复杂数学公式,见底部的原文链接)--->>>
This blending mode doesn't produce very strong auras, but the formula maintains highlights and creates a more vivid image. It is one of the better choices for dealing with luminescent objects like black lighting, glow in the dark stickers, and fiber optics to name a few examples. One thing to note about this formula is that it requires you have a neutral gray image, unlike the other two blending modes that require a black background. One quick way to do this in shader is to apply the following formula to the glowmap.这种混合模式并不会产生较强的光晕,但是此公式维持了高光并且产生了更生动的图像。对于一些发冷光的对象,它是一种更好的选择。对此公式,一个需要注意的地方是它需要你有一个中性灰度图像,而不像其它两种混合模式那样需要一个黑背景。一个快速实现的方法是在着色器中对glowmap使用如下公式。
src = (src * 0.5) + 0.5
Blurring模糊
The separable blurring technique (also known as the box-blur) gets its name from the way it performs blurring. In the traditional sense, blurring is performed using a convolution filter. That is, an N x M matrix that samples neighbouring pixels and finds an average. A faster way to perform this activity is to separate the blurring into two passes. The first pass will blur all pixels horizontally. The second pass will blur all pixels vertically. The result is the same as performing blur with a convolution filter at a significantly faster speed.可分离的模糊技术(也被称为均值模糊-box-blur)的名字来源于它执行模糊的方式。在传统场景中,模糊使用一个卷积过滤器。它是一个NxM的矩阵,采样周围的像素并找到一个平均值。实现它的一个更快的方法是将模糊分成两个通道。第一个通道将会在水平方向上模糊所有像素。第二个通道将会在垂直方向上模糊所有像素。它的结果和使用卷积过滤是一样的,但是速度有显示的提升。
Left: Unfiltered image.左边:过滤的图像
Middle: Pass 1, horizontal blurring applied.中间:通道1,应用水平方向模糊
Right: Pass 2, vertical blurring applied.右边:通道2,应用垂直方向模糊
What's unique here is that the lower resolution you use, the more effective the blurring. A 256x256 texture for instance can produce a very soft blur with a small blur radius, whereas a 1024x1024 texture requires a large kernel to blur it sufficiently enough. You have to find the right balance between resolution and blurring. To much of either can hinder performance. Glowmaps tend to work best with lower resolutions, between 64x64 and 256x256.比较独特的就是分辨率越低,模糊就越有效率。一个256x256的纹理能够产生一个模糊半径小而且非常柔和的模糊,然而一个1024x1024的纹理需要一个大的模糊核来产生足够显著的模糊。
Gaussian Filter高斯过滤
The Gaussian blur filter produces a smooth falloff, which works very well with glowmaps. Since we're performing the blur in two steps, one for the X-axis and another for the Y-axis, we only need to use a 1-dimensional Gaussian filter.高斯模糊过滤产生光滑的衰减,它和glowmap搭配效果非常好。因为我们以两步的方式来执行模糊,第一步是在x轴方向,第二步是在y轴方向,我们只需要使用一个1维的高斯过滤。
<<<---(复杂数学公式,见底部原文链接)--->>>
Where
x is the positive or negative offset from the sample point. The sample point is located at x = 0.
σ is the standard deviation, which controls how much the blur deviates from the source pixel. The greater the deviation, the more faded and less intense the blur appears. The smaller the deviation, the more intense or blocky the blur will appear. The demo uses 1/6th the blur radius, which produces good results.
Blur Strength模糊强度
The Gaussian formula produces a more intense value the closer you are to the sample point. That is, the closer x is to 0. Typically for every 1 pixel you advance in the texture, you advance 1 unit in the Gaussian formula. If you multiply the Gaussian offset by a value less than 1.0, you will reduce the falloff rate of the blur and produce a more overexposed result. This can be useful when you want to intensify the aura for a specific purpose. This adjusts the Gaussian formula such that:高斯公式中离采样点越近,产生的值越强烈。也就是说,x与0越接近。典型的来说,在纹理中前进一个像素,也意味着在高斯公式中增加一个单位。如果你将高斯偏移乘以一个小于1.0的值,你将会减少模糊的衰减率,产生一个更加曝光过度的结果。这在你为一些特殊的目的,需要增强光晕的强度的时候非常有用。
x = x * (1.0 - strength)
Where
Sampling at one-pixel intervals, the image on the left shows a Gaussian filter with a blur strength of 0 and the image on the right shows a blur strength of 0.4.以一个像素的间隔采样,左边的图像展示了模糊强度为0的高斯过滤,右边的模糊强度为0.4.
Extra: Image Softening其它:图像柔化
Since the glowmap uses blurring to produce auras, the same technique is also used to soften an image.由于glowmap使用模糊来产生光晕,相同的技术也被用在图像柔化上。
The image on the left shows a standard photograph, but the image on the right shows what happens when you apply the same technique used for glowmaps. You pass the entire rendered frame into the blur shader and then screen the result on top of the original frame. The end result is a softer, more dreamy looking image.左边的像素展示了一个标准的图像,右边的图像展示当你对它应用和glowmap使用的相同的技术时的效果。你将整个绘制帧传入模糊着色器,然后在原始帧上对结果进行筛选。最终的结果就是一个柔化的,看起来更虚幻的图像。
Conclusion结论
Glow effects have a wide variety of uses and improve the image quality substantially, even if the effect is used superficially. Particle effects, light coronas, neon lights, luminescent objects, image softening are just some examples of where glow effects shine. Glowmaps are easy to implement and fast to render, making them a useful feature for any developer on any platform.辉光效果有广泛的应用,它实质上增加了图像质量,即使效果被肤浅的使用。粒子效果,光晕,霓虹灯,发冷光的对象,图像柔化就是一些辉光效果展示威力的例子。Glowmap实现起来比较简单,绘制也比较快,这也使得它在任何平台上对任意开发者都是一项有用的特性。
- See more at: http://devmaster.net/posts/3100/shader-effects-glow-bloom#sthash.YgO15uTG.dpuf
其它参考:http://www.zwqxin.com/archives/shaderglsl/review-high-dynamic-range.html

