CGContext对缩放图片的剪裁
本例子类似于微信头像上传前对上传图片的剪裁功能,利用CGContext的CTM属性对坐标系的宽高进行了缩放倍数,再对图片进行剪裁。该例子还使用了UIImageView对图片的显示,UIScrollView对图片的缩放,移动。
- (void)viewDidLoad
{
[super viewDidLoad];
self.view.backgroundColor = [UIColor blackColor];
//设置剪裁按钮
UIButton* crop = [UIButton buttonWithType:UIButtonTypeCustom];
crop.frame = CGRectMake(0, 0, 60, 30);
[crop setTitle:@"crop" forState:UIControlStateNormal];
[crop setTitleColor:[UIColor redColor] forState:UIControlStateNormal];
crop.backgroundColor = [UIColor grayColor];
crop.alpha = 0.5;
[crop addTarget:self action:@selector(crop:) forControlEvents:UIControlEventTouchUpInside];
[self.view addSubview:crop];
//创建一个UIImageView用于显示需要剪裁的图片
imageView = [[UIImageView alloc]initWithFrame:CGRectMake(0, 0, self.view.frame.size.width, 400)];
imageView.image = [UIImage imageNamed:@"test.png"];
//创建一个UIScrollView用于对图片进行缩放效果
scrollView = [[UIScrollView alloc]initWithFrame:CGRectMake(0, 50, self.view.frame.size.width, 400)];
scrollView.delegate = self;
scrollView.contentSize = self.view.frame.size;
//设置UIScrollView有水平拉动反弹效果
scrollView.alwaysBounceHorizontal = YES;
//设置UIScrollView有垂直拉动反弹效果
scrollView.alwaysBounceVertical = YES;
scrollView.backgroundColor = [UIColor blackColor];
//设置能给图片最小的放大倍率
scrollView.minimumZoomScale = 1.f;
//设置能给图片最大的放大倍率为2倍
scrollView.maximumZoomScale = 2.f;
[scrollView addSubview:imageView];
[self.view addSubview:scrollView];
//创建一个截取图片的边框
CALayer* cropLayer = [CALayer layer];
cropLayer.borderColor = [[UIColor grayColor]CGColor];
cropLayer.borderWidth = 3.f;
cropLayer.anchorPoint = CGPointMake(0, 0);
cropLayer.position = CGPointMake(0, 50);
cropLayer.bounds = CGRectMake(0, 0, self.view.frame.size.width, 320);
[self.view.layer addSublayer:cropLayer];
}
//UIScrollView缩放回调事件
- (UIView *)viewForZoomingInScrollView:(UIScrollView *)scrollView{
return imageView;
}
//剪裁按钮触发的事件
-(void)crop:(id)sender{
NSLog(@"transform:%@",NSStringFromCGAffineTransform(imageView.transform));
NSLog(@"coordinate:%@",NSStringFromCGRect(imageView.frame));
NSLog(@"offset:%@",NSStringFromCGPoint(scrollView.contentOffset));
//把剪裁后的图片保存到相册中
UIImageWriteToSavedPhotosAlbum([UIImage imageWithCGImage:[self cropImage]], self, @selector(image:didFinishSavingWithError:contextInfo:), nil);
}
//剪裁图片方法
-(CGImageRef)cropImage{
//创建context,用于产出处理后的图片
UIGraphicsBeginImageContextWithOptions(CGSizeMake(imageView.frame.size.width, imageView.frame.size.height), NO, 0);
CGContextRef context = UIGraphicsGetCurrentContext();
//改变context的CTM属性,根据UIImageView被放大的几何变换修改context的坐标系宽高倍率
CGContextScaleCTM(context, scrollView.zoomScale, scrollView.zoomScale);
//把图片绘制到context中,还要根据UIScrollView对图片的偏移量
[imageView.image drawInRect:CGRectMake(-scrollView.contentOffset.x, -scrollView.contentOffset.y,imageView.frame.size.width, imageView.frame.size.height)];
UIImage* image= UIGraphicsGetImageFromCurrentImageContext();
UIGraphicsEndImageContext();
NSLog(@"crop:%@",NSStringFromCGSize(image.size));
//把缩放生成后的图片进行剪裁,剪裁的宽高要同时根据缩放的比率
CGImageRef corp = CGImageCreateWithImageInRect(image.CGImage, CGRectMake(0, 0, self.view.frame.size.width*scrollView.zoomScale, 320*scrollView.zoomScale));
return corp;
}
//保存图片成功后的回调
- (void)image:(UIImage *)image didFinishSavingWithError:(NSError *)error
contextInfo:(void *)contextInfo{
NSLog(@"saved..");
}
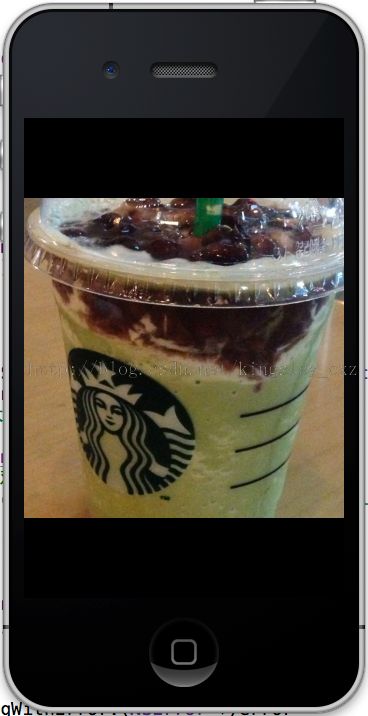
效果如下:
