cocos2d-x 笔记(三) sprite类
Orca原创,转贴请标明链接Orca的移动开发轨迹。
目前整个学习笔记的版本是cocos2d-x 2.1.0beta3。一、sprite的创建
1.基本的创建方法
先打开HelloWorldScene.cpp,重写一遍背景的加入。
		// 进行测试,首先是加入普通sprite
		// 计算整个屏幕的size
		CCDirector * _pdirector = CCDirector::sharedDirector();
		CCSize winSize = _pdirector->getVisibleSize();
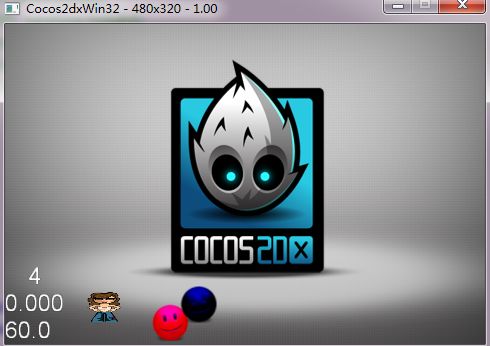
		CCSprite *bg = CCSprite::create("helloworld.png");
		bg->setPosition(ccp(winSize.width / 2, winSize.height / 2));
		this->addChild(bg);
这是最基本的加入sprite的方式。先用文件生成指向sprite对象的指针,然后设置这个对象的属性。设置完了以后再加入当前的layer。
sprite即精灵,这是我们整个游戏当中的基础对象。
对于sprite的属性,我们可以查阅官方文档。
可见它继承于Node,TextureProtocol,RGBAProtocol
可以先在sprite.h里面看一下sprite类的声明。
先看有关创建部分
   /** Creates an sprite with an image filename.
     The rect used will be the size of the image.
     The offset will be (0,0).
     */
    static CCSprite* create(const char *pszFileName);

    /** Creates an sprite with an image filename and a rect.
     The offset will be (0,0).
     */
    static CCSprite* create(const char *pszFileName, const CCRect& rect);
其实我们可以发现,以前有许多创建sprite的接口,但是都已经被标注为This interface will be deprecated sooner or later.
也就是说,现在官方推荐使用的创建sprite的方式就只剩下两个重载函数。
1.static CCSprite* create(const char *pszFileName);
2.static CCSprite* create(const char *pszFileName, const CCRect& rect);
第一个方式是直接从文件创建,第二个方式是从文件创建指定范围大小的精灵。
CCRect这是指定一个图像范围的类,这里先不管,先看create里面支持的文件到底有哪些。
仔细看源代码可以发现,create里面使用了initWithFile方法,再到这个方法去看实际调用的函数:
CCTexture2D *pTexture = CCTextureCache::sharedTextureCache()->addImage(pszFilename);
是的,是从texturecache对象里面调用了addImage。
那么去看看addImage方法的说明。
/** Returns a Texture2D object given an file image
* If the file image was not previously loaded, it will create a new CCTexture2D
* object and it will return it. It will use the filename as a key.
* Otherwise it will return a reference of a previously loaded image.
* Supported image extensions: .png, .bmp, .tiff, .jpeg, .pvr, .gif
*/
也就是说支持的文件格式有png、bmp、tiff、jpeg、pvr、gif。
好了,基本理解是这样的,接下来我们再试验一下create的另外一个重载函数。
static CCSprite* create(const char *pszFileName, const CCRect& rect);
这次使用的代码如下:
                CCDirector *_director = CCDirector::sharedDirector();
		CCSize winSize = _director->getVisibleSize();
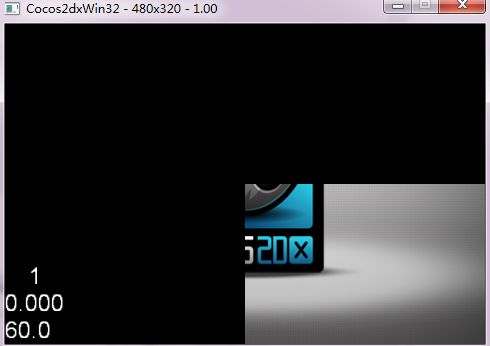
		// 设定生成图片的范围,这里是设置为从原图480x320的中点开始向右下,占据整个图片1/4的面积
		CCRect testret = CCRectMake(240.0f, 160.0f, 240.0f, 160.0f);
		CCSprite *bg = CCSprite::create("helloworld.png", testret);
		// 设置锚点的位置为(100%, 0%);
		bg->setAnchorPoint(ccp(1.0f, 0));
		bg->setPosition(ccp(winSize.width, 0));
		this->addChild(bg);
那么根据上面的代码得出的结果是
这里的说明基本在代码里面注释了。要注意的是,设定ccrect范围的时候,是从左上角往下面数的,这点和坐标系从左下数不同。
还值得一提的是有关锚点。锚点指的是整个sprite里面的重心点的位置,在sprite进行放置、旋转、缩放时,均以锚点为sprite的中心点。
在目前的cocos2dx当中,默认的锚点是(0.5, 0.5),也就是在图片的正中心。我们这里改到了右下角(1.0, 0)。
关于anchor这里不再赘述,可以搜索有关anchor的知识。
2.使用压缩图片的创建
由于opengles的图片存取策略(详细的请自己查阅,这里不做解释了),所以要使内存占用最小,最好使用一些图片打包工具来进行图片打包。
我们这里就使用texturepacker来处理吧。
texturepacker的下载地址,当然这个是要收费的:texturepacker
首先随便拿几个文件放到texturepacker里面
Imageformat我们一般选择RGBA4444,这种格式可以处理透明,失真也比较少。
算法选择FloydSteinberg+Alpha。
此外需要提醒的是,为了使失真尽可能的少,图片最好少使用大范围高梯度的渐变,如果非要使用的话请多加一些细条纹纹理。理由涉及到压缩算法,我也不是很清楚,有兴趣的可以去拜谷歌娘。
		// 获取framecache单例
		CCSpriteFrameCache *_spriteFrameCache = CCSpriteFrameCache::sharedSpriteFrameCache();
		// 设置基本纹理模式为RGBA4444
		CCTexture2D::setDefaultAlphaPixelFormat(kTexture2DPixelFormat_RGBA4444);
		// 在cache里面添加
		_spriteFrameCache->addSpriteFramesWithFile("test.plist");
		// 从plist当中创建sprite
		CCSprite *testP1 = CCSprite::createWithSpriteFrameName("b1.png");
		//
		testP1->setPosition(ccp(100, 200));
		bg->addChild(testP1);
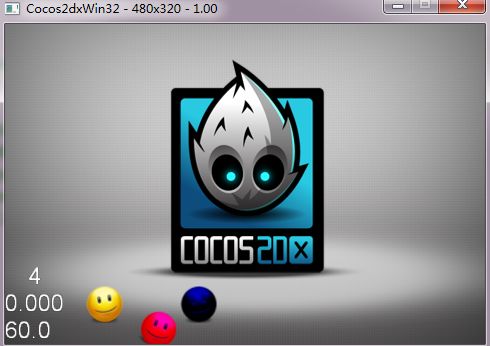
效果图如下
再补充一条
使用batchnode添加sprite
        // 建立一个batchnode,加载纹理
        CCSpriteBatchNode *spriteBatch = CCSpriteBatchNode::create("test.png", 20);
        this->addChild(spriteBatch);
         CCSprite *testP1 = CCSprite::createWithSpriteFrameName("b1.png");
         testP1->setPosition(ccp(100, 200));
        spriteBatch->addChild(testP1);
代码就是这样。
关于CCSpriteBatchNode,需要说明的是,它可以在同时渲染多个精灵,只要在同一个batchnode里面的精灵都可以渲染出来,这样对游戏的帧率,内存的优化是非常有好处的。
这里使用的是SpriteBatchNode和SpriteFrameCache配合使用的方法。把Batchnode结点理解为一个layer容器就可以理解上面的写法了。
二、基本属性的设置
这里我们已经设定过了anchorpoint和position,接下来要设定的是sprite的其他常用的属性:
1.color
                // 创建一个sprite
		CCSprite *pea1 = CCSprite::create("Images/Pea.png");
		pea1->setPosition(ccp(100, 40));
		bg->addChild(pea1);
		// 再来一个
		CCSprite *pea2 = CCSprite::create("Images/Pea.png");
		bg->addChild(pea2);
		// 位置在pea1的大小右侧再加10
		pea2->setPosition(ccp(pea1->getPositionX() + pea1->getContentSize().width + 10, pea1->getPositionY()));
		// 设置颜色
		pea2->setColor(ccc3(255, 0, 255));
		// 再来一个
		CCSprite *pea3 = CCSprite::create("Images/Pea.png");
		bg->addChild(pea3);
		// 位置在pea2的大小右侧再加10
		pea3->setPosition(ccp(pea2->getPositionX() + pea2->getContentSize().width + 10, pea2->getPositionY()));
		// 设置颜色
		pea3->setColor(ccBLUE);
显示效果
大致就是这样,也没有别的需要解释的了。
2.scale
继续跟着上面的代码来。
		// 设置缩放
		pea1->setScale(0.2f);
		pea2->setAnchorPoint(ccp(0, 1.0f));
		pea2->setScaleX(0.5f);
		pea3->setScaleY(1.2f);
p2的anchorpoint位置发生了改变,因此缩放的重心也就发生了改变,所以变成了这样。
3.rotate
rotate就是设定旋转角度。这个也和anchorpoint的位置有关
        // 设置rotate
        pea1->setRotation(0.5f);
        pea2->setRotation(30.0f);
setRotation的参数是角度,这个也没什么好说的。
4.透明度
		// 设置透明度
		pea1->setOpacity(40);
		pea2->setOpacity(80);
		pea3->setOpacity(255);
- 关于这条可以看下文档:If the the texture has premultiplied alpha then, the R, G and B channels will be modified. Values goes from 0 to 255, where 255 means fully opaque.所以说取值范围是0~255。
-
5.设置内容
		// 设置内容
		CCTextureCache *_texturecache = CCTextureCache::sharedTextureCache();
		pea1->setTexture(_texturecache->addImage("Images/grossinis_sister1.png"));

这里要注意的有两点:
1)texture要使用的话必须先加入CCTextureCache类的单例当中。
2)如果填充texture的话,被填充的texture会自动适应原有sprite的size。
其实还有不少属性,等用到的时候再说吧。
下一篇正式进入testcpp各示例的说明。


