Quartz2D绘图
Quartz2D绘图
绘图:必须在drawRect:rect中实现,因为只有drawInRect方法才能拿到绘图上下文.
注意点:当想刷新绘图时,不能手动直接调用drawRect方法,而是调用[self setNeedsDisplay]去刷新视图。
drawRect调用时机: loadView–> viewDidLoad–> viewWillAppear–> drawRect
// 控制器
// 1. loadView加载视图
// 2. viewDidLoad视图加载完毕
// 3. viewWillAppear将要显示视图
// 4. drawRect绘制视图
// 5. viewDidAppear视图显示完毕
绘制图形的三种实现方式
绘图方法一:最基本实现方式的流程和步骤
- 获取绘图上下文 CGContextRef
- 描述路径(包括:获取路径和设置路径起点和终点)
- 将路径添加到上下文
- 渲染上下文
// 1. 获取绘图上下文
CGContextRef ctx = UIGraphicsGetCurrentContext();

// 2. 描述路径
// 2.1 创建可变路径
CGMutablePathRef path = CGPathCreateMutable();
// 2.2 设置路径起点((10,10)起点坐标)
CGPathMoveToPoint(path, NULL, 10, 10);
// 2.3 设置路径终点(绘制直线)
CGPathAddLineToPoint(path, NULL, 100, 100);

// 3. 将路径添加到上下文
CGContextAddPath(path);

// 4. 渲染上下文
CGContextStrokePath(ctx);
绘图实现方法二:隐藏路径实现绘图(路径创建被封装到了描述路径的过程中)
- 获取上下文
- 描述路径
- 渲染上下文
// 1. 获取上下文
CGContextRef ctx = UIGraphicsGetCurrentContext();

// 2. 描述路径
CGContextMoveToPoint(ctx, 10, 10);  // 起点
CGContextAddLineToPoint(ctx, 100, 100);  // 终点

// 3. 渲染上下文
CGContextStrokePath(ctx);
绘图实现方法三:推荐,贝瑟尔绘图bezier,可以绘制各种有规矩的图形,不能绘制曲线(曲线绘制仍然需要用最基本的绘制方式实现)
- 创建贝瑟尔路径, UIBezierPath对象
- 描述路径
- 渲染上下文([path fill], 会自动填充和渲染,即能够在填充同时完成其他两个操作:[path stroke]渲染和[path closePath]关闭路径形成闭环)
// 1. 创建贝瑟尔路径, UIBezierPath对象
UIBezierPath *path = [UIBezierPath bezierPath];

// 2. 描述路径
[path moveToPoint:(CGPointMake(10, 10))]; // 起点
[path addLineToPoint: (CGPointMake(100, 100))]; // 终点

// ...... 可以设置图形的一些属性,比如:颜色,线条粗细等等

// 3. 渲染
[path stroke];  // [path fill]填充, [path closePath]关闭路径形成闭环
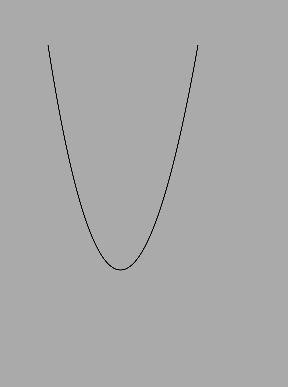
绘制曲线
绘制单点曲线,原理:在直线上增点一个点,将其拉伸一定弧度
实现方法:
/* Append a quadratic curve from the current point to `(x, y)', with control point `(cpx, cpy)'. */

/** * 根据起点,中间点,终点绘制曲线 * *  @param c 图形上下文 *  @param cpx 曲线中间点x坐标,用来拉伸直线,达到绘制曲线效果 *  @param cpy 曲线中间点y坐标,用来拉伸直线,达到绘制曲线效果 *  @param x 曲线终点x坐标 *  @param y 曲线终点y坐标 */
CG_EXTERN void CGContextAddQuadCurveToPoint(CGContextRef __nullable c,
    CGFloat cpx, CGFloat cpy, CGFloat x, CGFloat y)
    CG_AVAILABLE_STARTING(__MAC_10_0, __IPHONE_2_0);
实现步骤
     // 取上下文
    CGContextRef ctx = UIGraphicsGetCurrentContext();

    // 描述路径
    // 起点(50, 50)
    CGContextMoveToPoint(ctx, 50, 50);
    // 曲线中间点(120, 500), 终点(200, 50)
    CGContextAddQuadCurveToPoint(ctx, 120, 500, 200, 50);

    // 渲染
    CGContextStrokePath(ctx);
曲线效果
绘制多点曲线
方法:
    /** * 绘制多点曲线,有多个驼峰 * *  @param c 图形上下文 *  @param cp1x 峰点一的x坐标 *  @param cp1y 峰点一的y坐标 *  @param cp2x 峰点二的x坐标 *  @param cp2y 峰点二的y坐标 *  @param x 终点的x坐标 *  @param y 终点的y坐标 */
    CG_EXTERN void CGContextAddCurveToPoint(CGContextRef __nullable c, CGFloat cp1x,
                                            CGFloat cp1y, CGFloat cp2x, CGFloat cp2y, CGFloat x, CGFloat y)
    CG_AVAILABLE_STARTING(__MAC_10_0, __IPHONE_2_0);
实现
     // 上下文
    CGContextRef ctx = UIGraphicsGetCurrentContext();

    // 路径
    // 起点(20, 100)
    CGContextMoveToPoint(ctx, 20, 100);
    // 峰点一:(80,200), 峰点二:(150, 20), 终点(200, 100);
    CGContextAddCurveToPoint(ctx, 80, 200, 150, 20, 200, 100);

    CGContextStrokePath(ctx);
效果
绘制矩形/圆形/扇形
直接使用bezier系列的方法就可以实现矩形,圆形,扇形等有规则的形状
绘制矩形
- 正角矩形
方法:
// 类方法,使用UIBezierPath类对象直接调用,绘制普通矩形
+ (instancetype)bezierPathWithRect:(CGRect)rect;
实现
     // 获取贝瑟尔路径,直接创建矩形图形
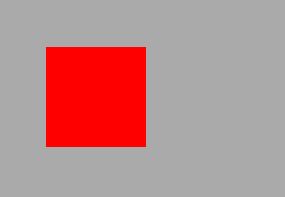
    UIBezierPath *path = [UIBezierPath bezierPathWithRect:CGRectMake(50, 50, 100, 100)];

    // 上色
    [[UIColor redColor] set];

    // 填充,渲染
    [path fill];
效果
- 圆角矩形
方法
// 绘制圆角状矩形,cornerRadius:指定矩形角圆弧度的半径
+ (instancetype)bezierPathWithRoundedRect:(CGRect)rect cornerRadius:(CGFloat)cornerRadius; // rounds all corners with the same horizontal and vertical radius
实现
    // 贝瑟尔路径
    UIBezierPath *path = [UIBezierPath bezierPathWithRoundedRect:CGRectMake(100, 100, 100, 100) cornerRadius:10];

    // 填充色
    [[UIColor redColor] set];

    // 填充,渲染
    [path fill];
效果
- 绘制椭圆
原理
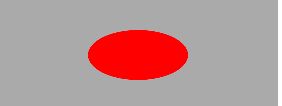
rect制定的width和height值不一样时,就可以实现椭圆效果,如果两者相同则绘制出的是正圆
方法
// 根据制定的rect绘制椭圆
+ (instancetype)bezierPathWithOvalInRect:(CGRect)rect;
实现
    // 贝瑟尔路径
    UIBezierPath *path = [UIBezierPath bezierPathWithOvalInRect:CGRectMake(100, 100, 100, 50)];

    // 上色
    [[UIColor redColor] set];

    // 填充,渲染
    [path fill];
效果
- 绘制扇形/圆/弧形
说明
设定起始角度和结束角度,不闭合时为扇形,闭合则为圆,只绘制弧度,且不填充情况下为弧形
方法
/** * center: 中心点,圆点 * radius: 圆半径 * startAngle: 起始角度(默认在圆点的右边角度为:0) * endAngle: 结束角度 */
+ (instancetype)bezierPathWithArcCenter:(CGPoint)center radius:(CGFloat)radius startAngle:(CGFloat)startAngle endAngle:(CGFloat)endAngle clockwise:(BOOL)clockwise;
实现
    /** * center: 中心点,圆点 * radius: 圆半径 * startAngle: 起始角度(默认在圆点的右边角度为:0) * endAngle: 结束角度 */
    UIBezierPath *path = [UIBezierPath bezierPathWithArcCenter:CGPointMake(150, 150) radius:100 startAngle:0 endAngle:M_PI * 2 clockwise:YES];

     /**** 绘制扇形时,需要绘制一条到达圆心的直线路径 ****/
     // 绘制到原点的路径
    [path addLineToPoint:CGPointMake(150, 150)];

    // 上色
    [[UIColor redColor] set];

    // 调用fill的内部,会自动渲染,并且闭环(不用再调用[path stroke]和[path closePath])
    [path fill];

    // 绘制弧形,不需要填充,也不需要绘制到圆心直线路径
    [path stroke];
效果
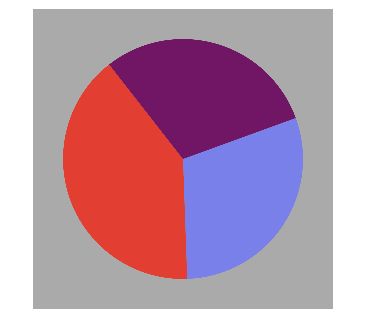
实例:绘制饼划分图
思路
将一个圆,分隔成多个扇形,然后给每个扇形着上不同的颜色,且根据其所占比例设置对应的弧度。
实现
#pragma mark 绘图
- (void)drawRect:(CGRect)rect {

    [self drawPie:rect];

}

#pragma mark 画饼
- (void)drawPie:(CGRect)rect
{
    // 30%红色, 30%绿色,40%蓝色: 绿色开始角度20
    // 半径
    CGFloat radius = rect.size.width * 0.5;
    CGPoint center = CGPointMake(radius, radius);
    CGFloat startAngle = -M_PI / 9;

    // 圆半径
    CGFloat circleRadius = radius - 30;

    // 保存比例的数组
    NSArray *scale = @[@(30), @(40), @(30)];

    for (int i = 0; i < scale.count; i++) {
        // 绘制图形
        // 当前扇形弧度
        CGFloat angle = [scale[i] intValue] * M_PI * 2 / 100;
        // 当前扇形的开始位置
        CGFloat start = startAngle;
        // 当前扇形的结束位置
        CGFloat end = start + angle;

        UIBezierPath *path = [UIBezierPath bezierPathWithArcCenter:center radius:circleRadius startAngle:start endAngle:end clockwise:YES];
        [path addLineToPoint:center];
        [[self randomColor] set];
        [path fill];

        // 改变下一个扇形的起始位置
        startAngle = end;
    }

}

#pragma mark 点击视图,随机改变颜色
- (void)touchesBegan:(NSSet<UITouch *> *)touches withEvent:(UIEvent *)event
{
    [self setNeedsDisplay];
}

#pragma mark 随机颜色
- (UIColor *)randomColor
{
    CGFloat r = arc4random_uniform(256) / 255.0;
    CGFloat g = arc4random_uniform(256) / 255.0;
    CGFloat b = arc4random_uniform(256) / 255.0;

    return [UIColor colorWithRed:r green:g blue:b alpha:1.0];
}
效果


