下载android4.0源代码和kernel及编译
下载android源代码及编译及遇到的问题:
最新的android4.0源代码公布以后,相信很多人和我一样都跃跃欲试,其实4.0的代码下载和编译和以前的版本差不多,但是有一些小的差别,写下来供不明真相的新手来参考
首先,开发环境,google建议在ubuntu10.0.4下,并且最好是64位,既然是为了工作和学习,就尽量按照官方要求的来吧。
Python 2.5 -- 2.7 ubuntu10.0.4已经默认安装了,所以不需要安装,其他环境需要安装
JDK 6 编译4.0需要jdk 6 ,sdk的编译需要jdk 5
Git 1.7 or newer
如果你的ubuntu是32位的,请在源码下载后编译前按以下步骤修改:(注:以前需要改下面,现在不需要了,可以直接编译,google好像做了32位,64位都可以编译了)
下载完源码后,修改下面四个文件:external/clearsilver/cgi/Android.mk
external/clearsilver/java-jni/Android.mk
external/clearsilver/util/Android.mk
external/clearsilver/cs/Android.mk
将其中的 LOCAL_CFLAGS += –m64
LOCAL_LDFLAGS += –m64
修改为 LOCAL_CFLAGS += –m32
LOCAL_LDFLAGS += –m32
在build/core/main.mk
找到 ifneq (64,$(findstring 64,$(build_arch)))
将其修改为 ifneq (i686,$(findstring i686,$(build_arch)))
如果你装的ubuntu是最新的11.04打头的,由于内核版本的bug可能会在编译的最后出现头文件丢失的错误比如:![]() ,请按照以下方法修复:
,请按照以下方法修复:
repo download platform/external/qemu 22776/1 如果你是10.0.4就不要做多余的事情了,如果你修复了,编译出的版本可能会出现黑屏现象进入不了系统,切记!
编译的环境不同,碰到的问题也会千奇百怪,如果你编译出问题了请养成google和百度的习惯
1:jdk的安装比较简单,就不做介绍了
2:安装依赖库:
64-bit:
$ sudo apt-get install git-core gnupg flex bison gperf build-essential \ zip curl zlib1g-dev libc6-dev lib32ncurses5-dev ia32-libs \ x11proto-core-dev libx11-dev lib32readline5-dev lib32z-dev \ libgl1-mesa-dev g++-multilib mingw32 tofrodos python-markdown \ libxml2-utils xsltproc32-bit$ sudo apt-get install git-core gnupg flex bison gperf build-essential \ zip curl zlib1g-dev libc6-dev libncurses5-dev x11proto-core-dev \ libx11-dev libreadline6-dev libgl1-mesa-dev tofrodos python-markdown \ libxml2-utils xsltproc
On Ubuntu 10.10:
$ sudo ln -s /usr/lib32/mesa/libGL.so.1 /usr/lib32/mesa/libGL.so
On Ubuntu 11.10:
$ sudo apt-get install libx11-dev:i386
3:下载Repo
$ mkdir ~/bin $ PATH=~/bin:$PATH
$ curl https://dl-ssl.google.com/dl/googlesource/git-repo/repo > ~/bin/repo $ chmod a+x ~/bin/repo
4: 创建源码目录:
$ mkdir ANDROID_SOURCE$ cd ANDROID_SOURCE
5: 获取git上的android源码版本
$ repo init -u https://android.googlesource.com/platform/manifest
我们下载最新版
$ repo init -u https://android.googlesource.com/platform/manifest -b android-4.0.3_r1
此时需要你填写用户名和email
填写后即可执行同步命令
6:下载源码
$ repo sync
可加参数: -jx x代表开启多少个线程来下载源码
源码+repo 一共13G左右(因为repo会自动执行check out 命令)
如果中间出错或者网络不稳定,可以重新初始化repo,用同一个email即可实现本地git库和服务器git库的同步
编译源码

下载完源码后进入源码主目录
1 :执行:
$ source build/envsetup.sh
souce命令执行的是源码包build目录下的envsetup文件
可以看出这个文件里定义了很多函数供编译使用
function help()
function get_abs_build_var()
function get_build_var()
function check_product()
function check_variant()
function setpaths()
function printconfig()
function set_stuff_for_environment()
function set_sequence_number()
function settitle()
function choosetype()
function chooseproduct()
function choosevariant()
function tapas()
function choosecombo()
function print_lunch_menu()
function lunch()
function gettop
function m()
function findmakefile()
function mm()
function mmm()
function croot()
function pid()
function gdbclient()
function jgrep()
function cgrep()
function resgrep()
function getprebuilt
function tracedmdump()
function runhat()
function getbugreports()
function startviewserver()
function stopviewserver()
function isviewserverstarted()
function smoketest()
function runtest()
function runtest_py()
function godir ()
2:选择一个target
$ lunch full-eng
我们编译后在模拟器中运行,所以选择full
我们选择最大的权限,也就是root后的版本,所以选择eng
3:编译源码
$ make -j4
过程大概3小时
编译完后在源码目录下会生成out文件夹如图
好了,可以检验以下我们编译的源码是否正常运行了
$ emulator
如果提示找不到命令,请初始化环境
$ source build/envsetup.sh
$ lunch full-eng
下载的过程中可能遇到的问题: 报错:
- Exception in thread Thread-3:
- Traceback (most recent call last):
- File "/usr/lib/python2.6/threading.py", line 532, in __bootstrap_inner
- self.run()
- File "/usr/lib/python2.6/threading.py", line 484, in run
- self.__target(*self.__args, **self.__kwargs)
- File "/home/haili/android-4.0.4_r1.2/.repo/repo/subcmds/sync.py", line 200, in _FetchHelper
- clone_bundle=not opt.no_clone_bundle)
- File "/home/haili/android-4.0.4_r1.2/.repo/repo/project.py", line 978, in Sync_NetworkHalf
- and self._ApplyCloneBundle(initial=is_new, quiet=quiet):
- File "/home/haili/android-4.0.4_r1.2/.repo/repo/project.py", line 1519, in _ApplyCloneBundle
- exist_dst = self._FetchBundle(bundle_url, bundle_tmp, bundle_dst, quiet)
- File "/home/haili/android-4.0.4_r1.2/.repo/repo/project.py", line 1583, in _FetchBundle
- raise DownloadError('%s: %s ' % (req.get_host(), str(e)))
- DownloadError: android.googlesource.com: <urlopen error [Errno 110] Connection timed out>
- ...
- Exception in thread
- Thread-3:
- Traceback (most recent call last):
- File "/usr/lib/python2.6/threading.py", line 532, in __bootstrap_inner
- self.run()
- File "/usr/lib/python2.6/threading.py", line 484, in run
- self.__target(*self.__args, **self.__kwargs)
- File "/home/haili/android-4.0.4_r1.2/.repo/repo/subcmds/sync.py", line
- 200, in _FetchHelper
- clone_bundle=not opt.no_clone_bundle)
- File "/home/haili/android-4.0.4_r1.2/.repo/repo/project.py", line 978,
- in Sync_NetworkHalf
- and self._ApplyCloneBundle(initial=is_new, quiet=quiet):
- File "/home/haili/android-4.0.4_r1.2/.repo/repo/project.py", line
- 1519, in _ApplyCloneBundle
- exist_dst = self._FetchBundle(bundle_url, bundle_tmp, bundle_dst,
- quiet)
- File "/home/haili/android-4.0.4_r1.2/.repo/repo/project.py", line
- 1583, in _FetchBundle
- raise DownloadError('%s: %s ' % (req.get_host(), str(e)))
- DownloadError: android.googlesource.com: <urlopen error [Errno 110]
- Connection timed out>
- ...
看这出错很莫名,Python是正确安装了的,版本也是要求的。其实官网(http://source.android.com/source/downloading.html)有段说明,如果认真执行就可解决。
1. 浏览器登录https://android.googlesource.com/new-password,并用gmail帐号登录;
2. 点击网页上的“允许访问”,得到类似:
- machine android.googlesource.com login git-<userName>.gmail.com password <password>
- machine android-review.googlesource.com login git-<userName>.gmail.com password <password>
- machine
- android.googlesource.com login git-<userName>.gmail.com password
- <password>
- machine android-review.googlesource.com login
- git-<userName>.gmail.com password <password>
的信息。
3. 把上面那段信息(<userName>和<password>用自己得到的真实信息)追加到~/.netrc文件结尾;
4. 下载地址的URI更改为https://android.googlesource.com/a/platform/manifest(中间加上了“/a”)。
然后按照官网描述的正常步骤操作,即可拉下Android源码。官方的说法是:因为访问基本是匿名的,为了防止连接过多,对同一IP地址的连接数做了一定的限制。看来是用gmail帐号进行认证。这样的话,在公司网络内或者用虚拟机下载的话,会经常遇到这问题。
编译遇到的问题:
问题如下:- Install: out/host/linux-x86/framework/droiddoc.jar
- target Generated: libclearsilver-jni <= out/host/common/obj/JAVA_LIBRARIES/clearsilver_intermediates/javalib.jar
- host C: libclearsilver-jni <= external/clearsilver/java-jni/j_neo_util.c
- In file included from /usr/include/features.h:378,
- from /usr/include/string.h:26,
- from external/clearsilver/java-jni/j_neo_util.c:1:
- /usr/include/gnu/stubs.h:9:27: error: gnu/stubs-64.h: 没有那个文件或目录
- make: *** [out/host/linux-x86/obj/SHARED_LIBRARIES/libclearsilver-jni_intermediates/j_neo_util.o] 错误 1
解决办法:
- sudo apt-get install lib64z1-dev libc6-dev-amd64 g++-multilib lib64stdc++6
下载android kernel及编译:
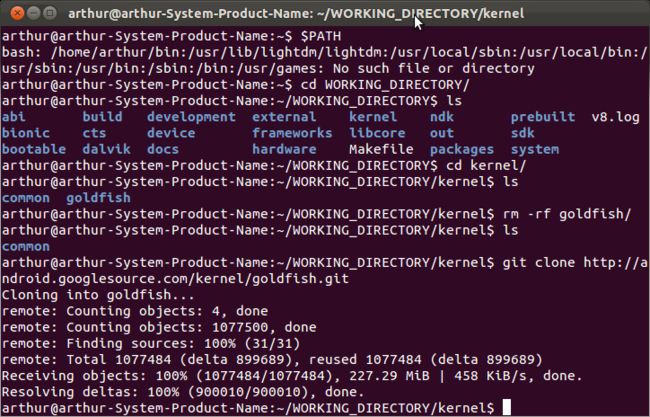
第一步:下载goldfish源码
在Android源码根目录下新建kernel文件夹
- $mkdir kernel
- $cd kernel
- $mkdir
- kernel
- $cd kernel
- $git clone http://android.googlesource.com/kernel/goldfish.git
- $git
- clone http://android.googlesource.com/kernel/goldfish.git
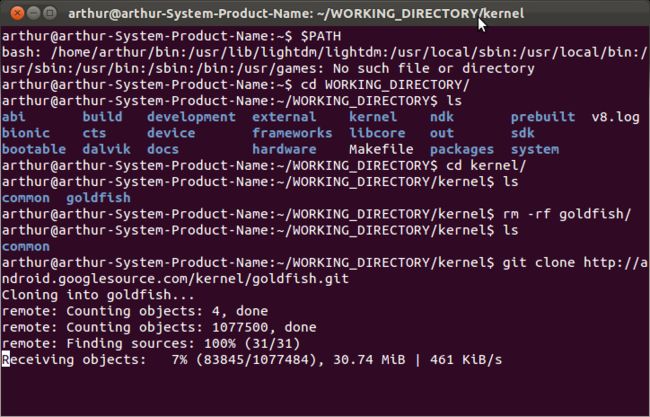
下载完毕如下图:
此时在kernel目录下会生成一个goldfish文件夹。进入此目录:
- $cd goldfish
- $cd
- goldfish
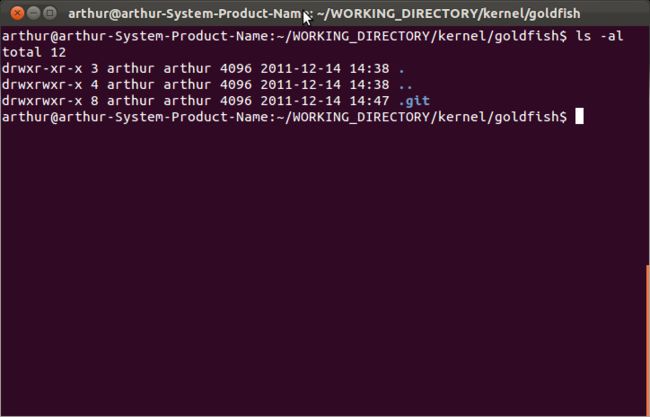
此目录下有一个隐藏的目录.git,通过
- $ls -al
- $ls
- -al
可看到此目录:
查看所有分支:
- git branch -a
- git
- branch -a
check out:
- $git checkout remotes/origin/android-goldfish-2.6.29
- $git
- checkout remotes/origin/android-goldfish-2.6.29

此时你会看到goldfish目录下会出现很多文件
- $ls
- $ls

这个时候goldfish源码就已经下下来了,接下来的事情就是编译了.
第二步:编译goldfish
导出交叉编译工具目录到$PATH环境变量中去.
- export PATH=$PATH:~/WORKING_DIRECTORY/prebuilt/linux-x86/toolchain/arm-eabi-4.4.3/bin
- export
- PATH=$PATH:~/WORKING_DIRECTORY/prebuilt/linux-x86/toolchain/arm-eabi-4.4.3/bin
我们将使用上述这个目录下的交叉编译器 arm-eabi- gcc
然后在glodfish目录下用gedit打开Makefile文件,找到这两行文字:
# ARCH
?= (SUBARCH)
修改为:
ARCH ?= arm
- $gedit Makefile
- $gedit
- Makefile
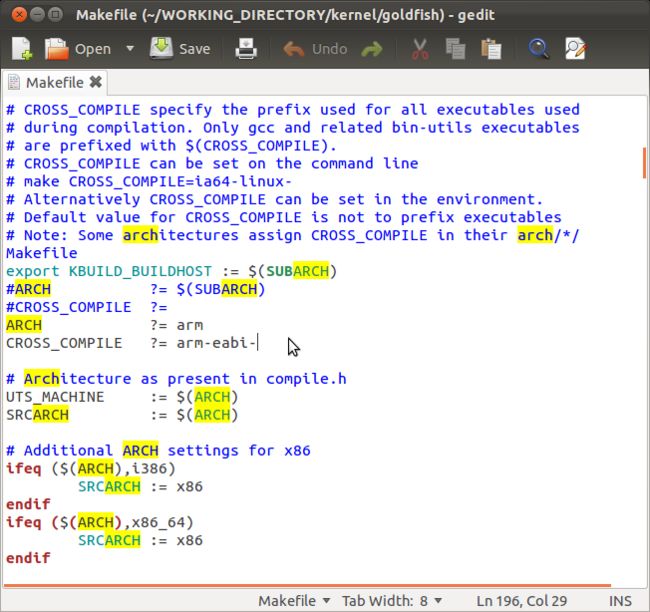
注意:ARTH ?=arm,的arm后边不要有空格,不然就会出现如下类似错误:
Make:...../kernel/goldfish/arch/arm: Is a directory. Stop.
害我白白浪费了几个小时.
上述操作的目的是为了指定目标设备的体系架构和交叉编译器,其实也可以通过以下指令来完成:
- $ export ARCH=arm
- $ export SUBARCH=arm
- $ export CROSS_COMPILE=arm-eabi-
- $
- export ARCH=arm
- $ export SUBARCH=arm
- $ export CROSS_COMPILE=arm-eabi-
为了确保环境参数正确,接下来执行下面两条指令,否则有可能不能正常启动模拟器.(注:以下两条指令是在Android源码根目录下执行)
- $ source build/envsetup.sh //缺少这条指令,可能会导致无法编译通过
- $ lunch full-eng //缺少这条指令,可能会导致无法启动模块器,系统报无法找到AVD,并要求你创建AVD。
- $
- source build/envsetup.sh //缺少这条指令,可能会导致无法编译通过
- $ lunch full-eng //缺少这条指令,可能会导致无法启动模块器,系统报无法找到AVD,并要求你创建AVD。
关闭gedit,接下来就开始make了,执行如下指令:
- $ make goldfish_armv7_defconfig
- $ make
- $ make
- goldfish_armv7_defconfig
- $ make
提示:
$make goldfish_armv7_defconfig指令的意思是将目录WORKING_DIRECTORY/kernel/goldfish/arch/arm/configs/下的goldfish_armv7_defconfig文件内的Kconfig配置内容复制到WORKING_DIRECTORY/kernel/goldfish/目录下的.config文件中,.config文件是一个隐藏目录,保存着各个目录下Kconfig文件的配置.
最终结果如下图所示:
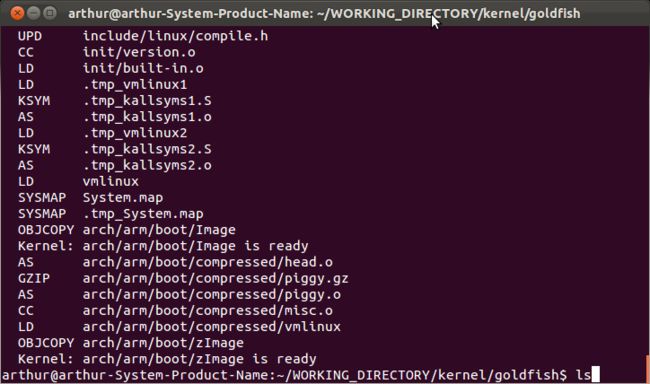
这样就表示编译成功了.
- $ ls arch/arm/boot/
- $
- ls arch/arm/boot/
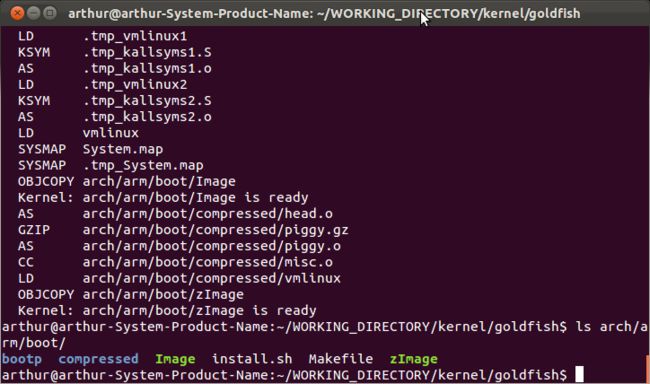
第三步:在模拟器中启动编译好的内核
按下来再运行其下指令:
- $ export PATH=$PATH:~/WORKING_DIRECTORY/out/host/linux-x86/bin
- $ export ANDROID_PRODUCT_OUT=~/WORKING_DIRECTORY/out/target/product/generic
- $ emulator -kernel ~/WORKING_DIRECTORY/kernel/goldfish/arch/arm/boot/zImage &
- $
- export PATH=$PATH:~/WORKING_DIRECTORY/out/host/linux-x86/bin
- $ export
- ANDROID_PRODUCT_OUT=~/WORKING_DIRECTORY/out/target/product/generic
- $ emulator -kernel
- ~/WORKING_DIRECTORY/kernel/goldfish/arch/arm/boot/zImage &

进入模拟器从设置里看版本信息:
从上图可以看出当前Android版本是4.0.1,内核版本是2.6.29,说明成功了.
同样也可以通过adb shell来查看内核版本信息,如下图:
- $adb shell
- #cd proc
- #cat version
- $adb
- shell
- #cd proc
- #cat version


