Android UI之ListView+CheckBox(避免抢占焦点)
1 需求
1.1 内容
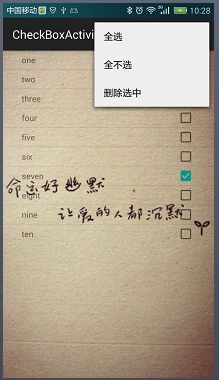
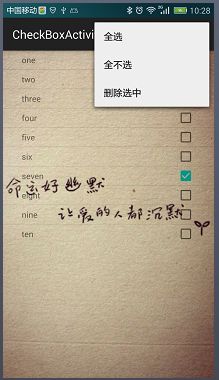
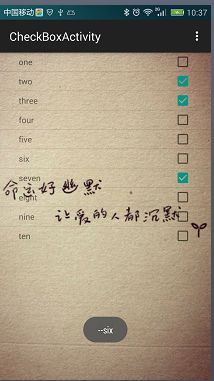
单选,全选,全不选,删除选中Item,每个Item的单击事件保留(Item单击事件和选中checkbox是两个功能,不影响)。
1.2 效果图
1.3 要点
1.3.1 通过重写listview的adapter,将listview和checkbox结合在一起,并且二者可以分别操作,两个功能不影响。
1.3.2 避免CheckBox抢占焦点,解决方法如:2.3所示
1.4 备注
如果需要实现“点击itemView选中checkbox”,点击链接
点击itemView选中checkbox
2 源码
2.1 activity_check_box.java
<RelativeLayout xmlns:android="http://schemas.android.com/apk/res/android" xmlns:tools="http://schemas.android.com/tools" style="@style/LayoutParent" tools:context="com.example.guan.listview.ListViewActivity">

    <ListView  android:id="@+id/lv_show" android:layout_width="match_parent" android:layout_height="wrap_content"></ListView>

</RelativeLayout>
2.2 CheckBoxAdapter.java
/** * 单选,全选,全不选,删除选中Item,每个Item的单击事件保留 * (Item单击事件和选中checkbox是两个功能,不影响)。 * * 通过重写listview的adapter,将listview和checkbox结合在一起,并且二者可以分别操作 */
public class CheckBoxActivity extends AppCompatActivity {

    private List list = new ArrayList();
    private CheckBoxAdapter checkBoxAdapter;
    private static final int ID_COLUMN_INDEX = 100;

    @InjectView(R.id.lv_show)
    ListView lvShow;


    @Override
    protected void onCreate(Bundle savedInstanceState) {
        super.onCreate(savedInstanceState);
        setContentView(R.layout.activity_check_box);
        ButterKnife.inject(this);

        InitAdapter();
    }

    private void InitAdapter() {
        list.add("one");
        list.add("two");
        list.add("three");
        list.add("four");
        list.add("five");
        list.add("six");
        list.add("seven");
        list.add("eight");
        list.add("nine");
        list.add("ten");

        checkBoxAdapter = new CheckBoxAdapter(this, list);
        lvShow.setAdapter(checkBoxAdapter);

        lvShow.setOnItemClickListener(new AdapterView.OnItemClickListener() {
            @Override
            public void onItemClick(AdapterView<?> parent, View view, int position, long id) {
                Toast.makeText(CheckBoxActivity.this,"--" + list.get(position).toString(), Toast.LENGTH_SHORT).show();
            }
        });
    }

    @Override
    public boolean onCreateOptionsMenu(Menu menu) {
        // Inflate the menu; this adds items to the action bar if it is present.
        getMenuInflater().inflate(R.menu.menu_check_box, menu);
        return true;
    }

    @Override
    public boolean onOptionsItemSelected(MenuItem item) {
        int id = item.getItemId();

        switch (id) {
            case R.id.action_all:
                for (int i = 0; i < checkBoxAdapter.getCount(); i++) {
                    checkBoxAdapter.sSelected.put(i, true);
                }
                checkBoxAdapter.notifyDataSetChanged();
                Toast.makeText(CheckBoxActivity.this,"全选", Toast.LENGTH_SHORT).show();
                break;

            case R.id.action_allnot:
                for (int i = 0; i < checkBoxAdapter.getCount(); i++) {
                    checkBoxAdapter.sSelected.put(i, false);
                }
                checkBoxAdapter.notifyDataSetChanged();
                Toast.makeText(CheckBoxActivity.this,"全不选", Toast.LENGTH_SHORT).show();
                break;

            case R.id.action_delete:
                for(int i = 0; i < CheckBoxAdapter.sDeleteSet.size(); i++) {
                    list.remove(i);
                }
                checkBoxAdapter.notifyDataSetChanged();
                Toast.makeText(CheckBoxActivity.this,"删除选中项", Toast.LENGTH_SHORT).show();
                break;

            default:
                break;
        }

        return super.onOptionsItemSelected(item);
    }
}
2.3 item_checkbox.xml
<?xml version="1.0" encoding="utf-8"?>
<RelativeLayout xmlns:android="http://schemas.android.com/apk/res/android"
    android:layout_width="match_parent"
    android:layout_height="100dp"
    <!--避免CheckBox抢占焦点,解决方法1-->
    android:descendantFocusability="blocksDescendants" >

    <TextView
        android:id="@+id/tv_num"
        style="@style/WrapParent"
        android:layout_alignParentLeft="true"
        android:layout_centerVertical="true"
        android:layout_marginLeft="32dp"
        android:text="Textview" />

    <CheckBox
        android:id="@+id/cb_check"
        style="@style/WrapParent"
        <!--避免CheckBox抢占焦点,解决方法2-->
        android:focusable="false"
        android:layout_alignParentRight="true"
        android:layout_centerVertical="true"
        android:layout_marginRight="32dp" />

</RelativeLayout>
2.4 CheckBoxAdapter.java
/** * @author Guan * @file com.example.guan.adapter * @date 2015/8/14 * @Version 1.0 */
public class CheckBoxAdapter extends BaseAdapter {
    private Context mContext;
    /** * List原数据列表 */
    private List mList;
    /** * 全选或者全不选列表 */
    public static Map<Integer, Boolean> sSelected;
    /** * 删除记录列表 * Set集合不会存在重复的元素 */
    public static HashSet sDeleteSet;

    public CheckBoxAdapter(Context context, List list) {
        this.mContext = context;
        this.mList = list;
        sSelected = new HashMap<Integer, Boolean>();
        sDeleteSet = new HashSet();
    }

    @Override
    public int getCount() {
        return mList.size();
    }

    @Override
    public Object getItem(int position) {
        return position;
    }

    @Override
    public long getItemId(int position) {
        return position;
    }

    @Override
    public View getView(int position, View convertView, ViewGroup parent) {
        // 2、使用了ViewHolder作为子布局的缓存,使用View的setTag方法将缓存与每个item绑定,
        // 则也可以省去了findViewById的事件
        ViewHolder holder;

        if (convertView != null) {
            // 3、获取ViewHolder
            holder = (ViewHolder) convertView.getTag();
        } else {
            convertView = LayoutInflater.from(mContext).inflate(R.layout.item_checkbox, null);
            holder = new ViewHolder(convertView);
            convertView.setTag(holder);
        }

        // 4、绑定数据到holder
        holder.tvNum.setText(mList.get(position).toString());
        if (sSelected.size() != 0) {
            holder.cbCheck.setChecked(sSelected.get(position));
        }
        // 选中监听
        holder.cbCheck.setOnCheckedChangeListener(new onCbCheck(position));
        return convertView;
    }

    /** * 1、将ViewHolder设置为static的目的是指在初始化Adapter时初始化一次这个内部类, * 否则将会在每次创建Adapter时都要初始化一次,而这是没有必要的。 */
    static class ViewHolder {
        @InjectView(R.id.tv_num)
        TextView tvNum;
        @InjectView(R.id.cb_check)
        CheckBox cbCheck;

        ViewHolder(View view) {
            ButterKnife.inject(this, view);
        }
    }

    /** * CheckBox监听 */
    public class onCbCheck implements OnCheckedChangeListener {
        int pos;

        public onCbCheck(int position) {
            pos = position;
        }

        @Override
        public void onCheckedChanged(CompoundButton buttonView, boolean isChecked) {
            if (isChecked) {
                sDeleteSet.add(pos);
            } else {
                sDeleteSet.remove(pos);
            }
        }
    }
}
三、效果图


