android开发游记:meterial design 使用circularReveal仿哔哩哔哩(bilibili)搜索框动画
一直觉得bilibili的安卓客户端做的很不错,所以自己在项目中都会有意识或无意识地去模仿,最近觉得它的搜索框弹出收回的效果体验挺不错的,于是研究了一下模仿着做了一个:
(ps:模仿不是罪,罪过的是没有经过思考地抄袭)
bilibili搜索框效果图:
博主模仿版:

实现原理:
这里的波纹动画需要使用的ViewAnimationUtils库来实现,但是该库是5.0以后才引入的,所以无法满足低版本。但是不用担心,已经有开源库为我们实现了低版本的动画,用法和ViewAnimationUtils一致。
这里首先要介绍一个开源库circularReveal,主要是提供了波浪式的展开和回缩动画,利用这个库提供的动画再自定义一下就很容易实现上面的效果了
有兴趣的朋友可以自动down下源码看一下:
CircularReveal libaray 源码下载
我这里就利用CircularReveal库,做了一个demo,就是上面的效果图的:
demo下载地址
整个搜索框是使用fragment实现的,弹出层是覆盖在activity上的一个fragment,具体搜索逻辑自己去实现,demo只提供出入场动画:
先贴出fragment的布局文件:
<?xml version="1.0" encoding="utf-8"?>
<LinearLayout xmlns:android="http://schemas.android.com/apk/res/android" android:id="@+id/root" android:layout_width="match_parent" android:layout_height="match_parent" android:orientation="vertical">

    <io.codetail.widget.RevealFrameLayout  android:layout_width="match_parent" android:layout_height="wrap_content" android:layout_gravity="center_horizontal" android:layout_margin="7dp">

        <LinearLayout  android:id="@+id/content" android:layout_width="match_parent" android:layout_height="match_parent" android:orientation="vertical">

            <io.codetail.widget.RevealLinearLayout  android:layout_width="match_parent" android:layout_height="wrap_content" android:orientation="horizontal">

                <LinearLayout  android:id="@+id/edit_lay" android:background="#ffffff" android:layout_width="match_parent" android:layout_height="wrap_content">

                <EditText  android:id="@+id/edit_search" android:layout_width="0dp" android:layout_height="40dp" android:layout_weight="1" android:ems="10" android:hint="search" android:inputType="textPersonName" android:layout_marginLeft="13dp" android:textColor="#333333" android:textColorHint="#cccccc">

                    <requestFocus />
                </EditText>

                <ImageView  android:id="@+id/img_search" android:padding="7dp" android:layout_width="40dp" android:layout_height="40dp" android:scaleType="fitXY" android:src="@drawable/icon_search" />

                </LinearLayout>

            </io.codetail.widget.RevealLinearLayout>

            <LinearLayout  android:id="@+id/items" android:layout_width="match_parent" android:layout_height="400dp" android:background="#ffffff" android:orientation="vertical" android:paddingLeft="15dp">

                <TextView  android:layout_width="wrap_content" android:layout_height="wrap_content" android:layout_marginTop="10dp" android:text="New Text" android:textColor="#333333" />

                <TextView  android:layout_width="wrap_content" android:layout_height="wrap_content" android:layout_marginTop="10dp" android:text="New Text" android:textColor="#333333" />

                <TextView  android:layout_width="wrap_content" android:layout_height="wrap_content" android:layout_marginTop="10dp" android:text="New Text" android:textColor="#333333" />

                <TextView  android:layout_width="wrap_content" android:layout_height="wrap_content" android:layout_marginTop="10dp" android:text="New Text" android:textColor="#333333" />
            </LinearLayout>
        </LinearLayout>

    </io.codetail.widget.RevealFrameLayout>
</LinearLayout>布局很简单,根据自己需要更改,这里只是一个示例,要注意的一点就是:需要执行动画的视图必须有一个RevealLinearLayout或者RevealFrameLayout的父View。如上的布局,因为动画其实是由这个父View完成的。
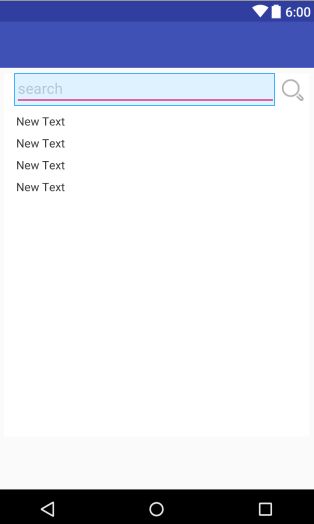
布局效果:
代码解析
首先,点击搜索按钮,弹出fragment并放入回退栈fragment:reveal中:
    @Override
    public boolean onOptionsItemSelected(MenuItem item) {
        int id = item.getItemId();
        if (id == R.id.action_search) {
            getSupportFragmentManager()
                    .beginTransaction()
                    .add(android.R.id.content, new FragmentRevealExample(), "fragment_my")
                    .addToBackStack("fragment:reveal")
                    .commit();
            return true;
        }
        return super.onOptionsItemSelected(item);
    }
重点代码就在FragmentRevealExample中:
在fragment的onCreate()函数中添加一个绘制监听,在绘制渲染之前执行动画:
    edit_lay.getViewTreeObserver().addOnPreDrawListener(
        new ViewTreeObserver.OnPreDrawListener() {
            @Override
            public boolean onPreDraw() {
                //执行动画
                //......
            }
        });
下面是执行动画的主要代码:
 centerX = img_search.getLeft()+img_search.getWidth()/2;
 centerY = img_search.getTop()+img_search.getHeight()/2;

 SupportAnimator mRevealAnimator = ViewAnimationUtils.createCircularReveal(
       edit_lay, centerX, centerY, 20,
       PdUtil.hypo(edit_lay.getWidth(), edit_lay.getHeight()));

 mRevealAnimator.addListener(new SupportAnimator.AnimatorListener() {
     @Override
     public void onAnimationStart() {
         edit_lay.setVisibility(View.VISIBLE);
     }
     @Override
     public void onAnimationEnd() {
         new Handler().postDelayed(new Runnable() {
             @Override
             public void run() {
                 items.setVisibility(View.VISIBLE);
                 edit_search.requestFocus();
                 if (getActivity()!=null) {
                     InputMethodManager imm = (InputMethodManager)getActivity()
                                 .getSystemService(Context.INPUT_METHOD_SERVICE);
                     imm.showSoftInput(edit_search, InputMethodManager.SHOW_IMPLICIT);
                 }
             }
         }, 100);
     }
     @Override
     public void onAnimationCancel() {
     }
     @Override
     public void onAnimationRepeat() {
     }
 });
 mRevealAnimator.setDuration(200);
 mRevealAnimator.setStartDelay(100);
 mRevealAnimator.setInterpolator(new AccelerateDecelerateInterpolator());
 mRevealAnimator.start();
动画其实是模仿一个圆放大的过程,我们首要就有计算出圆心的坐标 centerX,centerY,就是放大镜的图标的中心点:
    centerX = img_search.getLeft()+img_search.getWidth()/2;
    centerY = img_search.getTop()+img_search.getHeight()/2;
然后通过library提供的ViewAnimationUtils的createCircularReveal方法获取一个动画对象执行mRevealAnimator,解释下createCircularReveal()方法的参数:
createCircularReveal(View view,int centerX,int centerY,float startRadius, float endRadius)
- view:就是需要执行动画的对象,这里简单来说就是搜索框上的EditText,由于还有一个放大镜的图片,所以我用一个LinearLayout包围起来了,那我们需要的对象就是这个LinearLayout,这里要注意,要执行动画的话,那么选定的View必须有一个RevealLinearLayout或者RevealFrameLayout的父View,因为你选的View本身是没有动画效果的动画是由这两个拥有动画效果的父View来完成的。
- centerX:动画中心点X坐标
- centerY:动画中心点Y坐标
- startRadius:动画开始时的圆半径
- endRadius:动画结束时的圆半径
centerX和centerY已经计算出来了,startRadius我们默认20px,endRadius则取控件的最大宽度(对角线长度):
还记得勾股定理吗?
    public static float hypo(int a, int b){
        return (float) Math.sqrt(Math.pow(a, 2) + Math.pow(b, 2));
    }
动画配置完了,接下来就是动画监听器:
由于动画开始时会有闪动,所以在开始前隐藏需要动画的View,然后在开始时显示它,这样就不会有闪动了:
     @Override
     public void onAnimationStart() {
         edit_lay.setVisibility(View.VISIBLE);
     }
在动画结束后延迟100毫秒,然后显示整个fragment,并弹出键盘:
     @Override
     public void onAnimationEnd() {
         new Handler().postDelayed(new Runnable() {
             @Override
             public void run() {
                 items.setVisibility(View.VISIBLE);
                 edit_search.requestFocus();
                 if (getActivity()!=null) {
                     InputMethodManager imm = (InputMethodManager)getActivity()
                                 .getSystemService(Context.INPUT_METHOD_SERVICE);
                     imm.showSoftInput(edit_search, InputMethodManager.SHOW_IMPLICIT);
                 }
             }
         }, 100);
     }
最后设置动画时长和延迟,就可以执行动画了:
 mRevealAnimator.setDuration(200);
 mRevealAnimator.setStartDelay(100);
 mRevealAnimator.setInterpolator(new AccelerateDecelerateInterpolator());
 mRevealAnimator.start();
到这里,展开动画就完成了,接着是,回缩动画:
注意fragment并不能获取回退健点击事件,所以处理过程要放在activity中,fragment添加一个public的onBackPressed,在activity回退事件中获取fragment并调用fragment的自定义回退事件onBackPressed:
Activity:
    @Override
    public void onBackPressed() {
        FragmentRevealExample fragment = (FragmentRevealExample) getSupportFragmentManager().
                findFragmentByTag("fragment_my");
        if(fragment!=null) {
            fragment.onBackPressed();
        }else {
            super.onBackPressed();
        }
    }
Fragment:
在fragment的onBackPressed中执行回缩动画:
    public boolean onBackPressed() {
        SupportAnimator mRevealAnimator = ViewAnimationUtils.createCircularReveal(content,
                centerX, centerY, 20, PdUtil.hypo(content.getWidth(), content.getHeight()));
        mRevealAnimator = mRevealAnimator.reverse();
        if (mRevealAnimator==null) return false;
        mRevealAnimator.addListener(new SupportAnimator.AnimatorListener() {
            @Override
            public void onAnimationStart() {
                content.setVisibility(View.VISIBLE);
            }
            @Override
            public void onAnimationEnd() {
                content.setVisibility(View.INVISIBLE);
                if (getActivity()!=null)
                    getActivity().getSupportFragmentManager().popBackStack();
            }
            @Override
            public void onAnimationCancel() {
            }
            @Override
            public void onAnimationRepeat() {
            }
        });
        mRevealAnimator.setDuration(200);
        mRevealAnimator.setStartDelay(100);
        mRevealAnimator.setInterpolator(new AccelerateDecelerateInterpolator());
        mRevealAnimator.start();
        return true;
    }
回缩动画和开始动画类似,主要是调用了mRevealAnimator.reverse(),使动画方向反转,由放大变为回缩。注意在动画结束后把fragment实例从回退栈中移除(出栈):
getActivity().getSupportFragmentManager().popBackStack();这样示例的部分就完成了。
如果需要弹出的键盘挤压布局视图的话。需要在AndroidManifest.xml给该Activity加上一个属性:
android:windowSoftInputMode="adjustResize"如果不加的话,弹出的键盘是覆盖在视图之上的。是否需要这个效果看个人爱好了。