win10 安装 Pytorch
一、安装Pytorch
打开官方网址
https://pytorch.org/get-started/locally/#supported-windows-distributions
选择合适版本,复制最下方命令到CMD中安装

出现如下错误
ReadTimeoutError: HTTPSConnectionPool(host='download.pytorch.org', port=443):
Read timed out.

于是根据上面的链接,手动去下载,打开
https://download.pytorch.org/whl/torch_stable.html
搜索 cu92/torch-1.2.0%2Bcu92-cp36-cp36m-win_amd64.whl
然后用迅雷下载.
之后用下面命令安装
pip install torch-1.2.0+cu92-cp36-cp36m-win_amd64.whl
之后验证是否安装成功,结果出错如下:

查询解决办法,现在Python版本是3.6.0,所以升级Python版本
conda update python
升级之后到了Python 3.6.2,再次验证,问题解决!
>>> import torch
>>> torch.__version__
'1.2.0+cu92'
Additionally, to check if your GPU driver and CUDA is enabled and accessible by PyTorch, run the following commands to return whether or not the CUDA driver is enabled:
>>> torch.cuda.is_available()
True
二、安装torchvision
首先用pip安装失败,安装成功,但是导入时报错from torch.C ......
torchvision ImportError: DLL load failed: 找不到指定的模块。
pip install -i https://pypi.doubanio.com/simple/ torchvision
之后从官网下载安装包手动安装成功
https://download.pytorch.org/whl/torch_stable.html
三、另外的安装方法
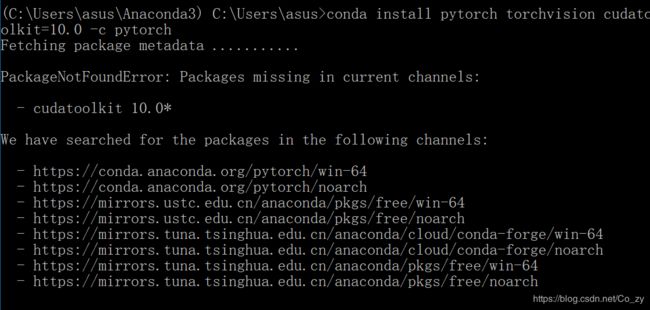
最开始使用conda方式安装,结果出现下面问题

解决方法: 首先添加清华的镜像源,然后再安装
https://mirrors.tuna.tsinghua.edu.cn/help/anaconda/

原本的命令如上图,添加清华源之后
conda install pytorch torchvision cudatoolkit=10.0
参考 https://blog.csdn.net/sunqiande88/article/details/80085569

