mnist 手写图片文件解析
http://yann.lecun.com/exdb/mnist/
下载4个数据集
There are 4 files:
train-images-idx3-ubyte: training set images
train-labels-idx1-ubyte: training set labels
t10k-images-idx3-ubyte: test set images
t10k-labels-idx1-ubyte: test set labels
文件格式
TRAINING SET LABEL FILE (train-labels-idx1-ubyte):
[offset] [type] [value] [description]
0000 32 bit integer 0x00000801(2049) magic number (MSB first)
0004 32 bit integer 60000 number of items
0008 unsigned byte ?? label
0009 unsigned byte ?? label
........
xxxx unsigned byte ?? label
The labels values are 0 to 9.
TRAINING SET IMAGE FILE (train-images-idx3-ubyte):
[offset] [type] [value] [description]
0000 32 bit integer 0x00000803(2051) magic number
0004 32 bit integer 60000 number of images
0008 32 bit integer 28 number of rows
0012 32 bit integer 28 number of columns
0016 unsigned byte ?? pixel
0017 unsigned byte ?? pixel
........
xxxx unsigned byte ?? pixel
Pixels are organized row-wise. Pixel values are 0 to 255. 0 means background (white), 255 means foreground (black).
 |
 |
import os
import struct
import numpy as np
import matplotlib.pyplot as plt

def load_mnist(path,kind='train'):
    """Load MNIST data from 'path'"""

    labels_path = os.path.join(path, '%s-labels.idx1-ubyte'%kind)
    image_path = os.path.join(path, '%s-images.idx3-ubyte'%kind)

    with open(labels_path, 'rb') as lbpath:
        magic,n = struct.unpack('>ll',lbpath.read(8))
        labels = np.fromfile(lbpath,dtype=np.uint8)

    with open(image_path, 'rb') as imgpath:
        magic,num,rows,cols = struct.unpack('>llll',imgpath.read(16))
        images = np.fromfile(imgpath, dtype=np.uint8).reshape(len(labels),784)

    return images,labels


#read from file
train_images, train_labels = load_mnist('./','train')
#images (60000,)
#labels (60000, 784)
test_img, test_lb = load_mnist('./', 't10k')

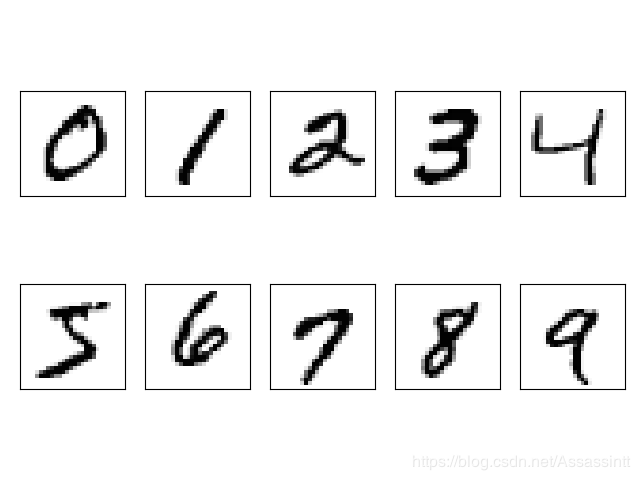
###show 0~9
#一个包含figure和axes对象的元组, 把父图分成2×5个子图
fig, ax = plt.subplots(nrows=2,ncols=5, sharex=True, sharey=True,)
ax = ax.flatten() #把子图展开赋值给axes

#rect是所有train_labels 值为 1的 index的集合。
rect=train_images[train_labels==1] #(6742,784)
for i in range(10):
    img = train_images[train_labels==i][0].reshape(28,28)
    ax[i].imshow(img,cmap='Greys', interpolation='nearest') #cmap(colormap)样式 interpolation 插值运算
ax[0].set_xticks([]) #设置刻度值即坐标轴刻度 xticks yticks
ax[0].set_yticks([])
plt.tight_layout() #自动调整子图参数,使之填充整个图像区域, 实验特性
plt.show()

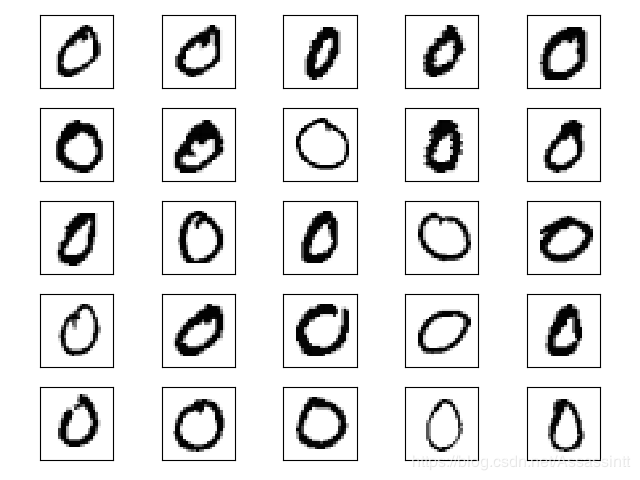
###show same number
fig, ax = plt.subplots(nrows=5,ncols=5,sharex=True, sharey=True)
ax = ax.flatten()
for i in range(25):
    image = train_images[train_labels==0][i].reshape(28,28)
    ax[i].imshow(image,cmap='Greys', interpolation='nearest')
ax[0].set_xticks([])
ax[0].set_yticks([])
plt.tight_layout()
plt.show()
也可以import mnist 直接下载,如下是训练识别数字图片的代码
import keras
from keras.datasets import mnist
from keras.models import Sequential
from keras.layers import Dense, Dropout, Flatten
from keras.layers import Conv2D, MaxPooling2D
from keras import backend as K
from keras.optimizers import SGD

#input image dimensions
img_rows, img_cols = 28,28

#the data, split between train and test sets
(x_train, y_train), (x_test, y_test) = mnist.load_data()
#(60000, 28, 28) (60000,) (10000, 28, 28) (10000,)
print(x_train.shape, y_train.shape, x_test.shape, y_test.shape)


x_train = x_train.reshape(x_train.shape[0], img_rows*img_cols)
x_test = x_test.reshape(x_test.shape[0], img_rows*img_cols)

x_train = x_train.astype('float32')
x_test = x_test.astype('float32')
x_train /= 255
x_test /= 255
#x_test=np.random.normal(x_test) #加噪点,需要dropout
print('x_train shape:', x_train.shape) #(60000, 28, 28, 1)
print(x_train.shape[0], 'train samples') # 60000
print(x_test.shape[0], 'test samples') #10000

#convert class vectors to binary class matrices
y_train = keras.utils.to_categorical(y_train, 10)
y_test = keras.utils.to_categorical(y_test, 10)
print('y_train shape:', y_train.shape)


model = Sequential()
model.add(Dense(input_dim=28*28, units=689, activation='relu'))
#model.add(Dropout(0.7))
model.add(Dense(units=689,activation='relu'))
#model.add(Dropout(0.7)
model.add(Dense(units=689,activation='relu'))
#model.add(Dropout(0.7)
#for i in range(10):
#    model.add(Dense(units=689,activation='relu'))

model.add(Dense(units=10,activation='softmax'))

model.compile(loss='categorical_crossentropy', optimizer=SGD(0.1), metrics=['accuracy'])
#model.compile(loss='categorical_crossentropy', optimizer='adam', metrics=['accuracy'])
model.fit(x_train,y_train,batch_size=100,epochs=20)

score = model.evaluate(x_train,y_train,batch_size=1000)
print('Total loss on Traning Set:', score[0])
print('Accuracy on Trainting Set:', score[1])

score = model.evaluate(x_test,y_test,batch_size=1000)
print('Total loss on Testing Set:', score[0])
print('Accuracy on Testing Set:', score[1])