OpenCV学习笔记七:几何变换
介绍简单的图像几何变换,主要包括缩放,移动,旋转,仿射变换,透视变换等
一、扩展缩放
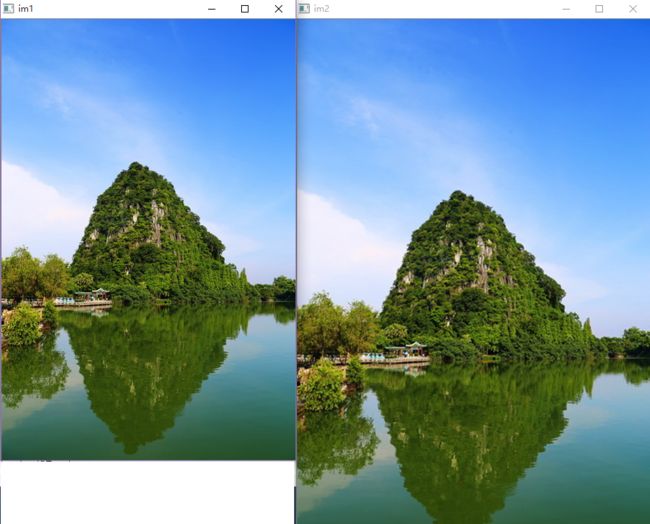
扩展缩放只改变图像的尺寸大小。OpenCV提供了函数resize()可以实现这个功能。可以通过指定缩放因子也可以直接指定尺寸来设置图像的大小。扩展缩放时,可以选择不同的插值方法,扩展时推荐使用INTER_CUBIC和INTER_LINEAR,缩放时推荐使用INTER_AREA。默认情况下,扩展和缩放使用的都是INTER_LINEAR。
void resize(InputArray src, OutputArray dst, Size dsize, double fx=0, double fy=0, int interpolation=INTER_LINEAR )其中:
- src, dst分别为原图像和扩展缩放后的图像。
- dsize为缩放后图像的大小
- fx, fy分别为X和Y方向的缩放因子,dszie和fx, fy不能同时为0
- interpolation,插值方法,有以下几种:
- INTER_NEAREST - 最近邻插值
- INTER_LINEAR - 线性插值(默认)
- INTER_AREA - 区域插值
- INTER_CUBIC - 三次样条插值
- INTER_LANCZOS4 - Lanczos插值
Mat image = imread("1.jpg",CV_LOAD_IMAGE_UNCHANGED);
namedWindow("im1");
imshow("im1",image);

Mat output;
//图像缩放
resize(image,output,Size(),2,2,INTER_CUBIC);
namedWindow("im2");
imshow("im2",output);
二、平移
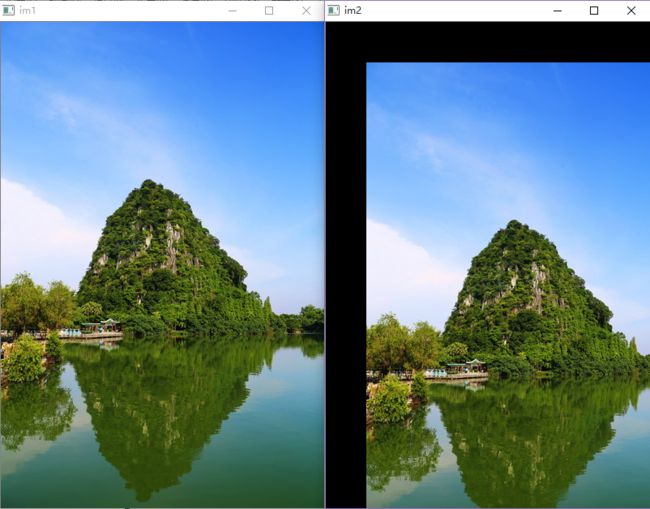
平移是将图像移动到其它位置,可以使用OpenCV提供的函数wrapAffine达到目的。如果想让图像沿(x,y)方向移动,移动的距离为(tx,ty),则可以以下面的方式构建移动矩阵,然后作为参数传递给wrapAffine。
M=[1001txty]
void warpAffine(InputArray src, OutputArray dst, InputArray M, Size dsize, int flags=INTER_LINEAR, int borderMode=BORDER_CONSTANT, const Scalar& borderValue=Scalar())其中:
- src, dst分别为输入图像和输出图像
- M是变换矩阵
- flags是插值算法
enum InterpolationFlags{
    /** nearest neighbor interpolation */
    INTER_NEAREST        = 0,  //最近邻插值
    /** bilinear interpolation */
    INTER_LINEAR         = 1, //双线性插值
    /** bicubic interpolation */
    INTER_CUBIC          = 2, //双三次插值
    /** resampling using pixel area relation. It may be a preferred method for image decimation, as
    it gives moire'-free results. But when the image is zoomed, it is similar to the INTER_NEAREST
    method. */
    INTER_AREA           = 3, //区域插值,使用象素关系重采样。当图像缩小时候,该方法可以避免波纹出现。当图像放大时,类似于 INTER_NEAREST方法
    /** Lanczos interpolation over 8x8 neighborhood */
    INTER_LANCZOS4       = 4, //Lanczos插值(超过8×8像素邻域的Lanczos插值)
    /** mask for interpolation codes */
    INTER_MAX            = 7,
    /** flag, fills all of the destination image pixels. If some of them correspond to outliers in the
    source image, they are set to zero */
    WARP_FILL_OUTLIERS   = 8, //填充所有输出图像的象素
    /** flag, inverse transformation

    For example, polar transforms:
    - flag is __not__ set: \f$dst( \phi , \rho ) = src(x,y)\f$
    - flag is set: \f$dst(x,y) = src( \phi , \rho )\f$
    */
    WARP_INVERSE_MAP     = 16  //逆变换
}; - boderMode是边界处理方式
enum BorderTypes {
    BORDER_CONSTANT    = 0, //!< `iiiiii|abcdefgh|iiiiiii`  with some specified `i`
    BORDER_REPLICATE   = 1, //!< `aaaaaa|abcdefgh|hhhhhhh`
    BORDER_REFLECT     = 2, //!< `fedcba|abcdefgh|hgfedcb`
    BORDER_WRAP        = 3, //!< `cdefgh|abcdefgh|abcdefg`
    BORDER_REFLECT_101 = 4, //!< `gfedcb|abcdefgh|gfedcba`
    BORDER_TRANSPARENT = 5, //!< `uvwxyz|absdefgh|ijklmno`

    BORDER_REFLECT101  = BORDER_REFLECT_101, //!< same as BORDER_REFLECT_101
    BORDER_DEFAULT     = BORDER_REFLECT_101, //!< same as BORDER_REFLECT_101
    BORDER_ISOLATED    = 16 //!< do not look outside of ROI
};
使图片在X方向和Y方向各移动50个像素
Mat kernel(2,3,CV_32F,Scalar(0));
kernel.at<float>(0,0) = 1;
kernel.at<float>(1,1) = 1;
kernel.at<float>(0,2) = 50;
kernel.at<float>(1,2) = 50;
warpAffine(image,output,kernel,Size(image.cols,image.rows));
三、旋转
对一个图像旋转角度 θ ,需要用到如下形式的旋转矩阵:
M=[cosθsinθ−sinθcosθ]
OpenCV允许在任意地方进行旋转,旋转矩阵的形式应更新为更加通用的形式:
M=[α−ββα(1−α)∗center.x−β∗center.yβ∗center.x+(1−α)∗center.x]
其中:
α=scale∗cosθ
β=scale∗sinθ
OpenCV提供了一个函数用于构建上述的旋转矩阵:
Mat getRotationMatrix2D(Point2f center, double angle, double scale)- center: 旋转中心
- angle:旋转弧度,注意要将角度转换成弧度
- scale: 缩放比例
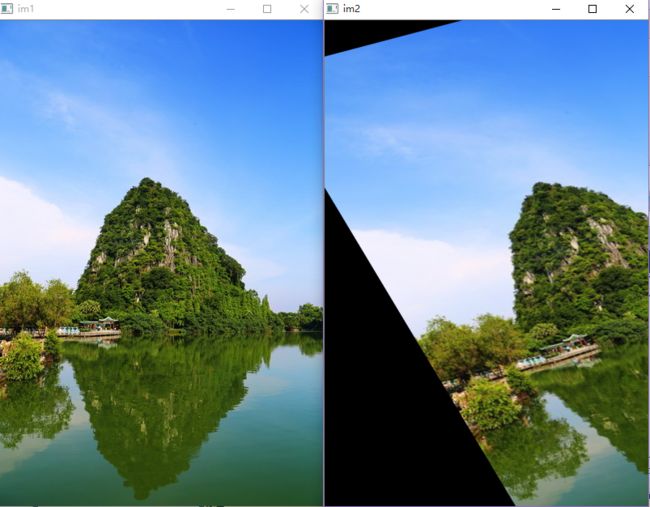
double degree = 30;
double angle = degree  * CV_PI / 180.; // 弧度
double a = sin(angle), b = cos(angle);
int width = image.cols;
int height = image.rows;
int width_rotate = int(height * fabs(a) + width * fabs(b));
int height_rotate = int(width * fabs(a) + height * fabs(b));
Point center = Point(image.cols / 2, image.rows / 2);

Mat map_matrix = getRotationMatrix2D(center, degree, 1.0);
map_matrix.at<double>(0, 2) += (width_rotate - width) / 2;     // 修改坐标偏移
map_matrix.at<double>(1, 2) += (height_rotate - height) / 2;   // 修改坐标偏移
Mat outout;
warpAffine(image, output, map_matrix, Size(width_rotate, height_rotate),INTER_CUBIC | CV_WARP_FILL_OUTLIERS, BORDER_CONSTANT, Scalar(0));
四、仿射变换
在仿射变换中,原图中所有的平行线在结果图像中仍保持平行。为了创建这个矩阵,需要从原图像中找到三个点以及他们在输出图像中的位置。将两个点数组传递给 getAffineTransform可以创建仿射变换需要的变换矩阵(2X3矩阵),将其传递给warpAffine即可。仿射变换的结果为平行四边形
Point2f src[3] = {Point2f(50,50),Point2f(200,50),Point2f(50,200)};
Point2f dst[3] = {Point2f(10,100),Point2f(200,50),Point2f(100,250)};

Mat kernel = getAffineTransform(src,dst);
warpAffine(image,output,kernel,Size(image.cols,image.rows));
五、透视变换
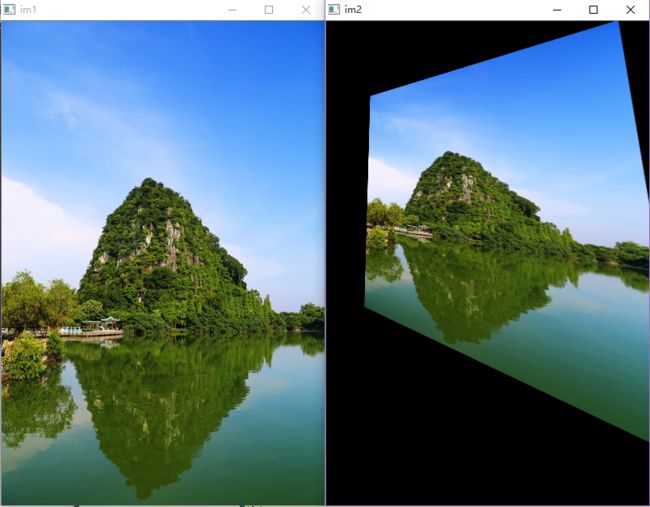
透视变换(Perspective Transformation)是将图片投影到一个新的视平面(Viewing Plane),也称作投影映射。其需要一个3X3的变换矩阵。要构建这个矩阵需要选取四个点且其中任意三个点不能共线。然后将点数组传递给getPerspectiveTransform就可以构建出变换矩阵。最后使用warpPerspective施行透视变换。透视变换的结果可以是任意四边形。
void warpPerspective(InputArray src, OutputArray dst, InputArray M, Size dsize, int flags=INTER_LINEAR, int borderMode=BORDER_CONSTANT, const Scalar& borderValue=Scalar())示例:
Point2f src[4] = {Point2f(100,50),Point2f(100,550),Point2f(350,50),Point2f(350,550)};
Point2f dst[4] = {Point2f(100,100),Point2f(100,350),Point2f(300,50),Point2f(350,450)};Mat kernel = getPerspectiveTransform(src,dst);
warpPerspective(image,output,kernel,Size(image.cols,image.rows));


