http://ios-driver.github.io/ios-driver/ # 官网关于ios-driver详细使用说明
-
工具
- VMware 12 Pro + vm tools.iso + Unlocker + OS X10.11 + Apple ID
- Xcode7.3 + JDK1.8 + Maven3.5.3 + Gauge0.9.7 +ios-driver 0.6.5 + IDEA2017.3.4
-
System requirements for OSX
- ios-driver is built upon 2 different frameworks from Apple.
- For native apps, it uses the UIAutomation framework from Apple (more here). You need xcode with an IOS SDK > 5.0.
- To check if you have the correct setup:
- $ xcodebuild -showsdks
- To check if you have the correct setup:
- For native apps, it uses the UIAutomation framework from Apple (more here). You need xcode with an IOS SDK > 5.0.
- The server is written in Java and requires Java 7.To check that you have the correct version :
- $ java -version
- Mac 中 JDK默认安装路径
- JETdeMac:apache-maven-3.5.3 JET$ /usr/libexec/java_home -V
- Matching Java Virtual Machines (1):
- 1.8.0_162, x86_64: "Java SE 8" /Library/Java/JavaVirtualMachines/jdk1.8.0_162.jdk/Contents/Home
- /Library/Java/JavaVirtualMachines/jdk1.8.0_162.jdk/Contents/Home
- 设置环境变量 JAVA_HOME
- ios-driver is built upon 2 different frameworks from Apple.
1、先得要有Mac系统( Mac笔记本,或者VMware安装OS X 虚拟机)
2、创建ios simulator
-
OS X EI Capitan 10.11.1快速升级方法介绍
- https://www.cnblogs.com/korykim/p/4907044.html
-
Mac上安装Xcode
- 下载安装包形式安装
- https://developer.apple.com/download/more/下载apple开发工具,包括xcode & Command Line Tools (macOS El Capitan version 10.11) for Xcode8.2等(需要输入apple id)
- Mac10.11, 对应安装Xcode 8.2 (5.2G) 版本
- Mac系统对应XCode版本,都可以在这个链接里查看得到
- 建议使用safari浏览器下载,速度很快(我的达到了2M/s)
- Mac下载的文件在哪?
- 从 App Store 中下载的软件:
- 如果你是从 App Store 应用商店中下载的软件,可以在 Launchpad 面板中看到。我们可以通过按键盘上的 F4 键,或在触控板上用四个手指合拢打开 Launchpad 面板。
- 另外我们还可以在 Finder 中的“应用程序”中找到它们,这里会显示当前电脑上安装的所有应用软件
- 还可以在终端命令窗口中输入 ls /Applications 来查看所有的应用软件。
- 查看在 Safari 浏览器下载的:
- 如果你是通过 Safari 浏览器下载的内容,可以点击 Safari 窗口右上角的“下载”图标.随后可以看到最近的下载列表,如果想要打开下载文件的位置,请点击文件右侧的“查找”图标.接着就会在 Finder 窗口中显示该文件的所在位置
- 直接在 Dock 栏中的下载栏目中查看:
- 在屏幕下方 Dock 栏的右侧有一个“下载”栏目,可以看到最近下载的文件
- 从 App Store 中下载的软件:
- Mac下载的文件在哪?
- Xcode: This is the complete Xcode developer toolset for Apple Watch,Apple TV,iPhone,iPad,and Mac. It includes the Xcode IDE,ios Simulator,and all required toolsand frameworks for building iOS,watchOS,tvOS and macOS apps.
- 安装xcode_7.3.dmg
- 双击xcode_7.3.dmg,等完成后,按照提示,拖动到Applications,耐心等待(正在将"xcode.app"拷贝到"应用程序" (10.48G)) ---- 此过程,时间很漫长...
- 查看xcode的版本
- 终端中输入 xcodebuild -version
- JETdeMac:~ JET$ xcodebuild -version
- Xcode 7.3
- Build version 7D175
- Win7 64位上安装的OS X虚拟机, Win7 32 bit mstsc连接 Win7 64bit, OS X Terminal上复制,直接复制到win7 32上是无法复制的;
- 先复制到win7 64上,再复制到win7 32bit 上,是可以的.
- Win7 64位上安装的OS X虚拟机, Win7 32 bit mstsc连接 Win7 64bit, OS X Terminal上复制,直接复制到win7 32上是无法复制的;
- 有时候直接输入这个命令xcodebuild -version,报错:error: tool 'xcodebuild' requires Xcode // select: error: tool 'xcodebuild' requires Xcode, but active developer directory '/Library/Developer/CommandLineTools' is a command line tools instance
- 解决办法 (这是因为找不到xcode路径)
- 终端输入: xcode-select --switch /Applications/Xcode.app/Contents/Developer/
- 解决办法 (这是因为找不到xcode路径)
- 点击“Xcode”的menu菜单。点击里面的“About xcode”选项,此时会打开对话框。
- 终端中输入 xcodebuild -version
- https://developer.apple.com/download/more/下载apple开发工具,包括xcode & Command Line Tools (macOS El Capitan version 10.11) for Xcode8.2等(需要输入apple id)
- 安装Xcode8.2
- 下载下来以后,发现文件名是 Xcode_8.xip,以往的扩展名都是 .zip,今年的有一点不一样。但是归档工具还是能识别这个文件,双击以后,本来挺激动。但是,发现过了一会报了一个错误 “未能完成该操作。cpio read error:Undefined error:0”。
- 拿这个错误去内搜了一下,没有有价值的解决方案,后来又去了谷歌,在 stack overflow 上找到了答案,你只要把Mac系统升级到最新的 10.11.6,再重启系统,双击打开就没有问题了。
- 命令行方式安装指定版本的Xcode & simulator
- https://blog.csdn.net/snowrain1108/article/details/51325040
- 干净地卸载Xcode
- 根目录下的必须要用管理员权限:
- sudo rm -rf /Applications/Xcode.app
- sudo rm -rf /Library/Preferences/com.apple.dt.Xcode.plist
- 然后删除自己目录下的:
- rm -rf ~/Library/Preferences/com.apple.dt.Xcode.plist
- rm -rf ~/Library/Caches/com.apple.dt.Xcode
- rm -rf ~/Library/Application\ Support/Xcode
- 以及和开发者相关的:
- rm -rf ~/Library/Developer/Xcode
- rm -rf ~/Library/Developer/CoreSimulator
- rm -rf ~/Library/Developer/XCPGDevices
- 根目录下的必须要用管理员权限:
- 安装/卸载command line tools for xcode
- 安装:
- brew doctor
- 卸载:
- cd /Library/Developer
- JETdeMac:Developer JET$ sudo rm -rf CommandLineTools/
- 安装:
- 下载安装包形式安装
-
mac安装神器brew
- 命令行输入: /usr/bin/ruby -e "$(curl -fsSL https://raw.githubusercontent.com/Homebrew/install/master/install)" 回车(这里有提示目录不存在,要创建需要按return键,如果用的windows键盘,就是回车键)
- 此过程,自动安装: Installing Command Line Tools (macOS El Capitan version 10.11) for Xcode
- 它的用法
- brew update 更新brew;
- brew install {应用名,如git} 安装软件
- brew cask install {应用名,如git} 也是下载安装,与上面的区别,请查看https://www.zhihu.com/question/22624898
- 更多用法请 brew help
- 命令行输入: /usr/bin/ruby -e "$(curl -fsSL https://raw.githubusercontent.com/Homebrew/install/master/install)" 回车(这里有提示目录不存在,要创建需要按return键,如果用的windows键盘,就是回车键)
-
Install Gauge for Mac OS X
- 1. use brew
- brew update
- brew install gauge
- gauge -v 验证是否安装OK
- JETdeMac:Downloads JET$ gauge -v
- Gauge version: 0.9.7
- Plugins
-
- No plugins found
- Plugins can be installed with
gauge install {plugin-name}
- gauge init java
- JETdeMac:MyGaugeTest JET$ gauge run specs/
- Installing required plugins.
- .....................
- ........................
-
Specification Heading
-
Vowel counts in single word ✔ ✔
-
Vowel counts in multiple word ✔ ✔
- Successfully generated html-report to => /Users/JET/Downloads/MyGaugeTest/reports/html-report/index.html
- Specifications: 1 executed 1 passed 0 failed 0 skipped
- Scenarios: 2 executed 2 passed 0 failed 0 skipped
- gauge -v 验证是否安装OK
- 2. use zip
- $ unzip -o gauge-0.9.7-darwin.x86_64.zip -d /usr/local/bin
- 1. use brew
-
Install JDK for OS X
- oracle官网下载mac版本的JDK: jdk-8u162-macosx-x64.dmg
- 双击安装,出现pkg文件,直接双击安装即可
- java -version 查看是否安装成功
- 默认已经设置了环境变量
- JETdeMac:~ JET$ java -version
- java version "1.8.0_162"
- Java(TM) SE Runtime Environment (build 1.8.0_162-b12)
- Java HotSpot(TM) 64-Bit Server VM (build 25.162-b12, mixed mode)
- 默认已经设置了环境变量
-
Install Maven for OS X (IDEA201703.04版本自带Maven3.3.9,在Mac中配置好很久自己安装的3.5.2/3,都无法加载pom.xml中的依赖。还是使用IDEA自带的Maven!!!)
- htps://blog.csdn.net/u011886447/article/details/70200922
- 从官网(http://mirrors.hust.edu.cn/apache/maven/maven-3/3.5.2/binaries/)下载 Maven (apache-maven-3.5.2-bin.tar.gz)并解压。
- tar -zxvf apache-maven-3.5.2-bin.tar.gz -C /data/maven/
- mkdir -p /data/maven/LocalHouse
- 设置环境变量
- JETdeMac:Home JET$ sudo vi ~/.bash_profile # 设置maven & java 环境变量
- export MAVEN_HOME="/data/maven/apache-maven-3.5.2"
- export PATH="PATH"
- export JAVA_HOME="/Library/Java/JavaVirtualMachines/jdk1.8.0_162.jdk/Contents/Home"
- export PATH="PATH"
- JETdeMac:Home JET$ source ~/.bash_profile # 使环境变量生效
- JETdeMac:Home JET$ mvn -v # 检查环境变量是否生效
- Apache Maven 3.5.2 (3383c37e1f9e9b3bc3df5050c29c8aff9f295297; 2018-02-25T03:49:05+08:00)
- Maven home: /data/maven/apache-maven-3.5.2
- Java version: 1.8.0_162, vendor: Oracle Corporation
- Java home: /Library/Java/JavaVirtualMachines/jdk1.8.0_162.jdk/Contents/Home/jre
- Default locale: zh_CN, platform encoding: UTF-8
- OS name: "mac os x", version: "10.11.1", arch: "x86_64", family: "mac"
- JETdeMac:Home JET$ sudo vi ~/.bash_profile # 设置maven & java 环境变量
-
Mac下安装/注册/配置IDEA
- 安装IDEA
- 先到IDEA官网下载Mac版本的IDEA(ideaIU-2017.3.4.dmg)
- 直接双击ideaIU-2017.3.4.dmg,拖动到Applications,安装完成后,在Launch里找到IDEA,运行
- 注册IDEA
- 先Finder里快捷键组合 Shift+Command+G 三个组合按键,并输入 Hosts 文件的所在路径:/etc/hosts,将“0.0.0.0 account.jetbrains.com”添加到hosts文件中
- 注意:会提示"无权限更改“,所以只能通过下面的命令行sudo更改
- sudo nano /private/etc/hosts
- 将“0.0.0.0 account.jetbrains.com”添加到hosts文件中
- mac nano 保存退出
- Ctrl + x,保存,会提示按Y,不保存就 N,取消就 C
- Enter
- Ctrl + x,保存,会提示按Y,不保存就 N,取消就 C
- 登录http://idea.lanyus.com/ ,复制Activation code,粘贴到IDEA中
- Mac中,Command 相当于 Windows中的Ctrl
- Mac中,复制:command+c, 粘贴: command+v
- IDEA中,复制一行: command+d
- Mac中,Command 相当于 Windows中的Ctrl
- 先Finder里快捷键组合 Shift+Command+G 三个组合按键,并输入 Hosts 文件的所在路径:/etc/hosts,将“0.0.0.0 account.jetbrains.com”添加到hosts文件中
- 配置IDEA
- 配置Maven(Mac中,使用IDEA自带的Maven才正常加载pom.xml依赖!!)
- 按照Windows中配置方法(见Java/Maven配置),老是提示报错:
- No plugin found for prefix 'archetype' in the current project and in the plugin groups [org.apache.maven.plugins, org.codehaus.mojo] available from the repositories local (/data/maven/LocalHouse)http://cwiki.apache.org/confluence/display/MAVEN/NoPluginFoundForPrefixExceptionFailedto initialize project. exit status 1
- OS X中更改settings.xml中的存储路径:
- 1. sudo mv ~/.m2 ~/.m2_bak
- maven默认存储路径: /Users/JET/.m2/repository
- 2. sudo mv /data/maven/apache-maven-3.5.2/conf/settings.xml /data/maven/
- 3. sudo vi /data/maven/settings.xml
- /data/maven/apache-maven-3.5.3/
- /data/maven/settings.xml
- /data/maven/LocalHouse
- settings.xml内容如下:
- xmlns:xsi="http://www.w3.org/2001/XMLSchema-instance"
- xsi:schemaLocation="http://maven.apache.org/SETTINGS/1.0.0 http://maven.apache.org/xsd/settings-1.0.0.xsd">
/data/maven/LocalHouse alimaven central aliyun maven http://maven.aliyun.com/nexus/content/repositories/central/ alimaven aliyun maven http://maven.aliyun.com/nexus/content/groups/public/ central central Maven Repository Switchboard http://repo1.maven.org/maven2/ central repo2 central Human Readable Name for this Mirror. http://repo2.maven.org/maven2/ ibiblio central Human Readable Name for this Mirror. http://mirrors.ibiblio.org/pub/mirrors/maven2/ jboss-public-repository-group central JBoss Public Repository Group http://repository.jboss.org/nexus/content/groups/public google-maven-central Google Maven Central https://maven-central.storage.googleapis.com central maven.net.cn oneof the central mirrors in china http://maven.net.cn/content/groups/public/ central
- settings.xml内容如下:
- 注意: cmd 运行 gauge init java_maven_selenium 时,不能打开IDEA,否则一直卡在那里
- 1. sudo mv ~/.m2 ~/.m2_bak
- Configure-Preferences-Maven: # 试过很多次,还是无效
- rm -rf ~/.m2
- rm -rf /data/maven/apache-maven-3.5.2/conf/settings.xml
- Maven home:
- /data/maven/apache-maven-3.5.2
- User Setting Files:
- /data/maven/settings.xml
- LocalRepository:
- /data/maven/LocalHouse
- 按照Windows中配置方法(见Java/Maven配置),老是提示报错:
- 配置Gauge插件
- Configure-Preferences-Plugins:
- 搜索“gauge",下载(0.3.11), install
- 但是不知道是网络不好,还是啥原因,一直下载不成功
- 后来直接到IDEA Plugin网站下载gauge(http://plugins.jetbrains.com/plugin/7535-gauge) Gauge-Java-Intellij-0.3.11.zip
- IDEA:Configure-Preferences-Plugins:
- Install plugins from disk, 选择Gauge-Java-Intellij-0.3.11.zip,点击restart IDEA
- IDEA:Configure-Preferences-Plugins:
- 搜索“gauge",下载(0.3.11), install
- Configure-Preferences-Plugins:
- JDK配置
- idea Structure Project:
- 默认设置为了我自己安装的1.8版本的(可以再检查下)
- idea Structure Project:
- 配置Maven(Mac中,使用IDEA自带的Maven才正常加载pom.xml依赖!!)
- 安装IDEA
-
官网推荐ios-driver
- For testing any iOS native, hybrid, or mobile web application using WebDriver - we recommend: ios-driver.
-
ios-driver官网推荐使用simulator
- Using simulators is the default way to use ios-driver.It offers more flexibility, and it is faster than tests on a real device. However, if your specific needs require tests on real device, in the next release, ios-driver will also support devices without having to make any modifications! ( http://ios-driver.github.io/ios-driver/ )
- Note: Release 0.6.5 does not support xCode 5. If you are using xCode 5, please use the latest snapshot 0.6.6-SNAPSHOT.
-
Mac系统如何启动iOS模拟器 快速启动iOS模拟器教程
- 创建模拟器包:
- 在终端上运行下面的命令来查找你的机器上可用的SDK的版本:
- xcodebuild -showsdks
- 继续在终端运行如下命令,用你的模拟器SDK替换“-sdk”后面的字段
- xcodebuild -arch i386 -sdk iphonesimulator9.3
- 注意:如果你的项目是多“Target”的项目,那么你还需要指定一个Target,从而生成那个Target的模拟器包,命令如下:
- xcodebuild -arch i386 -sdk [iphonesimulator] -scheme [NameOfScheme]
- 运行成功后,在终端将输出一系列信息,并以** BUILD SUCCEEDED **结尾。
- 生成的模拟器包存储在这个路径:
- {Derive data directory}/build/Release-iphonesimulator/{projectname}.app
- 这一路径的具体信息在最后终端的输出信息中也可以找到。
- xcodebuild -arch i386 -sdk [iphonesimulator] -scheme [NameOfScheme]
- 注意:如果你的项目是多“Target”的项目,那么你还需要指定一个Target,从而生成那个Target的模拟器包,命令如下:
- xcodebuild -arch i386 -sdk iphonesimulator9.3
- 通过命令行启动iOS模拟器:
- brew install ios-sim
- ios-sim launch
- 在终端上运行下面的命令来查找你的机器上可用的SDK的版本:
- 用ios5.0模拟器(iphonesimulator5.0)建立工程
- $ xcodebuild -sdk iphonesimulator5.0
- 默认是Release工程,要设置成Debug模式如下:
- $ xcodebuild -sdk iphonesimulator5.0 -configuration Debug
- clean创建的工程
- $ xcodebuild clean -sdk iphonesimulator5.0 -configuration Debug
- 默认是Release工程,要设置成Debug模式如下:
- $ xcodebuild -sdk iphonesimulator5.0
- 创建模拟器包:
-
https://www.cnblogs.com/feifeidxl/p/4581369.html[Selenium] IOS 之 ios-driver
-
xcodebuild -showsdks
 image
image xcodebuild -arch i386 -sdk iphonesimulator9.3
-
在第一次运行 ios-driver 之前,应确保一下目录和文件的权限更新:
 image
image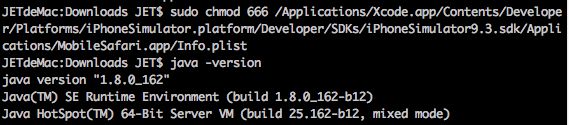 image
image -
先ios-driver网上下载ios-server-0.6.5-jar-with-dependencies.jar
 image
image image
image -
浏览器查看wd/hub/status,默认端口号为5555,可在浏览器中访问如下地址,如果看到类似JSON 对象的信息,则说明前述操作成功
 image
image
-
-
例子:
- 例子1:自动化操作iOS浏览器,打开百度网页等操作
- IDEA中添加 ios-server-0.6.5-jar-with-dependencies.jar 文件,因为需要库的支持org.uiautomation.ios.IOSCapabilities
- maven:
org.uiautomation ios-server 0.6.5
- 代码实例:
- 示例代码:
- package com.learningselenium.ios;
- import junit.framework.TestCase;
- import java.net.URL;
- import org.openqa.selenium.remote.RemoteWebDriver;
- import org.openqa.selenium.remote.DesiredCapabilities;
- import org.uiautomation.ios.IOSCapabilities;
- public class testiOSBaidu extends TestCase{
- public void testBaidu() throws Exception{
- //设置DesiredCapabilities,其中IOSCapabilities设置为iphone,如果程序运行在iPad模拟器上,可设置为ipad。
- //参数Safari 表示待测试程序的bundle name,因为这里是测试 Web 页面,默认是用 Safari 打开
- DesiredCapabilities safari = IOSCapabilities.iphone("Safari");
- RemoteWebDriver driver = new RemoteWebDriver(new URL("http://localhost:5555/wd/hub"), safari );
- driver.get("http://www.baidu.com");
- driver.close();
- }
- }
- 2.ios-driver 的 Native app 实例
- 接下来以苹果官网的示例程序 InternationalMountains 为例,对原生 app 的测试过程进行讲解,示例代码下载地址:
- https://developer.apple.com/legacy/library/samplecode/internationalMountains/introduction/intro.html
- 请确保app 程序和 UIAutomation已关联,方法如下:
- 在 Xcode 的菜单中选择 Product->Profile,并选择 Automation。该设定会构建 app 并启动 Instruments
- 将 Instruments 关闭,并在 Xcode 中选择 Window->Organizer->Projects,可看到 InternationalMountains.app 文件所在位置为:
- ~/Library/Developer/Xcode/DerivedData/InternationalMountainseordguimrxknwoaynobkvpirkacs/Build/Products/Debugiphonesimulator/InternationalMountains.app
- 接着进入刚下载的 ios-server-0.6.5-jar-with-dependencies.jar 的路径,执行如下命令:
- $ java -jar ios-server-0.6.5-jar-with-dependencies.jar -aut
- ~/Library/Developer/Xcode/DerivedData/InternationalMountainseordguimrxknwoaynobkvpirkacs/Build/Products/Debugiphonesimulator/InternationalMountains.app -port 4444
- 接下来确认 ios-driver 启动成功并可访问该 app,可通过浏览器访问如下地址,如果看到类似JSON 对象的信息,说明前述操作成功:
- http://localhost:4444/wd/htb/status
- 如果是在模拟器中运行app,则需要在启动 ios-driver 时使用 -simulators 参数,执行命令及打印信息:
- $ java -jar ios-server-0.6.5-jar-with-dependencies.jar -aut
- ~/Library/Developer/Xcode/DerivedData/InternationalMountainseordguimrxknwoaynobkvpirkacs/Build/Products/Debugiphonesimulator/InternationalMountains.app -port 4444 -simulators
- ... test can access the server at http://0.0.0.0:4444/wd/hub ...
- 应确保已经通过了 Xcode 启动了模拟器,否则需要通过浏览器查看 ios-driver 的启动状态是否正常
- 针对 InternationalMountains 的测试用例代码如下:
- package com.learningselenium.ios;
- import java.net.URL;
- import jave.util.List;
- import java.io.File;
- import junit.framework.TestCase;
- import org.openqa.selenium.By;
- import org.openqa.selenium.WebElement;
- import org.openqa.selenium.TakesScreenshot;
- import org.openqa.selenium.OutputType;
- import org.openqa.selenium.remote.RemoteWebDriver;
- import org.openqa.selenium.remote.DesiredCapabilities;
- import org.openqa.selenium.remote.Augmenter;
- import org.uiautomation.ios.IOSCapabilities;
- public class testiOSInternationalMountains extends TestCase{
- public void testInternationalMountains() throws Exception{
- DesiredCapabilities nativeAppCap= IOSCapabilities.iphone("InternationalMountains", "1.1");
- RemoteWebDriver driver = new RemoteWebDriver(new URL("http://localhost:4444/wd/hub"), nativeAppCap);
- List
cells = driver.findElement(By.className("UIATableCell")); - assertEquals(9, cells.size());
- WebElement first = cells.get(0); //操作列表中第一个元素
- first.click();
- //截屏操作和操作页面元素
- TaksScreenshot screen = (TaksScreenshot ) new Augmenter().augment(driver);
- File ss = new File("screenshot.png");
- screen.getScreenshotAs(OutputType.FILE).renameTo(ss);
- System.out.println("screenshot take:" + ss.getAbsolutePath());
- By selector = By.xpath("//UIAStaticText[contains(@name, ‘climbed’)]");
- WebElement text = driver.findElement(selector);
- System.out.println(text.getAttribute("name"));
- driver.quit();
- }
- }
- 如果需要在真实设备上运行app,则需要在启动 ios-driver 时使用 -beta 参数,执行命令:
- $ java -jar ios-server-0.6.5-jar-with-dependencies.jar -beta -port 4444
- 3. ios-driver 的源码编译
- https://github.com/ios-driver/ios-driver 源码(git/clone ios-driver-dev.zip)
- 在解压后的源码根目录执行如下命令:
- sudo mvn clean package
- 或
- sudo mvn clean install
- 如果编译成成,会看到如下日志:
- ...
- [INFO]BUILD SUCCESS
- ...
- build without the tests : mvn package -DskipTests
- https://github.com/ios-driver/ios-driver 源码(git/clone ios-driver-dev.zip)
- 4. Web app 或混合式 app
- 针对这种方式的 app,需要用到远程 Webkit 的调试协议,并且 iOS 的版本要求为6+,Safari 的版本要求为6+。如果无法满足以上条件,也可继续测试原生 app,但无法在 Safari 上运行 Web 页面,也不能使用 DOM 选择器来与 UIWebviews 交互。
- 例子1:自动化操作iOS浏览器,打开百度网页等操作