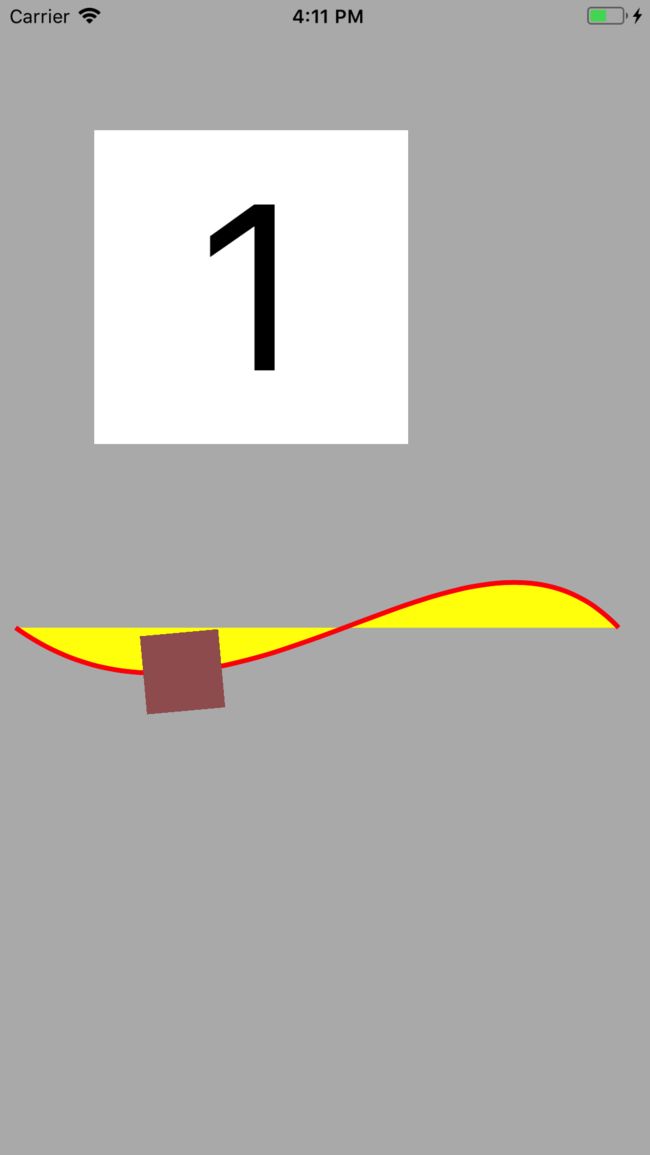
动画只是Core Animation特性的冰山一角
Core Animation功能
Core Animation自身并不是一个绘图系统。它只是一个负责在硬件上合成和操纵应用内容的基础构件。
视图层级 图层树 呈现树 渲染树 组成
视图:
UIVIew类都是从UIView基类(父类)派生出来的,UIview用来处理触摸事件,做一些简单的动画效果(累死滑动 渐变)
每一个UIView都有一个CAlayer实例图层属性!!!
CALayer类 管理子图层的位置,不关心任何响应事件,不处理用户的交互,他有一些方法和属性来做动画效果 注:CALayer处理响应事件有 -containsPoint:和-hitTest:帮你处理 。 下面会讲到
UIView没有暴露出来的CALayer的功能:
阴影,圆角,带颜色的边框 3D变换 非矩形范围 透明遮罩 多级非线性动画
CALayer之 contents属性:ID属性(给CGImage类型,但真正赋值的内容是CGimageRef)
//CGimageRef 是指向CGImage结构的指针
layer.contents = (__bridge id)image.CGImage;
这样我们就可以不需要额外的图层 直接在ayerView的宿主图层contents属性设置图片了!
- (void)viewDidLoad {
[super viewDidLoad];
UIImage *image = [UIImage imageNamed:@"xxx"];
self.view.layer.contents = (__bridge id)image.CGImage;
//图片变形处理上
//self.view.contentMode = UIViewContentModeScaleAspectFit;
// contentMode操作对应的是应用层
// CALayer 对应的是 contentsGravity
self.view.layer.contentsGravity = kCAGravityResizeAspect;
}
/*
NSString * const kCAGravityCenter
NSString * const kCAGravityTop
NSString * const kCAGravityBottom
NSString * const kCAGravityLeft
NSString * const kCAGravityRight
NSString * const kCAGravityTopLeft
NSString * const kCAGravityTopRight
NSString * const kCAGravityBottomLeft
NSString * const kCAGravityBottomRight
NSString * const kCAGravityResize
NSString * const kCAGravityResizeAspect
NSString * const kCAGravityResizeAspectFill
*/
使用contentsGravity替换contentMode
// self.view.contentMode = UIViewContentModeScaleAspectFit;
//NSString类型
self.view.layer.contentsGravity = kCAGravityResizeAspect;
layout 还有:
contentScale (定义尺寸 视图大小比例 ) 这里我就不多说了
masksToBounds(显示是否超出边界的内容) 这里我就不多说了
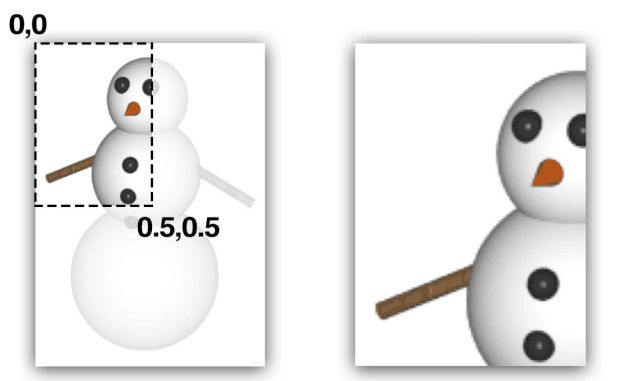
contentsRect(默认是{0,0,1,1}) <大概说说>
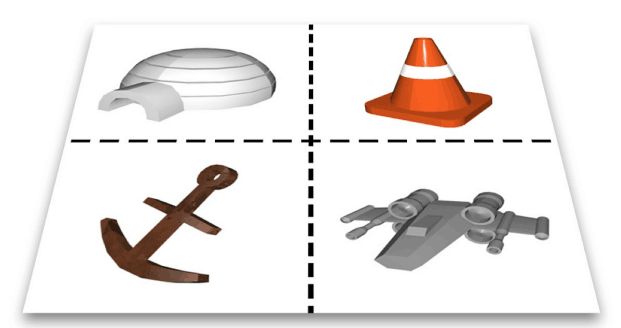
拼接图片:
UIImage *img = [UIImage imageNamed:@"yyy.png"];
[self addSpriteImage:img withContentRect:CGRectMake(0, 0, 0.5, 0.5)];
[self addSpriteImage:img withContentRect:CGRectMake(0.5, 0, 0.5, 0)];
[self addSpriteImage:img withContentRect:CGRectMake(0, 0.5, 0, 0.5)];
[self addSpriteImage:img withContentRect:CGRectMake(0.5, 0.5, 0, 0)];
}
-(void)addSpriteImage:(UIImage*)img withContentRect:(CGRect)rect{
self.view.layer.contents = (__bridge id)img .CGImage;
self.view.layer.contentsGravity = kCAGravityResizeAspect;
self.view.layer.contentsRect = rect;
}
contentsCenter CGRect 定义一个固定的边框和在图层上可拉伸的区域) 例如:我们的聊天框(边框不变 拉伸中间1个像素可以根据文字改变聊天框的大小)这些切割都会用到。这里我就不多说了
下面我们聊聊绘制图
继承UIView 实现-drawRect:方法
:
1、如果UIView检测到这个方法 方法会被调用(利用Core Graphics绘制) 会分配一个寄宿图 像素尺寸=视图大小*contentsScale(默认1.0浮点数 讲过)
如果不需要就不要创建 这会造成CUP资源和内存浪费:所以苹果建议如果没有自定义的代码任务不要在子类中写一个这个方法
2、然后内容被缓存起来 直到更新调用:-setNeedDisplay方法
需要重绘时 CALayer 调用 (void)displayLayer:(CALayer*)layer;来请求它的代理
如果代理不实现displayLayer:方法 CALayer会尝试调用-(void)drawLayer:(CALayer*)layer inContext:(CGContextRef)ctx;
绘制图时你也不必要实现-displayLayer:和-drawLayer:inContext: 通常做法是实现UIView的drawRect:方法 UIView会帮你做完剩余的工作 包括需要重绘的时候调用-display方法。
下面我们再聊聊 --图层几何学
UIView有三种比较重要的布局:frame bounds center
CALayer对应的叫:frame bounds position
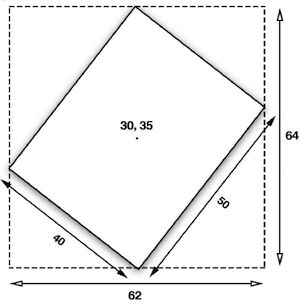
frame:当旋转 变换后可能和bounds的宽高不一致:
frame实际上是代表覆盖在图层旋转之后的整个轴对齐的矩形区域 如图所示:
锚点 anchorPoint(默认{0.5,0.5})
视图的center 和图层的position属性都是指定了anchorPoint的对与父图层位置
图层的anchorPoint通过position控制frame的位置 anchorPoint属性并没有被UIView接口暴露出来,这也是视图的position属性叫做“center”的原因。
CALayer坐标系 里的z轴
CALayer存在于三维空间中 zPosition和 anchorPointZ,都是Z轴上描述图层位置的浮点类型
-(void)viewDidLoad{
[super viewDidLoad];
//redView在前 greenView在后 我们可以使用下面的方法将greenView前置
self.greenView.layer.zPosition = 1.0f;
}
HitTesting
CALayer处理响应事件 -containsPoint:和-hitTest:
使用containsPoint判断被点击的图层 (接收CGPoint类型参数 )
使用hitTest判断被点击的图层(接收CGPoint类型参数 返回图层本身)测算顺序依赖图层树顺序(UIView处理事件类似)
{
如果改变了图层Z轴的顺序,就不能检查到最前方的视图点击事件!!!
虽然在屏幕上顺序是在前面 但是不能改变传递的顺序!!!
}
自动布局
UIViewAutoresizingMask和
NSLayoutConstraint API
但如果想随意控制CALayer的布局,就需要手动操作 使用:CALayerDelegate的
-(void)layoutSublayersOfLayer:(CALayer*)layer;
执行这个方法的条件:
1、bounds发生改变
2、-setNeedLayout方法被调用
这里插入一个知识点:
-setNeedsLayout方法: 标记为需要重新布局,异步调用layoutIfNeeded刷新布局,不立即刷新,但layoutSubviews一定会被调用
-layoutIfNeeded方法:如果,有需要刷新的标记,立即调用layoutSubviews进行布局(如果没有标记,不会调用layoutSubviews)
而layoutSubviews 被触发是:
1️⃣、init初始化不会触发layoutSubviews
但是是用initWithFrame 进行初始化时,当rect的值不为CGRectZero时,也会触发
2️⃣、addSubview会触发layoutSubviews
3️⃣、设置view的Frame会触发layoutSubviews,当然前提是frame的值设置前后发生了变化
4️⃣、滚动一个UIScrollView会触发layoutSubviews
5️⃣、旋转Screen会触发父UIView上的layoutSubviews事件
6️⃣、改变一个UIView大小的时候也会触发父UIView上的layoutSubviews事件
总结:这就是为什么我们不单独使用图层 而是使用视图来构建应用程序的原因之一了
视觉效果:
圆角 conrnerRadius 设置圆角曲率 (浮点型)
只影响背景颜色 不影响背景图片和子图层
设置masksToBounds = yes 可以将图层里面的东西截取掉
图层边框 borderWidth(浮点型) 和 borderColor(默认是黑色 CGColorRef类型)
阴影 shadowOpacity(默认值0 ;>0时可以显示在任意图层之下;类型:0-1的浮点数)
shadowColor(CGColorRef类型)
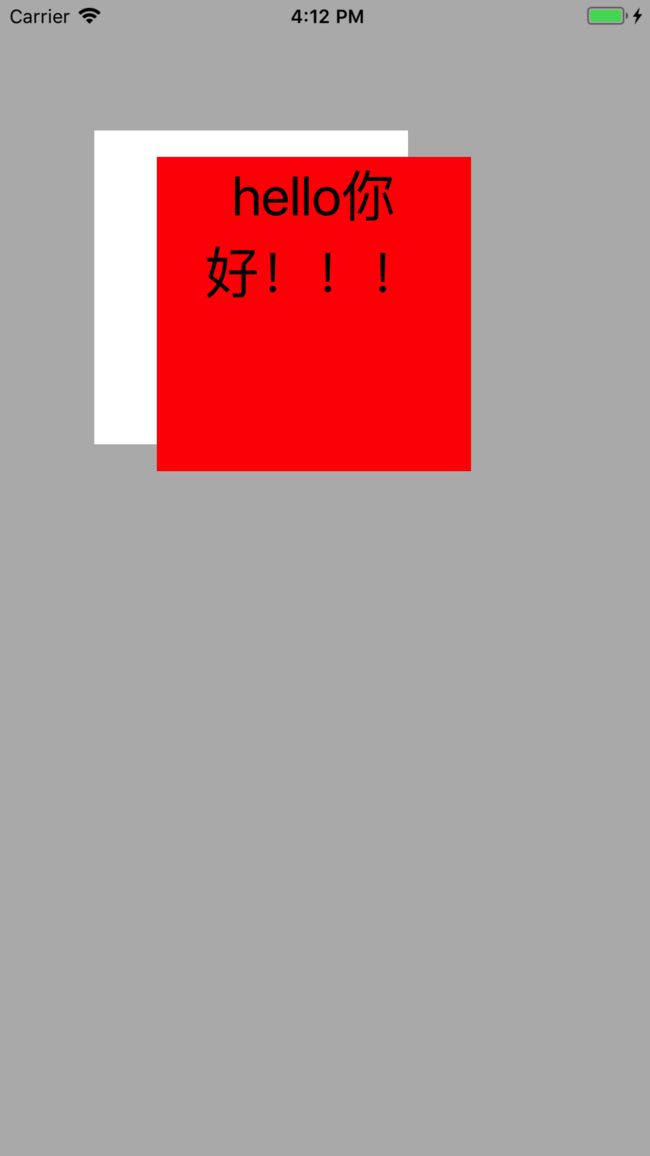
shadowOffset(小编做了demo 阴影是CGSize类型,坐标圆点是从本体的左上角开始的)
注:默认值是:(0,-3)向上投影
shadowRadius 控制阴影的模糊(半径)面积大小
shadowPath 属性提高代码绘制阴影的性能 代码如下:
- (void)viewDidLoad {
[superviewDidLoad];
CALayer*layer = [[CALayeralloc]init];
layer.frame=CGRectMake(100,100,100,100);
layer.backgroundColor= [UIColorredColor].CGColor;
[self.view.layeraddSublayer:layer];
layer.shadowOpacity=1.0;
layer.shadowColor= [UIColorblackColor].CGColor;
layer.shadowOffset=CGSizeMake(5,5);
layer.shadowRadius=10;
CGMutablePathRefmuPath =CGPathCreateMutable();
// add 矩形和圆形有单独的方法 其它的使用UIBezierPath类绘制
CGPathAddRect(muPath,NULL,CGRectMake(0,0,100,200));
layer.shadowPath= muPath;
// release
CGPathRelease(muPath);
}
图层蒙版 mask
- (void)viewDidLoad {
[superviewDidLoad];
UIImage*img = [UIImageimageNamed:@"222.png"];
UIImageView* imgView = [[UIImageViewalloc]initWithFrame:CGRectMake(20,100,300,300)];
imgView.image= img;
[self.view addSubview:imgView];
CALayer* layer = [CALayer layer];
layer.frame=CGRectMake(50,50,100,100);//坐标是从imgView的左上角开始的
// 上面已经讲解了加载img的方式图片加到蒙版上
layer.contents= (__bridgeid)img.CGImage;
//设置imgViewlayer为自定义的layer
imgView.layer.mask=layer;
}
效果图:
拉伸过滤
属性
minificationFilter(缩小)
magnificationFilter(放大)
三种过滤器
线性过滤保留了形状,最近过滤保留了像素的差异
kCAFilterLinear 线性滤波(双线性滤波)
kCAFilterNearest 取样最近的单像素点
kCAFilterTrilinear 三线性滤波
组透明 opacity
shouldRasterize :YES (图层及子图层都会被整合成衣蛾整体的图片)
当然还得需要设置:rasterizationScale = [UIScreen mainScreen].scale;
(防止出现Retina屏幕像素化)
变换
仿射变换
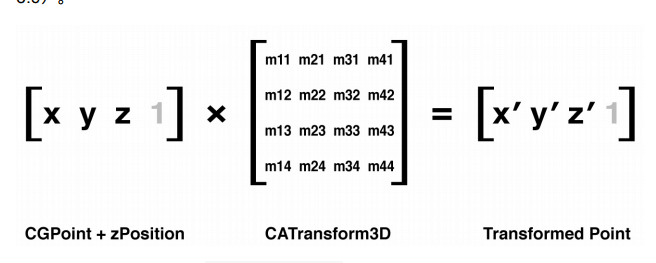
CGPoint
CGAffineTransform
Transformed CGPoint
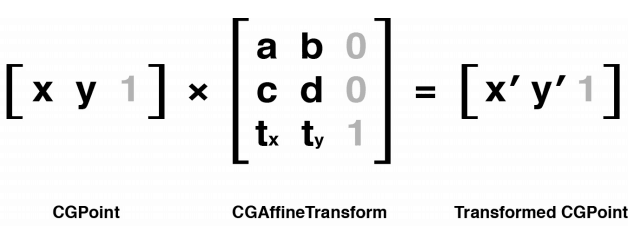
使用CGpoint的每一列和CGAffineTransform矩阵的每一行对应的元素相乘再求和,就形成了新的CGPoint类型的结果。
如果觉得矩阵不好理解 苹果还提供了三个API
先缩小50% 再旋转30度 最后右移动200像素
CGAffineTransformtramsform =CGAffineTransformIdentity;//初始化一个空的 没有任何变化的tramsform
tramsform =CGAffineTransformScale(tramsform,0.5,0.5);//缩小50%
tramsform =CGAffineTransformRotate(tramsform,M_PI/180.0*30);//旋转30度
tramsform =CGAffineTransformTranslate(tramsform,200,0);//右移
myView.layer.affineTransform = tramsform;
3D变换
CGPoint zPosition CaTransfrom3D Transformed Point
比较2D 平移和旋转多出了 Z轴
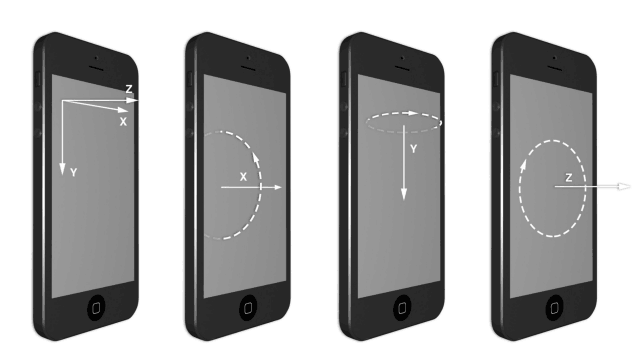
X Y Z 轴的方向:
移动:
x 向右 正数
y 向下 正数
z 向屏幕前 正数
旋转:
x 上边界向屏幕里面倒 正数
y 右边界向屏幕里面倒 正数
z 顺时针旋转 正数
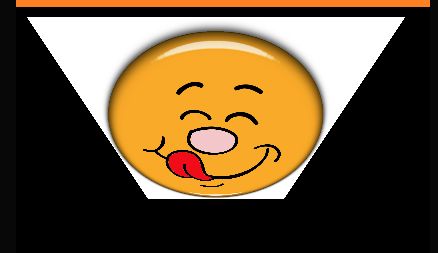
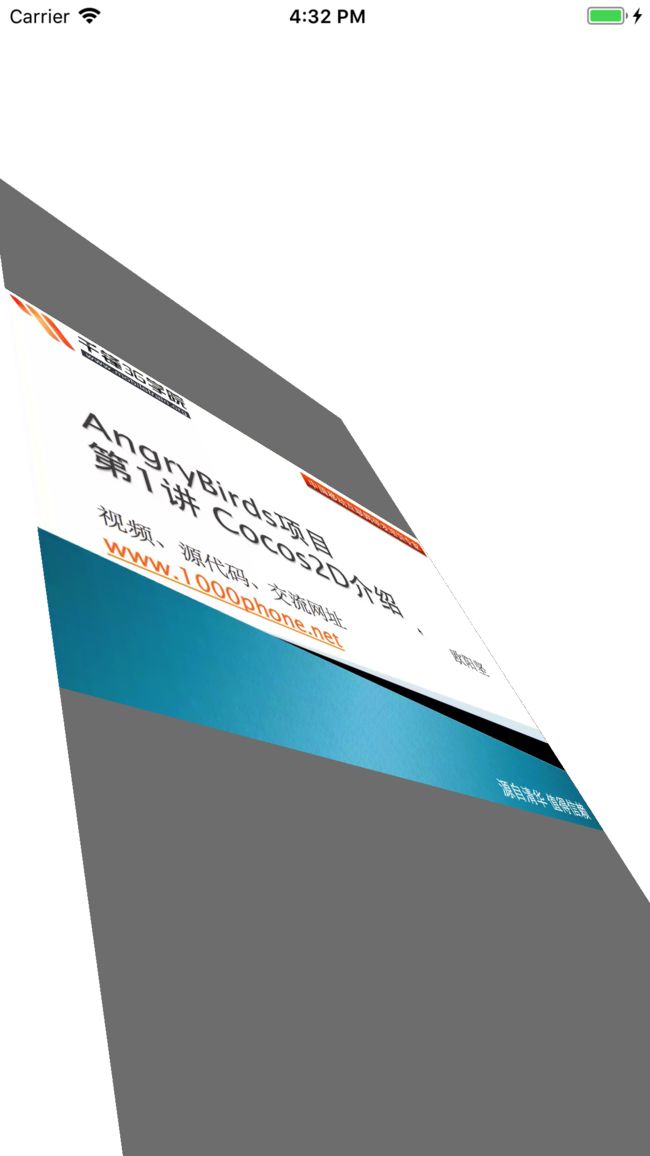
透视效果:M34
m34 用来计算到底离视角多远(默认是0)
-1.0/d
1、负数表示上边界透视
2、/d d 表示想象中视角相机和屏幕之间的距离(像素) 距离越大偏的越小(实际生活中想象一下)
self.view.backgroundColor= [UIColorblackColor];
UIImageView* imgView = [[UIImageViewalloc]initWithImage:[UIImageimageNamed:@"222"]];
imgView.frame=CGRectMake(100,44,200,200);
imgView.backgroundColor= [UIColorwhiteColor];
[self.viewaddSubview:imgView];
CATransform3Dtrans3d =CATransform3DIdentity;
trans3d.m34=1.0/150;
trans3d =CATransform3DRotate(trans3d,M_PI_4,1,0,0);
imgView.layer.transform= trans3d;
灭点
这个点被 Core Animation定义在 锚点anchorPoint 位置上 默认{0.5,0.5}上面讲到过
一个视图还好说 但是多个视图怎么办?????
sublayerTransForm 使用
概论的我就不多说了,举个例子
我们先创建一个容器backGroundView.layer
使用sublayerTransForm 于是所以的子图层都会自动继承这个变换方法。这样灭点就在容器的中点了 再使用CATransform3DMake...设置各个子图层变换
背面
CALayer 的doubleSided可以设置图层的背面是否被绘制 YES/NO
默认是可以绘制的
扁平化图层
每个视图都存在不同的3D空间里 每个图层的3D场景都是扁平化的 这个3D 效果仅仅是绘制在图层的表面。所以场景里面的东西不会随着观察的角度的改变而发生改变,图层也是同样的道理
固态对象
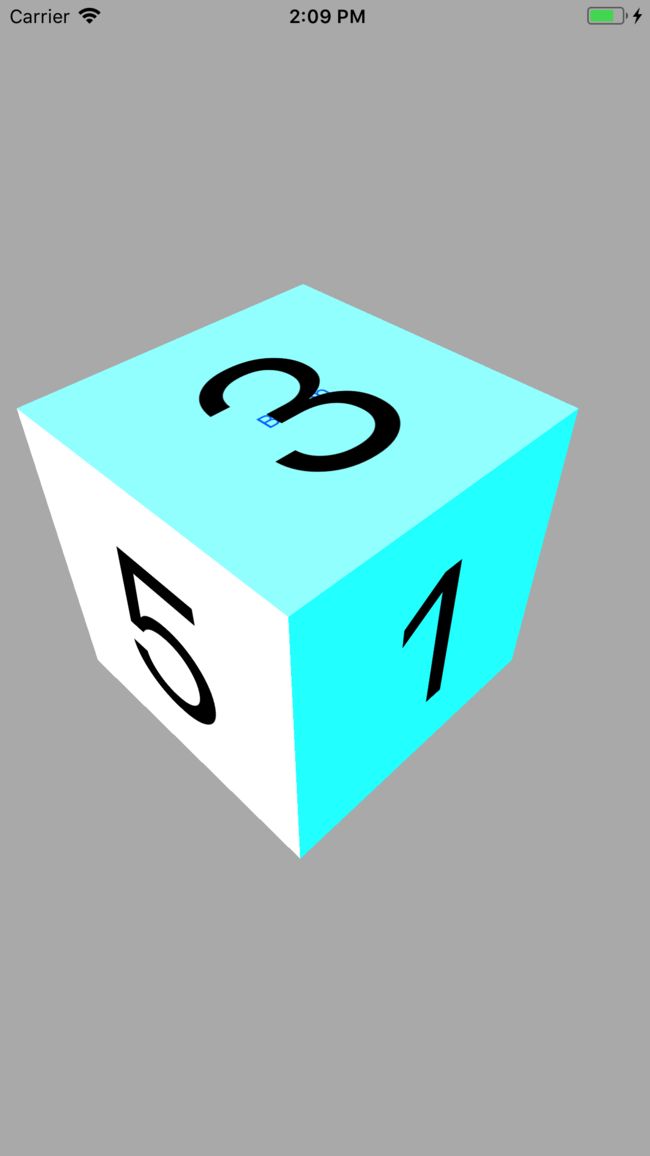
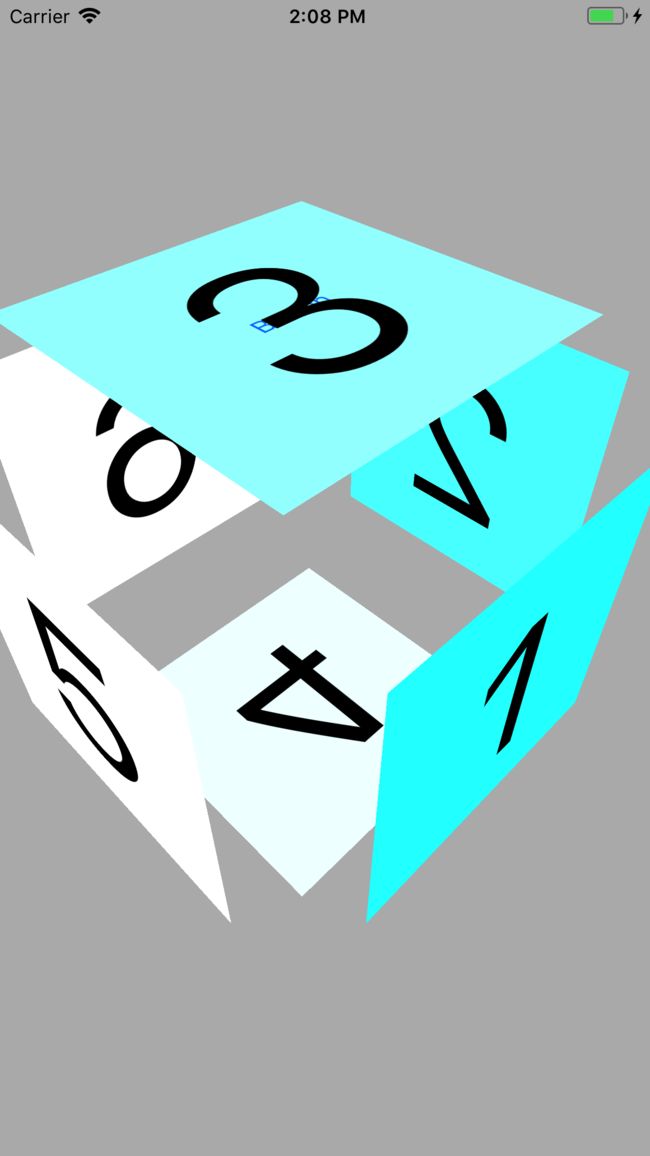
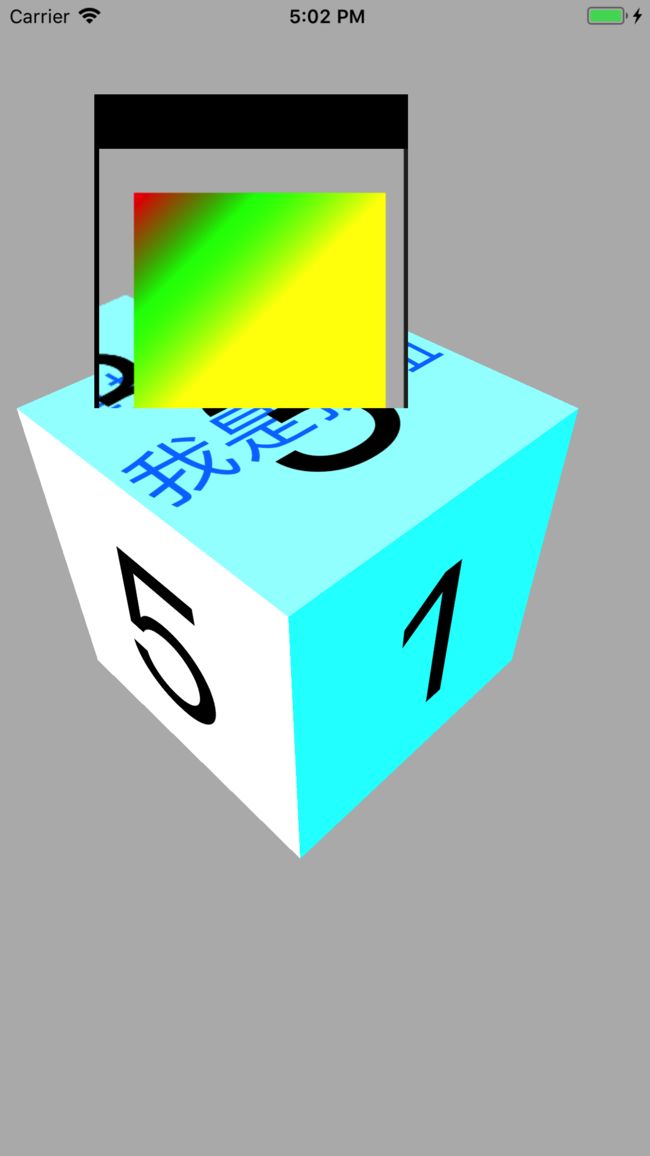
我们来用六个独立的视图来构成立方体的各个面
先上图 再发代码
打散点 再看一下 实现方法:
int off=CGRectGetWidth(v.frame)/2+50;
代码如下
#import"ViewController.h"
@interfaceViewController()
@property(weak,nonatomic)IBOutletUIView*containerView;
@property(strong,nonatomic)IBOutletCollection(UIView)NSArray* views;
@end
@implementationViewController
- (void)viewDidLoad {
[superviewDidLoad];
CATransform3Dperspective =CATransform3DIdentity;
perspective.m34= -1.0/500.0;
perspective =CATransform3DRotate(perspective, -M_PI_4,1,0,0);
perspective =CATransform3DRotate(perspective,M_PI_4,0,1,0);
self.containerView.layer.sublayerTransform= perspective;
UIView*v =self.views[0];
//这里设置视图边长的一半
intoff=CGRectGetWidth(v.frame)/2;
[selfcreate3DViews:off];
}
-(void)create3DViews:(NSInteger)off{
//正边"1"的界面
CATransform3Dtransform =CATransform3DMakeTranslation(0,0, off );
[selfaddView:0withTransform:transform];
//右边"2"的界面
transform =CATransform3DMakeTranslation(off,0,0);
transform =CATransform3DRotate(transform,M_PI_2,0,1,0);
[selfaddView:1withTransform:transform];
//上面"3"的界面
transform =CATransform3DMakeTranslation(0, -off,0);
transform =CATransform3DRotate(transform,M_PI_2,1,0,0);
[selfaddView:2withTransform:transform];
//下面"4"的界面
transform =CATransform3DMakeTranslation(0, off,0);
transform =CATransform3DRotate(transform, -M_PI_2,1,0,0);
[selfaddView:3withTransform:transform];
//左边"5"界面
transform =CATransform3DMakeTranslation(-off,0,0);
transform =CATransform3DRotate(transform, -M_PI_2,0,1,0);
[selfaddView:4withTransform:transform];
//正面背面"6"的界面
transform =CATransform3DMakeTranslation(0,0, -off);
transform =CATransform3DRotate(transform,M_PI,0,1,0);
[selfaddView:5withTransform:transform];
}
-(void)addView:(NSInteger)index withTransform:(CATransform3D)transform{
UIView* view =self.views[index];
[self.containerViewaddSubview:view];
index+=index;
view.backgroundColor= [UIColorcolorWithRed:index*40/255.fgreen:1blue:1alpha:1];
CGSizecontainerSize =self.containerView.bounds.size;
view.center=CGPointMake(containerSize.width/2.0, containerSize.height/2.0);
view.layer.transform= transform;//分别变换
}
- (void)didReceiveMemoryWarning {
[superdidReceiveMemoryWarning];
// Dispose of any resources that can be recreated.
}
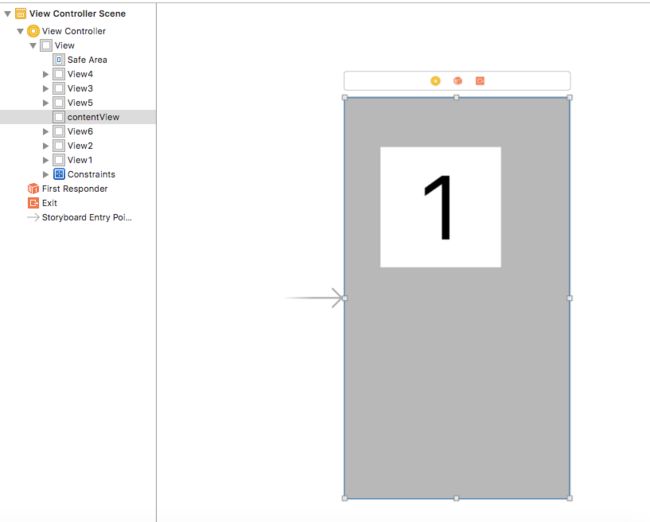
xib截图如下
光亮和阴影
正太向量:垂直于表面的向量(书上概论的我就不说了,其实我自己也不知道,而且也没必要知道这玩意)
我们需要用到GLKit框架
没一个CATransform3D都被转换成GLMatrix4,然后通过GLMatrix4GLMatrix3 函数得到一个3x3的旋转矩阵(指定了图层的方向)可以使用它得到正太向量的值。
在上面代码的-(void)addView:(NSInteger)index withTransform:(CATransform3D)transform 方法里面调用
[self applyLightToViews:view.layer];方法
-(void)applyLightToViews:(CALayer*)view{
floatAMBIENT_LIGHT =50;
floatLIGHT_DIFAULT =50;
CALayer*layer = [CALayerlayer];
layer.frame= view.bounds;
[viewaddSublayer:layer];
CATransform3Dtransform = view.transform;
GLKMatrix4matrix4 = *(GLKMatrix4*)&transform;
GLKMatrix3matrix3 =GLKMatrix4GetMatrix3(matrix4);
GLKVector3normal =GLKVector3Make(0,0,1);
normal =GLKMatrix3MultiplyVector3(matrix3, normal);
normal =GLKVector3Normalize(normal);
GLKVector3light =GLKVector3Normalize(GLKVector3Make(LIGHT_DIFAULT,0,0));
floatdotProduct =GLKVector3DotProduct(light, normal);
CGFloat shadow =1+dotProduct-AMBIENT_LIGHT;
layer.backgroundColor = [UIColor colorWithWhite:0alpha:shadow].CGColor;
}
大概意思就是再加一层layer 我觉得也不是很实用 ,代码已经贴出来了 ,有这方面需求的可以继续扩展,这里就不详细说明了。
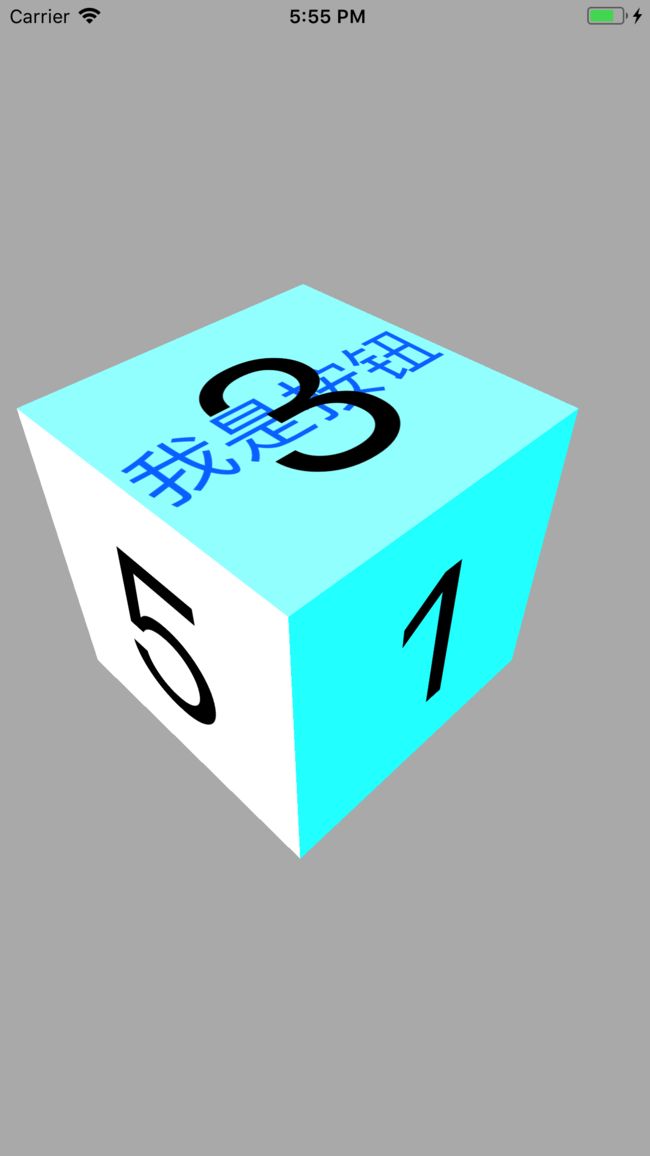
点击事件
由于添加View的顺序不一样 3界面的被4 5 6 界面遮挡 导致无法响应点击事件。
可以设置userInteractionEnabled属性为NO 保留3 界面YES
或者把视图3 覆盖到6上(其他几个界面不冲突)
绘制图层 CAShapeLayer
CAShapeLayer和Core Graphics相比 优势 (了解一下就好)
渲染快速
高速使用内存(不需要CALayer一样 需要寄宿图层)
不会被图层边界剪切
不会出现像素化
创建一个CGPath
可以使用paintcode工具进行绘制 然后创建CAShapLayer 调用shaplayer.path 赋值path 最后加载layer
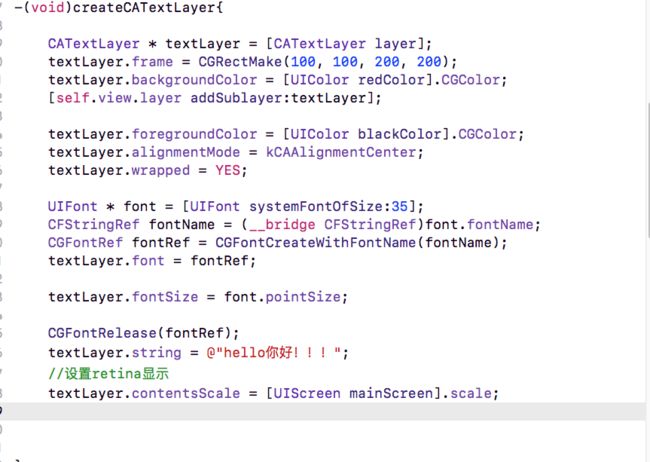
CATextLayer
富文本
有兴趣的老铁可以研究一下Core Text 都是iOS3.2之后的功能
.h页面
#import@class UIColor;
typedef enum
{
left,
center,
right,
}ZFTextAlignment;
typedef void(^LabelTextBlock)(NSRange range,UIColor *fuColor);
typedef void(^LabelTextBlockMore)(NSRange range);
@interface ZF_CATextLabel : CATextLayer
//基础样式
-(instancetype)createCATextLayerWithFrame:(CGRect)frame fontSize:(CGFloat)fontSize textColor:(UIColor*)color textAlignment:(ZFTextAlignment)alignment textString:(NSString*)str;
//特殊样式(富文本)// 这里没必要使用copy
@property (nonatomic, strong) LabelTextBlock labelBlock;
@property (nonatomic, strong) LabelTextBlockMore labelMoreBlock;
@end
.m页面
#import "ZF_CATextLabel.h"#import#import@implementation ZF_CATextLabel
-(instancetype)createCATextLayerWithFrame:(CGRect)frame fontSize:(CGFloat)fontSize textColor:(UIColor*)color textAlignment:(ZFTextAlignment)alignment textString:(NSString*)str{
if ([super init]) {
self.frame = frame;
self.foregroundColor = color.CGColor;
self.alignmentMode = [self ZFTextAlignment:alignment];
self.wrapped = YES;
UIFont * font = [UIFont systemFontOfSize:fontSize];
CFStringRef fontName = (__bridge CFStringRef)font.fontName;
CGFontRef fontRef = CGFontCreateWithFontName(fontName);
self.font = fontRef;
self.fontSize = font.pointSize;
CGFontRelease(fontRef);
self.string = str;
//设置retina显示
self.contentsScale = [UIScreen mainScreen].scale;
//////////////////////////////////////////////////////////////////////
__weak typeof(self) weakSelf = self;
self.labelBlock = ^(NSRange range, UIColor *fuColor) {
NSMutableAttributedString *string = nil;
string = [[NSMutableAttributedString alloc] initWithString:str];
//convert UIFont to a CTFont
CFStringRef fontName2 = (__bridge CFStringRef)font.fontName;
CGFloat fontSize2 = font.pointSize;
CTFontRef fontRef2 = CTFontCreateWithName(fontName2, fontSize2, NULL);
//set text attributes
NSDictionary *attribs = @{
(__bridge id)kCTForegroundColorAttributeName:(__bridge id)color.CGColor,
(__bridge id)kCTFontAttributeName: (__bridge id)fontRef2
};
[string setAttributes:attribs range:NSMakeRange(0, [string length])];
attribs = @{
(__bridge id)kCTForegroundColorAttributeName: (__bridge id)fuColor.CGColor,
(__bridge id)kCTUnderlineStyleAttributeName: @(kCTUnderlineStyleSingle),
(__bridge id)kCTFontAttributeName: (__bridge id)fontRef2
};
[string setAttributes:attribs range:range];
weakSelf.labelMoreBlock = ^(NSRange range) {
[string setAttributes:attribs range:range];
weakSelf.string = string;
};
//release the CTFont we created earlier
CFRelease(fontRef);
//set layer text
weakSelf.string = string;
};
}
return self;
}
//设置对齐方式
-(NSString*)ZFTextAlignment:(ZFTextAlignment)alignment{
NSString * left = kCAAlignmentLeft;
NSString * center = kCAAlignmentCenter;
NSString * right = kCAAlignmentRight;
switch (alignment) {
case 0:
return left;
break;
case 1:
return center;
break;
case 2:
return right;
break;
default:
break;
}
}
controller 调用
ZF_CATextLabel * label = [[ZF_CATextLabel alloc]init];
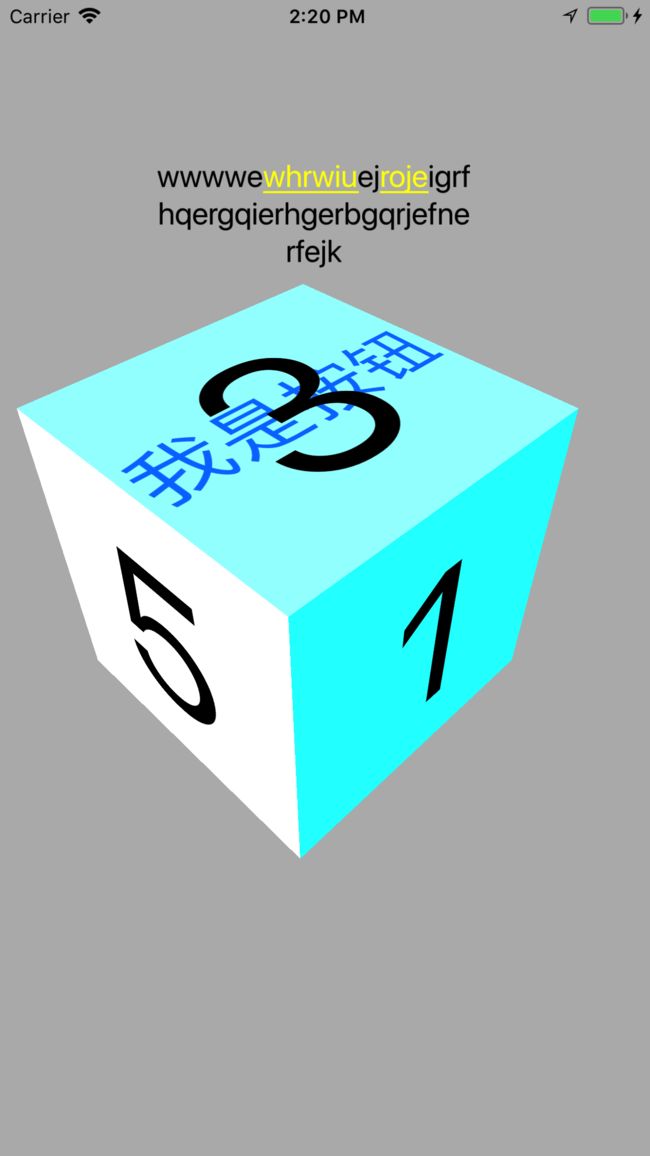
[label createCATextLayerWithFrame:CGRectMake(100, 100, 200, 200) fontSize:20 textColor:[UIColor blackColor] textAlignment:center textString:@"wwwwewhrwiuejrojeigrfhqergqierhgerbgqrjefnerfejk"];
label.labelBlock(NSMakeRange(5, 6), [UIColor yellowColor]);
label.labelMoreBlock(NSMakeRange(13, 4));
[self.view.layer addSublayer:label];
效果图:
CATransformLayer
构造复杂的3D事物(用于构造一个层级的3D结构)
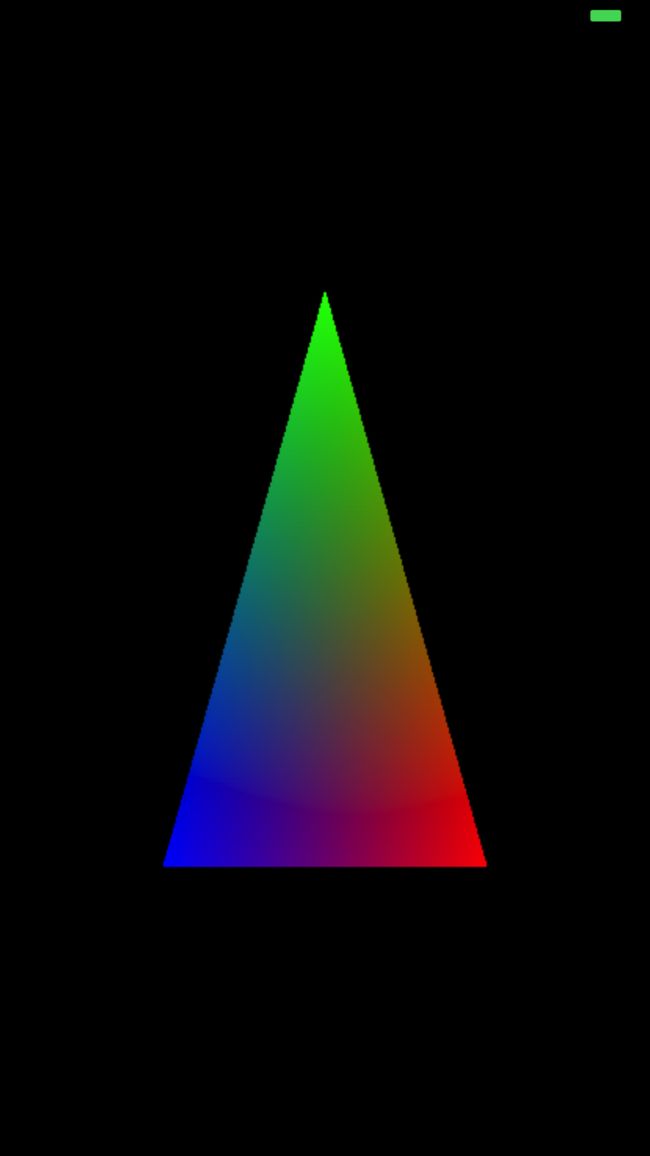
CAGradientLayer 渐变
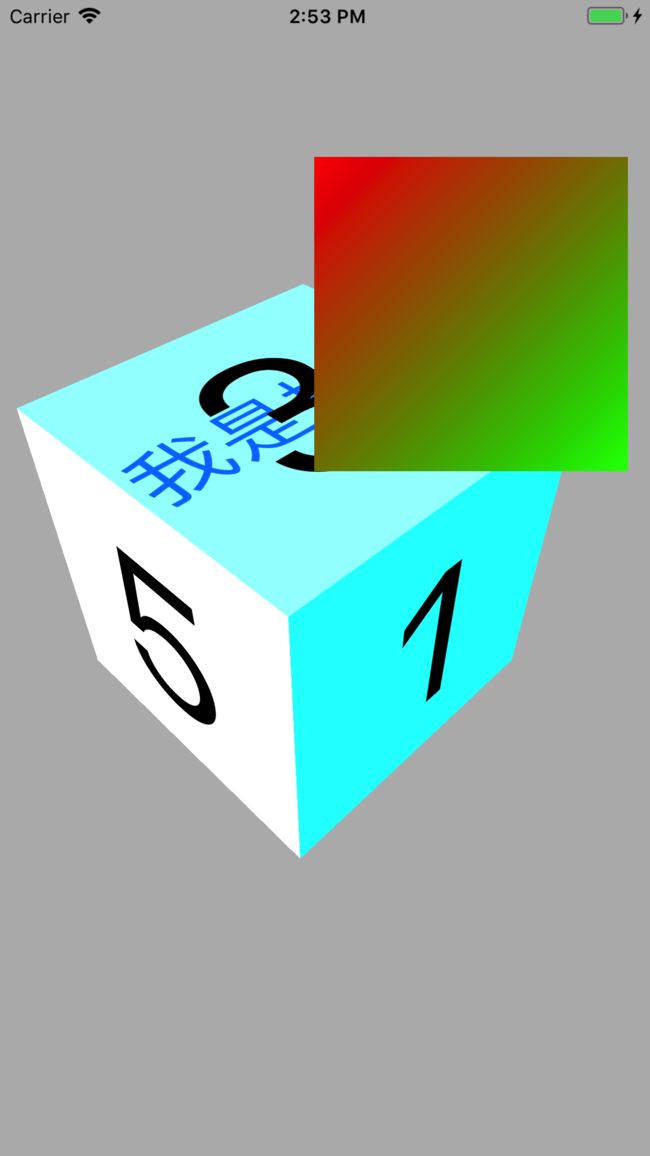
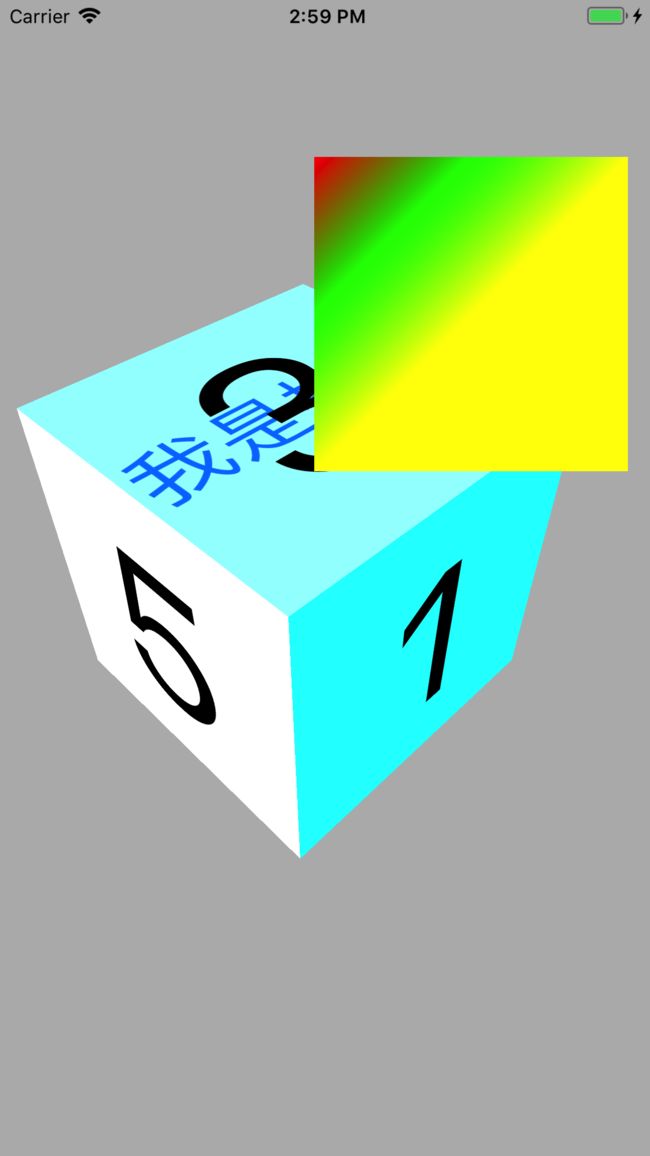
用来生成两种或多种颜色平滑渐变
双色效果
多色效果+locations
代码:
CAReplicatorLayer(生成相似图层)
扩展用于投影 反射:
CAScrollLayer
CALayer *layer = [CALayer layer];
UIImage *image = [UIImage imageNamed:@"xxx"];
layer.contents = (__bridge id)image.CGImage;
[self.view.layer addSublayer:layer];
scrollLayer = [CAScrollLayer layer];
scrollLayer.backgroundColor = [UIColor blackColor].CGColor;
scrollLayer.frame = CGRectMake(60, 60, 200, 200);
layer.frame = scrollLayer.frame;
[scrollLayer addSublayer:layer];
[self.view.layer addSublayer:scrollLayer];
UIPanGestureRecognizer *pan = [[UIPanGestureRecognizer alloc]initWithTarget:self action:@selector(changes:)];
[self.view addGestureRecognizer:pan];
}
-(void)changes:(UIPanGestureRecognizer*)pan{
CGPoint translation = [pan translationInView:self.view];
CGPoint origin = scrollLayer.bounds.origin;
origin = CGPointMake(origin.x-translation.x, origin.y-translation.y);
[scrollLayer scrollToPoint:origin];
[pan setTranslation:CGPointZero inView:self.view];
}
效果图
CATiledLayer加载大图(大图分解成小片)
http://blog.sina.com.cn/s/blog_7192ec8e0100qz8m.html
Retina小图
layer.contentsScale = [UIScreen mainScreen].scale;
意味着图将会以一半的大小渲染在Retina设备上
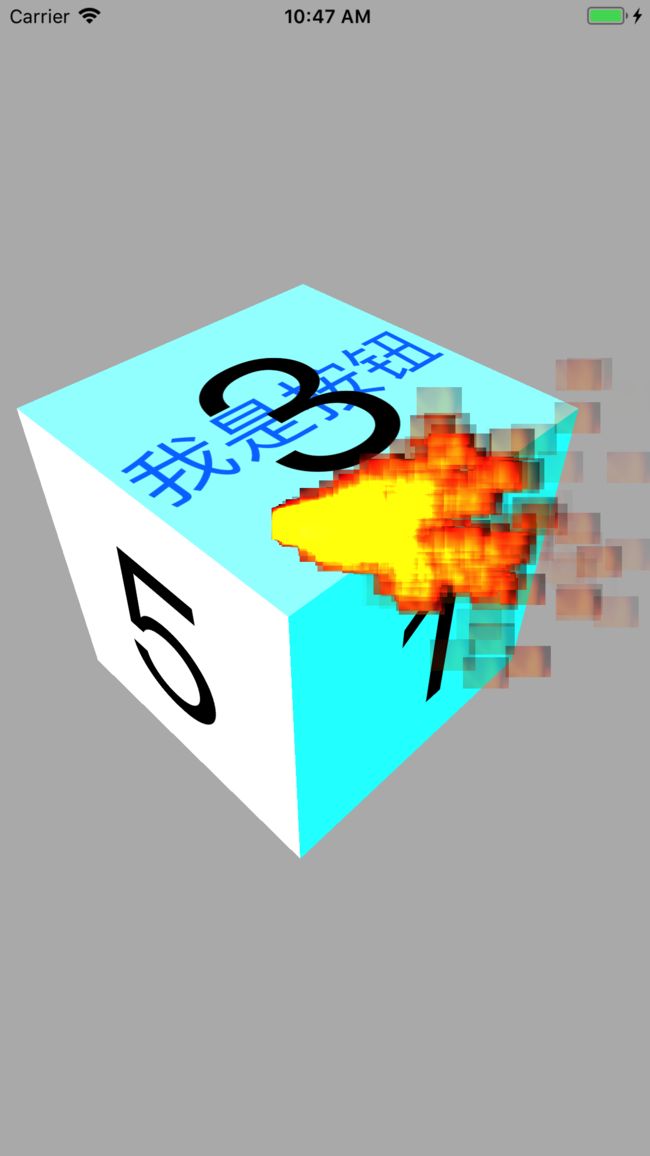
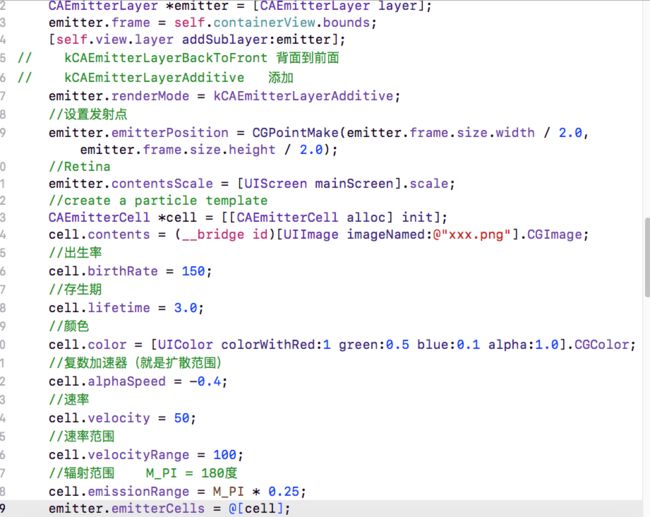
CAEmitterLayer(粒子引擎)
Emitter:发射器
CAEAGLLayer(处理高性能图形绘制)
引入(GLKit)(OpenGLES)框架
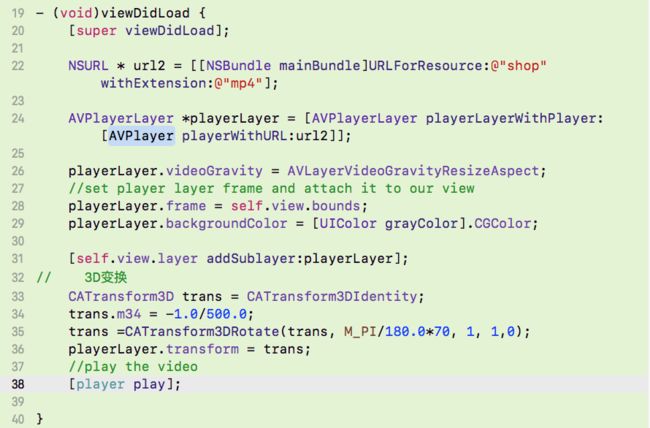
AVPlayerLayer(iOS上播放视频)
需要添加AVFoundation框架
动画
隐式动画 (没有指定动画的类型)
事务(包含一系列属性动画集合的机制,当事务提交时,开始用一个动画过渡到新值)
[CATransaction begin];
/**
* 中间设置CATransaction的变化
**/
[CATransaction commit];
显示动画
属性动画
使用kvc对动画打标签
@property (nonatomic, weak) IBOutlet UIImageView *hourHand;
@property (nonatomic, weak) IBOutlet UIImageView *minuteHand;
@property (nonatomic, weak) IBOutlet UIImageView *secondHand;
@property (nonatomic, weak) NSTimer *timer;
@end
@implementation ViewController
- (void)viewDidLoad {
[super viewDidLoad];
self.secondHand.layer.anchorPoint = CGPointMake(0.5f, 0.9f);
self.minuteHand.layer.anchorPoint = CGPointMake(0.5f, 0.9f);
self.hourHand.layer.anchorPoint = CGPointMake(0.5f, 0.9f);
//start timer
self.timer = [NSTimer scheduledTimerWithTimeInterval:1.0 target:self selector:@selector(tick) userInfo:nil repeats:YES];
[self updateHandsAnimated:NO];
}
- (void)tick
{
[self updateHandsAnimated:YES];
}
- (void)updateHandsAnimated:(BOOL)animated
{
//convert time to hours, minutes and seconds
#if __IPHONE_OS_VERSION_MAX_ALLOWED <= 80000 // 当前Xcode支持iOS8及以下 测试时可以不写
NSCalendar *calendar = [[NSCalendar alloc] initWithCalendarIdentifier:NSGregorianCalendar];
NSUInteger units = NSHourCalendarUnit | NSMinuteCalendarUnit | NSSecondCalendarUnit;
NSDateComponents *components = [calendar components:units fromDate:[NSDate date]];
CGFloat hourAngle = (components.hour / 12.0) * M_PI * 2.0;
//calculate hour hand angle //calculate minute hand angle
CGFloat minuteAngle = (components.minute / 60.0) * M_PI * 2.0;
//calculate second hand angle
CGFloat secondAngle = (components.second / 60.0) * M_PI * 2.0;
//rotate hands
[self setAngle:hourAngle forHand:self.hourHand animated:animated];
[self setAngle:minuteAngle forHand:self.minuteHand animated:animated];
[self setAngle:secondAngle forHand:self.secondHand animated:animated];
#else
NSLog(@"%s",__func__);
#endif
}
- (void)setAngle:(CGFloat)angle forHand:(UIView *)handView animated:(BOOL)animated
{
//旋转 CATransform3DMakeRotation
CATransform3D transform = CATransform3DMakeRotation(angle, 0, 0, 1);
if (animated) {
//create transform animation
CABasicAnimation *animation = [CABasicAnimation animation];
[self updateHandsAnimated:NO];
animation.keyPath = @"transform";
animation.toValue = [NSValue valueWithCATransform3D:transform];
animation.duration = 0.5;
animation.delegate = self;
[animation setValue:handView forKey:@"handView"];
[handView.layer addAnimation:animation forKey:nil];
} else {
//set transform directly
handView.layer.transform = transform;
}
}
//一共两个代理方法 一个是开始 一个是停止
- (void)animationDidStop:(CABasicAnimation *)anim finished:(BOOL)flag
{
//set final position for hand view
UIView *handView = [anim valueForKey:@"handView"];
handView.layer.transform = [anim.toValue CATransform3DValue];
}
关键帧动画
CAKeyframeAnimation(CAPropertyAnimation的子类)
通过帧 改变背景色
- (void)viewDidLoad {
[super viewDidLoad];
CAKeyframeAnimation *animation = [CAKeyframeAnimation animation];
// bounds = 大小?
// contentsRect = 内容矩形
// frame = 位置
// hidden = 隐藏
// mask = 标记
// maskToBounds
// position = 位置
// shadowOffset = 阴影偏移?
// shadowColor = 阴影颜色
// shadowRadius = 阴影角度
// transform.scale = 比例轉換
// transform.scale.x = 宽的比例轉換
// transform.scale.y = 高的比例轉換
// transform.rotation.z = 平面圖的旋轉
// opacity = 透明度
// margin=边框间隔?
// zPosition = 平面图的位置
// backgroundColor = 背景色
// cornerRadius = layer的角度
// borderWidth = 边框宽度
// contents = 内容?
animation.keyPath =@"backgroundColor";
animation.duration = 2.0f;
animation.values = @[(__bridge id)[UIColor redColor].CGColor,(__bridge id)[UIColor greenColor].CGColor,(__bridge id)[UIColor yellowColor].CGColor,(__bridge id)[UIColor blueColor].CGColor];
[self.view.layer addAnimation:animation forKey:nil];
}
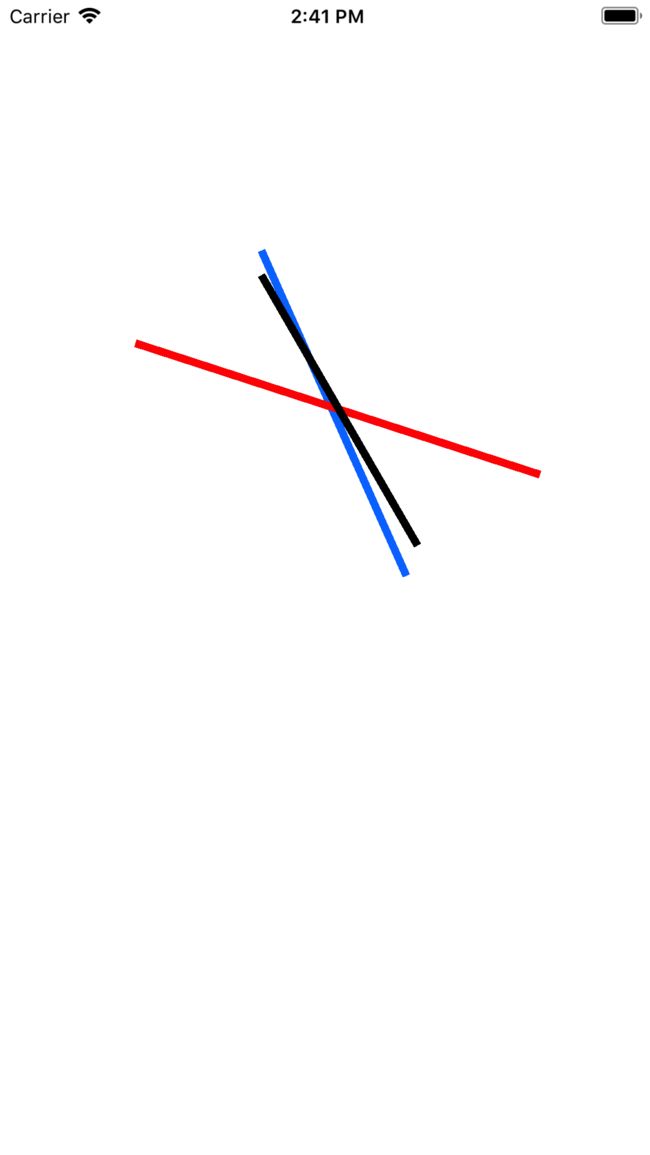
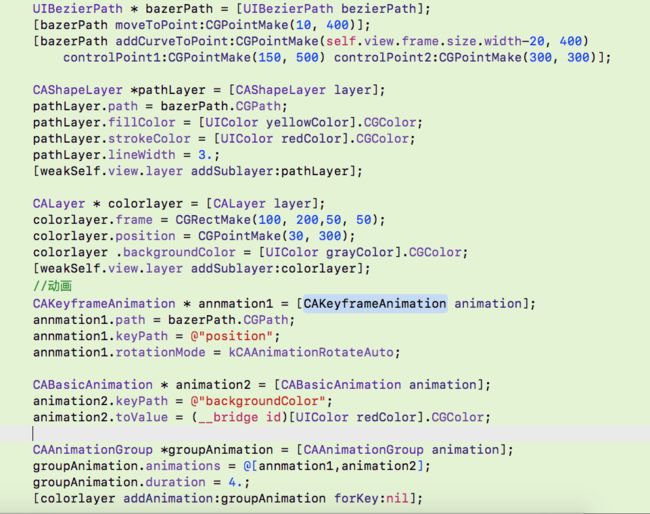
沿着一个贝塞尔曲线对图层做动画
动画组
CABasicAnimation和 CAKeyframeAnimation仅仅作用于单独的属性
CAAnimationGroup 可以把这些动画组合起来
效果图
过渡
使用type(NSString)和subtype来标识变换的效果
type NSString{
KCATransitionFade (默认) 淡入淡出效果
KCATransitionMoveIn 顶部滑动进入
KCATransitionPush 把旧图层从另一侧推出去的效果
KCATransitionReveal 把原始的图层滑动出去显示新的外观
}
subtype{
KCATransitionFromRight
KCATransitionFromLeft
KCATransitionFromTop
KCATransitionFromBottom
}
隐式过渡
自定义动画(UIView)
[UIView transitionWithView:noteViewduration:0.6 options:UIViewAnimationOptionTransitionCurlUp animations:^{
// 在noteView视图上设置过渡效果
NSString *currentText =noteView.text;
noteView.text =nextText;
self.nextText =currentText;
}completion:^(BOOL finished){
}];
- (void)fadeMe {
[UIView animateWithDuration:1.0 animations:^{
fadeMeView.alpha = 0.0f; // 作用在fadeMeView视图
}];
- (void)moveMe {
[UIView animateWithDuration:0.5 animations:^{
moveMeView.center = CGPointMake(moveMeView.center.x
, moveMeView.center.y - 200); // 作用在moveMeView视图
}];
}
renderInContext创建自定义过渡效果
在动画过程中取消动画
补充:之前-addAnimation:forkey:方法中的key参数来添加动画之后检索一个动画 使用如下方法:
-(CAAnimation*)animationForKey:(NSString*)key;
但是不支持动画过程中修改动画 ,我们使用:
移除对应的:
-(void)removeAnimationForKey:(NSString*)key;
移除所以的:
-(void)removeAllAnimations;
CAMediaTiming协议
定义了一段动画内控制逝去时间的属性的集合
CALayer 和CAAnimation都实现了这个协议
duration (CFTimeInterval类型 、双进度浮点型) 持续时间
repeatCount 重复 默认都是0:0.25秒和1次
- (void)viewDidLoad {
[super viewDidLoad];
[self animationDoor];
}
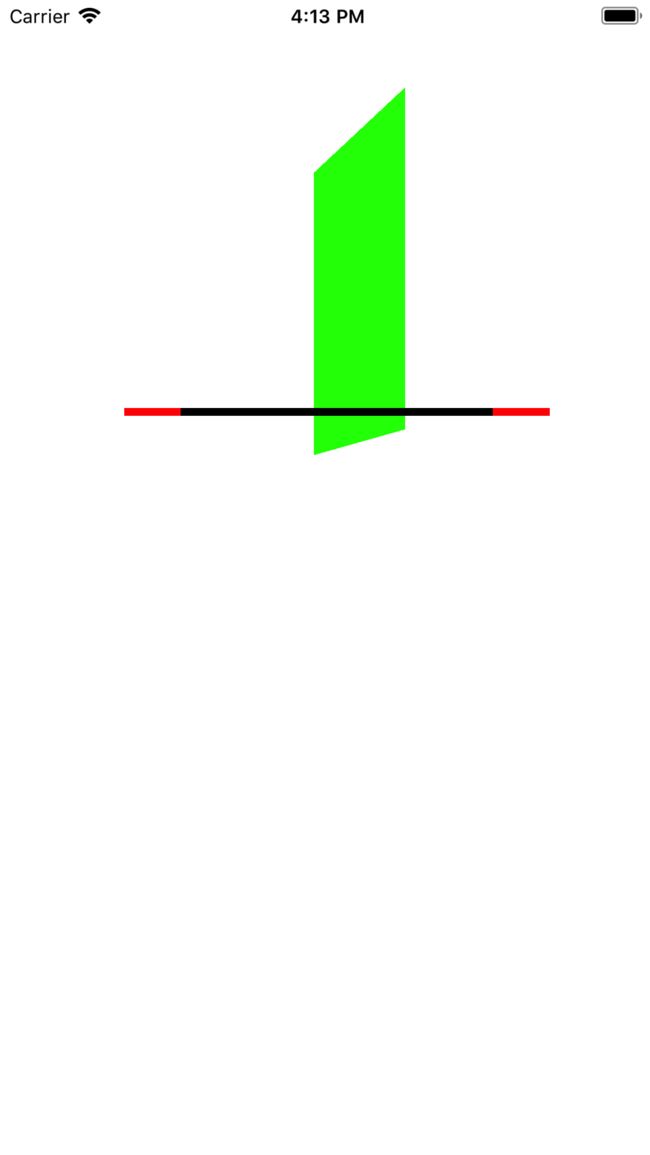
-(void)animationDoor{
CALayer * doorLayer = [CALayer layer];
doorLayer.frame = CGRectMake(100, 100, 100, 180);
[self.view.layer addSublayer:doorLayer];
doorLayer.backgroundColor = [UIColor greenColor].CGColor;
doorLayer.position = CGPointMake(200, 200);
doorLayer.anchorPoint = CGPointMake(0, 0.5);
CATransform3D trans3d = CATransform3DIdentity;
trans3d.m34 = 1.0/500.;
self.view.layer.sublayerTransform = trans3d;
CABasicAnimation * basicAnimation = [CABasicAnimation animation];
basicAnimation.keyPath = @"transform.rotation.y";
basicAnimation.toValue = @(M_PI);//旋转到多少度
basicAnimation.duration = 3.;
basicAnimation.repeatDuration = HUGE_VALF;//float
basicAnimation.autoreverses = YES;
[doorLayer addAnimation:basicAnimation forKey:nil];
}
相对时间(加速 延迟 偏移)
beginTime 动画开始前的延迟时间 默认是0(表示立即执行)
speed 是时间的倍数默认是1.0
timeOffset 让动画快进到某一点(当timeOffset= 1/2 时,表示从一般的地方开始执行)
fileModel
更新中。。。
更多可参考https://www.gitbook.com/book/zsisme/ios-/details
