在之前的文章中,同一个 tableView 里的单元格类型都是一样的。但有时我们需要在一个 tableView 里显示多种类型的数据,这就要求 tableView 可以根据当前行的数据自动使用不同类型的 cell。下面通过样例演示这个功能如何实现。
九、同一个 tableView 中使用不同类型的 cell
1,效果图
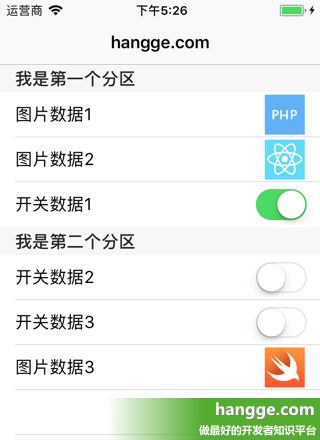
(1)tableView 绑定的数据源中一共有 2 个 section,每个 section 里分别有 3 条数据需要显示。
(2)每个 cell 会根据数据类型的不同,自动选择相应的显示方式:“文字+图片”或“文字+开关按钮”。
2,StroyBoard 设置
(1)首先拖入一个 tableView,设置好相关约束,并与代码中做 @IBOutlet 关联。
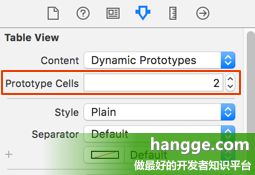
(2)将 tableView 的单元格数量设置为 2。
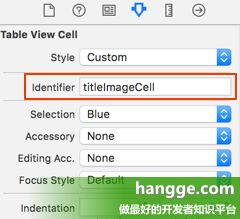
(3)将第一个单元格的 identifier 设置成“titleImageCell”。
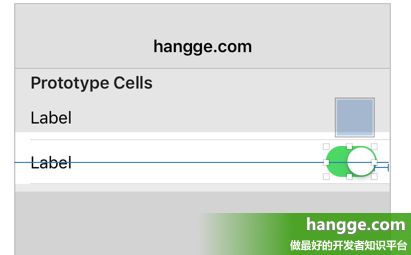
接着在该单元格中添加一个 Label 和 ImageView,并设置好相关约束。同时将它们的 Tag 分别设置为 1 和 2。
(4)将第二个单元格的 identifier 设置成“titleSwitchCell”。
接着在该单元格中添加一个Label 和 Switch,并设置好相关约束。同时将它们的 Tag 分别设置为 1 和 2。
3,样例代码
import UIKit
import RxSwift
import RxCocoa
import RxDataSources

class ViewController: UIViewController {

    @IBOutlet weak var tableView: UITableView!

    let disposeBag = DisposeBag()

    override func viewDidLoad() {
        super.viewDidLoad()

        //初始化数据
        let sections = Observable.just([
            MySection(header: "我是第一个分区", items: [
                .TitleImageSectionItem(title: "图片数据1", image: UIImage(named: "php")!),
                .TitleImageSectionItem(title: "图片数据2", image: UIImage(named: "react")!),
                .TitleSwitchSectionItem(title: "开关数据1", enabled: true)
                ]),
            MySection(header: "我是第二个分区", items: [
                .TitleSwitchSectionItem(title: "开关数据2", enabled: false),
                .TitleSwitchSectionItem(title: "开关数据3", enabled: false),
                .TitleImageSectionItem(title: "图片数据3", image: UIImage(named: "swift")!)
                ])
            ])

        //创建数据源
        let dataSource = RxTableViewSectionedReloadDataSource(
            //设置单元格
            configureCell: { dataSource, tableView, indexPath, item in
                switch dataSource[indexPath] {
                case let .TitleImageSectionItem(title, image):
                    let cell = tableView.dequeueReusableCell(withIdentifier: "titleImageCell",
                                                             for: indexPath)
                    (cell.viewWithTag(1) as! UILabel).text = title
                    (cell.viewWithTag(2) as! UIImageView).image = image
                    return cell

                case let .TitleSwitchSectionItem(title, enabled):
                    let cell = tableView.dequeueReusableCell(withIdentifier: "titleSwitchCell",
                                                             for: indexPath)
                    (cell.viewWithTag(1) as! UILabel).text = title
                    (cell.viewWithTag(2) as! UISwitch).isOn = enabled
                    return cell
                }
            },
            //设置分区头标题
            titleForHeaderInSection: { ds, index in
                return ds.sectionModels[index].header
            }
        )

        //绑定单元格数据
        sections
            .bind(to: tableView.rx.items(dataSource: dataSource))
            .disposed(by: disposeBag)
    }
}

//单元格类型
enum SectionItem {
    case TitleImageSectionItem(title: String, image: UIImage)
    case TitleSwitchSectionItem(title: String, enabled: Bool)
}

//自定义Section
struct MySection {
    var header: String
    var items: [SectionItem]
}

extension MySection : SectionModelType {
    typealias Item = SectionItem

    init(original: MySection, items: [Item]) {
        self = original
        self.items = items
    }
}
RxSwift使用详解系列
原文出自:www.hangge.com转载请保留原文链接


