【Tensorflow】使用CNN识别手写数字
学习Tensorflow后,利用CNN实现的第一个练习。大部分内容参考了别人的博客专栏,仅作为自己的学习笔记。
使用CNN识别手写数字的程序整体而言比较简单,本文的代码主要包括三部分:
- CNN模型的搭建及模型的训练与保存。
- 模型的恢复及前向传播。
- 手写数字的捕获。
-
CNN模型的搭建及模型的训练与保存
CNN作为最基本的神经网络,网上关于其介绍非常多,这里不再赘述。关于Tensorflow CNN的内容,推荐莫烦的教程。
直接上代码:
import tensorflow as tf
from tensorflow.examples.tutorials.mnist import input_data

mnist = input_data.read_data_sets('../MNIST_data/',one_hot=True)

training_epochs = 2000
training_batch = 50
display_step = 50

sess = tf.InteractiveSession()

## Save to file
# remember to define the same dtype and shape when restore

xs = tf.placeholder(tf.float32,[None,28 * 28],name='x_data')
ys = tf.placeholder(tf.float32,[None,10],name='y_data')
keep_prob = tf.placeholder(tf.float32,name='keep_prob')

def weight_variable(shape,name):
    initial = tf.truncated_normal(shape,stddev=0.1)
    return tf.Variable(initial,name=name)

def bias_variable(shape,name):
    initial = tf.constant(0.1,shape=shape)
    return tf.Variable(initial,name=name)

# x:输入 W:权重
def conv2d(x,W):
    return tf.nn.conv2d(x,W,strides=[1,1,1,1],padding='SAME')

# x:输入
def max_pool_2x2(x):
    return tf.nn.max_pool(x,ksize=[1,2,2,1],strides=[1,2,2,1],padding='SAME')


x_data = tf.reshape(xs,[-1,28,28,1])

## conv1 layer##
W_conv1 = weight_variable([5,5,1,32],'weight_conv1')   #5*5的采样窗口 32个卷积核从一个平面抽取特征 32个卷积核是自定义的
b_conv1 = bias_variable([32],'biases_conv1')   #每一个卷积核一个偏置值
h_conv1 = tf.nn.relu(conv2d(x_data,W_conv1)+b_conv1) # output size 28x28x32
h_pool1 = max_pool_2x2(h_conv1)      # output size 14x14x32

## conv2 layer##
W_conv2 = weight_variable([5,5,32,64],'weight_conv2')   #5*5的采样窗口 32个卷积核从一个平面抽取特征 32个卷积核是自定义的
b_conv2 = bias_variable([64],'biases_conv2')   #每一个卷积核一个偏置值
h_conv2 = tf.nn.relu(conv2d(h_pool1,W_conv2)+b_conv2) # output size 14x14x64
h_pool2 = max_pool_2x2(h_conv2)      # output size 7x7x64

## fc1 layer ##
W_fc1 = weight_variable([7*7*64,1024],'weight_fc1')
b_fc1 = bias_variable([1024],'biases_fc1')
h_pool2_flat = tf.reshape(h_pool2,[-1,7*7*64])
h_fc1 = tf.nn.relu(tf.matmul(h_pool2_flat,W_fc1)+b_fc1)
h_fc1_drop = tf.nn.dropout(h_fc1,keep_prob)

## fc2 layer ##
W_fc2 = weight_variable([1024,10],'weight_fc2')
b_fc2 = bias_variable([10],'biases_fc2')
prediction = tf.nn.softmax(tf.matmul(h_fc1_drop,W_fc2) + b_fc2)

# get prediction digit
prediction_digit = tf.argmax(prediction,1,name='op_to_predict')

cross_entropy = tf.reduce_mean(-tf.reduce_sum(ys * tf.log(prediction),
                                              reduction_indices=[1])) # 每行计算交叉熵
train_step = tf.train.AdamOptimizer(1e-4).minimize(cross_entropy)

correct_prediction = tf.equal(tf.argmax(prediction,1),tf.argmax(ys,1))
accuracy = tf.reduce_mean(tf.cast(correct_prediction, tf.float32))


saver = tf.train.Saver()  # defaults to saving all variables

sess.run(tf.global_variables_initializer())

for i in range(training_epochs):
    batch_xs,batch_ys = mnist.train.next_batch(training_batch)
    if i % display_step == 0:
        print('step:%d, training accuracy:%g'%(i,accuracy.eval(feed_dict={xs:batch_xs,ys:batch_ys,keep_prob:1.0})))
    train_step.run(feed_dict={xs: batch_xs, ys: batch_ys, keep_prob: 0.5})
saver.save(sess,'model/CNN_MNIST_Model.ckpt', global_step = i + 1)   ##保存模型参数

print("test accuracy %g"%accuracy.eval(feed_dict={
       xs: mnist.test.images, ys:mnist.test.labels, keep_prob: 1.0}))
网上关于CNN的模型代码基本大同小异,主要记录下自己遇到的问题:
- 加载MNIST数据错误。由于网络原因无法下载MNIST数据,解决方法就是提前下载好MNIST数据,mnist = input_data.read_data_sets('MNIST数据地址',one_hot=True)。MNIST数据(百度网盘:3gti)
- 定义好不同tensor的name,方便之后restore的操作。
- prediction_digit = tf.argmax(prediction,1,name='op_to_predict'),training的时候不会run,作用是restore后,预测输入手写数字。
-
模型的恢复及前向传播
导入训练好的模型预测手写数字,这里有两种方法,比较简单方便的方法是利用tensorflow,直接加载进训练好的图、参数,输入预测图片得到结果;另一种就是比较麻烦的手写一遍相同的网络,做一次forward。还是推荐第一种方法。
import tensorflow as tf

# img shape [-1,28*28]
def detect(img):

    sess = tf.Session()

    # load meta
    saver = tf.train.import_meta_graph('model/CNN_MNIST_Model.ckpt-2000.meta')
    saver.restore(sess,tf.train.latest_checkpoint('model/')) #自动获取最后一次保存的模型

    # restore placeholder variable
    graph = tf.get_default_graph()
    x_data = graph.get_tensor_by_name('x_data:0')
    keep_prob = graph.get_tensor_by_name('keep_prob:0')

    # restore op
    op_to_predict = graph.get_tensor_by_name('op_to_predict:0')

    # feed_dict
    feed_dict = {x_data:img,keep_prob:1.0}

    prediction = sess.run(op_to_predict,feed_dict)

    print('Identified numbers:%d'%prediction[0])
代码很简单,没什么太多讲的。
-
手写数字捕获
这里使用了opencv的库。
# coding:utf-8
import cv2 as cv
import numpy as np
import sys
import datetime
import CNN_Model_Restore as predict

width = 512
height = 512
img = 0
palette = 0
point = (-1,-1)
min_x = sys.maxsize
min_y = sys.maxsize
max_x = -1
max_y = -1
line_thickness1 = 3
line_thickness2 = 20
drawing = False


def img_normal(raw):
    # normalize pixels to 0 and 1.
    # digit is 1, background is 0
    norm = np.array(raw,np.float32)
    norm /= 255.0
    return norm

def palette_init(width,height,channels,type,border = False):
    palette = np.zeros((width, height, channels), type)
    if border == True:
        cv.line(palette, (0,int(height / 2)), (width - 1, int(height / 2)), (255, 255, 255), 1)
        cv.line(palette, (int(width / 2),0), (int(width / 2),height -1 ), (255, 255, 255), 1)
    return palette

def draw_digit(event,x,y,flags,param):
    global palette
    global drawing
    global point
    global min_x
    global min_y
    global max_x
    global max_y

    if event == cv.EVENT_LBUTTONDOWN:
        point = (x,y)
        if x > max_x:
            max_x = x
        elif x < min_x:
            min_x = x

        if y > max_y:
            max_y = y
        elif y < min_y:
            min_y = y

        drawing = True
    if event == cv.EVENT_LBUTTONUP:
        point = (0, 0)
        drawing = False
    if event == cv.EVENT_MOUSEMOVE and flags == cv.EVENT_LBUTTONDOWN:
        if drawing == True:

            if x > max_x:
                max_x = x
            elif x < min_x:
                min_x = x

            if y > max_y:
                max_y = y
            elif y < min_y:
                min_y = y

            cv.line(palette,point,(x,y),(255,255,255),line_thickness1)
            cv.line(img, point, (x, y), (255, 255, 255), line_thickness2)
            point = (x, y)

def detect():
    row_min = min_y - 2 * line_thickness2
    row_max = max_y + 2 * line_thickness2

    col_min = min_x - 2 * line_thickness2
    col_max = max_x + 2 * line_thickness2
    roi = img[row_min if row_min >= 0 else 0:row_max if row_max < height else height - 1,
          col_min if col_min >= 0 else 0:col_max if col_max <= width else width - 1]

    # process
    # roi = cv.bitwise_not(roi)
    #cv.imshow('roi', roi)
    img_capture = cv.resize(roi, (28, 28))
    #cv.imshow('img_capture', img_capture)

    kernel = cv.getStructuringElement(cv.MORPH_CROSS, (3, 3))
    img_capture = cv.dilate(img_capture, kernel)
    #cv.imshow('dilate', img_capture)

    img_norm = img_normal(img_capture)
    # img_newshape = np.reshape(img_norm,[-1,28,28,1])
    # print(img_newshape.shape)

    img_newshape = np.reshape(img_norm, [-1, 28 * 28])
    start = datetime.datetime.now()
    predict.detect(img_newshape)
    # cnn.forward(img_newshape)
    end = datetime.datetime.now()
    print('cost time:%d s' % (end - start).seconds)


if __name__ == '__main__':
    cv.namedWindow('Input')
    cv.setMouseCallback('Input',draw_digit)
    palette = palette_init(width, height, 1, np.uint8,border=True)
    img = palette_init(width, height, 1, np.uint8)

    while(1):
        cv.imshow('Input',palette)

        c = cv.waitKey(33)&0xFF

        if c == ord('q') :
            cv.destroyAllWindows()
            break;
        elif c== ord('r'):
            palette = palette_init(512, 512, 1, np.uint8, border=True)
            img = palette_init(512, 512, 1, np.uint8)
            min_x = sys.maxsize
            min_y = sys.maxsize
            max_x = -1
            max_y = -1
        elif c == ord('f'):
            detect()
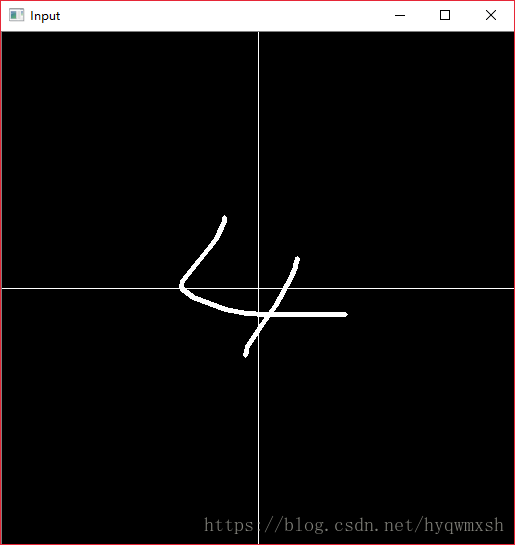
功能比较简单,利用鼠标输入手写数字,简单把数字部分切割出来,然后resize到MNIST数据的28*28大小,简单做下膨胀操作。然后就送进去做检测。
-
结果演示
识别结果:
问题:识别结果准确率不是很高,随着学习深入,以后会逐渐改进。
代码Github
参考链接:
https://blog.csdn.net/sparta_117/article/details/66965760
https://www.cnblogs.com/hejunlin1992/p/7767912.html
https://morvanzhou.github.io/tutorials/machine-learning/tensorflow/5-03-A-CNN/

